How to Convert Your Existing Amazon Echo to Kid’s Edition
How to Calculate a Z-Score Using Microsoft Excel
A Z-Score is a statistical value that tells you how many standard deviations a particular value happens to be from the mean of the entire data set. You can use AVERAGE and STDEV.S or STDEV.P formulas to calculate the mean and standard deviation of your data and then use those results to determine the Z-Score of each value.
[mai mult...]Cum se verifica starea AppleCare pe dispozitivele Apple
Indiferent daca dispozitivul dvs. Apple se afla in perioada de garantie initiala AppleCare sau este acoperit de AppleCare + , verificarea acoperire actuala poate fi primul pas in obtinerea unei reparatii. Iata cum puteti verifica ce este acoperit si ce nu.
Dupa cum multi oameni au invatat de-a lungul anilor, dispozitivele Apple reparate in afara AppleCare pot fi un efort costisitor, in special avand in vedere stadiul actual al reparatiilor notebook-urilor. Nimic nu este ieftin cand totul este lipit sau lipit intr-o placa logica, deci probabil veti fi in speranta ca fila de reparatii va fi preluata de Apple. Daca nu, lucrurile pot deveni costisitoare, rapide.
Din fericire, verificarea acoperire AppleCare este destul de simpla, si puteti verifica toate dispozitivele intr-un singur loc.
[mai mult...]Cum se scriu fractii in PowerPoint
Daca dati o prezentare pentru o companie sau daca predati o lectie intr-o clasa de matematica, este probabil sa utilizati fractiuni in prezentare. PowerPoint ofera mai multe structuri de fractii diferite, inclusiv inclinate, stivuite, lineare si mici. Iata cum sa le folositi.
[mai mult...]Cum se creeaza diagrame animate in PowerPoint
Diagramele sunt excelente pentru vizualizarea datelor. Adaugarea de animatie in diagrame poate face ca vizualizarea sa fie chiar mai buna, permitandu-va sa faceti lucruri cum ar fi introducerea unei bucati de diagrama placinta la un moment dat, astfel incat sa aveti mai mult spatiu de discutie. Iata cum puteti face acest lucru in Microsoft PowerPoint.
Animand o diagrama Pie in PowerPoint
Mai intai, deschideti prezentarea dvs. PowerPoint si mergeti la diapozitivul in care doriti diagrama animata. Pentru a insera o diagrama, comutati la fila “Insert” si faceti clic pe butonul “Chart”.
In fereastra Insert Chart care apare, selectati “Pie” din lista din stanga. In partea dreapta, selectati stilul diagramei pe care doriti sa-l utilizati din cele cinci optiuni care apar. Dupa ce ati facut selectia, faceti clic pe “OK” din coltul din dreapta jos al ferestrei.
Veti observa ca diagrama placilor a aparut acum pe diapozitiv si, impreuna cu aceasta, si diagrama Excel. Schimbati etichetele diagramei prin editarea textului din coloana A si introduceti datele respective in coloana B. Dupa ce ati terminat, inchideti foaia de calcul.
Apoi, selectati diagrama placinta si treceti la fila “Animatii”. Aici, selectati oricare dintre animatiile pe care doriti sa le utilizati din optiunile disponibile. In acest exemplu, vom folosi “Stergeti”.
Apoi, faceti clic pe “Panoul de animatie” pentru a deschide aceasta fereastra.
Panoul de animatie apare in partea dreapta a diapozitivului. Aici faceti dublu clic pe animatia pe care ati adaugat-o in diagrama placinta sau faceti clic pe sageata de langa ea si apoi selectati “Optiuni efect”.
O fereastra va aparea cu optiunile de efect, calendar si animatie grafica. Treceti la fila “Animatie diagrama”. Aici puteti alege modul in care se comporta animatia graficului – ca un obiect sau pe categorie. Alegerea optiunii “Un obiect” face ca intreaga diagrama sa apara simultan. Alegerea “dupa categorie” face ca graficul sa apara o singura bucata la un moment dat si exact asta vrem aici.
Puteti decide chiar daca doriti ca animatia sa inceapa prin desenarea fundalului graficului.
Cand faceti clic pe “OK”, diagrama placinta va arata la fel in vizualizarea de editare, dar apasati Shift + F5 pentru a reda diapozitivul dvs. si apoi faceti clic pe butonul stang al mouse-ului pentru a viziona noul diagrame animat in actiune.
[mai mult...]How to Set Up Groups with Google Assistant
Google Assistant voice commands for your smarthome work best if your devices are in groups (Google calls these groups “rooms”). Skipping this step during setup makes using your devices harder. Here’s how to create rooms and add devices to them.
[mai mult...]How to Make a Bootable Clone of Your Mac’s Hard Drive
There are a lot of reasons for wanting to boot from an external drive. If you’d like to keep files synced between a desktop and laptop, expand your storage, or have a bootable backup copy of your system, there’s a hidden feature in Disk Utility that makes it easy.
Generally, booting from an external drive will be slower, even with new Thunderbolt and USB-C drives. Those are still much slower than the solid state drives (SSDs) found in most new Macs. So while this isn’t recommended for daily use, it’s still possible.
[mai mult...]Ce este Apple True Tone si cum il folosesc?
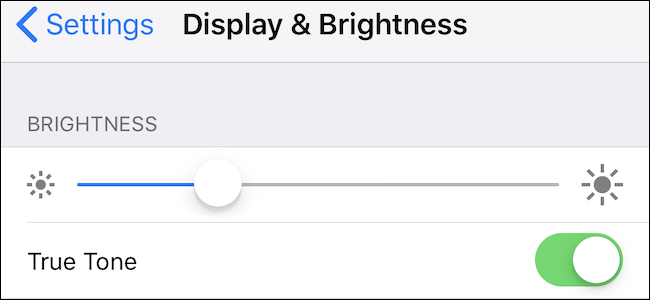
Daca ati utilizat recent un iPhone, iPad Pro sau MacBook Pro 2018, este posibil sa fi intampinat un nou comutator in setarile de afisare. True Tone are rolul de a face culoarea afisajului sa apara mai naturala si functioneaza.
True Tone a aparut pentru prima data in gama iPad Pro 2017, dar Apple a adus de atunci caracteristica iPhone-ului, incepand cu iPhone-ul 2017, iPhone 8 Plus si iPhone X. De atunci, lansat iPad Pro 2018 si 2018 MacBook Pro, ambele cu functia incorporata. Indiferent de dispozitivul pe care il utilizati, True Tone este proiectat sa preia nivelul de lumina si temperatura din jur si apoi sa ajusteze culoarea si intensitatea afisajului dispozitivului. Apple considera ca acest lucru permite ca afisajul sa apara mai natural, dar si sa impiedice efortul ochiului.
[mai mult...]Cum sa activati sau sa dezactivati atingerea 3D pe un iPhone
Apple ar putea sa se retraga din 3D Touch oarecum – nu este disponibil pe iPhone XR deloc – dar suntem inca fani mari ai optiunilor pe care le ofera. Daca nu sunteti, puteti sa dezactivati cu totii 3D Touch.
Touch 3D a venit cu dispozitivul iPhone 6, permitand oamenilor sa impinga mai ferm pe unele elemente ale interfetei iOS pentru a efectua actiuni sau a dezvalui optiuni suplimentare. Acesta ofera un clic dreapta pe tipuri, oferind iOS o adancime mai mare. De asemenea, adauga complexitatea, iar Apple nu a fost niciodata bun la realizarea caracteristicilor 3D Touch care sa poata fi descoperite. Daca aveti un dispozitiv iPhone 6s sau mai nou, cu exceptia iPhone XR mentionat mai sus, este posibil sa aveti activat functia 3D Touch si nu l-ati folosit niciodata.
Odata cu sosirea iPhone XR, Apple a introdus Haptic Touch, care ia o parte din functionalitatea 3D Touch si o plaseaza in spatele unui gest apasat. Cele doua gesturi – Touch 3D si Haptic Touch – nu se bucura insa de paritatea caracteristica in anumite moduri importante. Atingerea haptic nu accepta deloc “peek & pop” si comenzile rapide pe ecranul de pornire. Daca sunteti proprietar al iPhone XR, optiunea de a activa sau de a dezactiva Touch Haptic se afla in aceeasi locatie ca 3D Touch.
Aici vom trece prin pasii pe care ii puteti lua pentru a verifica daca functia 3D Touch este activata si, mai important, activati sau dezactivati-o dupa cum doriti. Sa incepem.
[mai mult...]


