Instalarea software-ului la imprimanta HP Color LaserJet Pro MFP M476dn

Instalarea software-ului la imprimanta HP Color LaserJet Pro MFP M476dn

Soluţia completă pentru Windows

  1. Introduceţi CD-ul imprimantei în computer sau lansaţi fişierul de instalare a software-ului, descărcat de pe Web.
  2. Programul de instalare a software-ului detectează limba sistemului de operare, apoi afişează meniul principal al programului de instalare în aceeaşi limbă. Când instalaţi de pe CD, dacă programul de instalare nu porneşte după 30 de secunde, accesaţi unitatea de CD de la computer şi lansaţi fişierul denumit SETUP.EXE.
  3. Ecranul Software Selection (Selectare software) prezintă în detaliu software-ul de instalat.
  • Instalarea software-ului recomandat include driverul de imprimare şi software pentru toate caracteristicile disponibile ale imprimantei.
  • Pentru a personaliza software-ul instalat, faceţi clic pe legătura Customizable software selections (Selecţii software personalizabil). După ce aţi terminat, faceţi clic pe butonul Următorul.
  1. Urmaţi instrucţiunile de pe ecran pentru a instala software-ul.
  2. Când vi se solicită să selectaţi un tip de conexiune, selectaţi opţiunea corespunzătoare pentru tipul de conexiune:
  • Conectare directă a acestui computer utilizând un cablu USB
  • Conectare printr-o reţea
  1. (Opţional) Pentru imprimantele dintr-o reţea, la sfârşitul procesului de instalare a software-ului, configuraţi caracteristicile de fax şi de scanare utilizând Fax Setup Wizard (Expert configurare fax), Scan 0to E-mail Wizard (Expert scanare către e-mail) şi Scan to Network Folder Wizard (Expert scanare către folder de reţea). Aceasta este o modalitate convenabilă de a configura aceste caracteristici. Pentru mai multe informaţii, consultaţi „Configurarea caracteristicilor de scanare pentru imprimantele dintr-o reţea”.

Soluţia completă pentru OS X

  1. Lansaţi fişierul .dmg de instalare a software-ului, pe care l-aţi descărcat de pe Web.
  2. Programul de instalare a software-ului detectează limba sistemului de operare, apoi afişează meniul principal al programului de instalare în aceeaşi limbă.
  3. Ecranul Installation Options (Opţiuni de instalare) prezintă în detaliu software-ul de instalat.
  • Pentru o instalare standard, faceţi click acum pe butonul Install (Instalare).
  • Pentru o instalare personalizată, faceţi click pe butonul Customize (Personalizare). În ecranul care se deschide, selectaţi componentele de instalat, apoi faceţi click pe butonul Install (Instalare).
  1. Urmaţi instrucţiunile de pe ecran pentru a instala software-ul.
  2. La sfârşitul procesului de instalare a software-ului, utilizaţi HP Utility Setup Assistant, pentru a configura opţiunile imprimantei.

Instalarea de bază pentru OS X

Pentru a instala driverele de bază pentru imprimare şi fax, fără a executa software-ul soluţiei complete HP de pe CD şi fără a efectua descărcarea de pe hp.com, urmaţi aceşti paşi:

  1. Conectaţi imprimanta la computer sau la reţea.
  2. Din System Preferences (Preferinţe sistem), faceţi clic pe Printers and Scanners (Imprimante şi scanere), apoi pe butonul plus din stânga-jos şi selectaţi M476, utilizând driverul denumit fie AirPrint, fie HP Printer.

Readiris Pro for HP

Descărcaţi acest software gratuit, pentru a activa caracteristici de scanare suplimentare, inclusiv recunoaşterea optică a caracterelor (Optical Character Recognition – OCR). În timpul instalării software-ului, faceţi clic pe elementul More Options (Mai multe opţiuni) din panoul din stânga, apoi selectaţi Web Support (Asistenţă Web) pentru a descărca acest software. Pentru a descărca software-ul de pe Web, accesaţi www.hp.com/support/ colorljMFPM476, selectaţi Drivers (Drivere), apoi faceţi click pe Software & Firmware (Software şi firmware).

[mai mult...]
Multifunctionala Konica Minolta bizhub 363

Operaţii utile de scanare în reţea

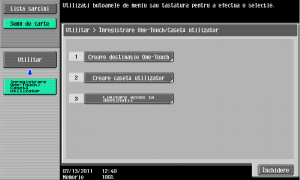
Înregistrarea destinaţiilor utilizate frecvent
Destinaţiile utilizate frecvent pot fi înregistrate.
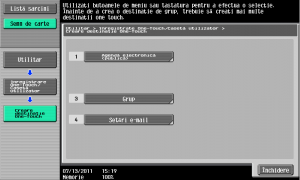
Destinaţiile pot fi înregistrate în agenda electronică sau ca destinaţii de grup.

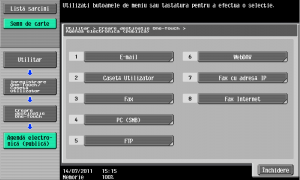
Destinaţii în agenda electronică
Prin înregistrarea unei destinaţii frecvent utilizate în agenda electronică, destinaţia poate fi preluată simplu,
prin apăsarea pe un buton al agendei electronice.
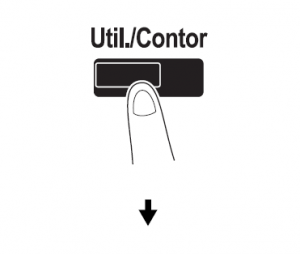
Deschiderea ecranului de înregistrare a destinaţiei

Ecranul de înregistrare a destinaţiei

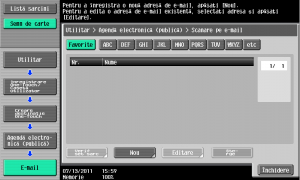
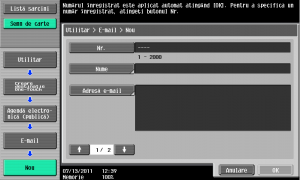
Înregistrarea unei adrese de e-mail

• Nr.: Cu ajutorul tastaturii numerice, tastaţi numărul de înregistrare.
• Nume: Specificaţi numele adresei de e-mail care se va înregistra.
• Adresă e-mail: Utilizaţi tastatura care apare în ecranul tactil pentru a tasta adresa de e-mail.
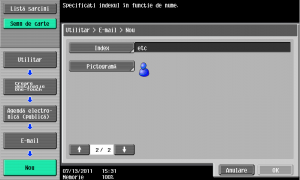
• Index: Selectaţi caracterele index utilizate pentru organizarea adreselor de e-mail. Prin selectarea
caracterelor index adecvate pentru numele înregistrat, adresa de e-mail poate fi găsită cu uşurinţă.
• Pictogramă: Când i-Option LK-101 este activat la acest aparat, selectaţi o pictogramă.

Destinaţii de grup
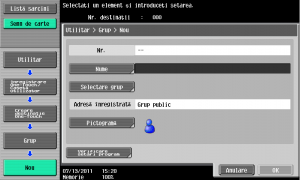
Se pot înregistra mai multe destinaţii, sub forma unui singur grup.
Destinaţiile care pot fi înregistrate ca destinaţie de grup trebuie înregistrate în agenda electronică.
Pentru înregistrarea unei destinaţii de grup, destinaţiile individuale trebuie mai întâi înregistrate în agenda
electronică.
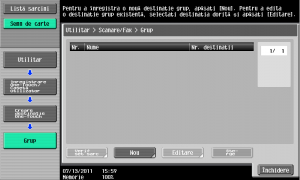
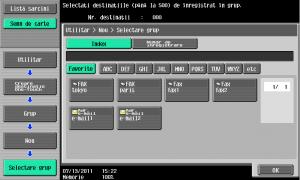
În ecranul Creare destinaţie One-Touch, atingeţi [Grup].

Înregistrarea destinaţiei de program
Setările de scanare, setările de transmisie şi destinaţia pot fi înregistrate cu un singur buton. Acestea se
numesc destinaţii de program. Destinaţiile de program înregistrate pot fi uşor reapelate şi utilizate.

[mai mult...]

How to reset Brother MFC-9340CDW toner cartridges

How to reset Brother MFC-9340CDW toner cartridges

After installing a new drum unit, the printer needs to be reset.

  1. Press “X” to clear the error message.
  2. Press the tools button (picture of a spanner).
  3. Press “All Settings”.
  4. Press “Machine Info”.
  5. Press “Parts Life”.
  6. Press “#” until the touch screen message changes.
  7. Press the colour of the drum that was replaced.
  8. Press “Yes”.

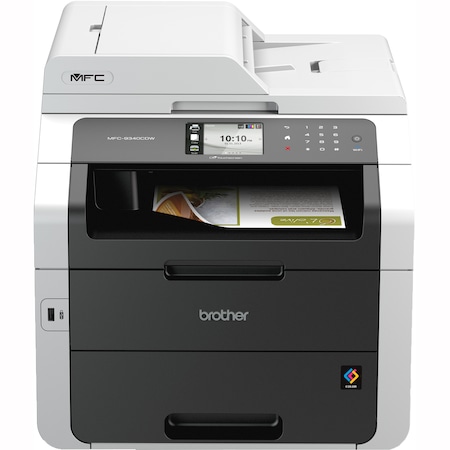
Multifunctional laser color Brother MFC-9340CDW, A4, Wireless

[mai mult...]

How to Delete All Partitions on USB Drive External HDD Windows XP 7 8 10

Delete All Partitions on USB Drive External HDD Windows XP 7 8 10

If you need to delete all partitions on a USB drive or external HDD, the method is a little different from that of deleting partitions on an internal hard disk.

You can connect a USB drive or external hard drive to Windows computer to save or transfer data. A USB flash drive or portable HDD works similarly to internal hard drive. You can partition a USB drive or removable hard drive into several partitions and even install Windows operating system on it. If you want to delete all partitions on a USB thumb drive or USB hard drive, please follow the steps below:

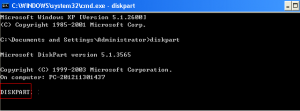
Step1. Open CMD and type diskpart

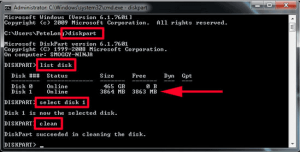
Step2. Type list disk > select disk number (e.g. select disk 2) > clean

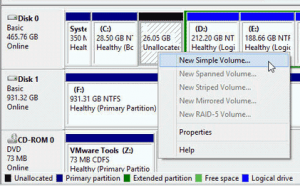
Step3. Open Disk Management on your computer and you can see the USB or external hard drive shows as unallocated space. Right click the unallocated space and select New Simple Volume

Step4. Follow the New Simple Volume Wizard and format the drive, after which you will see that the USB or external hard drive shows as a removable disk.

[mai mult...]

How to Delete All Partitions on Internal Disk of Windows 10 8 7 XP

Delete All Partitions on Internal Disk of Windows 10 8 7 XP

You may want to delete all partitions on an internal hard drive or an external USB drive on Windows. If you need to delete all partitions on an internal hard drive, you can use any of following methods:

Method1: Disk Management to Delete All Partitions in Windows for Free

No matter how many partitions it has on a hard disk, you can open Disk Management to delete all partitions on Windows computer. Before performing deleting in Windows Disk Management, please pay attention to following points:

1. You cannot delete a system partition on any Windows computer.
2. All data on the deleted partition would be erased permanently.

Now, follow the steps below to delete all partitions except system partition on Windows PC:

Step1. Open Disk Management on Windows computer. Right click any partition except system partition and select Delete Partition option. On Windows 7, 8, 10, you may select Delete Volume option.

Step2. Confirm to delete the selected partition, after which the selected partition would show as free space under Disk     Management.

Step3. Repeat Step1 and Step2 to delete other partitions on the hard disk.

Well, Disk Management is only able to delete each partition one by one. You cannot delete all partitions on a disk at the same time.

Method2: Free Delete All Partitions Using Diskpart

Diskpart is a little more complex than Disk Management to delete all partitions on a computer because it does not have a user-friendly interface. However, if you have a little knowledge about computer, you will also find it easy to handle. Please follow the guide below:

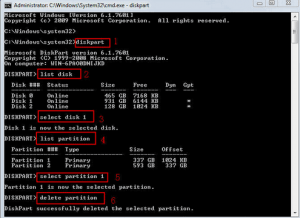
Step1. Open Command Line on Windows computer and then type diskpart
Step2. Type list disk
Step3. Type select disk number
e.g. Type select disk 0, select disk 1…It depends on which disk you want to delete.
Step4. Type list partition
Step5. Type select partition number (e.g. select partition 1, select partition 2)
Step6. Type delete partition

Method3: Delete All Partitions with Freeware for Windows XP 7 8 10

Whether you use Disk Management or Diskpart in Command Prompt, you need to delete every partition one by one. If there are several partitions on a disk, sometimes it may waste of time. If you want to delete all partitions on a disk at the same time with easier solution, you can use IM-Magic Partition Resizer. It is a free partition tool which is compatible with Windows XP, Vista, 7, 8, and 10 to delete all partitions within two simple steps:

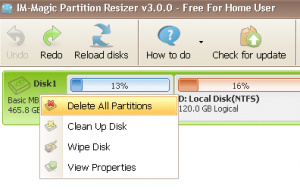
Step1. Right click the disk (.e.g. disk 1) instead of partition and select “Delete All Partitions”.

Step2. Confirm to delete the selected disk and then click “Apply Changes” button.

[mai mult...]

Programming Telephone Systems Panasonic KX-TA824

PT Programming—Instructions

Required Telephone

PBX settings can be customized through system programming by using a proprietary telephone (PT) with a display, such as the KX-T7731. An authorized administrator or the manager extension connected to extension jack 01 can access system programming.

Entering System Programming Mode

Using a PT to perform system programming allows an authorized administrator to set a wide range of PBX features and parameters. To enter system programming mode, the system password is required. With the system password, all system programming is accessible.

Notes
means default value throughout these programming instructions.

Entering Manager Programming Mode
Using a PT to perform manager programming allows the manager extension (extension jack 01) to set certain PBX features and parameters. To enter manager programming mode, the extension password for the manager (manager password) is required.
With the manager password, the following 4 system programming settings are accessible:
•[001] System Speed Dialing Number
•[011] System Speed Dialing Name
•[512] DISA Security Code
•[530] DISA Security Code Digits

Notes
•The system password may be entered instead of the manager password.
•With the manager password, the manager can also set a password to each extension. For moreinformation on how to assign a password to each extension including the manager password, referto the Operating Manual ( 2.1.7 System Feature Assignment).

Entering Characters
The PT’s dialing buttons can be used to enter characters when storing a name or message. The following tables depict the available characters:
Table 1 (Alphabet mode)/Table 2 (Numeral mode)

Notes
•To toggle between “Alphabet mode” and “Numeral mode”, press SELECT.
•To move the cursor right, press.
•To delete all characters, press CLEAR. To delete a character, press.

[mai mult...]