Cum se sparge parola wireless WPA, WPA2 sau WEP cu BackTrack

Cum se afla parola wifi (wireless) sau cum se trece de securitatea WPA, WPA2 si WEP cu BackTrack

Pentru acest tutorial am pregatit un stick usb cu distributia BackTrack, puteti folosi si un live cd. BackTrack este un sistem de operare ce contine o gramada de scule pentru monitorizare si audit, in cazul nostru vom detecta si exploata vulnerabilitatile unei retele wireless (reteaua mea).
Reaver este deja instalat pe BackTrack si este scula care ne va ajuta sa obtinem cheia, pin-ul si SSID-ul retelei la care dorim sa ne conectam. Practic Reaver se foloseste de o vulnerabilitate prezenta pe majoritatea routerelor si punctelor de access cu certificare WPS (wireless protected setup).
Gasire parola Wi-Fi sau Ghicire parola Wireless.
Folosind metoda Brute Force aplicatia Reaver incearca diferite combinatii pentru a descoperi pin-ul WPS, vulnerabilitatea vine din faptul ca Reaver poate descoperi prima data cele patru cifre din pin dupa care va incerca sa gaseasca urmatoarele 4 cifre. Daca stam sa ne gandim este mult mai usor sa chicesti doua grupuri cu un total de 20.000 (9999 fiecare grup) de combinatii decat sa incerci serial 99.999.999 de posibile combinatii.
Vulnerabilitatea consta in faptul ca routerul valideaza intr-un fel primul grup de patru cifre din pin.

Care sunt comenzile ?

1. airmon-ng pentru detectarea placii sau placilor de retea wireless
2. airmon-ng start wlan0 sau wlan1 in functie de cate placi de retea sunt si pe care vreti sa o folositi, placa intra in modul monitorizare
3. wash -i mon0 pentru detectare retele wireless, daca primiti eroare “Found packet with dab FCS, skipping…” incercati sa folositi comanda wash -i mon0 --ignore-fcs
4. reaver -i mon0 -b “aici bagati BSSID-ul” -d 0 -vv

Acum nu va ramane decat sa aveti rabdare.

[mai mult...]
How to remove or reset Asus laptop bios password

This is very simple way to remove or reset asus laptop bios password. To be honest personally only needed to reset bios password few times and was not matter of being forgotten just bought laptop with bios password installed and had to remove and every time had to spend hours to find site where to get the code to unlock bios.

There’s loads of sites where you can get the codes for reset but most of them have codes only for some rescue dates.. 2008-06-06 etc., that means you would have to set your windows date to date given and then enter to bios reset.


How to remove Asus laptop bios password easy way!

  1. Boot while while pressing/holding F2 to get into the BIOS / UEFI
  2. When the enter password window appears then press Alt + r or Alt Gr +r
  3. “Enter rescue password” window will appear, with YYYY-MM-DD
  4. Now take a note of that date and go to www.biosbug.com and enter it to search field and there you go. Only thing to remember is to enter it to your laptop as it reads.

[mai mult...]

Remove the Acer Laptop BIOS Password

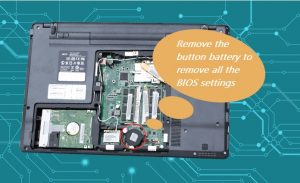
For all Acer laptops, the BIOS password and settings can be removed by taking off the battery on the motherboard for about three minutes.

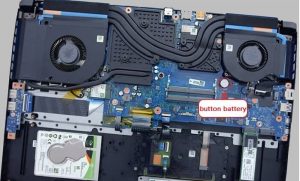
However, after I researched multiple models of Acer laptops, I find that the location of the button battery on the motherboard is different depending on the model of the Acer laptop. What’s more, for different models of Acer laptops, the difficulties of unpacking the case and removing the battery are not the same. For example, for the following model of Acer laptop, the button battery on the motherboard can be taken off easily after opening the small cover.

But for some models of Acer laptops like Acer Helios 500, to detach the button battery, the case needs to be unpacked firstly, which is hard to do and the detachment needs the help of the professional.

After unpacking the small back cover of the Acer Helios 500 laptop, we can’t see the button battery.

When the case is unpacked, we can find the button battery. However, it’s not easy to open the case and it’s not recommended to unpack it by ourselves, unless your hands-on ability is great.

In either cases, you can unpack the small back cover firstly to see if there is the button battery. If there is not, you can take it to the repair center and ask the professional to deal with it.

[mai mult...]

How to Remove/Reset BIOS Password in Dell Laptop

One of the most important password on your computer is BIOS (Basic Input / Output System) password. The information you have over the BIOS is referred as ESCD (Extended System Configuration Data). Setting up a password for BIOS is very helpful if you wish to prevent the system from booting up an operating system under unauthorized access. This does protects your sensitive information that you have over your PC.

Best 4 Ways to Reset/Remove BIOS Password on Dell Laptop

In circumstances where you forget the BIOS password or the information over BIOS get corrupted due to sudden power surge or cut events, hardware incompatibility (for a specific setting) or incorrect settings by the user. In such cases, it becomes vital to remove BIOS password as you may get permanently locked out of your computer. Now, if you’re looking for how to remove bios password using cmd or on dell laptop, you’re reached your destination. We’re going to explore the various means by which you can remove bios password on dell laptop.

1. Reset Defaults Option

First and foremost method is to reset BIOS to its defaults. Here’s the step by step tutorial on it.

    • First, boot up your computer and when you get to see Dell loading screen, hit the “F2” key to launch the BIOS. You’ll now witness that “Entering Setup” will appear on the screen.
Note: Please ensure what key is defined to boot your laptop into BIOS mode as for certain models, you may have to use a different key. You can check it at the bottom of the screen while the boot process is going through, boot into BIOS key is displayed right there.
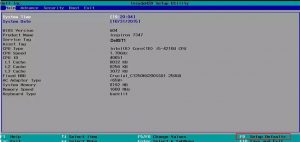
  • Once you have the BIOS up and running, depending on the age and its type, you can either make use of the “F9” key to Load Defaults (as is displayed on the bottom of the screen) to force reset the defaults. Or, you can also hit the “Alt” + “F” key combination over your keyboard. Also, hitting the “Load Defaults” button available on your screen will also serve the purpose to load the factory defaults.

  • Now, you need to hit the “Esc” on your keyboard to exit the BIOS menu. Before you exit, it will ask you whether to save the changes or discard them. Opt for “Save and exit” option in order to allow the changes to come into effect, hit “Enter” on it and you’re done.
  • Once your computer reboots, all your BIOS settings are restored back to its factory state now.

2. Using PSWD Jumper

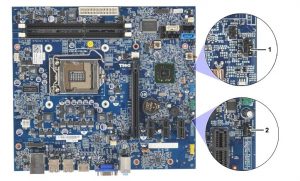
In order to make use of PSWD jumper to remove bios password in dell laptop, first you need to ensure that PSWD on your PC has two or three needles. This is because you need to follow a specific set of instructions to remove bios password in dell laptop for different PSWD needles.

When the PSWD has Two Needles

  • Turn off your computer and remove the power line (battery) and ensure the main board led is not glowing anymore.
  • Now, find the PSWD jumper over your main board.
  • Then, plug out the jumper cap from the PSWD needles and reboot your Dell computer. You shall hear a sound of drop now, this would mean that the BIOS password is removed successfully.
  • Turn off your Dell computer afterwards and plug in the jumper cap back to the PSWD needles.
  • That’s it, you’re no longer required to enter BIOS password in order to access BIOS settings.

When PSWD has Three Needles

  • Step 1 and Step 2 from above, remains the same.
  • In case, you find out that your PSWD jumper has 3 needles, you need to plug out the jumper cap of PSWD placed on the needles 1-2 and plug it into the needles 2-3. Reboot your PC and you shall hear a sound of drop now.
  • Now that you’ve successfully removed the BIOS password on dell laptop computer, turn it off and then reverse the jumper back to its original state i.e. on 1-2 needles.
  • Reboot your PC again and you’re all sorted.

3. Using CMD

In order to reset BIOS password using CMD you must be able to launch the DOS mode over your computer. For this, you need to plug in a bootable media that boots you up in DOS mode where you can execute the following commands (without quotes) followed by Enter after each of them:

  • debug
  • -o 70 2e
  • -o 71 ff
  • -q

That’s it, now reboot your PC and you’re all sorted!

Shortcomings of removing BIOS password

Well, though the aforementioned ways will certainly help you to remove BIOS password, there are several shortcomings for them if you opt to do it on your own. It is known fact that altering the BIOS involves great risks, you may end up corrupting your entire computer system. Eventually, losing your entire data. So in such a case, the safest bet is to reset the BIOS password in a way that won’t harm your PC and here we’re going to explore them up.

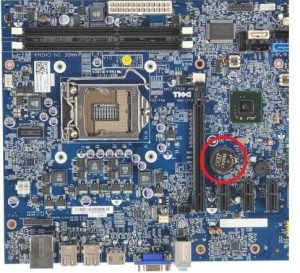
Remove Internal CMOS Battery

For this, you need to be quite careful as you need to open up your computer’s casing to remove the CMOS battery. Once you’ve done it, plug out the coin cell CMOS battery from the main board. Now, wait for approximately 5 minutes (depending on your motherboard, you may need to wait for longer). Then, slot it back. Congratulations! You’re done clearing everything over your BIOS and resetting the settings to its defaults.

Final Verdict

While moving towards concluding the today’s post, we do hope that you now have full understanding on how to remove bios password using cmd. Since, forgetting password is a common phenomenon, what if you no longer remember your Windows password? Well, fret not. Here comes PassFab 4WinKey for your rescue. With this powerful tool you need to perform such lengthy and technical steps that you were doing while removing bios password in dell laptop. The process is as simple as 1-2-3 thing. Be it local user account or an admin account or a Microsoft account, in just a couple of clicks you can effortlessly reset or remove the passwords of the respective accounts.


[mai mult...]

3 Ways to Unlock BIOS (UEFI) Password on Lenovo ThinkPad Laptop

If you set a supervisor password on your BIOS setup, you will be prompted to enter this password before accessing BIOS setup settings. However, if you forgot BIOS password in Lenovo laptop, how to enter BIOS setup settings? How to reset or clear the forgotten password?

When you get problem with your laptop, you had better contact with the manufacture support and ask for their recommended methods to unlock your BIOS setup settings. But as I see in the official site of Lenovo laptop, they can’t help to reset your BIOS password if you forgot the old password, they will recommend you to have the system board replaced.

If the Lenovo Service Support can’t help you to unlock your BIOS password, you can try with the methods below. Can try on Lenovo ThinkPad, IdeaPad, Yoga, and other series of Lenovo laptops.

Use the backdoor password

There is a backdoor password built-in to the BIOS by the manufacture. It is hidden, so we can’t see it normally, but we can try to find it out on the master password site.

1. Power on laptop, press F1 key to boot up BIOS entry screen.

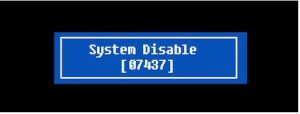
2. On the password text box try with three passwords, if all these three passwords are incorrect, you will be blocked with the screen “System Disabled”. And you will get a code to get the backdoor password. Write this code down.

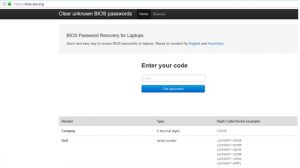
3. Go to another computer with internet connected, open this site: https://bios-pw.org/.

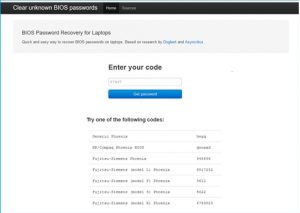
4. Enter the code you get on the System Disable screen and click on Get password.


5. You will get a list of passwords. Go to your laptop, restart it and press F1 key to boot to the BIOS entry screen again, and then try with the list of passwords one by one. But you only be able to enter three incorrect passwords before your system is locked. Good luck with you!

If you can’t find your backdoor password, try with the methods below.

Remove CMOS battery

1. Power off your Lenovo laptop, disconnect with the power source, unplug all of the cables from laptop.

2. Remove the battery from laptop, and then remove the bottom of the laptop’s case.

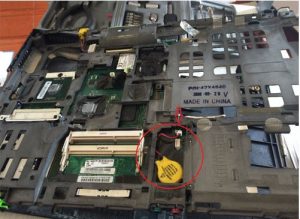
3. Find the CMOS battery, and remove the CMOS battery from laptop gently. This will reset BIOS settings to default settings, thereby clear BIOS password.

4. Wait for an hour, place the CMOS battery back in its slot again, and reassemble laptop.

5. Turn on the laptop, press F1 key repeatedly, you will get into Lenovo/ThinkPad BIOS settings without entering password.

Short circuit SDA and SCL in security chip

1. Power off laptop, disconnect with the power source, disassemble laptop. (Pay attention to the screw model and location, you can take a photo with it. Or if the machine assemble is completed, but you find that there are still a few small screws left, you will have a headache.)

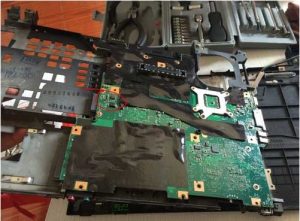
2. When disassemble the laptop, find the chip. It is on the back of the motherboard. Grasp the plastic frame and turn the motherboard over, you will see it. As the picture below, the chip is in the red circle.

3. To short circuit the chip, you need to power on and boot the laptop. So, after you find the SCL and SDA, connect the hard drive, battery, keyboard, display screen, and the other basic components with laptop.

4. Connect with the power adapter and turn on laptop. As soon as the keyboard light is on, short circuit the SCL and SDA.

5. If it goes well, you will get into BIOS smoothly without asking password. If not, you will need to try several times.

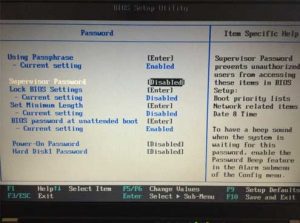
6. When get into BIOS settings, reset BIOS password. If it is unnecessary, you can disable the Supervisor Password on BIOS, in case, you forget BIOS password on your laptop again.

7. At last, remember to press F10 to exit and save the change.

8. After your BIOS password is unlocked successfully, power off laptop, reassemble your laptop.


[mai mult...]

Descarca youtube video cu ajutorul videoder

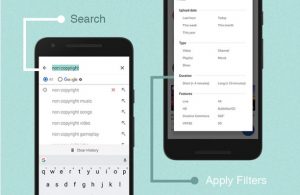
Cauta video sau piesa muzicala pe care doresti sa o descarci. Tu poti sa filtrezi cautarea de basis al tipului contentului (video,channel sau playlist) sau selecteaza time frame pentru rezultatele cautarii:

Selecteaza failul pe care doresti sa il descarci din rezultatul de cautare care va aparea.Tu poti descarca, desigur, o multime de video-uri dintr-o data:

Play sau Descarca

Acum poti selecta play video sau sa descarci in orice rezolutie oferita.Videoder  iti ofera posibilitatea sa descarci in rezolutie de la 144p pana la 1080p(Full HD) si chiar 4k(Ultra HD):

Seteaza locul si numarul de threads

Cand rezolutia e selectata,va aparea dialogul in care poti schimba locul de descarcare si sa selectezi numarul de network threads pentru descarcarea rapida:

Descarcarea va incepe acum

Tapeaza pe butonul pentru descarcare.Poti tapa pe download icon de pe ecran pentru a gestiona descarcarile:

[mai mult...]

Cum se interconectează routerele wireless TP-Link via wireless folosind modul bridge

Cu ajutorul modului bridge pot fi conectate 2 sau mai multe routere wireless / reţele LAN între ele în mod wireless, şi, de asemenea routere wireless TP-Link la un access point, utilizând modul bridge.

Pentru conectarea acestora în modul bridge, este necesar că toate routerele wireless să suporte această caracteristică, şi să fie configurate pentru a funcţiona în modul bridge.

  1. Modificarea adresei IP

Toate routerele TP-Link utilizează 192.168.1.1 ca adresă IP implicită, şi înainte de conectare este indicat să modificaţi adresa unuia dintre ele pentru a evita un conflict de adrese IP.

Vă rugăm verificaţi şi notaţi adresa MAC a routerelor înainte de a le configura.

Pasul 1 Deschideţi un browser web şi tastaţi adresa IP a routerului (implicit este 192.168.1.1) în câmpul adresă şi apoi apăsaţi Enter.

Pasul 2 Introduceţi numele de utilizator şi parola pe pagina de autentificare, numele de utilizator şi parola sunt implicit admin.

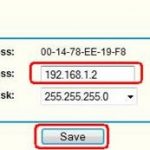
Pasul 3 Selectaţi Network->LAN din partea stângă, şi apoi modificaţi adresa IP din 192.168.1.1 în 192.168.1.2.

  1. Conectarea routerelor în modul bridge

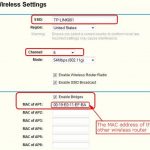
Pasul 1 Selectaţi Wireless->Wireless Settings din partea stângă, introduceţi un SSID pentru numele reţelei wireless şi selectaţi un canal.

Activaţi opţiunea Enable Bridge, şi introduceţi adresa MAC a routerului wireless la care doriţi să vă conectaţi în căsuţa ilustrată mai jos  (Este necesar să notaţi adresa MAC aparţinând celuilalt router şi să o introduceţi în căsuţă)

Pasul 2 Salvaţi şi reiniţializaţi routerul.

Pasul 3 Conectaţi computerul dvs. la celălalt router wireless, şi repetaţi pasul 1 şi pasul 2, după reiniţializarea ambelor routere conexiunea wireless va fi realizată.

Notă:

1 Canalul şi setările de securitate trebuie să fie aceleaşi pe ambele routere pentru a putea fi conectate.

2 Puteţi tasta SSID-uri diferite pentru routere pentru a diferenţia routerele/reţelele wireless pentru clientul dvs. wireless.

3 Dacă utilizaţi unul dintre routere ca router principal pentru conectarea la Internet şi partajaţi conexiunea la Internet, este indicat să dezactivaţi funcţia server DHCP pe routerul secundar.

[mai mult...]

Instalare windows în UEFI mod

UEFI, adică Universal Extensible Firmware Interface, înlocuiește vechile versiuni de BIOS, adică Basic Input Output System utilizat de zeci de ani, care este un program gratuit pe placa de bază ce rulează primul când pornește calculatorul sau laptop-ul, și este responsabil pentru lansarea primului fișier de încărcare a sistemului Windows.

Este mai rapid decât BIOS-ul, are mai multe caracteristici de securitate, sprijin de boot-Secure și Windows Defender pentru a proteja autentificarea, sprijin de hard disk-uri mari de 2 terabytes și mai mult de patru partiții, etc.

Atenție! Este posibil să convertiți unitățile MBR cu mai multe programe gratuite, deci nu trebuie să formatați întregul spațiu de stocare HDD, pentru care este nevoie să salvați toate datele, fiind o operațiune “mai lungă”. Aici menționăm doar două dintre numeroasele programe, care va rezolva bine această problemă:

  1. MiniTool Partition Wizard verziunile 10.x
  2. AOMEI Partition Assistant Standard

Dacă totuși vreți să faceți conversia individual, fără a utiliza programele menționate mai sus, procedați în felul următor:

Dacă doriți să utilizați avantajele UEFI, fără de a schimba hard disk-ul vechi, va fi nevoie de ștergerea tabelei de partiții MBR, deoarece UEFI necesită noua partiție GPT. În acest caz salvați toate datele necesare de pe hard disk și dispozitiv USB, deoarece vor fi șterse!!!

Operația constă din patru părți:

  •  Preparare
  • Ştergere partiții
  • Ştergere tabela veche MBR
  • Instalare Windows 10
[mai mult...]