
Soluții
Microsoft isn’t done with the new Windows sticky notes
[mai mult...]How to close unresponsive Apps on Windows 11
End a Program Using a Keyboard Shortcut
The easiest way to close an unresponsive app is by using a Windows keyboard shortcut. This hotkey closes any app in the focus—whether responsive or unresponsive.
To use this method, click the unresponsive app’s window so it’s in the focus. Then, on your keyboard, press Alt+F4. Soon as you press this key combo, Windows will quit the app in the focus.
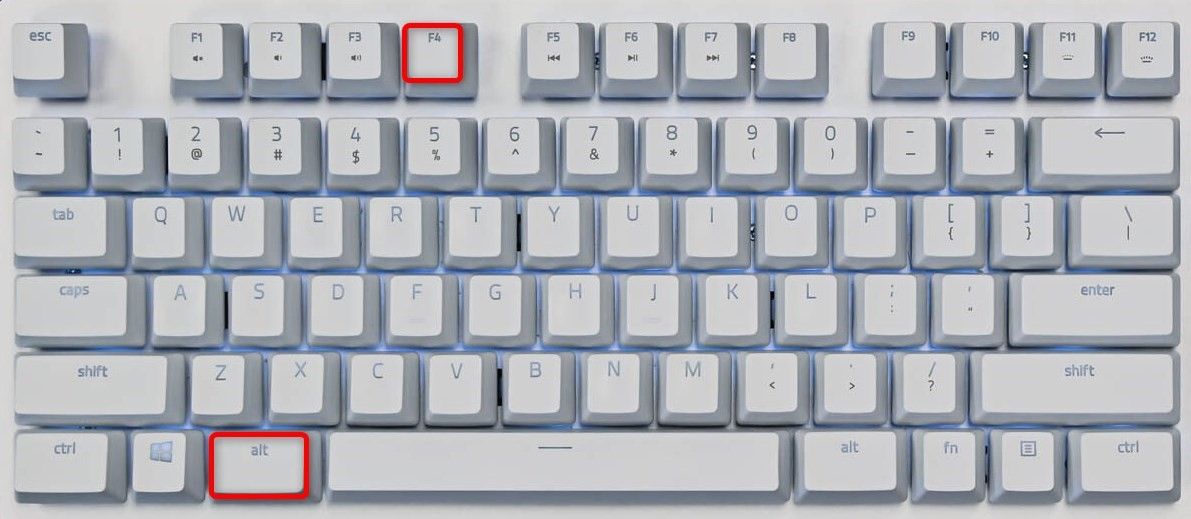
If the app remains open, wait a few seconds and press the same hotkey again. Make sure not to keep pressing this key combo, or you’ll end up closing other apps as well.
Close a Program from the Windows Taskbar
Windows 11 offers the option to force-close apps right from the taskbar. This option comes disabled by default, but you’re only a few clicks away from turning it on and using it.
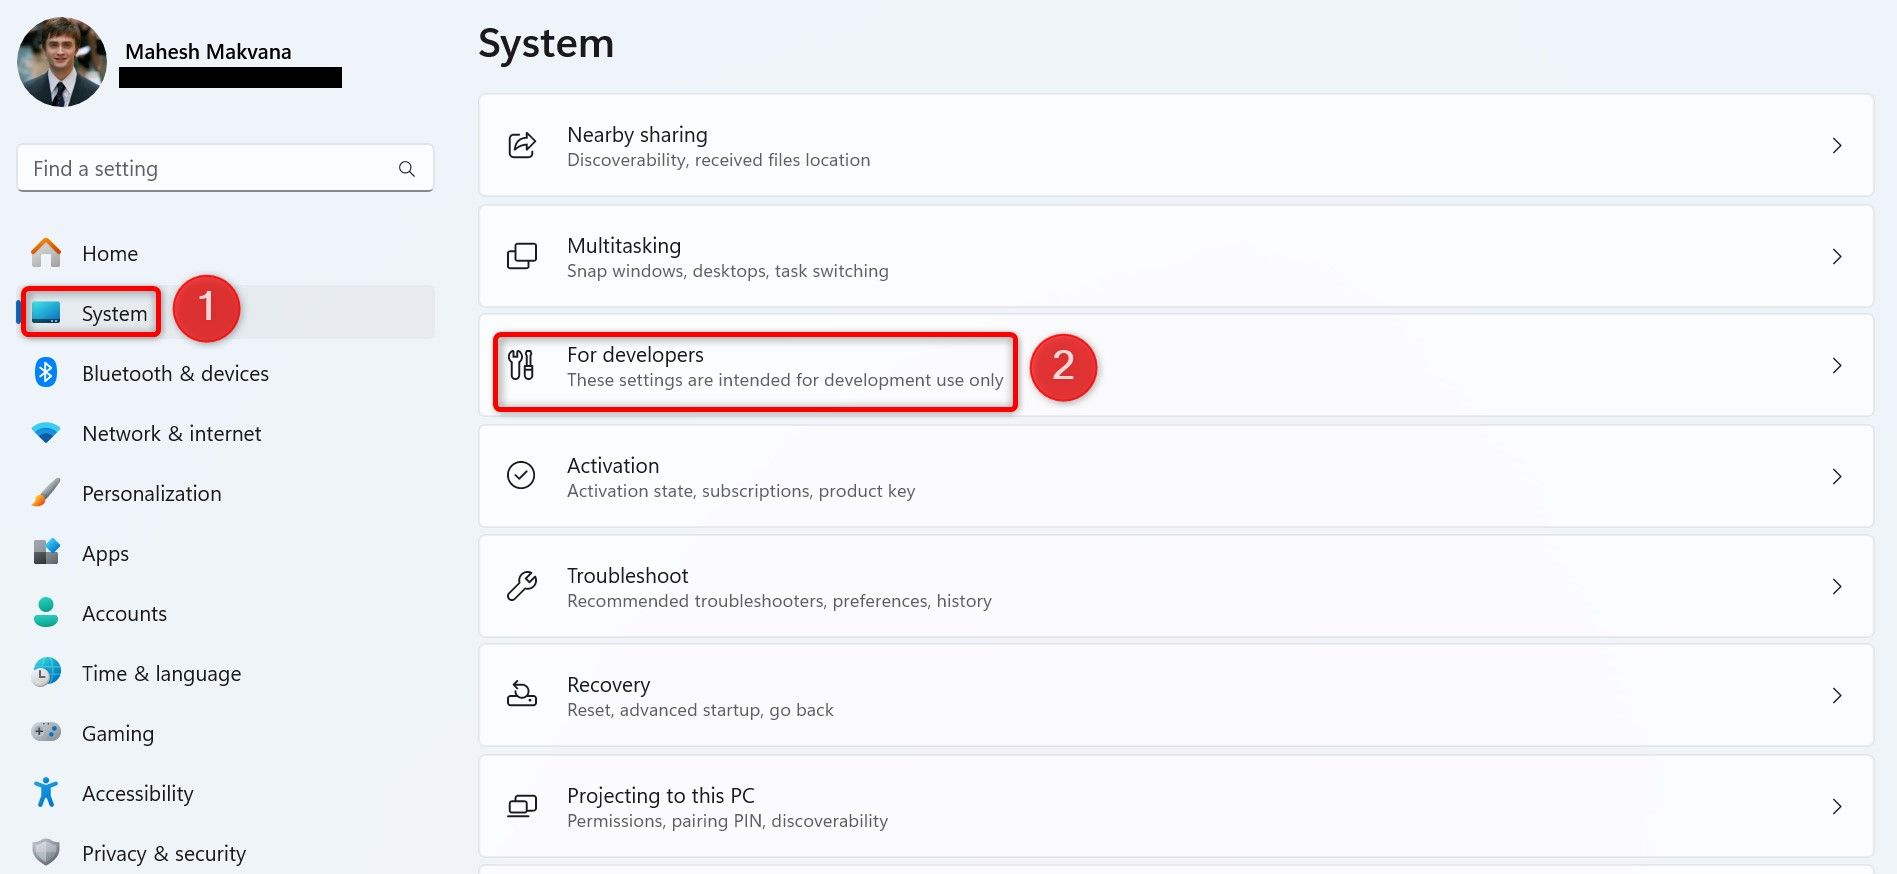
To turn on the force-close option, launch Windows 11 Settings by pressing Windows+i. From the left sidebar, select “System.” Scroll down the right pane and choose “For Developers”.
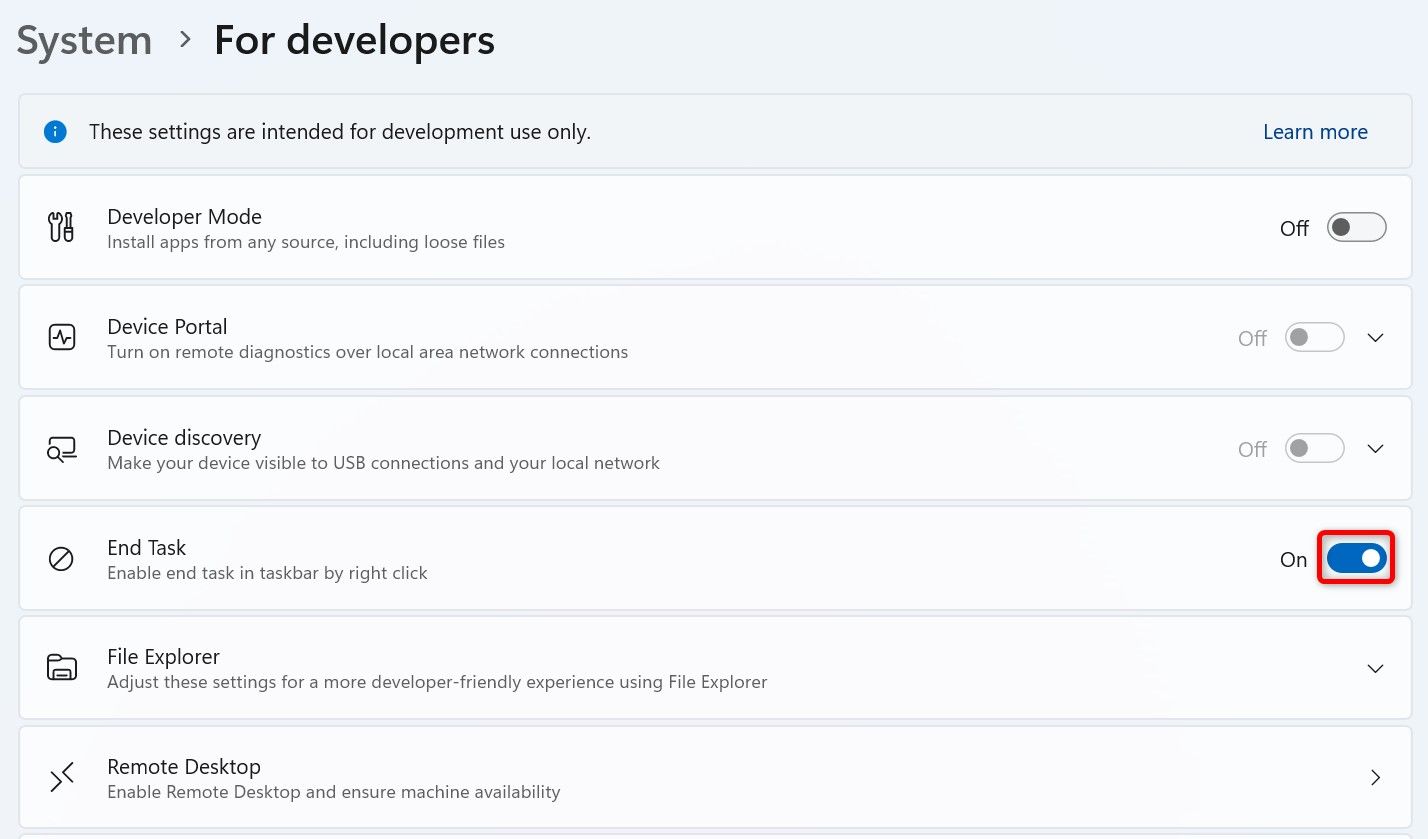
On the For Developers screen, turn on the “End Task” toggle. You can then close the Settings app. To remove the End Task option in the future, turn off the “End Task” toggle.
On the Windows taskbar, find the unresponsive app, then right-click the app’s icon and choose “End Task.”
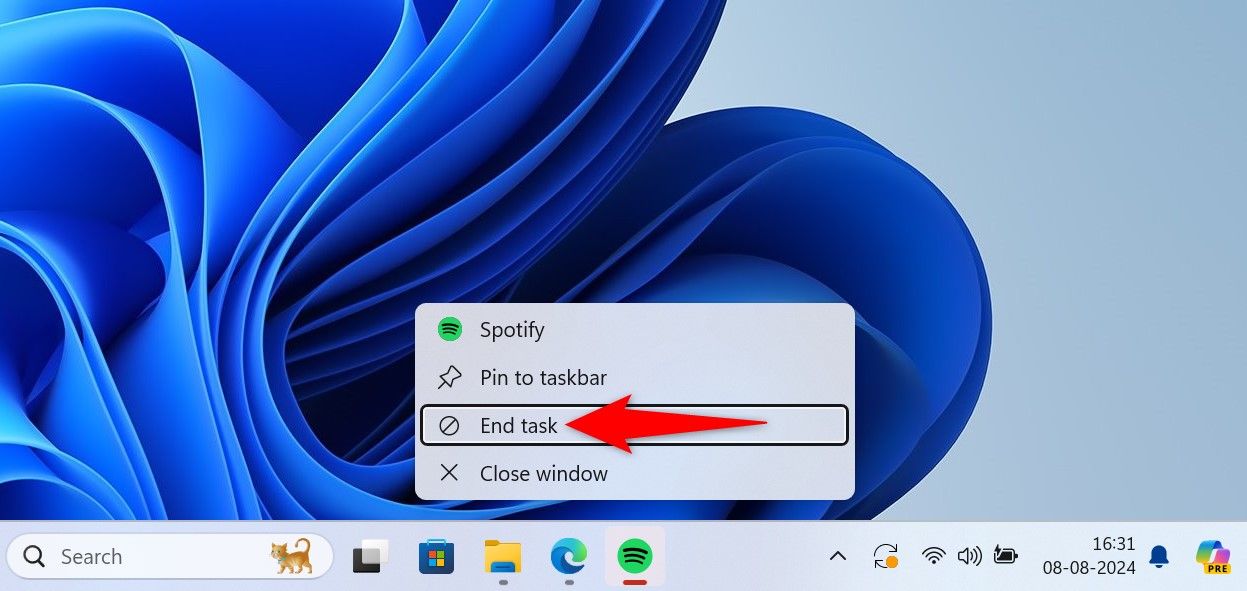
Windows will force-close the selected app.
End a Task with the Task Manager
Task Manager has long offered options to manage app processes on Windows PCs. You can use this utility to kill an unresponsive app’s process, quitting the app.
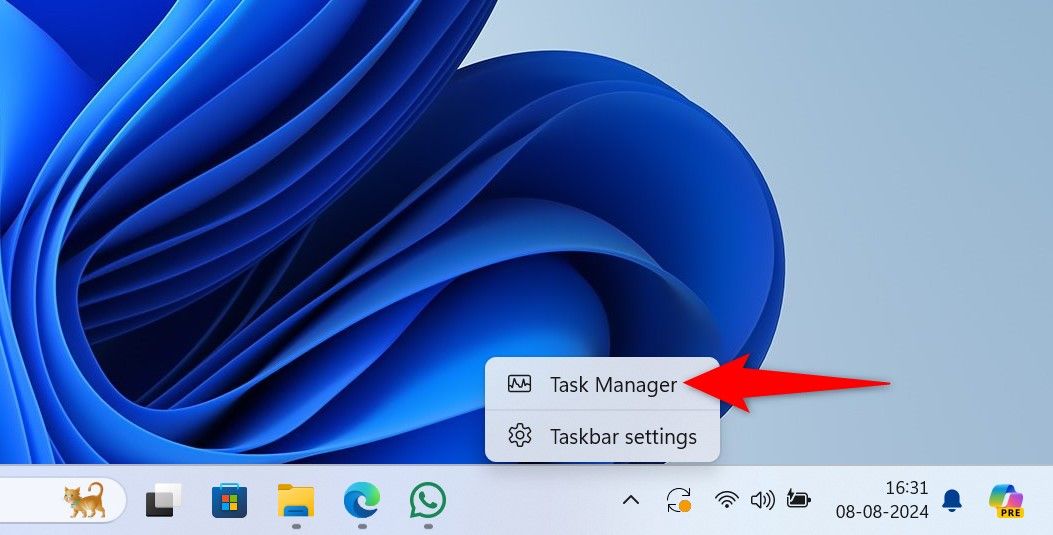
To use this method, launch Task Manager by right-clicking the Windows taskbar and choosing “Task Manager.” Another way to launch this tool is by pressing the Windows key, typing Task Manager, and selecting the tool in the search results.
On the Task Manager window, from the left sidebar, select the “Processes” tab.

On the right pane, find the unresponsive app. Right-click the app and choose “End Task.”
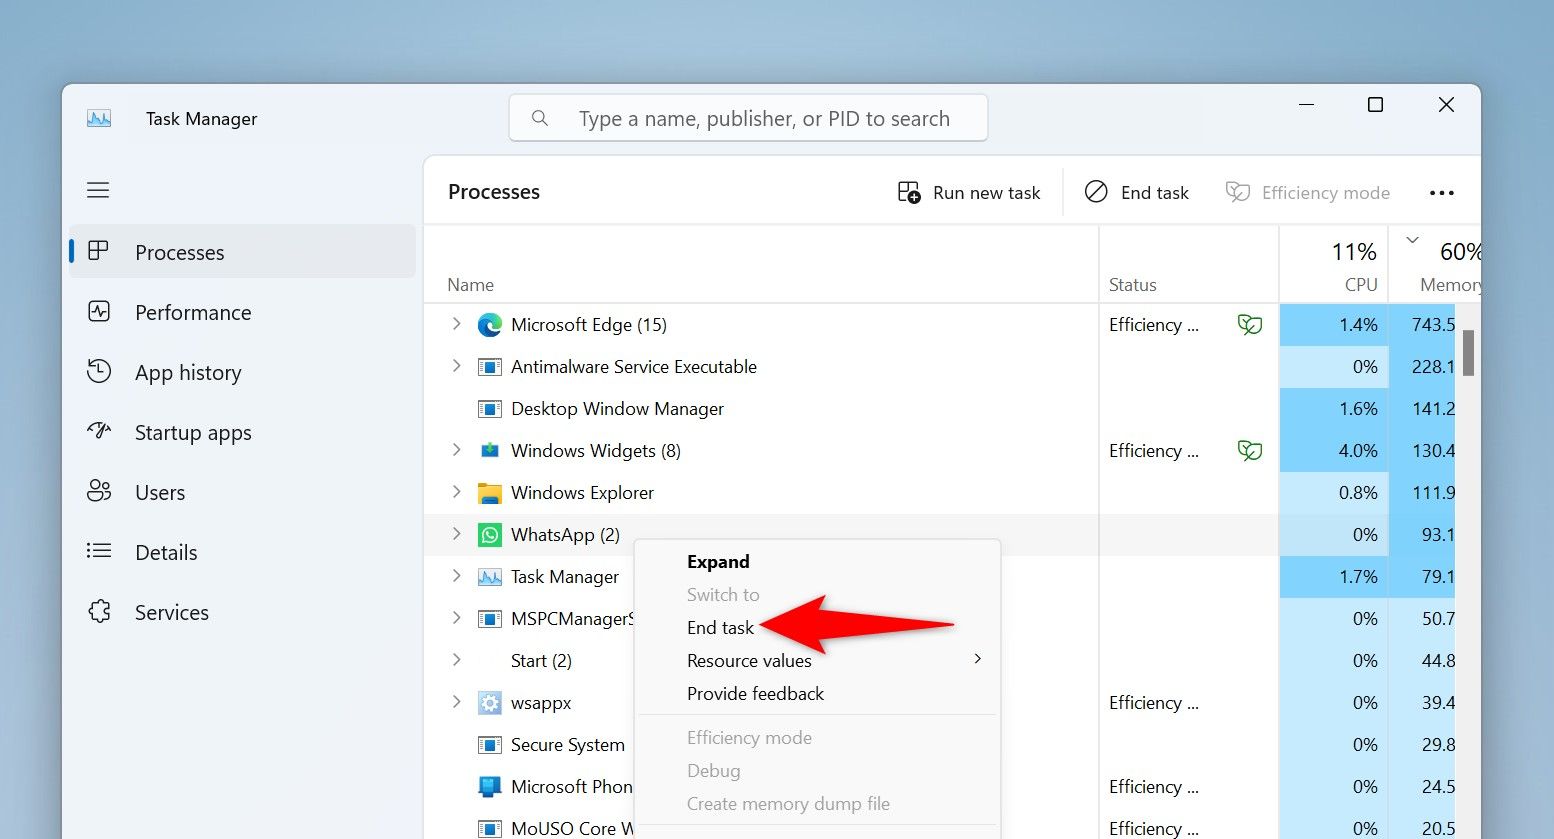
Task Manager will immediately close the selected app.
Using Settings
Windows 11’s Settings app also offers the option to terminate unresponsive apps. This requires a few more clicks than the other methods.
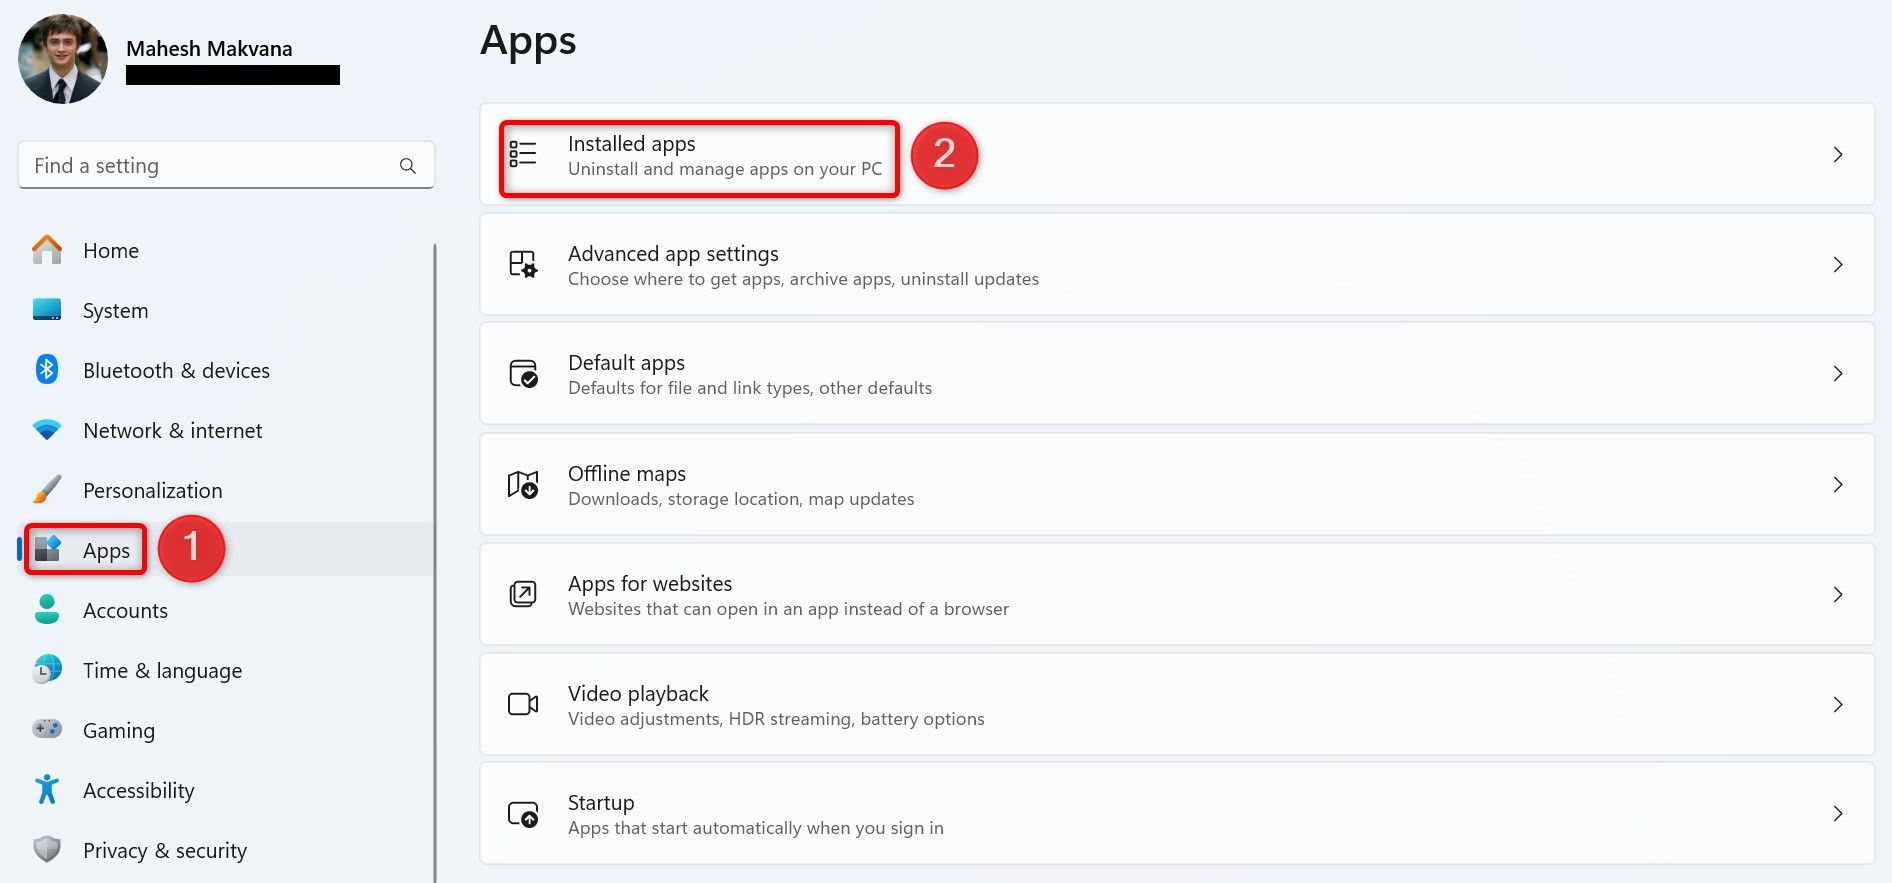
Start by launching Settings using Windows+i. From the left sidebar, select “Apps,” then choose “Installed Apps” in the right pane.
Find the unresponsive app on the list. Next to the app, click the three dots and choose “Advanced Options.” If you don’t find Advanced Options for your app, you can’t use this method.
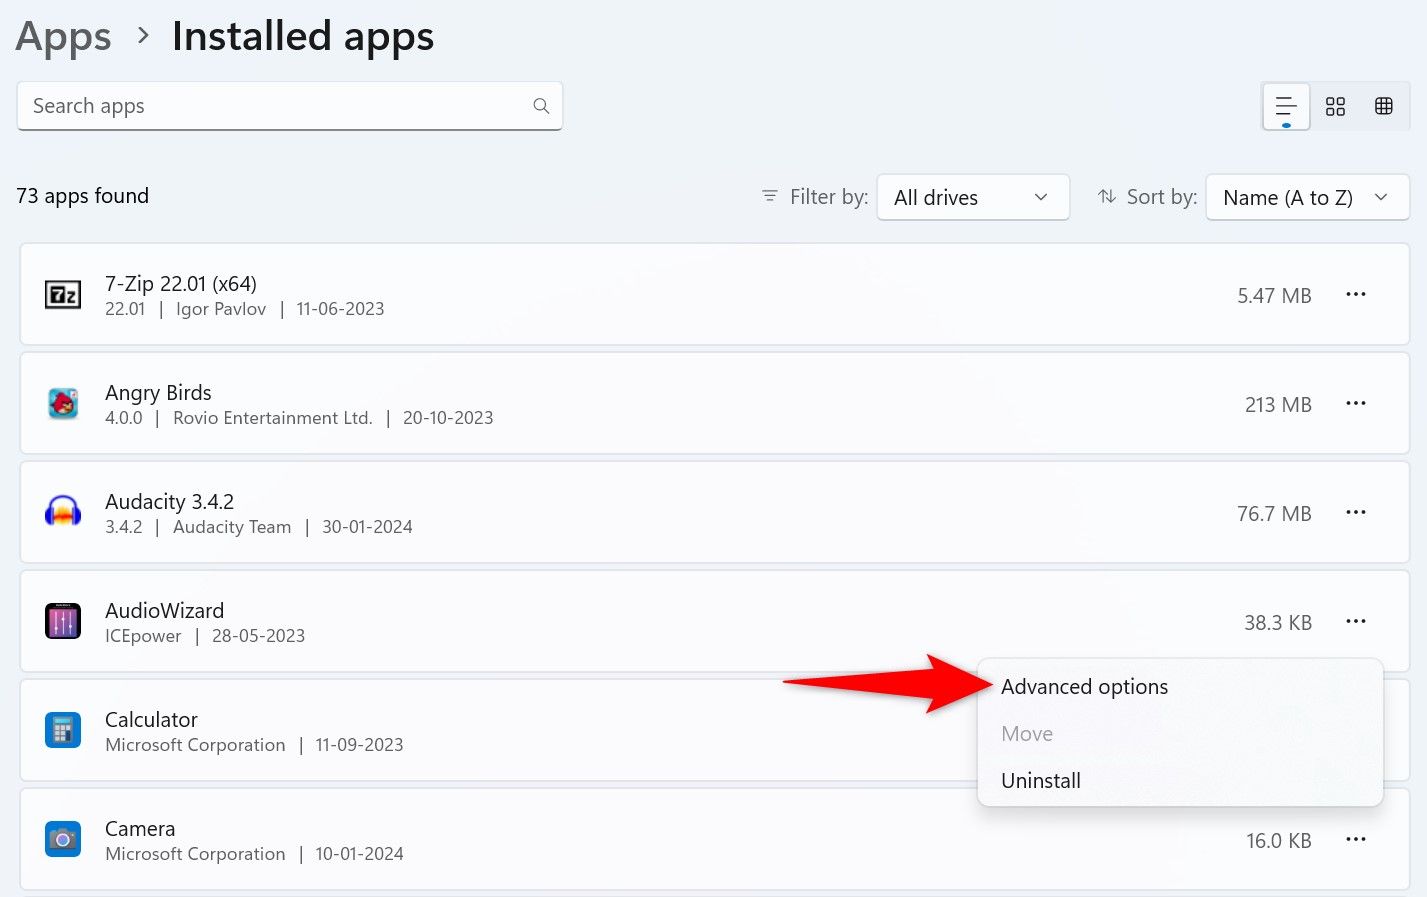
On the following page, scroll down to the Terminate section. Here, click the “Terminate” button.
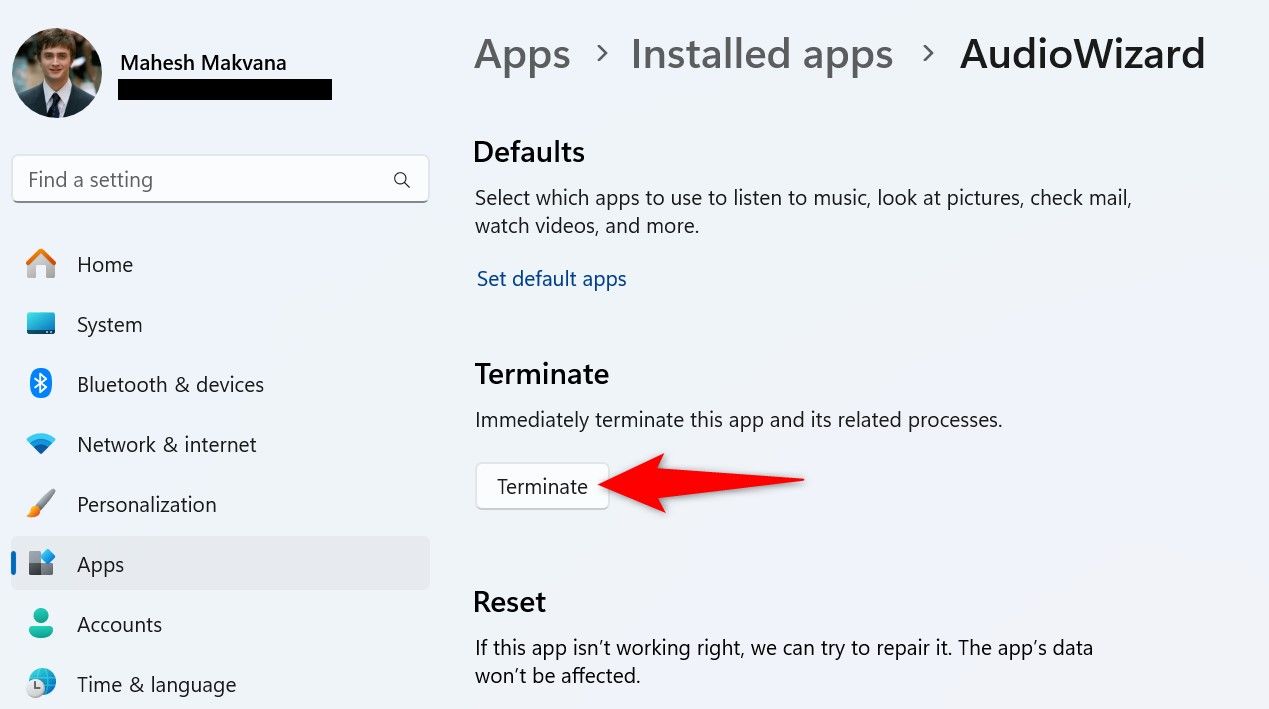
Settings will close the chosen app.
From Command Prompt
If you prefer command-line methods, or you currently only have access to Command Prompt, you can use a command to list all the running apps and end the unresponsive ones.
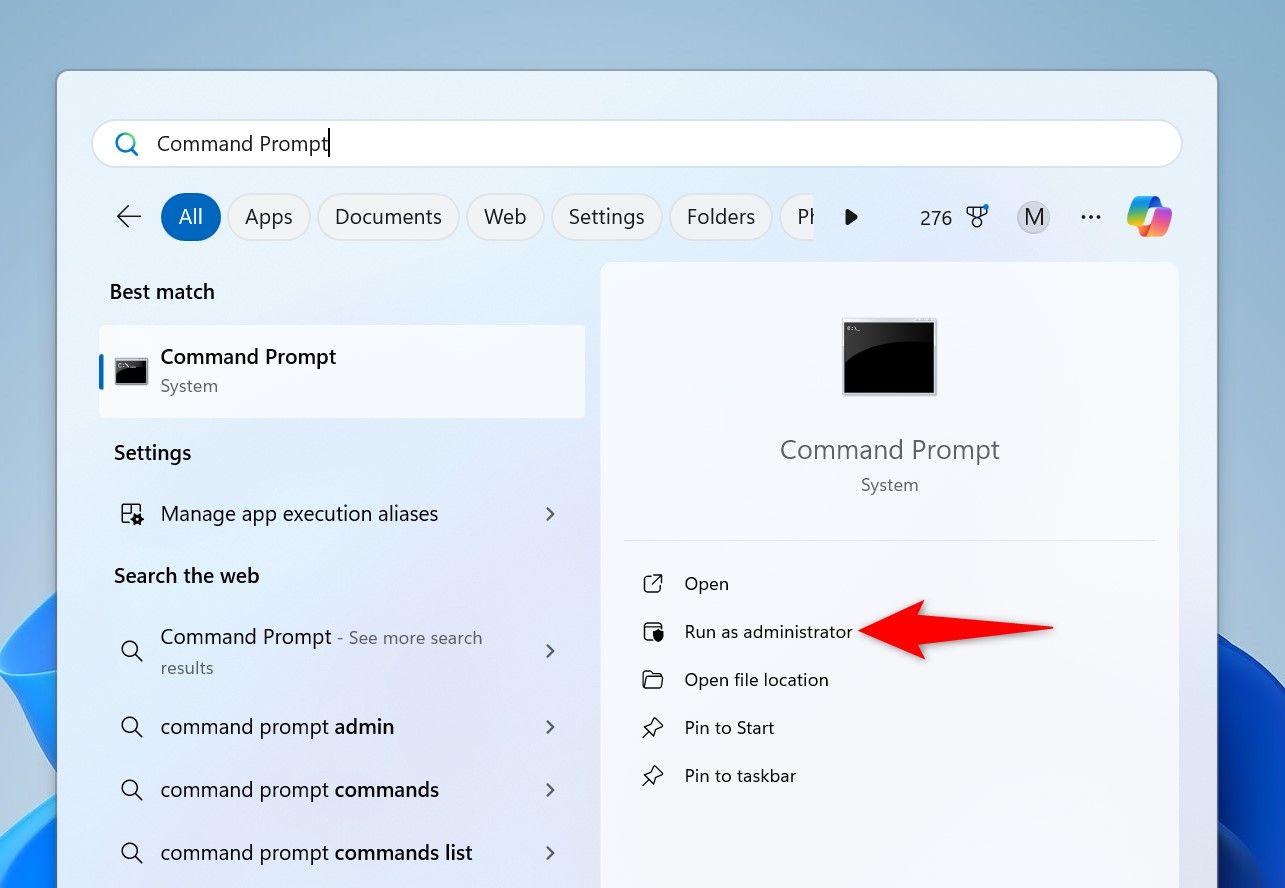
To use this method, launch Command Prompt with admin rights if you haven’t already. You can do that by pressing the Windows key, typing Command Prompt, and choosing “Run as Administrator.”
In the User Account Control prompt, select “Yes.”
In Command Prompt, type the following command and press Enter. You’ll see the list of apps running on your PC.
tasklist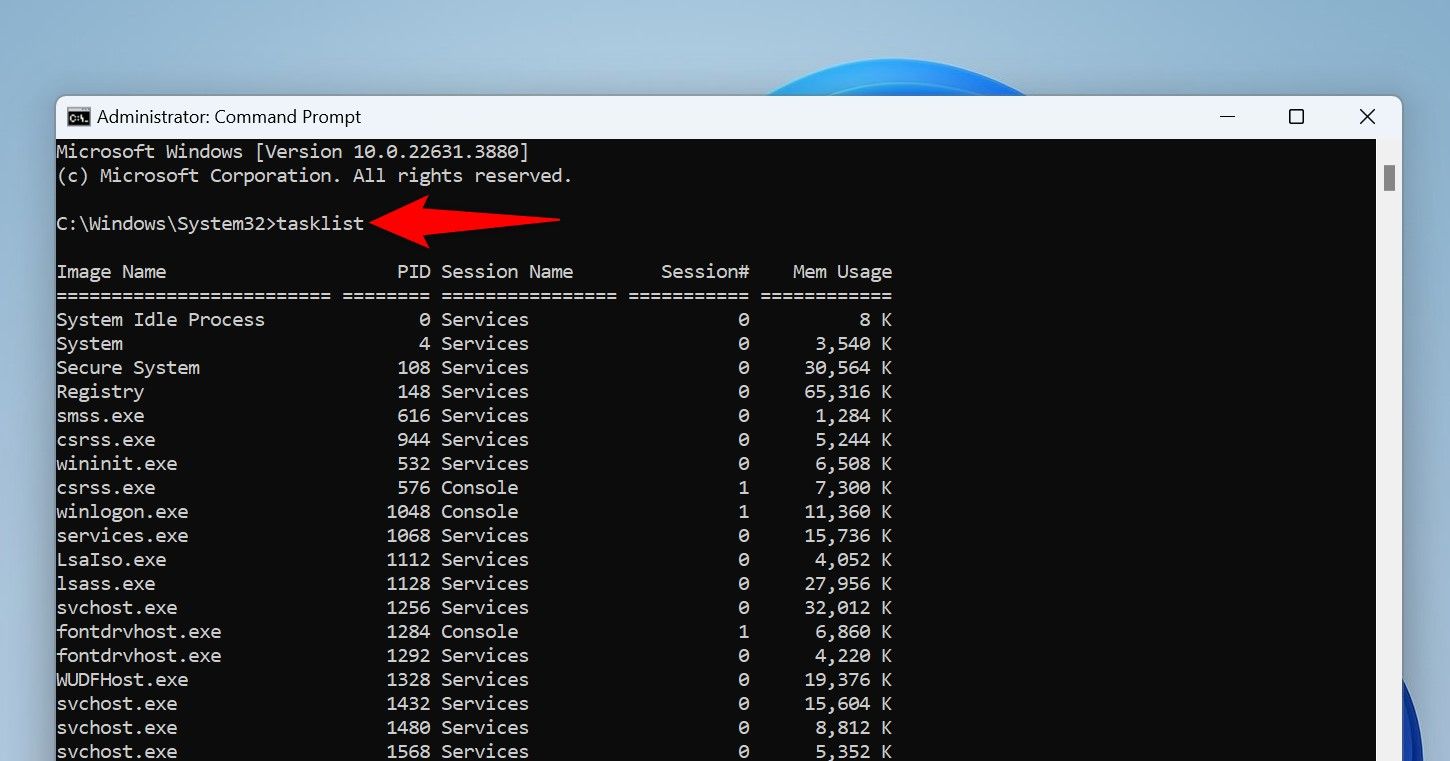
From the app list, find the unresponsive app. Then, run the following command, replacing AppName with the name you noted.
taskkill /im AppName /t /f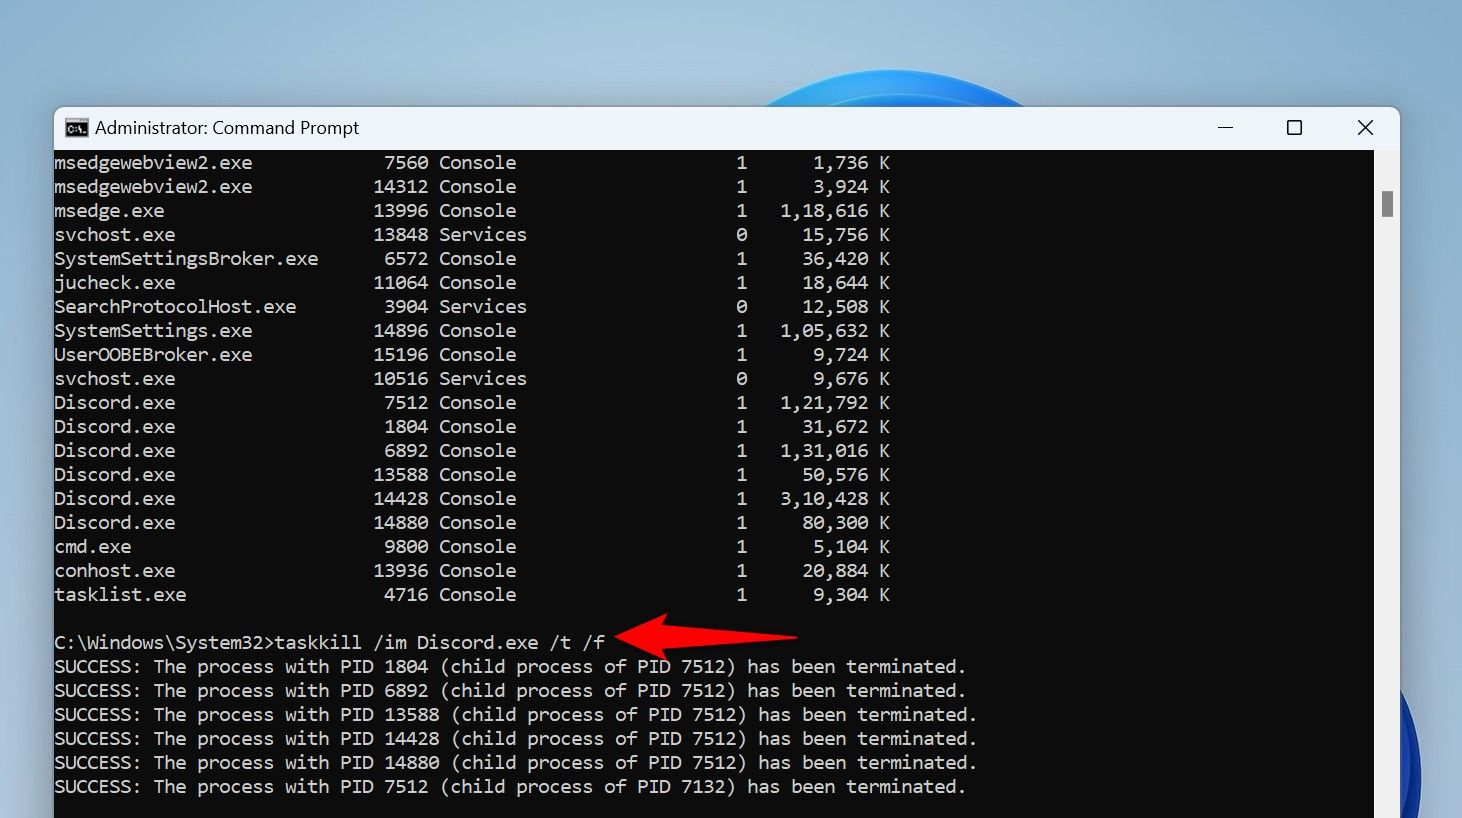
Here’s what each parameter does in the command:
- taskkill: This is the command that terminates the specified process.
- im: This parameter tells the command the next value is an executable file name.
- AppName: This is the name of the app to be closed.
- t: This parameter tells the command to close the specified app as well as its child processes.
- f: This forces the app to close.
The command has stopped the specified app on your computer.
Using PowerShell
PowerShell works much like Command Prompt, but you’ll use a different command (called a cmdlet) in this utility to force-close frozen apps on your PC.
- Start by pressing the Windows key, typing PowerShell, and choosing “Run as Administrator.”
- In the User Account Control prompt, select “Yes.”
- On the PowerShell window, type the following cmdlet and press Enter. This cmdlet retrieves a list of the running apps.
Get-Process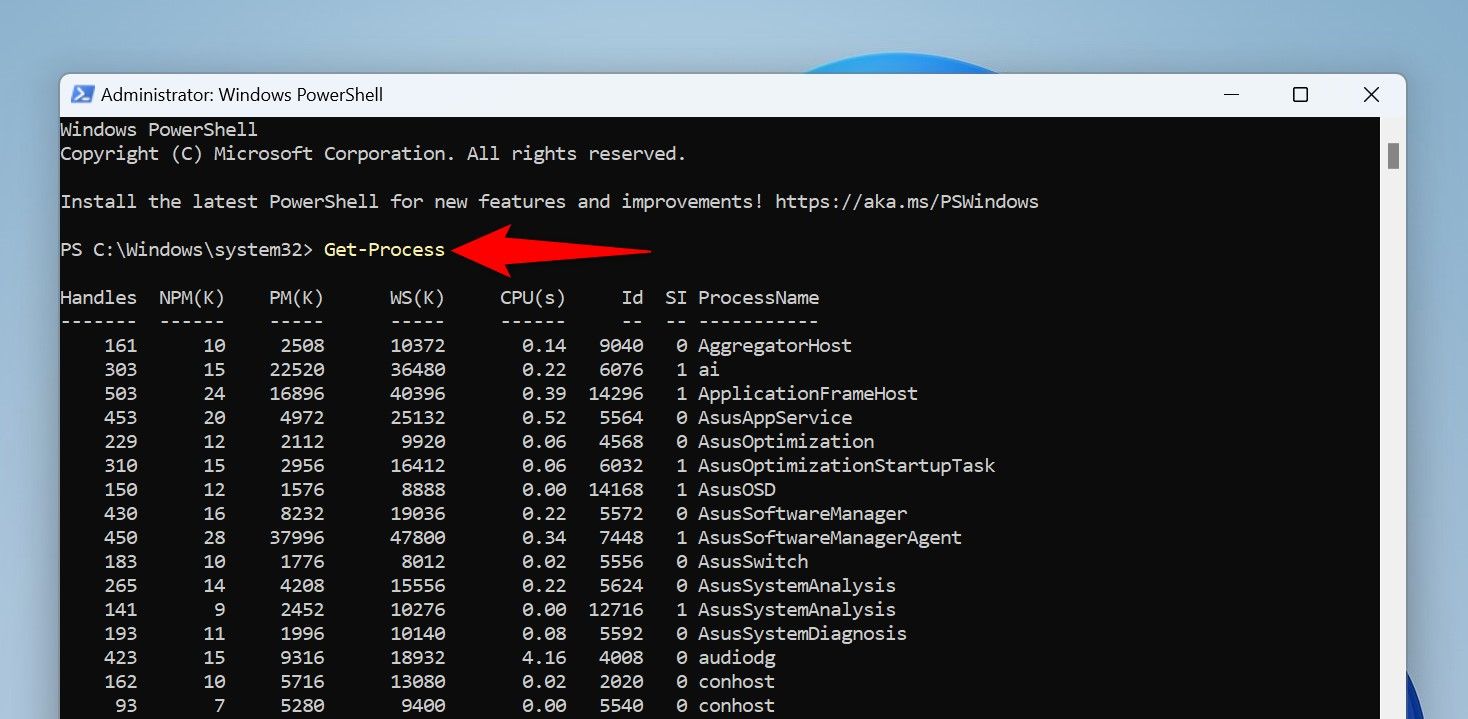
Find the frozen app on the list. Then, run the following cmdlet replacing App with the frozen app name.
Stop-Process -Name App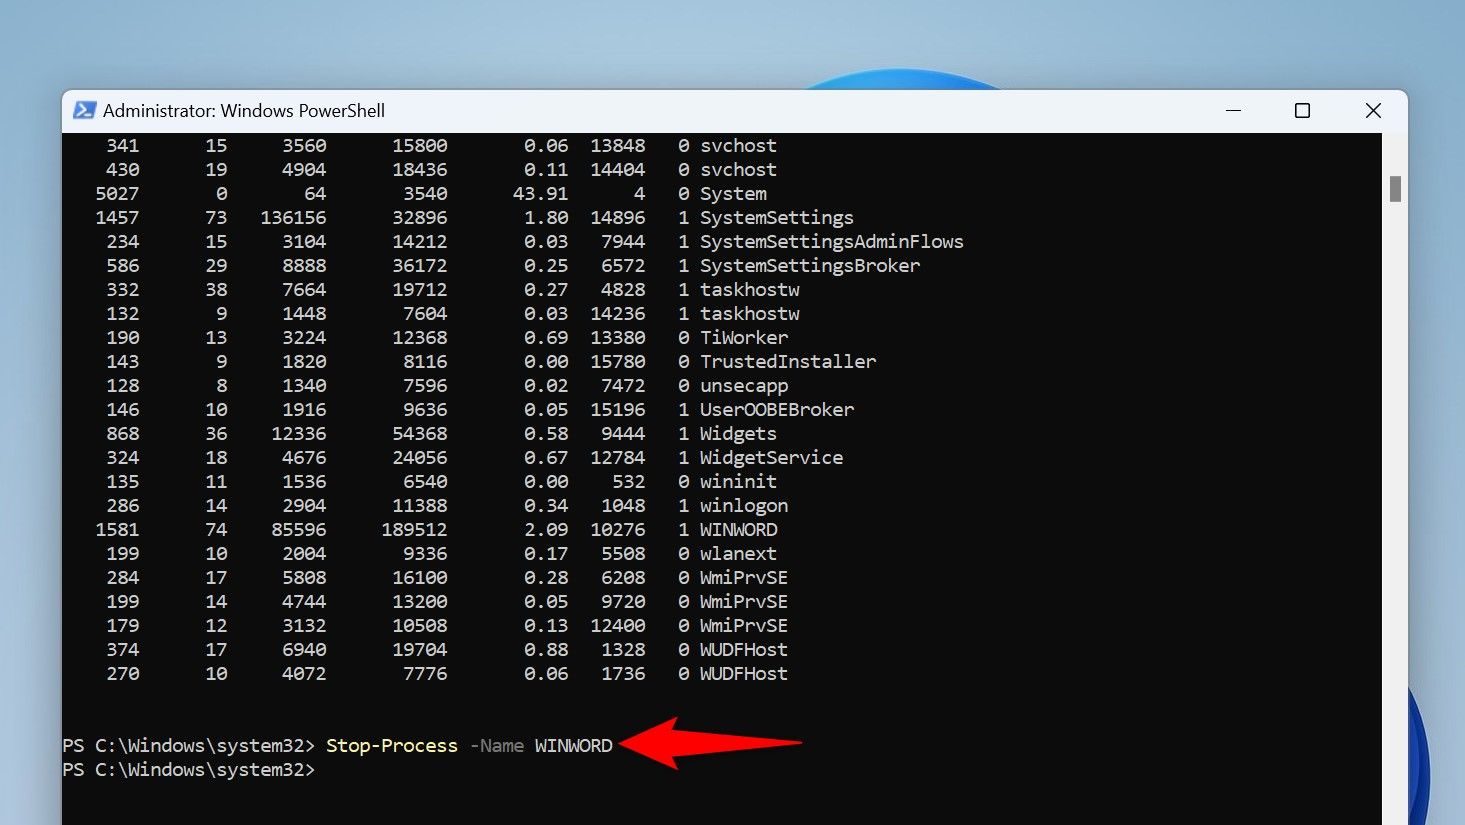
Here’s what each parameter does in this cmdlet:
- Stop-Process: This cmdlet terminates the specified process.
- -Name: This parameter tells the cmdlet the next value is a process/app name.
- App: This is the app to be closed.
PowerShell will close the specified app.
If nothing works, Restart your PC
If the frozen app remains frozen even after using the above methods, give your Windows 11 PC a restart to close all the running apps on your system.
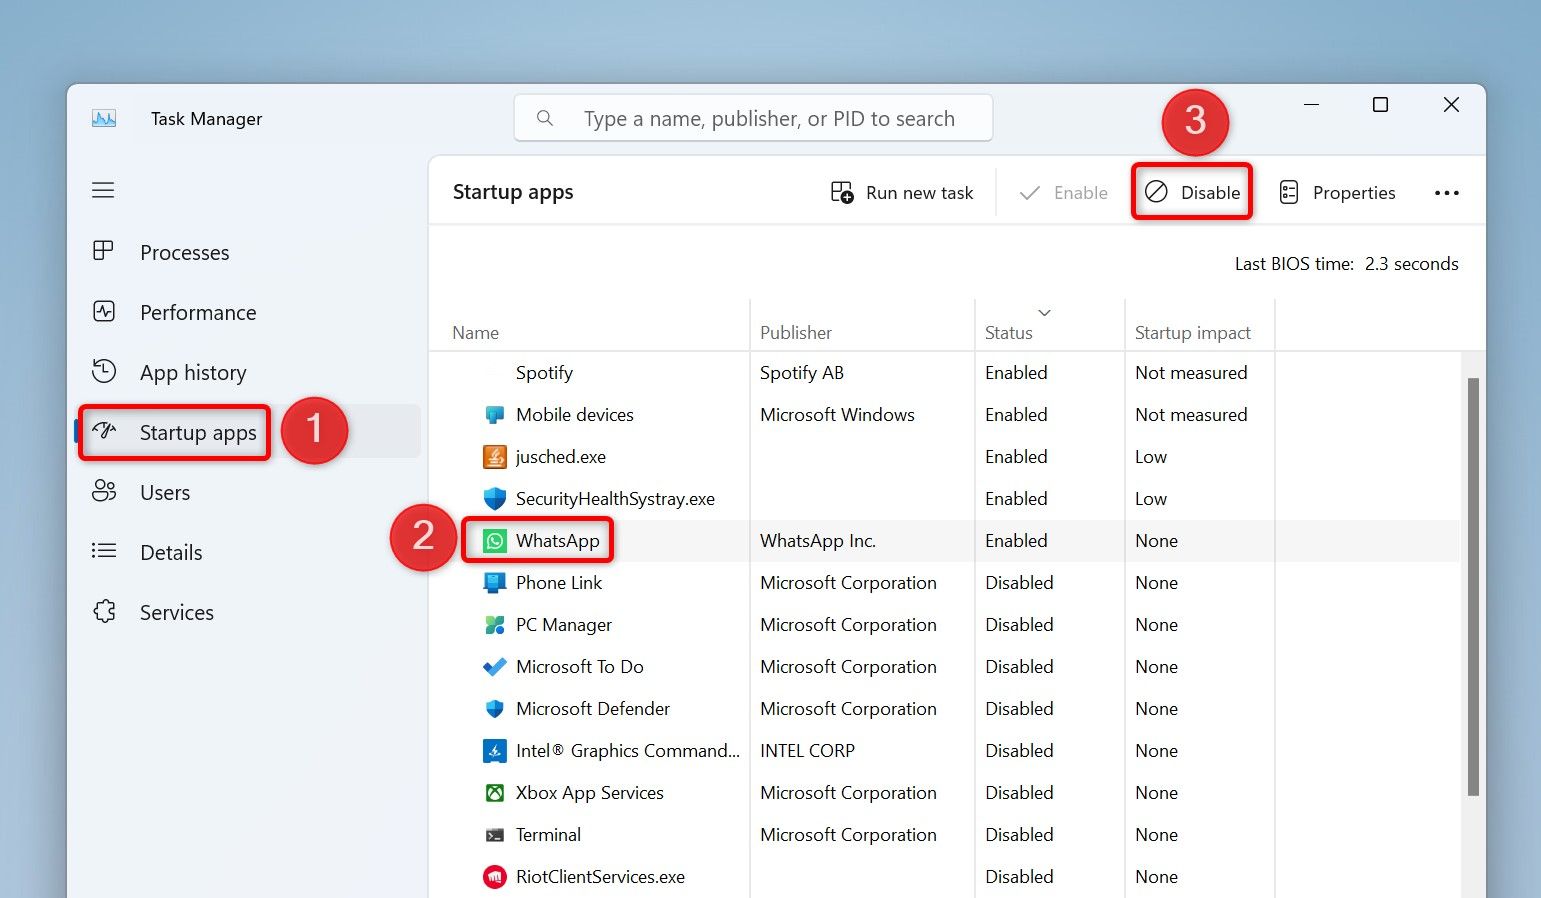
Before you reboot your PC, ensure the frozen app isn’t on the startup apps list. If it is, the app will automatically launch (and possibly freeze again) when your computer turns back on. To prevent that, open Task Manager and access the “Startup Apps” tab. Select the unresponsive app on the list and choose “Disable” at the top. Then, close Task Manager.
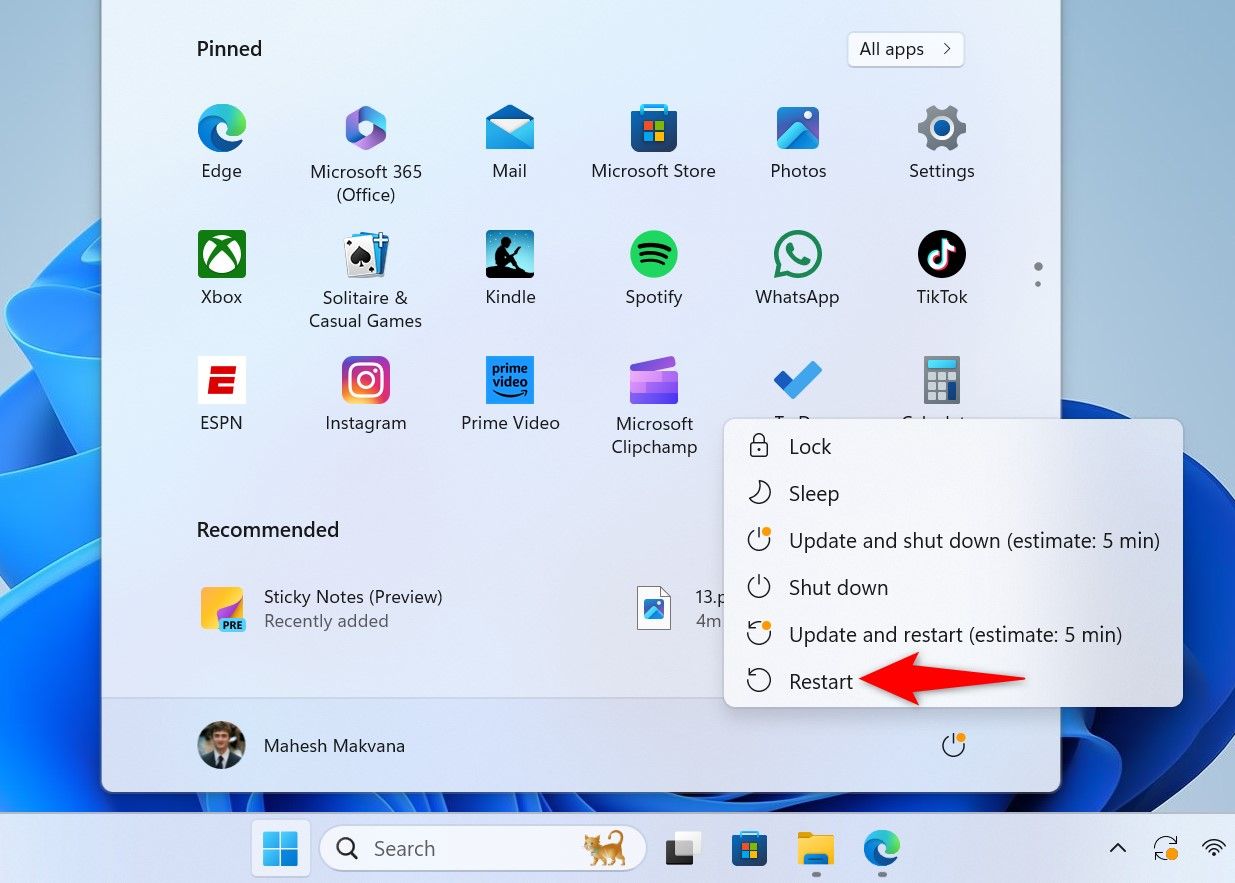
Once all of that is done, restart your computer by opening the Start Menu, selecting the Power icon, and choosing “Restart.”
You won’t have the unresponsive app running when your computer turns on. If you launch the app, and it continues to freeze up, either the app installation is faulty or there’s a compatibility issue. In this case, uninstall and reinstall the app and see if that fixes the issue. Alternatively, download another version of the app and see if it works.
[mai mult...]How to Customize the Taskbar Icons On Windows
Technically, the only thing you need to swap the default app icons on the taskbar are the icon files. Some apps come preinstalled with extra icons that you can use. Most don’t, so you’ll have to find custom icon files online, put them all in a folder, and then individually change the app icons.
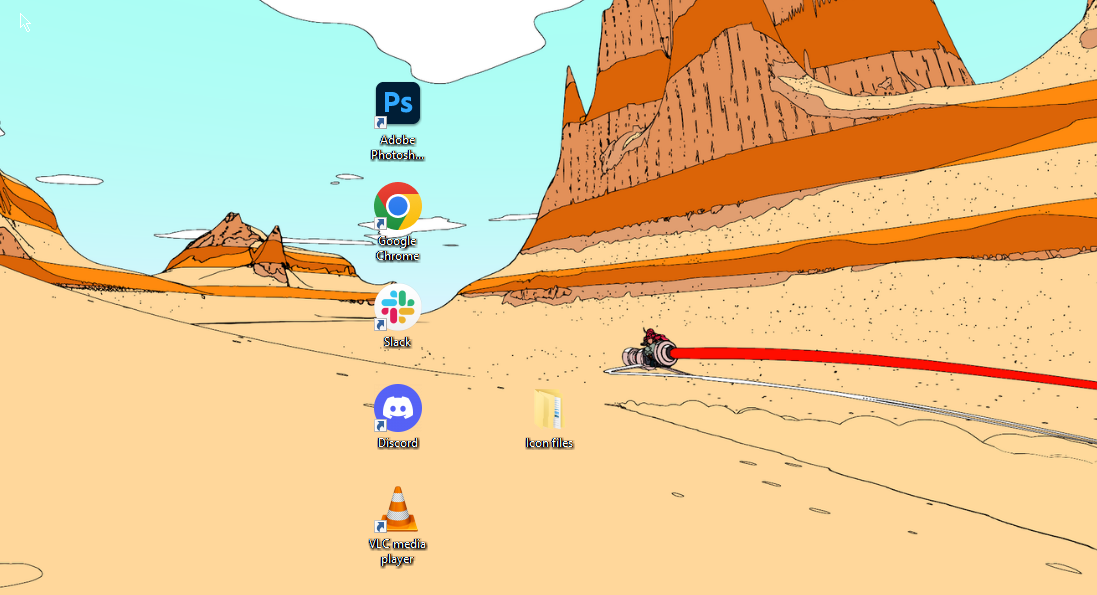
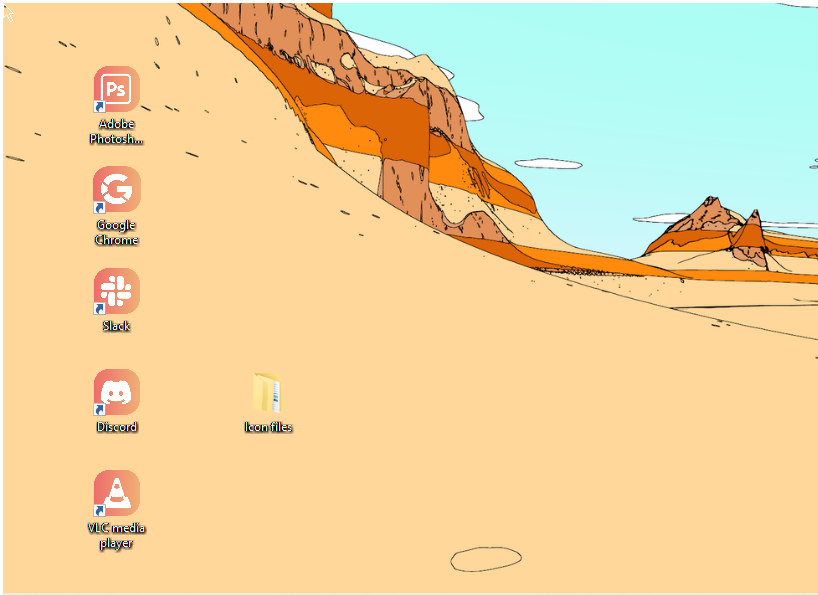
You’ll need to find the shortcuts for every app that’s going to be pinned on the taskbar, and place them all on the desktop. Depending on your chosen theme, you can create a theme pack for the taskbar that matches the overall design. This is what my selection looks like.
To break it down simply, you need two things:
- A folder with all the icon files for your taskbar apps. The file has to be in ICO, EXE, DLL, or ICL format.
- Move all the taskbar app shortcuts to the desktop.
Where to Get the Icons
You can download the icon files from any number of online libraries, some paid, others free. Icons8 and IconsScout are two free libraries. But there are dozens more available online.
Whichever source you pick, be sure to download the icons in one of the recommended file formats. The most popular format is ICO, and that’s the format in which I’ve downloaded the icons. Once you have downloaded all your icon files, place them in one folder for easy access.
Secondly, you want to get the app shortcuts in one place. I’ve collected them on the desktop for ease of use. If the shortcut isn’t already on the desktop, just create a new one.
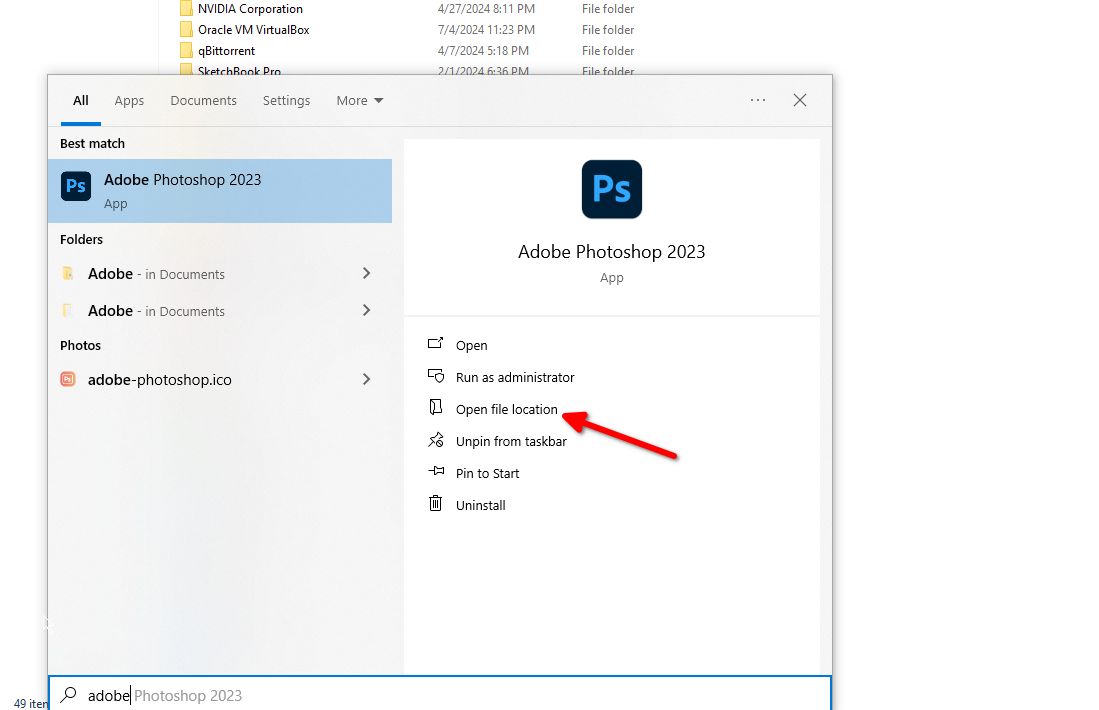
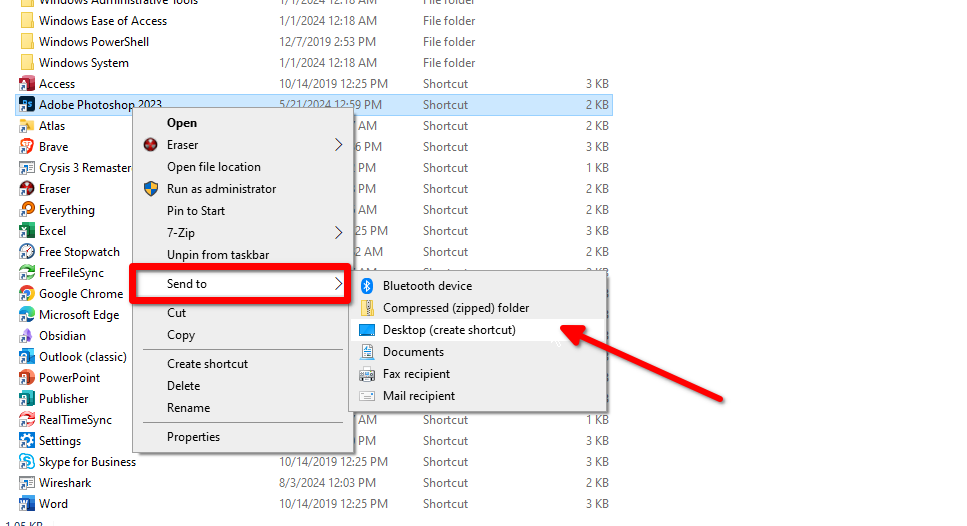
Search the app name (press the Windows key on the keyboard or click the button in the corner). Click “Open File Location” and find the EXE file in the directory. Right-click on the EXE file and select “Send To” and pick “Desktop.” It should pop up on the desktop right away.
After that, your shortcuts and icon files are good to go.
Changing Taskbar Icons
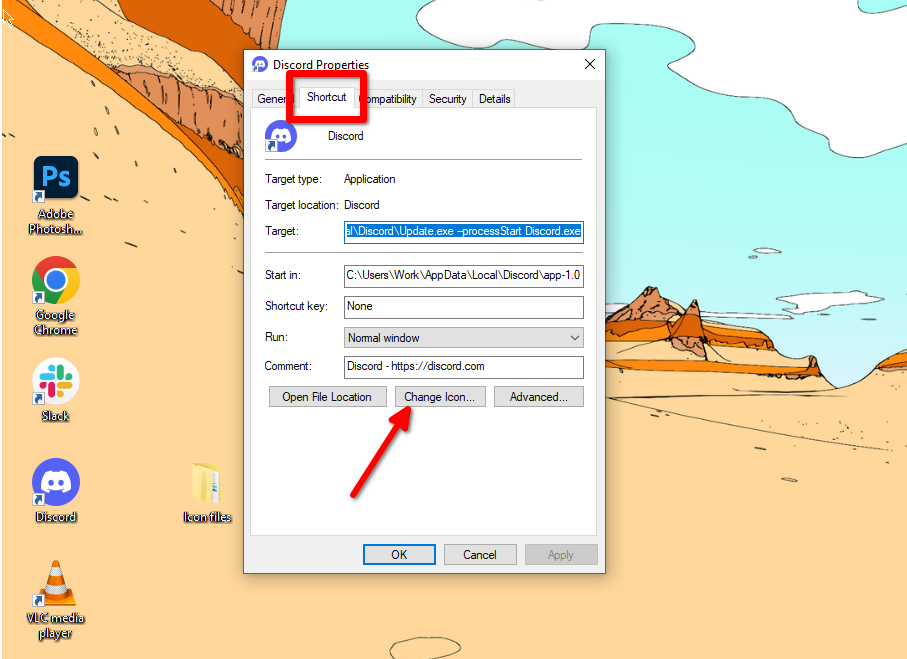
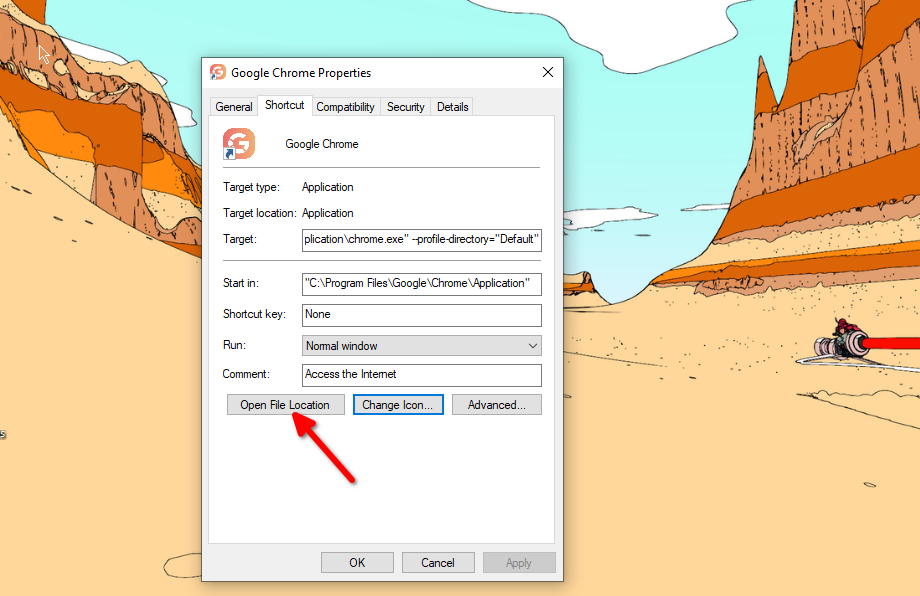
Now you’re ready to replace the icons on your taskbar. Right-click on a desktop shortcut and click “Properties.” Head to the “Shortcut” tab and click “Change Icon.”
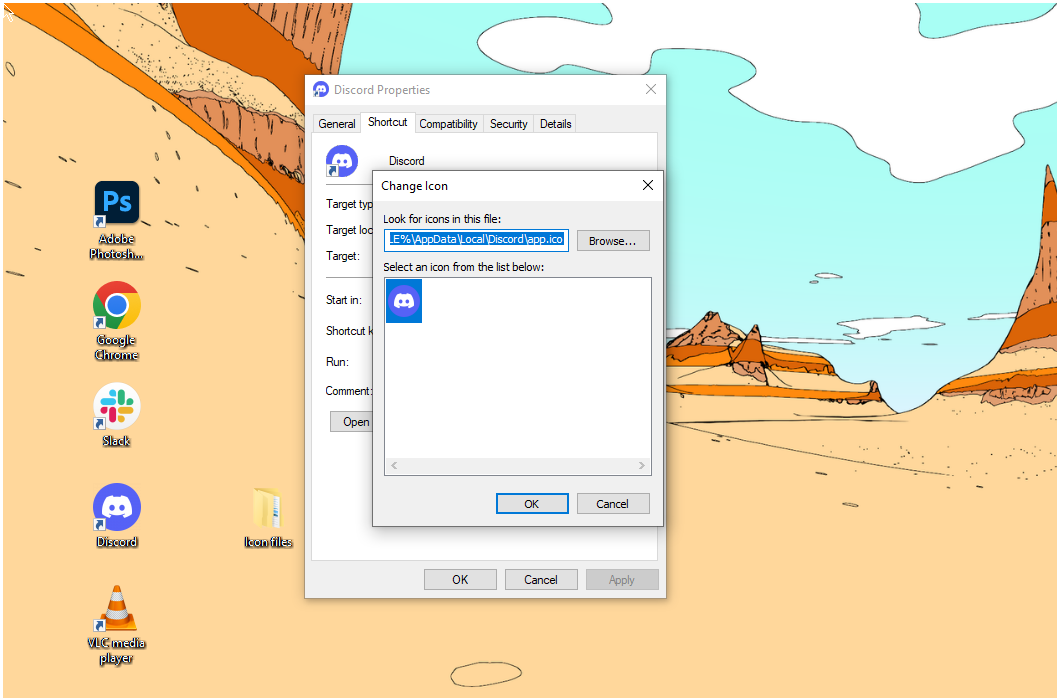
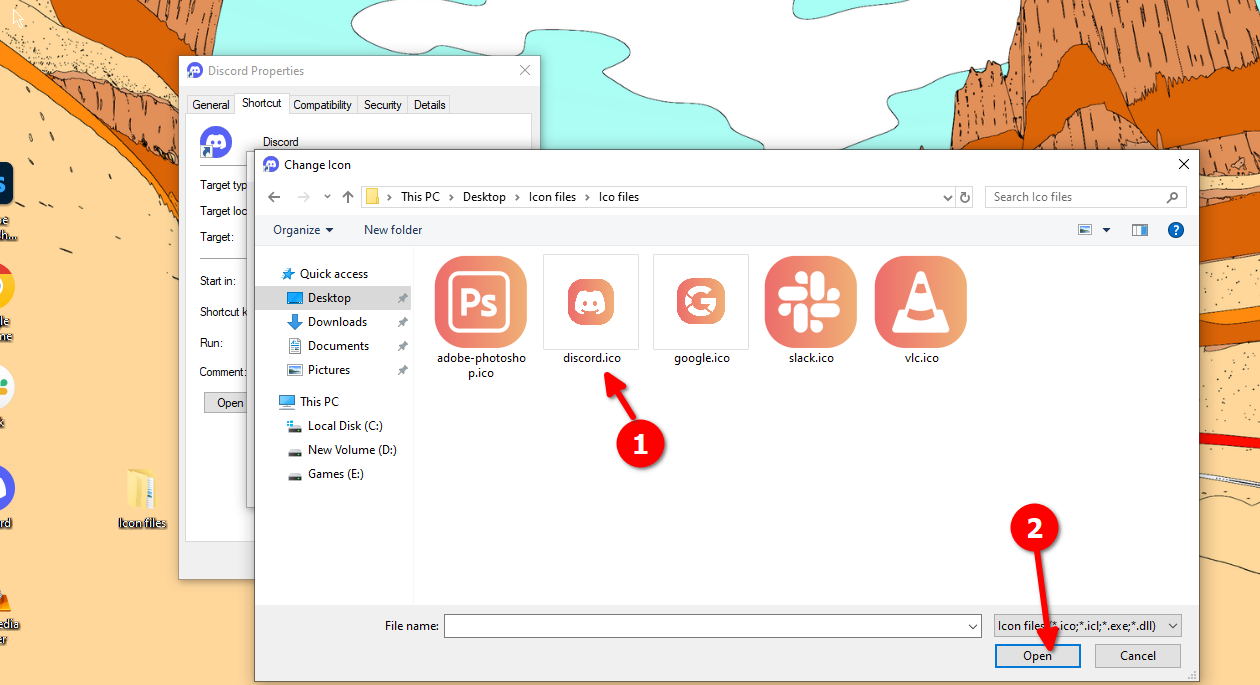
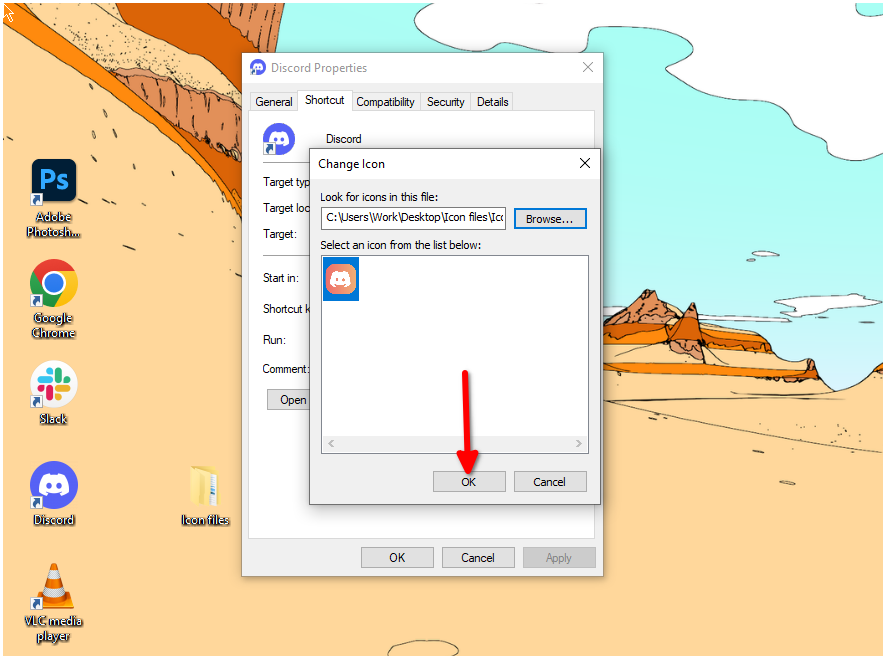
Here you’ll be able to upload a new icon file that replaces the original. Click “Browse” and locate the folder where you’ve saved all your custom icon files. Select the right icon and click “Open.” Click “OK” on both windows after that, and the desktop icon should change.
Repeat these steps for all the desktop icons. When you’re done, the desktop shortcuts should look something like this (except you’d be replacing them with your own icons).
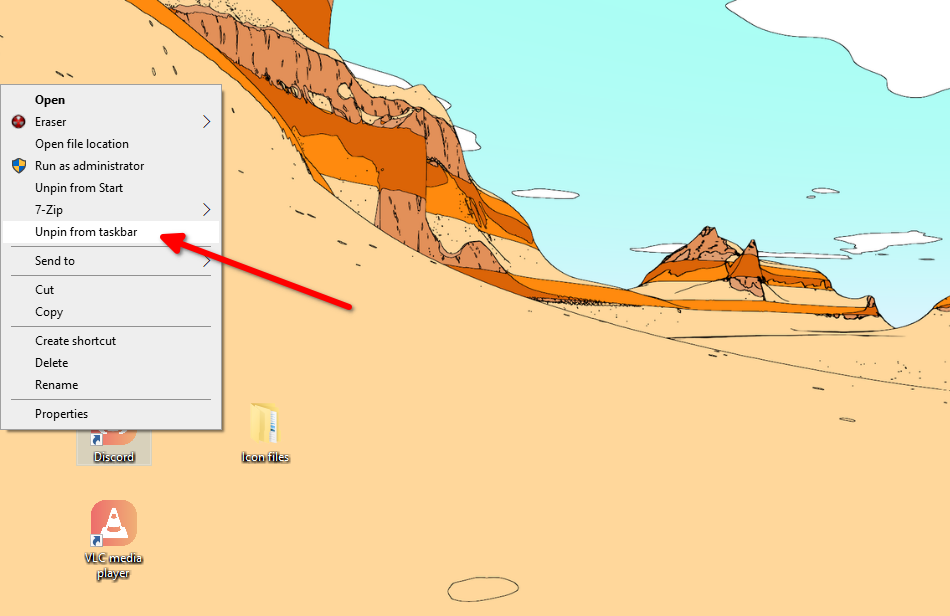
When you’re done, right-click on the desktop shortcuts one by one, select “Unpin from Taskbar.” Then right-click again and select “Pin to Taskbar.”
After you’ve changed the desktop icons and repinned the taskbar icons, you’re all done. Here’s what my taskbar looks like after the changes. You can repeat these steps with other ICO files to get different results. You can also change the taskbar color.
Revert Changes
Reverting the changes and restoring the original icons is just as easy. Once again, right-click on the desktop shortcut and select “Properties.” In the “Shortcut” tab on the properties panel, you’ll find a button labeled “Open File Location.” Click it and copy the program address (you’ll need it later).
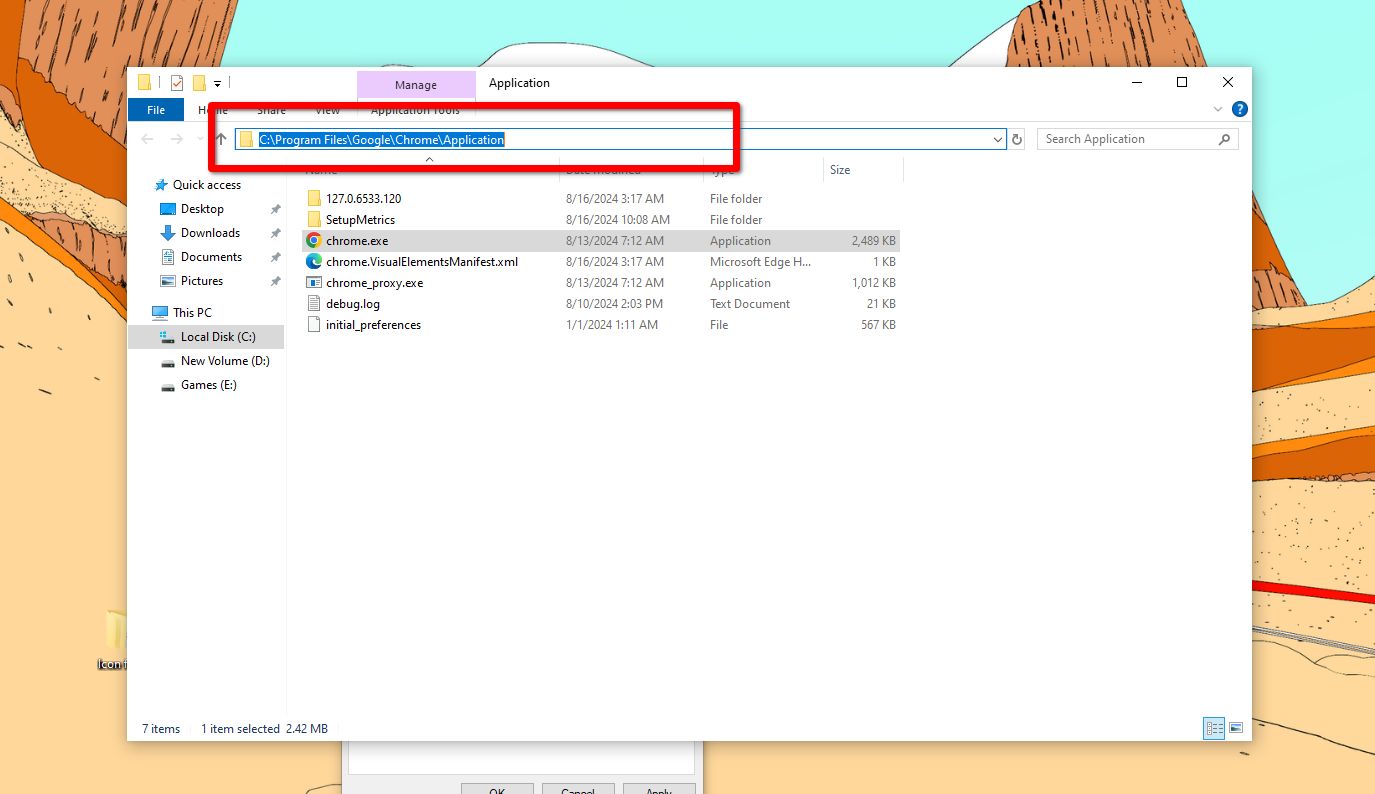
Now go back to the “Shortcut” tab under Properties and click “Change Icon” and then “Browse.” Paste the directory you copied earlier in the Explorer address bar. Select the EXE file, click “Open.” You’ll be presented with the default available icons. Pick one and click “OK.”
To change the icon in the taskbar, we’ll use the same trick. Right-click on the desktop shortcut, click “Unpin from the Taskbar.” Then right-click again and click “Pin to Taskbar.” The taskbar icon should change right away. Repeat these steps for the remaining taskbar icons to get back to the default look.
Cum se instalează MediaWiki pe Debian 12
MediaWiki este o platformă software wiki gratuită și open-source folosită pentru a alimenta diverse wiki-uri, inclusiv cea mai cunoscută, Wikipedia.Actualizați sistemul de operare Debian 12 la cea mai recentă versiune cu următoarea comandă:
# apt update && apt upgradeDe asemenea, instalați pachetele necesare.
# apt install curl nano wget unzip zipPasul 2: Instalați serverul web Apache
Îl puteți instala prin apt managerul de pachete executând următoarea comandă.
# apt install apache2Verificați starea serviciului Apache folosind systemctl status comanda:
# systemctl status apache2Ieșire:
● apache2.service - The Apache HTTP Server
     Loaded: loaded (/lib/systemd/system/apache2.service; enabled; preset: enabled)
     Active: active (running)
       Docs: https://httpd.apache.org/docs/2.4/
    Process: 24002 ExecStart=/usr/sbin/apachectl start (code=exited, status=0/SUCCESS)
   Main PID: 24006 (apache2)
      Tasks: 6 (limit: 2273)
     Memory: 23.4M
        CPU: 13.701s
     CGroup: /system.slice/apache2.service
             ├─24006 /usr/sbin/apache2 -k start
             ├─24206 /usr/sbin/apache2 -k start
             ├─24207 /usr/sbin/apache2 -k start
             ├─24208 /usr/sbin/apache2 -k start
Pasul 3: Instalați PHP și extensiile necesare
Pentru a instala PHP și extensiile necesare, executați următoarea comandă:
# apt install php libapache2-mod-php php-cli php-intl php-json php-common php-mbstring php-apcu php-mysql php-zip php-gd php-mbstring php-curl php-xml imagemagickOdată ce instalarea este completă, verificați dacă PHP este instalat:
php -vOutput:
PHP 8.2.7 (cli) (built: Jun 9 2023 19:37:27) (NTS)
Copyright (c) The PHP Group
Zend Engine v4.2.7, Copyright (c) Zend Technologies
with Zend OPcache v8.2.7, Copyright (c), by Zend TechnologiesPasul 4: Instalați MariaDB și creați o bază de date
Pentru a instala MariaDB, rulați următoarea comandă:
# apt install mariadb-server mariadb-clientVerificați starea serviciului MariaDB utilizând comanda systemctl status :
# systemctl status mariadbIeșire:
● mariadb.service - MariaDB 10.11.4 database server
     Loaded: loaded (/lib/systemd/system/mariadb.service; enabled; preset: enabled)
     Active: active (running)
       Docs: man:mariadbd(8)
             https://mariadb.com/kb/en/library/systemd/
   Main PID: 24964 (mariadbd)
     Status: "Taking your SQL requests now..."
      Tasks: 12 (limit: 2273)
     Memory: 87.9M
        CPU: 4.312s
     CGroup: /system.slice/mariadb.service
             └─24964 /usr/sbin/mariadbd
Acum rulați comanda de mai jos pentru a vă conecta la shell-ul MariaDB.
# mysql -u rootOdată ce v-ați conectat la serverul de baze de date, trebuie să creați o bază de date pentru instalarea MediaWiki:
MariaDB [(none)]> CREATE DATABASE mediawikidb;
MariaDB [(none)]> CREATE USER 'mediawikiuser'@'localhost' IDENTIFIED BY 'Str0ngPassw0rd';
MariaDB [(none)]> GRANT ALL PRIVILEGES ON mediawikidb. * TO 'mediawikiuser'@'localhost';
MariaDB [(none)]> FLUSH PRIVILEGES;
MariaDB [(none)]> EXIT;
Pasul 5: Instalați managerul de dependențe Composer
Pentru a instala Composer, executați următoarele comenzi:
# curl -sS https://getcomposer.org/installer | php
# mv composer.phar /usr/local/bin/composer
Verificați dacă Composer a fost instalat cu succes rulând următoarea comandă:
# composer --version
Composer version 2.6.6 2023-12-08 18:32:26
Pasul 6: Descărcați MediaWiki
Cea mai recentă versiune a MediaWiki este disponibilă de pe site-ul oficial al MediaWiki . Îl poți descărca cu următoarea comandă:
# wget https://releases.wikimedia.org/mediawiki/1.40/mediawiki-1.40.1.zipApoi extrageți fișierul în folderul /var/www/ cu următoarea comandă:
# unzip mediawiki-1.40.1.zip -d /var/www/Redenumiți-l pentru a o simplifica:
# mv /var/www/mediawiki-1.40.1/ /var/www/mediawikiAcum, instalați toate dependențele PHP folosind următoarea comandă:
# cd /var/www/mediawiki && composer install --no-devApoi activați permisiunea utilizatorului de server web Apache de a accesa fișierele:
# chown -R www-data:www-data /var/www/mediawiki/Pasul 7: Configurați Apache pentru MediaWiki
Pentru a crea un nou fișier VirtualHost, rulați următoarele comenzi:
# nano /etc/apache2/sites-available/mediawiki.confLipiți conținutul așa cum se arată mai jos:
 <VirtualHost *:80>
    ServerAdmin admin@your-domain.com
    DocumentRoot /var/www/mediawiki/

    ServerName your-domain.com
    ServerAlias www.your-domain.com

    <Directory /var/www/mediawiki/>
        Options FollowSymLinks
        AllowOverride All
        Order allow,deny
        allow from all
    </Directory>

    ErrorLog ${APACHE_LOG_DIR}/your-domain.com_error.log
    CustomLog ${APACHE_LOG_DIR}/your-domain.com_access.log combined

 </VirtualHost>
Nu uitați să înlocuiți your-domain.com cu numele de domeniu al serverului dvs.
Salvați și părăsiți fișierul de configurare.
Pentru a activa acest site, rulați comanda:
# /usr/sbin/a2ensite mediawiki.confPentru a implementa modificările, reporniți serverul web Apache:
# systemctl restart apache2Pasul 8: Accesați interfața web MediaWiki
Pentru a finaliza configurarea, accesați browserul dvs. și vizitați http://domeniul-vou.com.
Începeți configurarea făcând click pe linkul pentru „ configurați wiki”
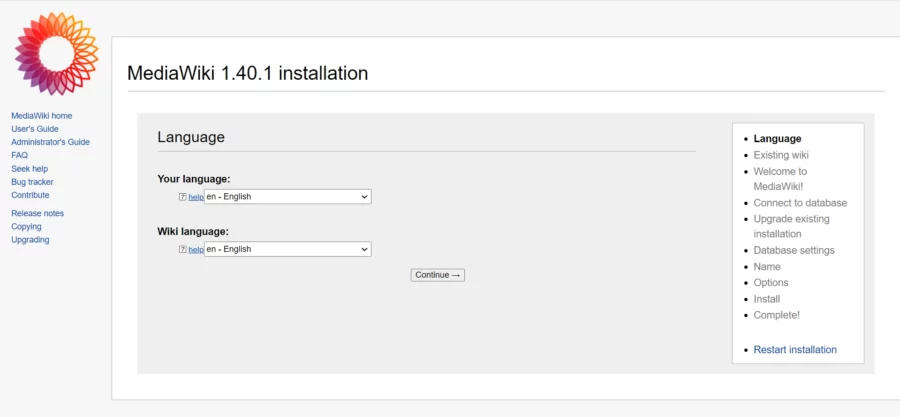
Alegeți limba și faceți clic pe butonul Continuare
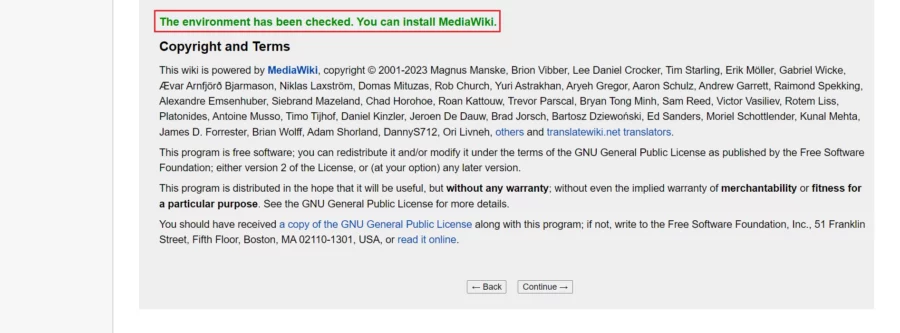
Dacă totul este în regulă, veți primi mesajul „ Mediul a fost verificat. Puteți instala MediaWiki”. Faceți click pe „ Continuați” pentru a trece la pasul următor.
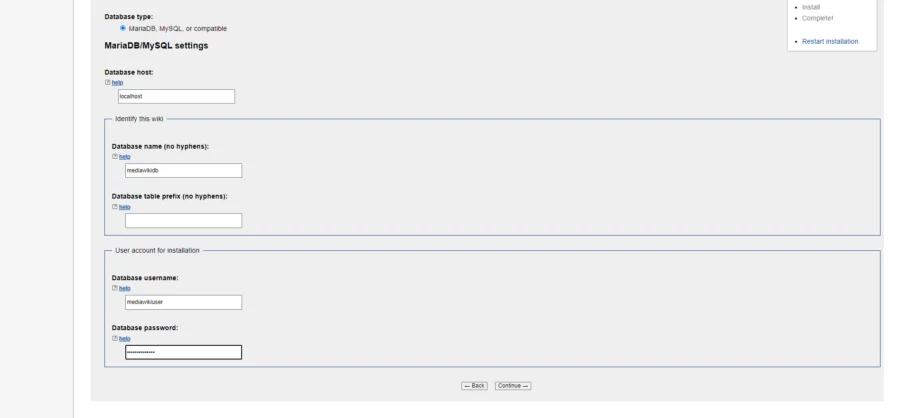
Adăugați informațiile bazei de date, cum ar fi numele bazei de date, numele de utilizator și parola pe care le-ați creat la pasul anterior.
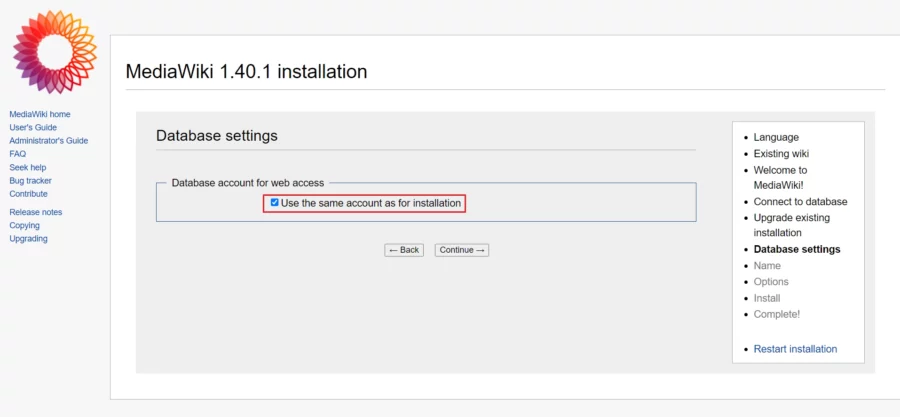
Faceți click pe butonul Continuare
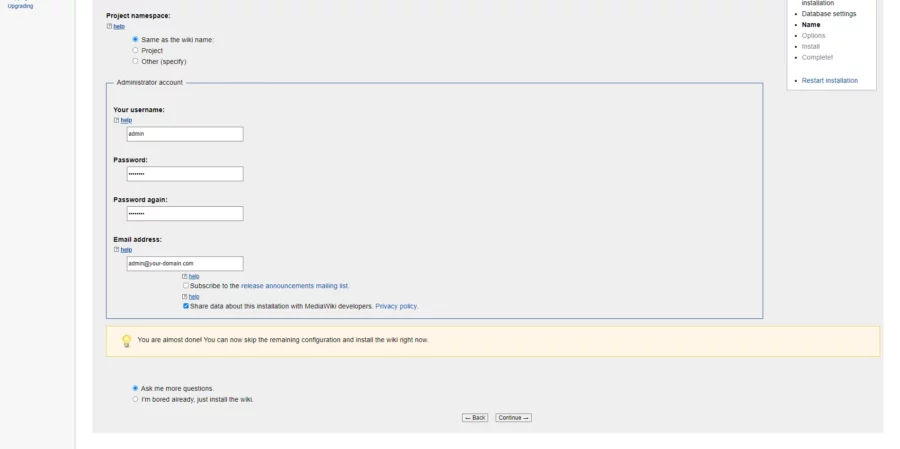
Furnizați numele site-ului dvs., numele de utilizator de administrator, parola și faceți click pe butonul Continuare
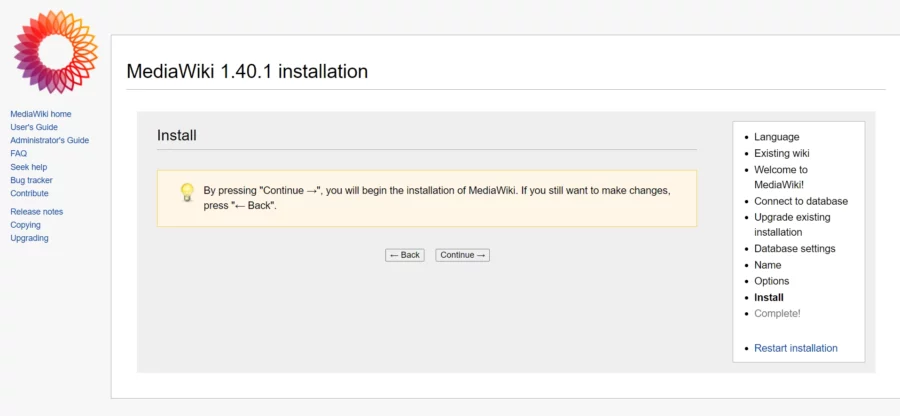
Faceți click pe butonul „Continuare”
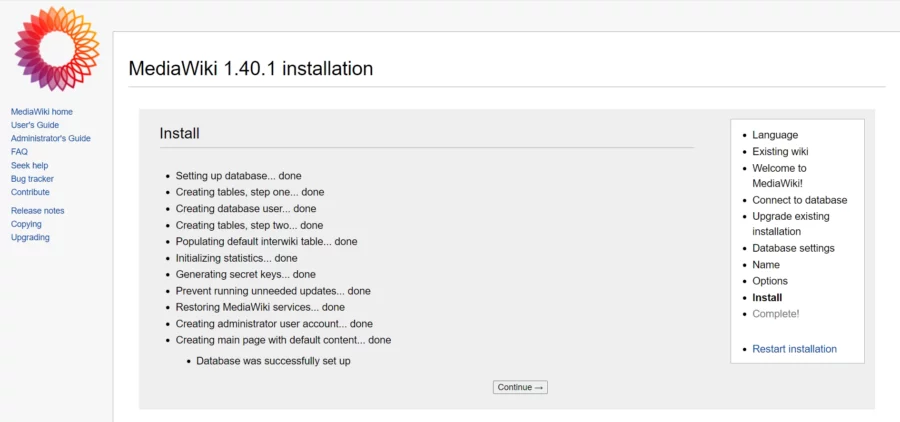
Sistemul va genera un „ LocalSettings.php” care conține toată configurația pe care ați făcut-o.
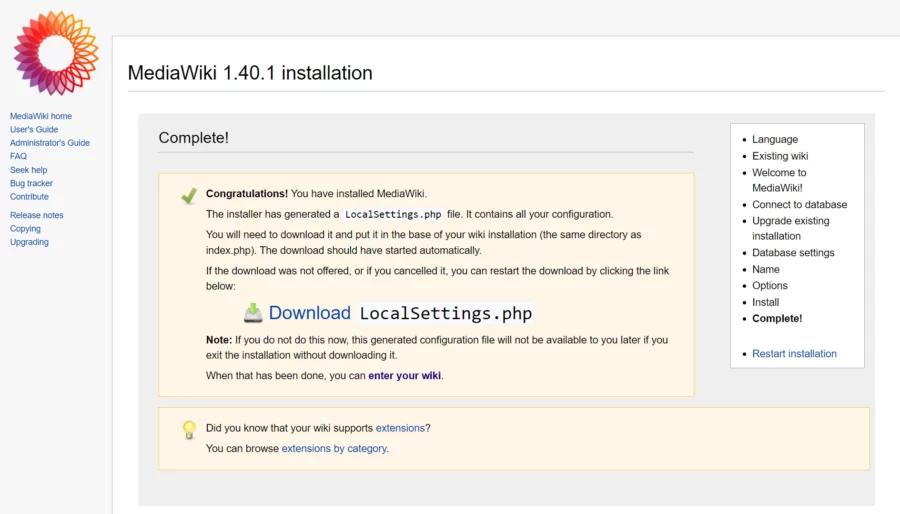
Copiați fișierul în directorul /var/www//mediawiki. Apoi, setați proprietatea corectă folosind următoarea comandă:
# chown www-data:www-data /var/www/mediawiki/LocalSettings.phpDupă ce ați finalizat acest ultim pas, veți fi redirecționat către tabloul de bord MediaWiki:

Cum se instalează RainLoop pe Debian 12
RainLoop este un client de e-mail cu sursă deschisă, bazat pe web, care permite utilizatorilor să-și acceseze conturile de e-mail printr-un browser web. Oferă o interfață ușor de utilizat pentru gestionarea e-mailurilor, a contactelor și a altor sarcini conexe, fără a fi nevoie de un client de e-mail dedicat, cum ar fi Outlook sau Thunderbird.
Pasul 1: Actualizați sistemul de operare
Actualizați sistemul de operare Debian 12 la cea mai recentă versiune cu următoarea comandă:
# apt update && apt upgradeDe asemenea, instalați pachetele necesare.
# apt install curl nano wget unzip zipPasul 2: Instalați serverul web Nginx
Îl puteți instala prin apt managerul de pachete executând următoarea comandă.
# apt install nginxVerificați starea serviciului Nginx folosind systemctl status comanda:
# systemctl status nginxPasul 3: Instalați PHP
Pentru a instala PHP și extensiile necesare, executați următoarea comandă:
# apt install php php-cli php-fpm php-json php-common php-mysql php-zip php-imap php-mbstring php-curl php-xml
Odată ce instalarea este completă, verificați dacă PHP este instalat:
php -v
Output:

PHP 8.2.12 (cli) (built: Oct 27 2023 13:00:10) (NTS)

Copyright (c) The PHP Group

Zend Engine v4.2.12, Copyright (c) Zend Technologies

    with Zend OPcache v8.2.12, Copyright (c), by Zend Technologies
După instalarea tuturor pachetelor, editați fișierul php.ini:# nano /etc/php/8.2/fpm/php.ini
Modificați următoarele setări în funcție de cerințele dvs.:
max_execution_time = 300
memory_limit = 512M
post_max_size = 25M
upload_max_filesize = 25M
Pentru a implementa modificările, reporniți serviciul php-fpm :
# systemctl restart php8.2-fpm
Pasul 4: Instalați MariaDB și creați o bază de date
Pentru a instala MariaDB, rulați următoarea comandă:
# apt install mariadb-server mariadb-clientVerificați starea serviciului MariaDB utilizând comanda systemctl status :
# systemctl status mariadbÎn mod implicit, MariaDB nu este întărit. Puteți securiza MariaDB folosind mysql_secure_installation scriptul.
# mysql_secure_installationConfigurați-l astfel:
- Set root password? [Y/n] Y
- Remove anonymous users? [Y/n] Y
- Disallow root login remotely? [Y/n] Y
- Remove test database and access to it? [Y/n] Y
- Reload privilege tables now? [Y/n] Y
Acum rulați comanda de mai jos pentru a vă conecta la shell-ul MariaDB.
# mysql -u root -pOdată ce v-ați conectat la serverul de baze de date, trebuie să creați o bază de date pentru instalarea Roundcube:
mysql> CREATE DATABASE rainloop;
mysql> CREATE USER 'rainloopuser'@'localhost' IDENTIFIED BY 'Str0ngPa$$word';
mysql> GRANT ALL PRIVILEGES ON rainloop . * TO 'rainloopuser'@'localhost';
mysql> FLUSH PRIVILEGES;
mysql> exit;
Pasul 5: Descărcați RainLoop
Puteți descărca cea mai recentă versiune stabilă pentru RainLoop cu următoarea comandă:
# https://www.rainloop.net/repository/webmail/rainloop-latest.zipDupă aceea, va trebui să decomprimați arhiva RainLoop:
# unzip rainloop-latest.zip -d /var/www/rainloop/Faceți din Nginx proprietarul folderului rainloop și acordați-i suficiente permisiuni.
# chown -R www-data:www-data /var/www/rainloop
# chmod 755 -R /var/www/rainloop
Pasul 6: Configurați Nginx pentru RainLoop
Apoi, creați un fișier de configurare a gazdei virtuale:
# nano /etc/nginx/conf.d/rainloop.confAdăugați următoarele rânduri:
server {

listen 80;

   server_name webmail.your-domain.com;
   root /var/www/rainloop;

   index index.php;

location / {
        try_files $uri $uri/ /index.php?$query_string;
   }

location ~ \.php$ {
        fastcgi_index index.php;
        fastcgi_split_path_info ^(.+\.php)(.*)$;
        fastcgi_keep_conn on;
        include fastcgi_params;
        fastcgi_pass unix:/var/run/php/php8.2-fpm.sock;
        fastcgi_param SCRIPT_FILENAME $document_root$fastcgi_script_name;
    }

location ^~ /data {
        deny all;
    }

}
Salvați și părăsiți fișierul de configurare.
Verificați sintaxa Nginx:
# /usr/sbin/nginx -t
nginx: the configuration file /etc/nginx/nginx.conf syntax is ok
nginx: configuration file /etc/nginx/nginx.conf test is successful
Pentru a implementa modificările, reporniți serverul web Nginx:
# systemctl restart nginxPasul 7: Instalați gratuit certificatul SSL Let’s Encrypt
Mai întâi trebuie să instalăm clientul Certbot care este folosit pentru a crea certificate Let’s Encrypt :
# apt install certbot python3-certbot-nginxPentru a obține certificatul SSL folosind Certbot, tastați comanda de mai jos:
# certbot --nginx -d webmail.your-domain.comDacă certificatul SSL este obținut cu succes, certbot afișează un mesaj pentru a arăta că configurația a avut succes:
IMPORTANT NOTES:
 - Congratulations! Your certificate and chain have been saved at:
   /etc/letsencrypt/live/webmail.your-domain.com/fullchain.pem
   Your key file has been saved at:
   /etc/letsencrypt/live/webmail.your-domain.com/privkey.pem
   Your cert will expire on 2024-03-06. To obtain a new or tweaked
   version of this certificate in the future, simply run certbot
   again. To non-interactively renew *all* of your certificates, run
   "certbot renew"
 - Your account credentials have been saved in your Certbot
   configuration directory at /etc/letsencrypt. You should make a
   secure backup of this folder now. This configuration directory will
   also contain certificates and private keys obtained by Certbot so
   making regular backups of this folder is ideal.
 - If you like Certbot, please consider supporting our work by:

   Donating to ISRG / Let's Encrypt:   https://letsencrypt.org/donate
   Donating to EFF:                    https://eff.org/donate-le
Acum, ați instalat cu succes SSL pe site-ul dvs. web.
Pasul 8: Configurarea și configurarea RainLoop
Acum deschideți browserul web și accesați https://webmail.your-domain.com/?adminși veți vedea următorul ecran:
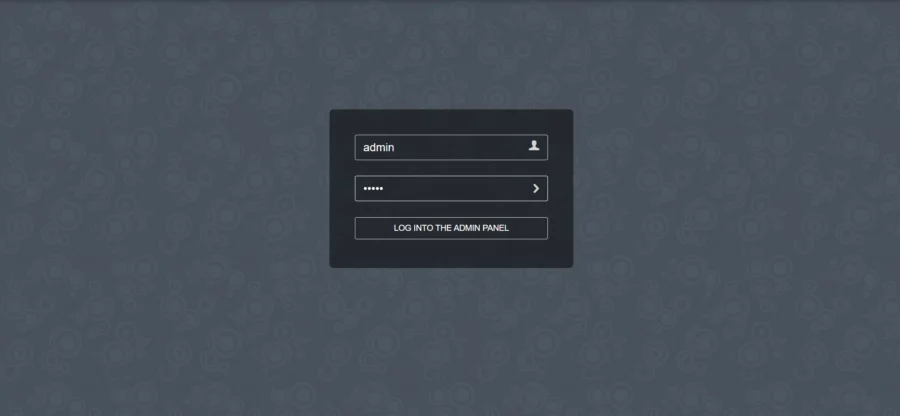
Vă puteți autentifica cu numele de utilizator implicit admin și parola implicită 12345. Veți vedea tabloul de bord Rainloop ca mai jos:
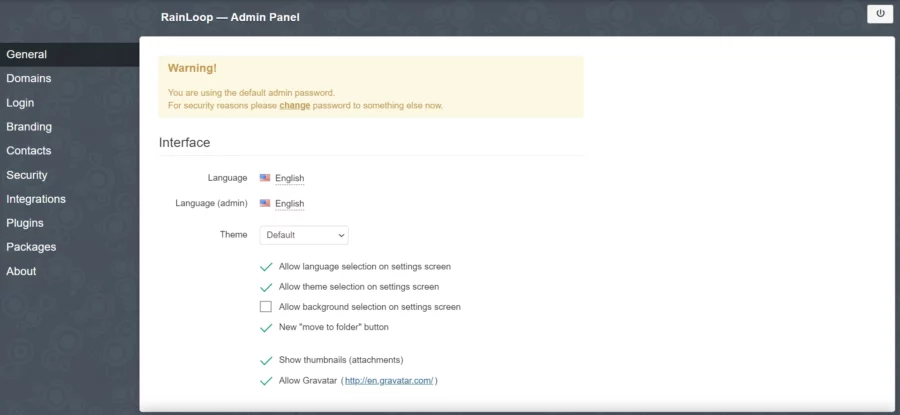
Când vă conectați pentru prima dată, trebuie să vă schimbați imediat parola de administrator

Introduceți noua parolă și faceți clic pe butonul Actualizare parolă pentru a schimba parola. Apoi, deschideți meniul Contacte și selectați MySQL din meniul drop-down:
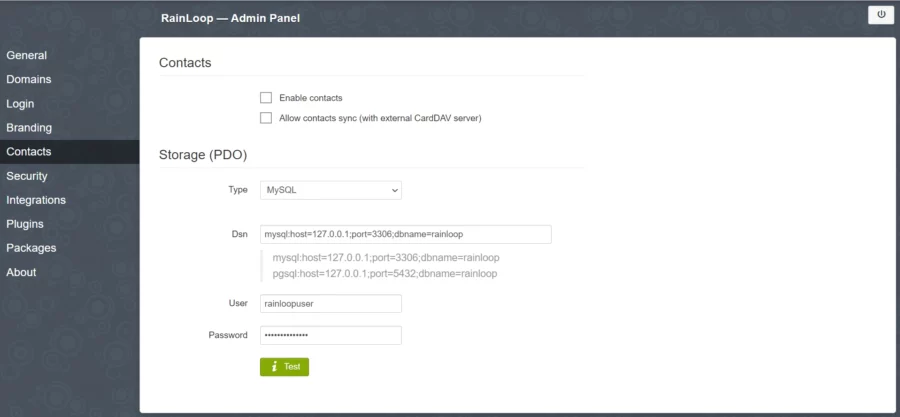
Introduceți datele de conectare ale bazei de date pe care le-ați creat mai devreme și apăsați butonul Test pentru a verifica conexiunea și a instala tabelele necesare. Dacă butonul devine verde, înseamnă că conexiunea a avut succes.