Creating a folder with specific permissions in Active Directory
Pentru a putea crea un folder cu drepturi de scriere sau citire, este necesar ca întâi de toate să se creeze un grup in Active Directory.
[mai mult...]Soluții pentru problemele tale IT

Pentru a putea crea un folder cu drepturi de scriere sau citire, este necesar ca întâi de toate să se creeze un grup in Active Directory.
[mai mult...]Apple Cash, formerly known as Apple Pay Cash, is a digital payment system that allows users to send and receive money from other Apple device users. It can be used to send and receive money through the Messages or Wallet app.
If you’d like to deposit the money you receive from a friend or family member, you can connect the card to your bank. Additionally, you can pull funds from your bank to reload the card if you’d like to use it as a form of payment. Apple Cash is only available to people over the age of 18. If you are under 18, you can still use Apple Cash through Family Sharing and Apple Cash Family.
Send Money from your Apple Cash Card
There are multiple ways to send money via Apple Cash; you just need to decide which route to take. The most popular way to send money is through the Message app. To do this, you just open a conversation with the person you want to send money to, tap the plus icon in the lower left of the screen, and tap Apple Cash.
Once the iMessage app for Apple Cash launches, type in how much money you’d like to send, tap the “Send” button underneath the amount, and then confirm with Face or Touch ID. Once you do, the money will be sent to the chosen person.
When you view your card, any money you send with Apple Cash will appear in the “Latest Transactions” section. You can filter your transactions by Daily Cash (if you have an Apple Card), sent or received, Tap to Cash transactions, bank transfers, or purchases.
Redeeming the funds on your Apple Cash card is straightforward. When viewing your Apple Cash card, tap on the three dots in the upper right corner of the screen and then tap “Transfer to Bank” from the drop-down menu.
You will then enter how much money you want to transfer. You can either use the whole amount—where next to “Current Balance” will tell how much money is currently on your Apple Cash card—or any amount lower. Entering any amount will show your Apple Cash balance after the amount is withdrawn. After you input it, you’ll confirm your bank and transfer option (either instant or one to three days), authenticate with Face or Touch ID, and initiate the deposit request.
You can still use your Apple Cash card on websites that don’t accept Apple Pay. Recently, Apple enabled a feature that allows you to access the digital number of your Apple Cash card, expanding the area where you can use it. To find the number, navigate to the Wallet app and open your Apple Cash card. Then, tap the three dots in the upper right corner of the screen and tap “Card Number.”
You’ll be asked to authenticate using Touch or Face ID. Once you do, you’ll be presented with your virtual card number, its experience date, security code, and card network. Tapping on “Additional Card Numbers” under that information will also give you your card’s PIN and the last four digits to identify Apple Pay transactions.
You can also request a new card number by tapping “Request New Card Number.” After authenticating yourself, your card information will instantly be updated before your eyes. Like using your Apple Cash card with Apple Pay, any transactions you make using the card number will be shown in the “Latest Transactions” section.
You can also automatically load funds onto your card when it reaches a certain amount by tapping “Set Up Auto Reload.” You’ll choose the amount you want to reload the card with—from $25 to $200 —and then the minimum balance you need to reach to load the funds automatically.
Sending and Canceling Reoccurring Payments
Your Apple Cash card also allows you to send recurring payments to another Apple Cash user, which is great for giving kids an allowance or paying someone back in installments.
To set this up, choose which app you want to start the payment in, the Messages or Wallet app, and then select the person to whom you’re sending the payments. After entering the amount you want to send, tap on “Send Recurring Payment” at the bottom of the screen.
When you do, you’ll be greeted by a screen that allows you to choose when the recurring payments start and how often they repeat. You can also add a memo with an icon to the payments. Once you set it up, you’ll authenticate yourself like usual, and the payments will begin.
[mai mult...]1.Press “Windows key + R” and open “services.msc” as shown below

Go ahead and find “Diagnostic Policy Service”
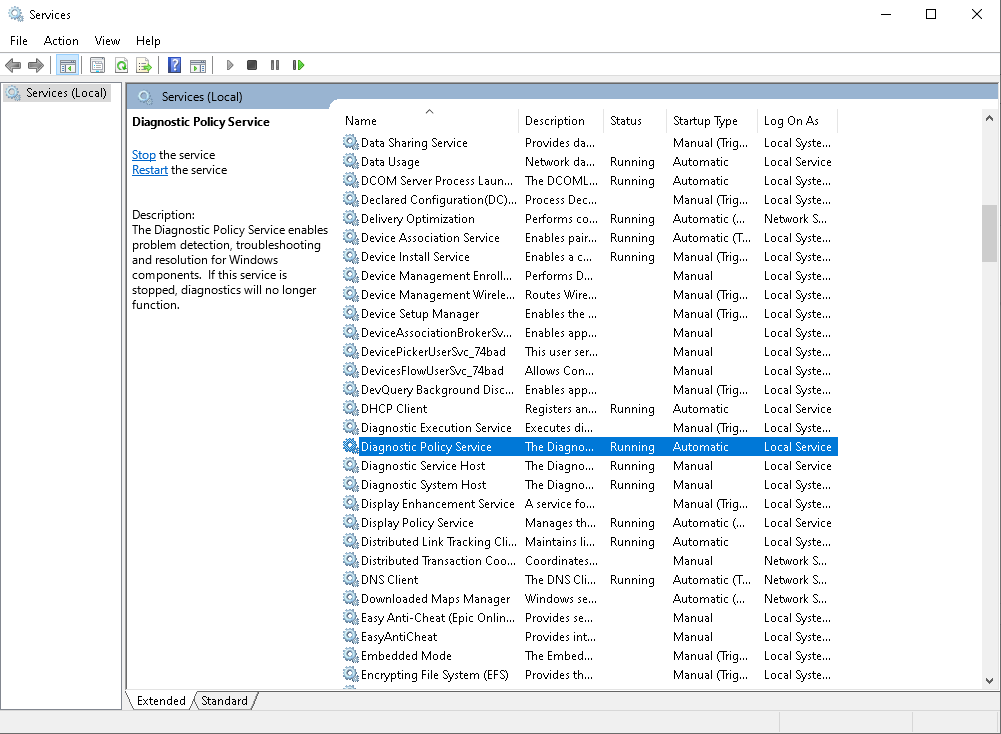
Right click on it and press “restart”

And after this, also restart your computer.
2.If you’re having trouble opening different versions of programs this might help you out.
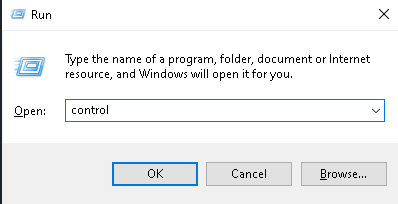
Press “windows key + R” and open up “control” as shown below
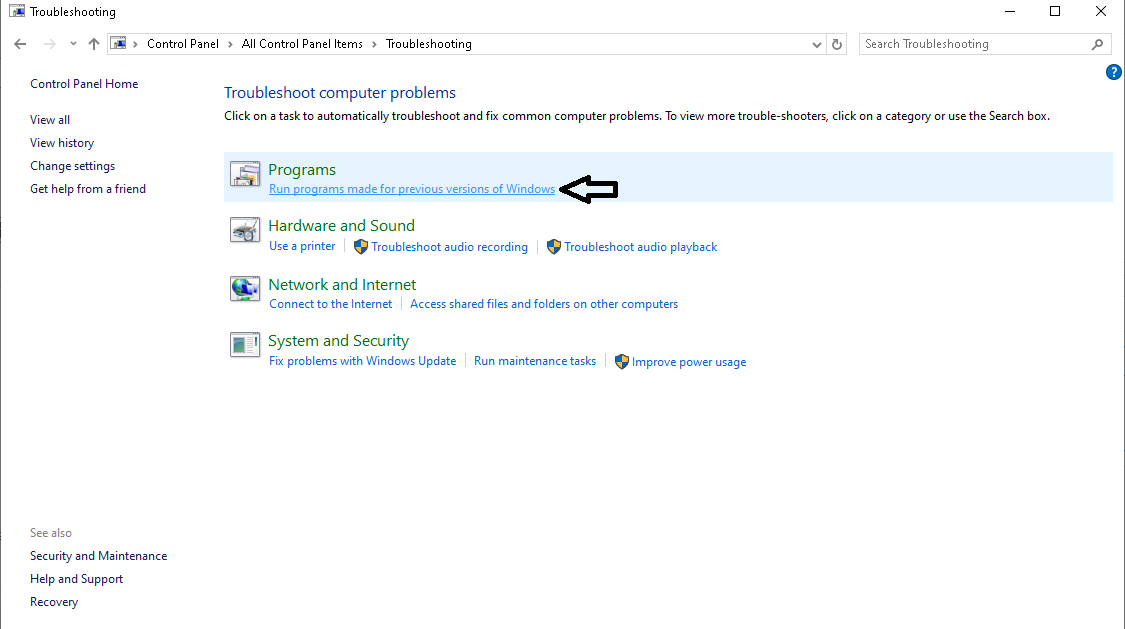
Find “troubleshooting”

Right below the “Programs” tab click on “Run programs made for previous versions of Windows”
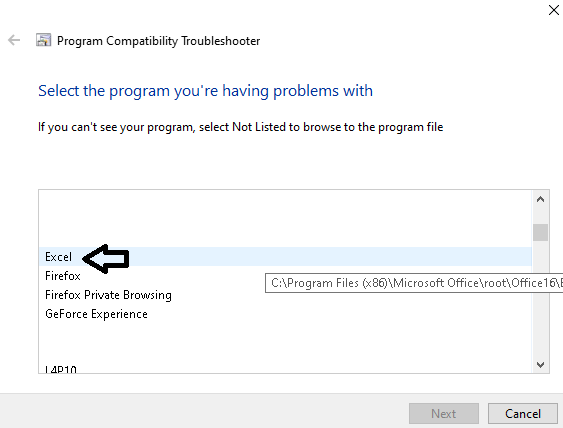
Choose the app that doesn’t run from the drop down menu (we’ll use Excel as an example)
Click on the “Try recommended settings”:
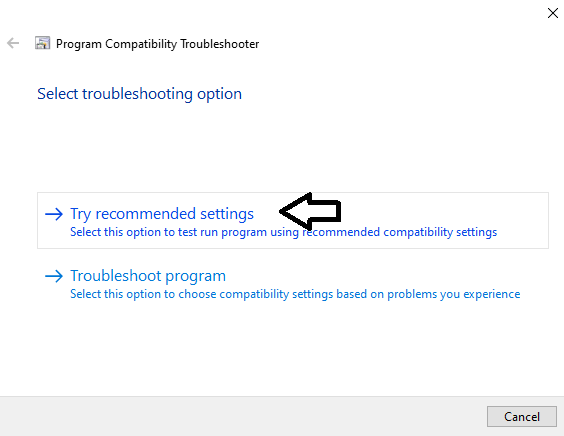
And on the next tab go ahead and click on “Test the program…”
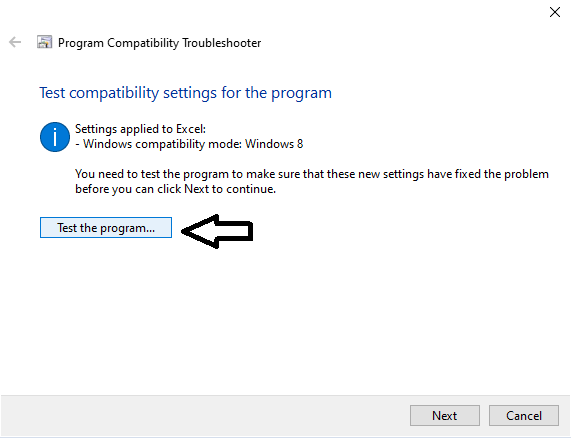
Your chosen app should run smoothly now.
[mai mult...]Activarea opțiunii „Always use secure connections” îți îmbunătățește securitatea online, forțând utilizarea HTTPS pe site-urile compatibile.
[mai mult...]PowerShell script to retrieve security-related events from the Windows Event Log, specifically from the Security log.
# Define the log name and security-related event IDs (adjust as needed)
$logName = “Security”
$securityEventIDs = @(4624, 4625, 4672, 4688, 4634, 4648, 4768, 4776) # Common security event IDs
# Get security events from the Windows Event Log
$securityEvents = Get-WinEvent -LogName $logName -MaxEvents 50 | Where-Object { $_.Id -in $securityEventIDs }
# Display the results
if ($securityEvents) {
foreach ($event in $securityEvents) {
Write-Output “———————————-”
Write-Output “Time: $($event.TimeCreated)”
Write-Output “Event ID: $($event.Id)”
Write-Output “Message: $($event.Message)”
}
} else {
Write-Output “No security events found.”
}
| Event ID | Description |
|---|
| 4624 | Successful login |
| 4625 | Failed login |
| 4672 | Special privileges assigned (admin logins) |
| 4688 | A new process was created |
| 4634 | Logoff event |
| 4648 | Explicit credential logon (RunAs) |
| 4768 | Kerberos authentication (TGT request) |
| 4776 | NTLM authentication attempt |