Group Policy
Verificare setari de politica active pentru un utilizator sau computer specific 6 Solutii
Verificare politici active pentru un specific OU si Link Order configuration 0 Solutii
Verificare aplicare Group Policy specific, setari si status 10 Solutii
Conectare Group Policy la un OU (Scoping) 4 Solutii
Verificare & Configurare setari Default Domain Password Policy 8 Solutii
Simulare Group Policy Deployment pentru New Policy (Test) 4 Solutii
Blocare transmitere drepturi in OU 0 Solutii
Instalare si dezinstalare aplicatii prin GPO
Se doreste instalarea unei aplicatii prin GPO.
[mai mult...]Restart PC-uri prin GPO
Se doreste restartarea PC-urilor mereu si la o ora anume.
[mai mult...]Inchidere PC-uri prin GPO
Dorim sa inchidem calculatoarele dupa o ora anume, deoarece angajati nu le inchid intotdeauna.
[mai mult...]Remote Desktop Connection – An authentication error has occurred
Vrem sa administram un server instalat pe un alt host de Hyper-v, iar la deschiderea consolei de administrare din Hyper-V si apoi conectarea la serverul in cauza aflam ca nu ne putem conecta. Eroarea este urmatoarea: An authentication error has occurred. The function requested is not supported.
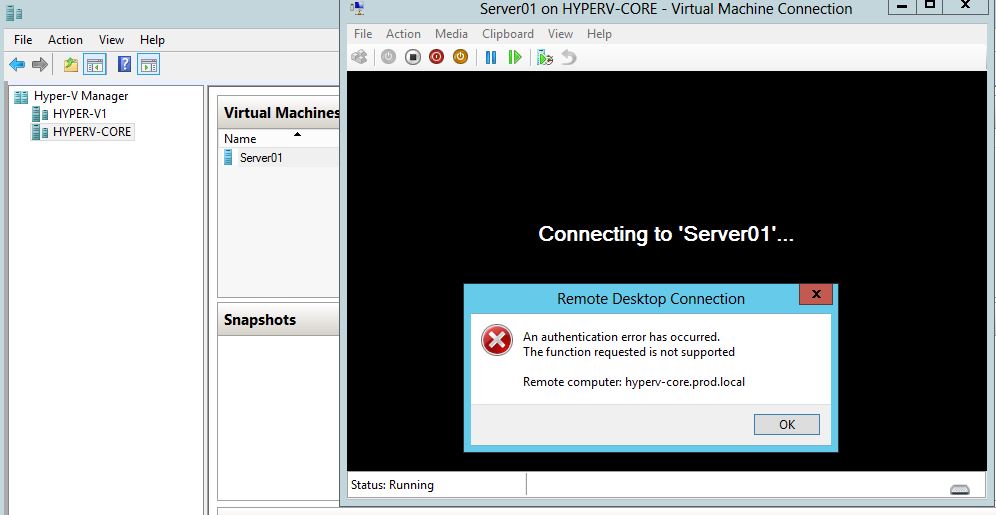
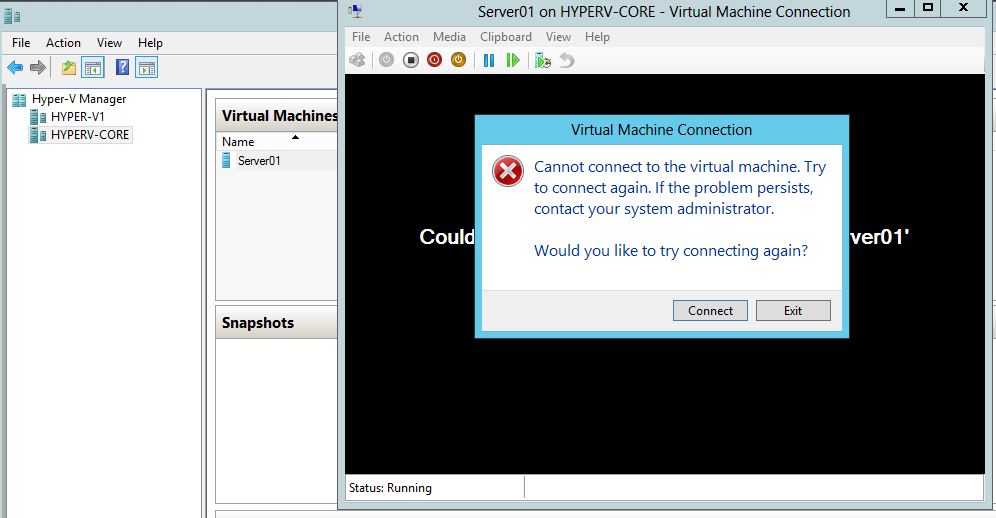
Cauza pentru aceasta eroare se datoreaza faptului ca nu avem instalate pe serverul de pe care se incearca conexiunea update-urile de Securitate necesare pentru a remedia problema legata de Credential Security Support Provider protocol (CredSSP). Pentru mai multe detalii despre aceasta problema accesati https://support.microsoft.com/en-us/topic/credssp-updates-for-cve-2018-0886-5cbf9e5f-dc6d-744f-9e97-7ba400d6d3ea
In cazul de fata trebuie instalate ultimele update-uri de Securitate.
[mai mult...]How to Restrict USB Read and Write Access in Windows 10
In many situations you might need to restrict USB storage Read and Write access on your Windows 10 system. In this guide I am going to show you a very easy way to do that without typing any commands. Fortunately, Windows gives you granular control over your devices without having the need to install any third party software.
Here are some of the most logical reasons you might want to control USB device access on your PC:
- To safeguard your PC from malware and viruses. USB devices are the primary source of malware infections
- To protect your data from getting stolen by anyone with physical access to your PC
- Not letting someone Live Boot another Operating System and get into your HDD storage
There can be various reasons, and honestly, it is very likely that you may face such a situation at some point. These kind of attacks are more occurring than you might imagine. Any newbie hacker or script kiddie can easily get into your system with just a USB stick.
Restrict / Disable USB Read and Write Access via Group Policy
We are going to look at two ways to disable USB device Read and Write access in Windows 10. Windows comes with Group Policies that control the working environment for Users and Computer accounts. You can easily control your USB device’s permissions by configuring a group policy. Here are two scenarios that you can control:
Denying Access for All Users (Method-1)
Restricting USB devices for all users can be done with a few very easy steps:
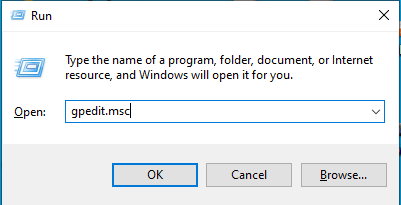
- First you need to open the Local Group Policy editor. To do that, go to the ‘Run’ and type gpedit.msc and click Enter.
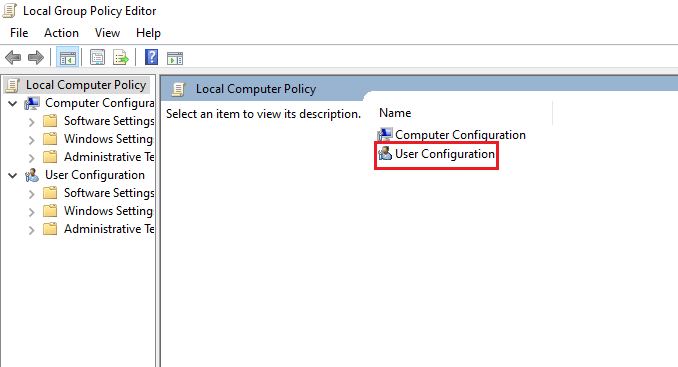
2. One the group policy editor opens, you will see two options: “Computer Configuration” and “User Configuration”. Open the User Configuration by double-clicking on it:
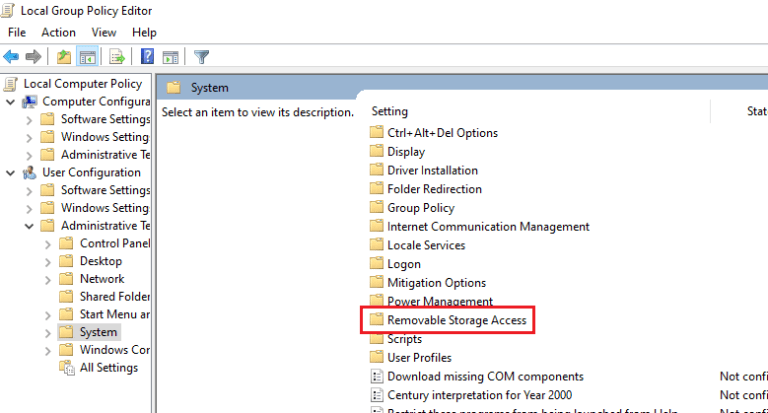
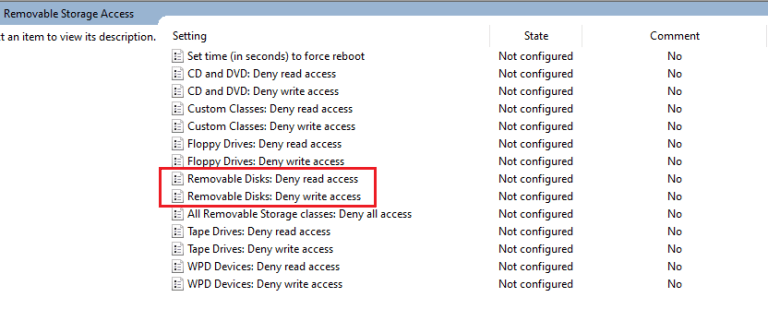
3. In the next Window, browse to the following path: Administrative Templates > System > Removable Storage Access.
4. In the next Window you will see a list of Group Policy settings that includes different types of devices including CD and DVD, Floppy Drives, Tape drives, WPD devices and Removable Disks. The ones that we are interested are Removable Disks. From these settings you can control both Read / Write permissions for USB flash drives. Let’s go ahead and Deny both the Read and Write Permissions:
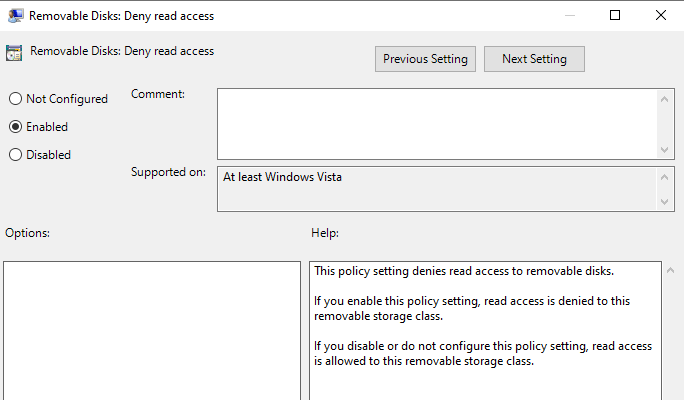
5. Double click on both the permissions one by one and select the Enable option to enforce these restrictions. Click ‘Apply’ and then ‘OK’.
6. After applying these restrictions, you can check whether the settings have applied correctly or not. To check that, insert a USB flash drive into your system’s USB port and try to open it from ‘My Computer’. It should give the following message:
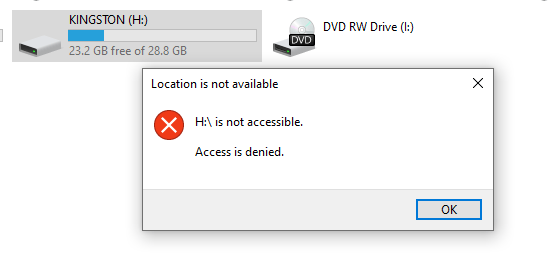
7. If you see this message, that means the policy setting has applied correctly and you have successfully restricted access to USB drives for all users. To remove the policy setting, simply go back to the settings and select Not Configured. It’s that simple.
Denying Access for a Specific User (Method-2)
If you need to restrict USB access for a specific user that uses your computer and not yourself then it’s also possible. The way to do it is a bit different than the method explained above. With this method, you can also enforce these restrictions for Administrators and Non-Administrators separately. Here are the steps to do it:
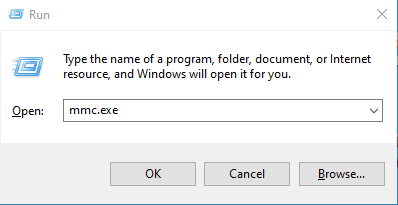
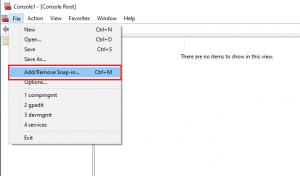
- First you need to open the Run dialog box and type mmc.exe and press Enter. This will open the Microsoft Management Console.

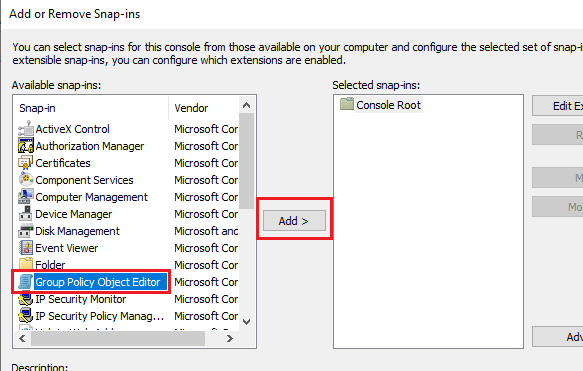
- In the Console Window, click on the ‘File’ menu and select Add/Remove Snap-in.
- In the list of Available Snap-ins, select Group Policy Object Editor and click on Add.

- A window of Group Policy Wizard will pop up. Here you will have to click the browse button to be able to select the User groups of your choice.

- In the next window, click on the Users tab and select the user for which you want to impose the restriction. Click OK and then click ‘Finish’.

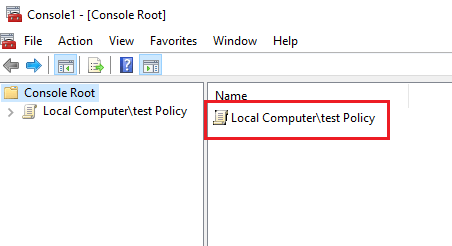
- After clicking OK, you should see the Group Policy Editor window just like we saw it in the first method. Simply double-click the container and you will see the same Group policy settings that were described in the first method.

- Now you have to follow the same path: User Configuration > Administrative Templates > System > Removable Storage Access and apply the same Read / Write Deny policy setting on Removable disks. Once it’s done, you can test the policy setting by logging in from that particular User and plugging in the USB storage device. You should see the same error message.