Situatie
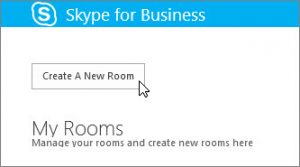
If you’ve been given authorization by your Skype for Business administrator, you can quickly get started creating your own persistent chat rooms.
Solutie
Pasi de urmat
Create a new chat room
In the Skype for Business main window, on the Chat Rooms tab, choose Add a Room  > Create a Chat Room.
Name your new chat room
- When you create a chat room, give it a unique and descriptive name.
- On the Create a room page, in the Room Name section, enter a name.
Choose Check Names to make sure it’s not already being used, and choose a different name if prompted.
Write a chat room description
When you create your chat room, add a description of the purpose. Keep your description short and write it so that it helps others decide whether to request membership and whether to set up notifications to keep tabs on what’s being discussed in the room. You can change the description at any time.
- On the Create a room page, in the Description section, write an explanation (256 characters maximum) of the room’s purpose.
Select a privacy setting
There are three privacy settings. Every Skype for Business chat room has one.
- On the Create a room page, in the Privacy section, choose a privacy setting—Open, Closed, or Secret—to control who can find and participate in a chat room.
Setting Description Open Anyone can find (via search) this room, open it, and read and write in (post to) it. Open rooms have no “membership” as such. Closed Non-members can find this room and see who is a member, but only members can open the room and read or post to it. (This is the default setting.) To join a closed room, the user must ask a manager of the room to be added to the members list. The room card identifies the chat room managers.
Secret Non-members can’t find this room or its room card, learn who has membership in the room, or read or post to it.
You can change the privacy setting for a room you manage at any time.


Leave A Comment?