How i use Microsoft Word as a Bullet Journal to achieve my goals

Configurare noua (How To)

Situatie

Solutie

Bullet journaling is an incredibly flexible system to organize and plan your life. It’s a daily planner, powerful to-do list, daily log, and tracker all rolled into a single journal. It’s designed for quickly capturing notes and planning that keeps you mindful of your goals.

In my experience, the trouble with most planners and productivity systems is that they’re just too ambitious and complicated. Neat boxes and fancy lines look pretty, but they’re just as impractical. Pre-made layouts like that cannot capture everything you throw at them. You’ll either waste space or run out of it. They’re generalized approximations, not tailored to your very specific, personal needs.

A bullet journal is simple and loosely defined, which makes it adaptable and flexible. You can capture anything in it—ideas, tasks, events, memories, doodles, habit trackers, finances, anything at all. And it’ll provide you with a simple system to keep it all organized and you on top of it.

Most people use a physical notebook and pen to keep their bullet journal. It’s not your only option though. You can also create and keep a digital bullet journal in Microsoft Word. There are two reasons why Word works as a bullet journal:

  1. Unlike other preset planners, you’re supposed to add a new page every day for the daily log. Even if you miss a day, there are no gaps in a bullet journal. The next blank space on the page is always where the next entry goes. So you can always just add a new page on your Word document to continue journaling. No friction or hopping around pages whatsoever.
  2. Secondly, a physical bullet journal will eventually run out of space. You can technically keep the Word bullet journal forever.

How to create a Bullet Journal in Microsoft Word

Your bullet journal inside Word can be as complex or as simple as you’d like it to be. You’ve probably seen some amazingly creative bullet journals on Pinterest or Instagram with all those flourishes, color, doodles, and artwork. But every bullet journal needs at least four pages (it’s kind of the default template), and so does our Word bullet journal.

  1. The index
  2. The future log
  3. The monthly log
  4. The daily log

I recommend that you keep your bullet journal as basic as possible. It doesn’t have to look pretty. It just has to get the ball rolling as quickly and effortlessly as possible.

You’ll need:

  • Microsoft Word.
  • Dot pattern image file (optional).

Create the Spread

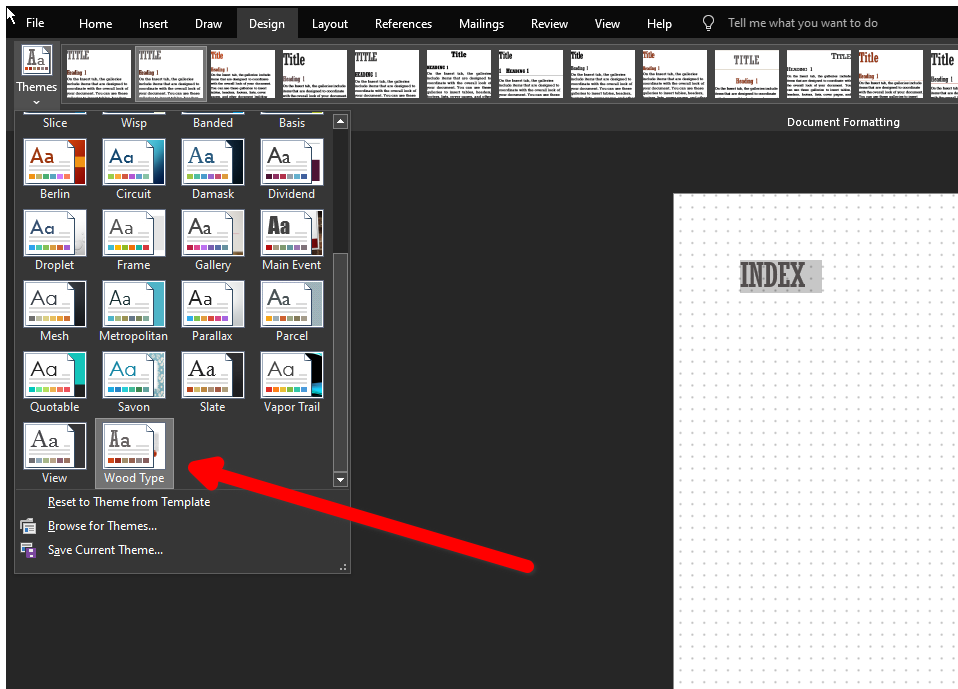
First create a blank document and apply a theme of your choice.

Theme templates in Word.

We need to set up the document before we can create individual pages for the bullet journal. Let’s start by adding page numbers. Double-click anywhere on top of the document to open the Header and Footer menu. On the “Header and Footer” ribbon, click “Page Number” and pick a page number format. Then close the Header and Footer menu.

Once that is done, we can apply a dotted pattern on all the pages to give it that classic bullet journal look. Find and click the “Watermark” button on the “Design” ribbon. Select “Custom Watermark” from the drop-down menu. Click “Picture Watermark” to upload your dot-patterned image file and click “OK.”

Create the Index

We’re ready to create our first bullet journal page. Click “Blank Page” on the “Insert” tab. The “Index” page is your directory to find everything in the bullet journal. That’s why we numbered the pages. You can always use the very next page on your journal for anything you want, and later, locate its page or page range in the index.

The future log is where you make long-term plans. Tasks, events, or notes that’ll be relevant in the next six months show up here. The future log doesn’t have to start from January. It should start from your current month. Create a table for the future log using the “Table” button in the “Insert” tab.

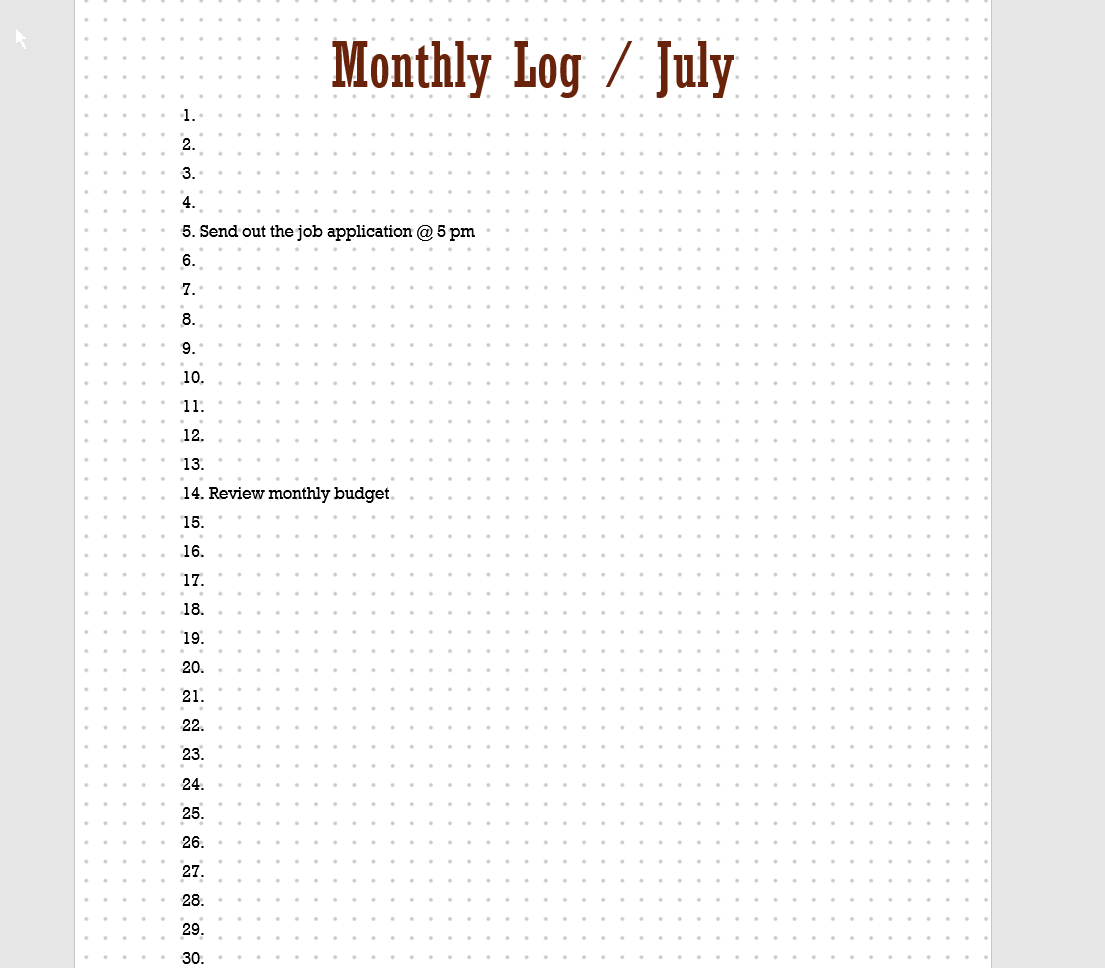
The monthly log captures and shows you an overview of what you need to get done or remember in that month. It’s supposed to be a bird’s eye view of your month. Mine is just a list of the month’s dates with the notes or tasks. You can add weekdays to the list if you want.

ksnip_20240801-203144

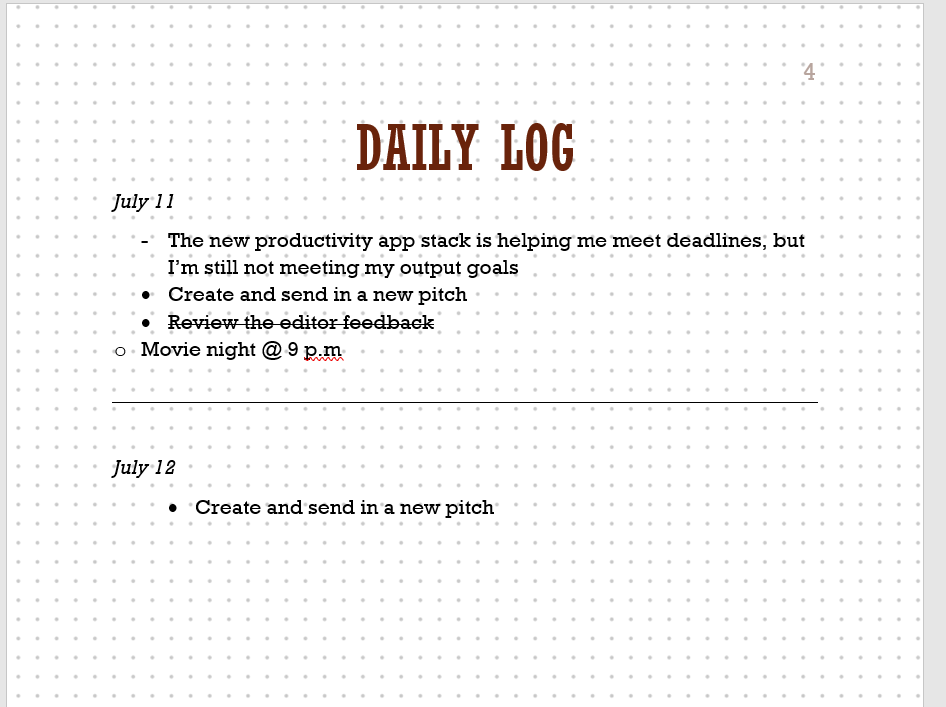
The daily log always goes on the very next blank space of your bullet journal. Just jot down the day and date and start logging. The daily log can have your to-do list, reminders, notes, events, highlights, all marked by their respective indicators. Once again, you can log the next item in the daily log into the very next line, regardless of its content.

ksnip_20240801-203451

Every bullet journal has a daily log. It’s a space where you can quickly capture any ideas, notes, reminders, and tasks one after another. There are no premade layouts, no boxes, or dotted lines. Cross items that are done or cancel them. At the end of the day, review your daily log and “migrate” leftover tasks. It keeps you mindful of what truly needs your attention and your tasks from slipping through the cracks.

Migrate

When you’re working with just a basic to-do list, it starts over anew every day. New tasks for the new day. It’s perfect if you always cross everything off your list. Suppose you missed an item, and you won’t have time to do it the next day, or the day after, or the next week. You decide to move it to next month. You’ll have to write it again on your to-do list at some point. Or you’re liable to forget it, which is what often happens (at least with me).

That’s where migration comes in. At the end of every day, you should review what’s left and decide whether you’re keeping or discarding it. You can strike the items that you’re discarding, or migrate them by giving them a migration mark and copying them in the weekly or monthly log.

Then simply transfer what’s in that month’s weekly or monthly to the daily log, while discarding tasks that aren’t relevant anymore.

Migration does two things:

  • Keeps items from getting lost. It makes sure you never forget to do a task just because it didn’t make it to a future to-do list.
  • Keeps you mindful of what you’re carrying on to the next day or any future date. Actually, typing the tasks manually every day allows you to regularly reassess their priority.

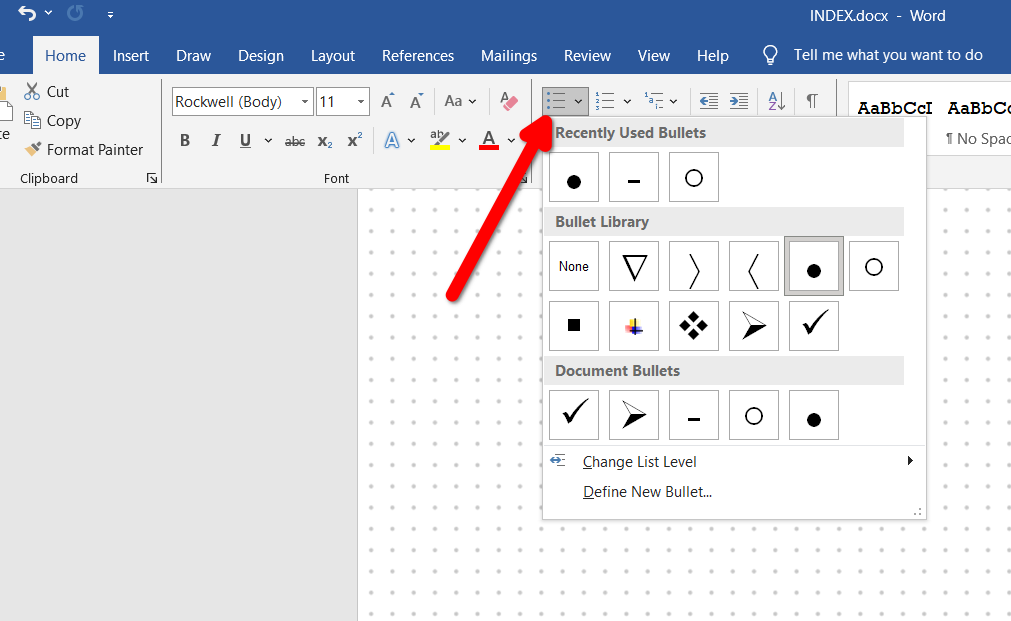
Technically, the entire Bullet Library in Microsoft Word is available to you. You can use any of these symbols to represent an item. In my system, circles are notes, triangles are events, dots are tasks. Strikethrough is for canceling tasks. Checkmarking a task marks it done. I represent a migrated task using arrows.

Signifiers for my digital bullet journal.

You can use any symbols to create your system as long as it’s consistent. Click the bullet button on the Home menu and select “Define Bullet.” Press “Symbol” and choose a symbol you want to use. Repeat these steps to create the whole library of symbols that you’ll be using.

Bullet journals don’t have to be physical. You can create a forever bullet journal in Microsoft Word that works. Keeping a journal helps get things done, smoothing out the journey to your goals.

Tip solutie

Permanent

Voteaza

(10 din 21 persoane apreciaza acest articol)

Despre Autor

Leave A Comment?