Situatie
Solutie
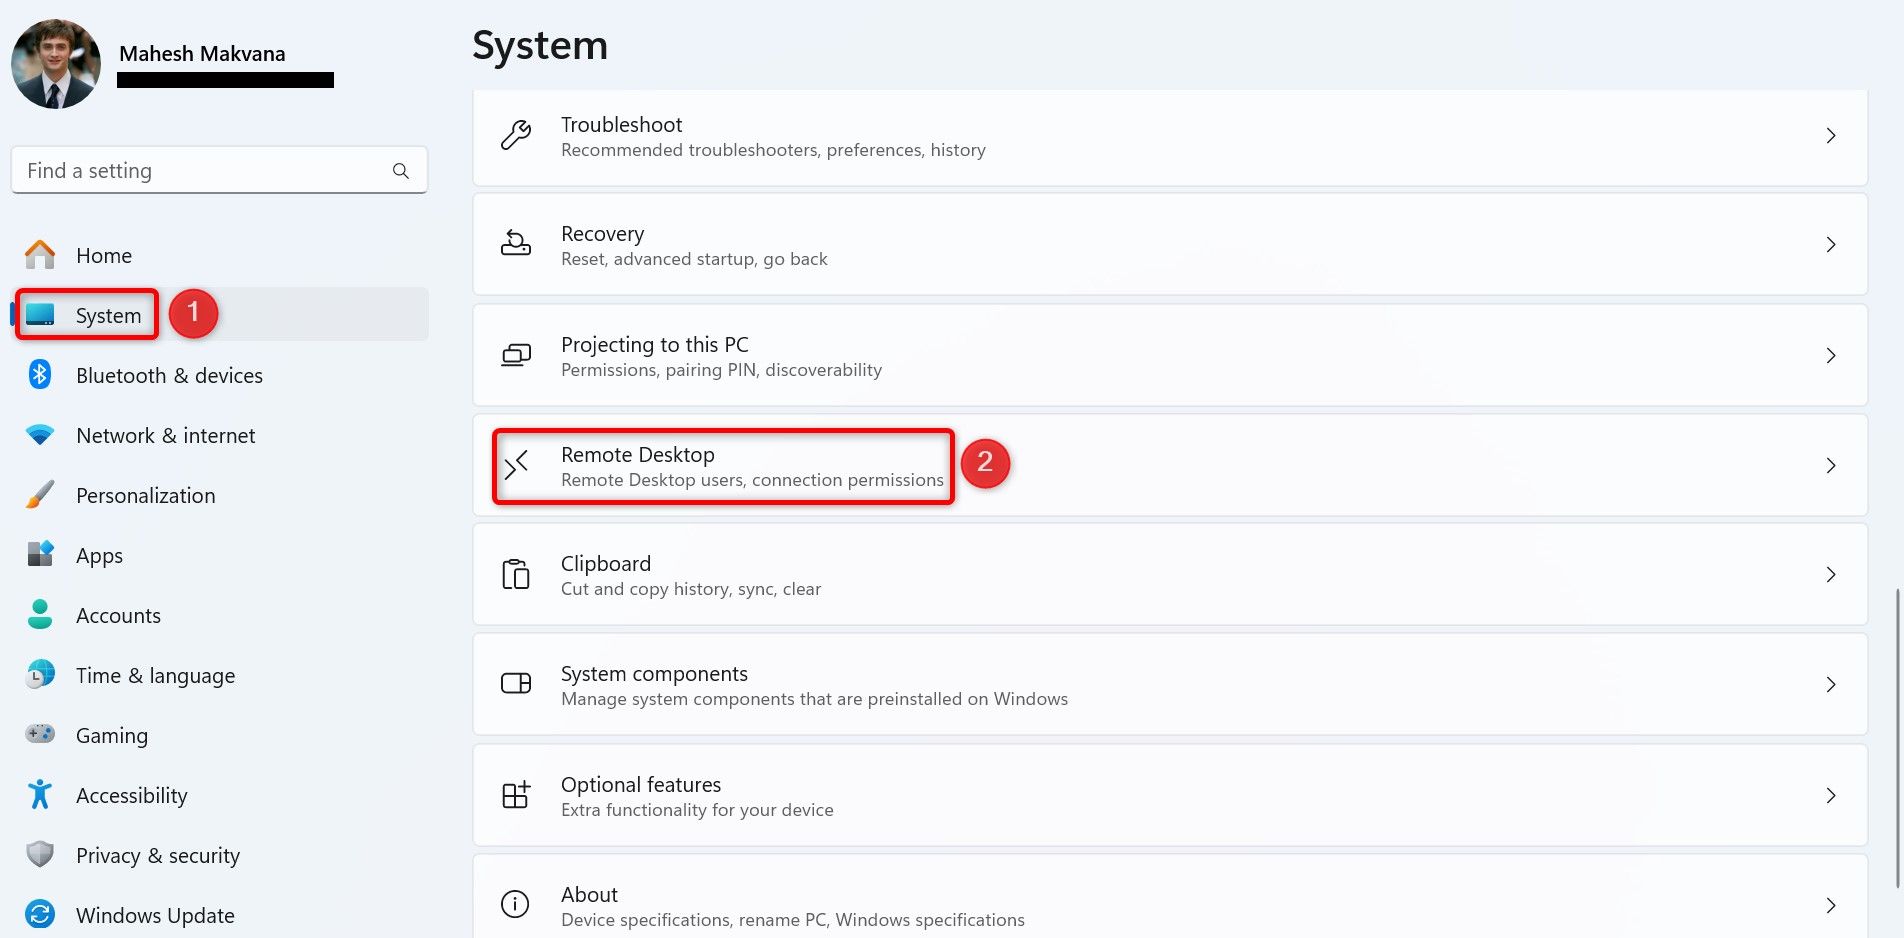
The easiest graphical way to disable Remote Desktop is by using Settings. Start by launching Settings using Windows+i. From the left sidebar, select “System.” On the right pane, scroll down and choose “Remote Desktop”.
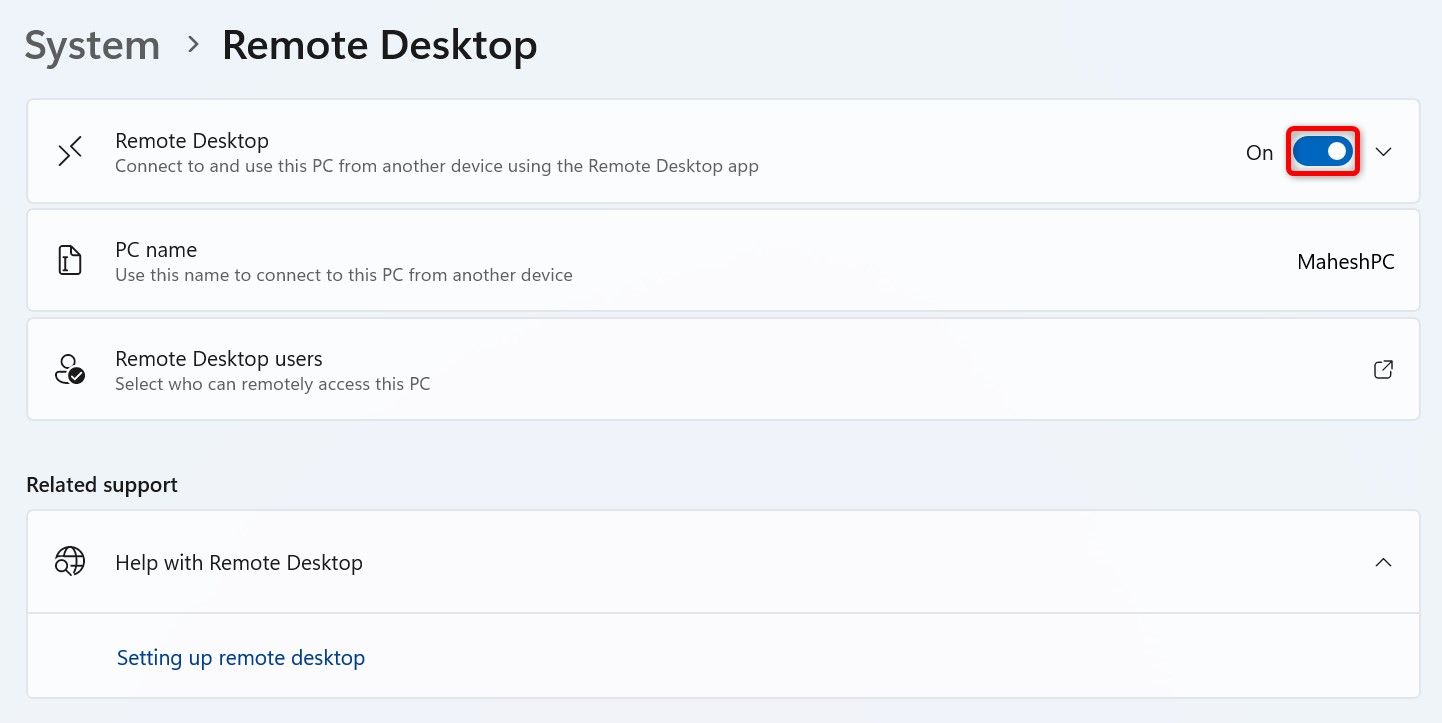
On the following screen, turn off the “Remote Desktop” toggle. To re-enable Remote Desktop in the future, turn on the “Remote Desktop” toggle.
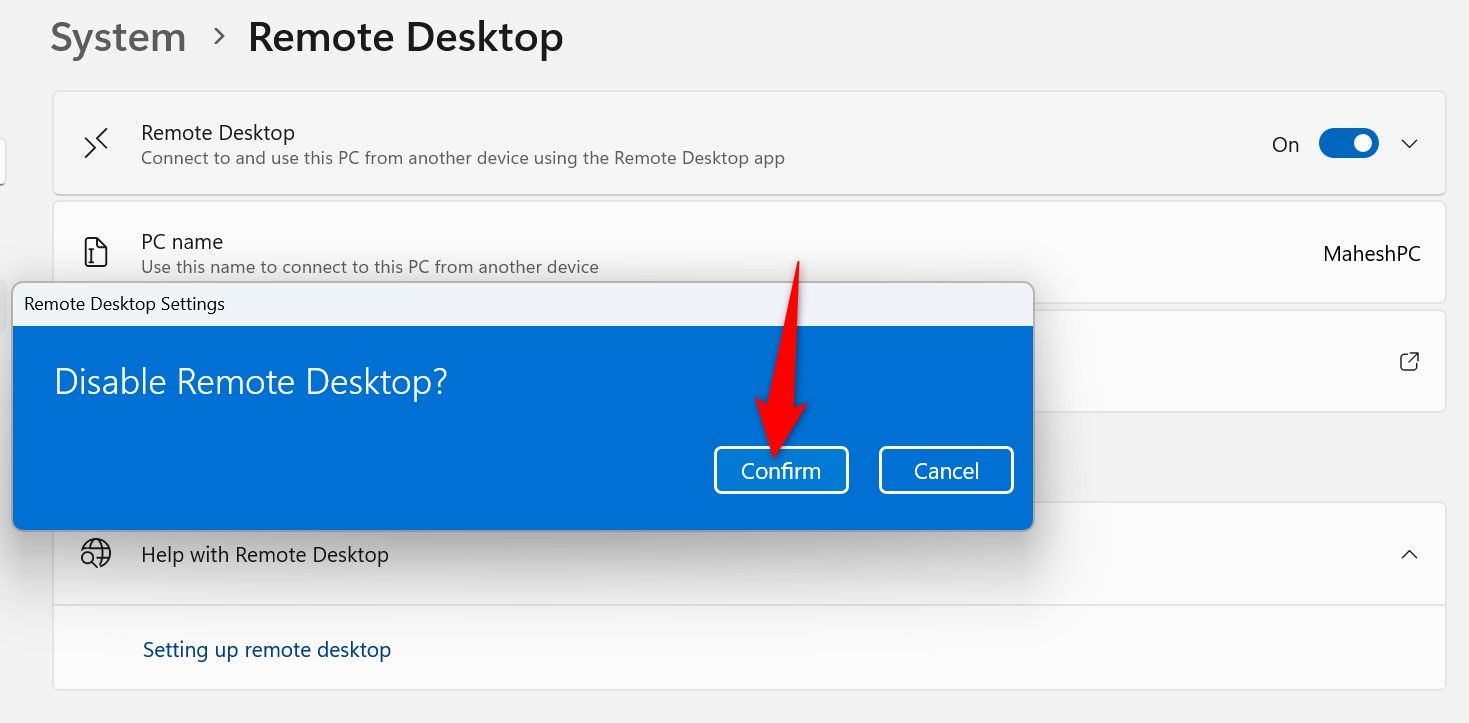
In the Disable Remote Desktop prompt, select “Confirm”
Remote Desktop is now disabled.
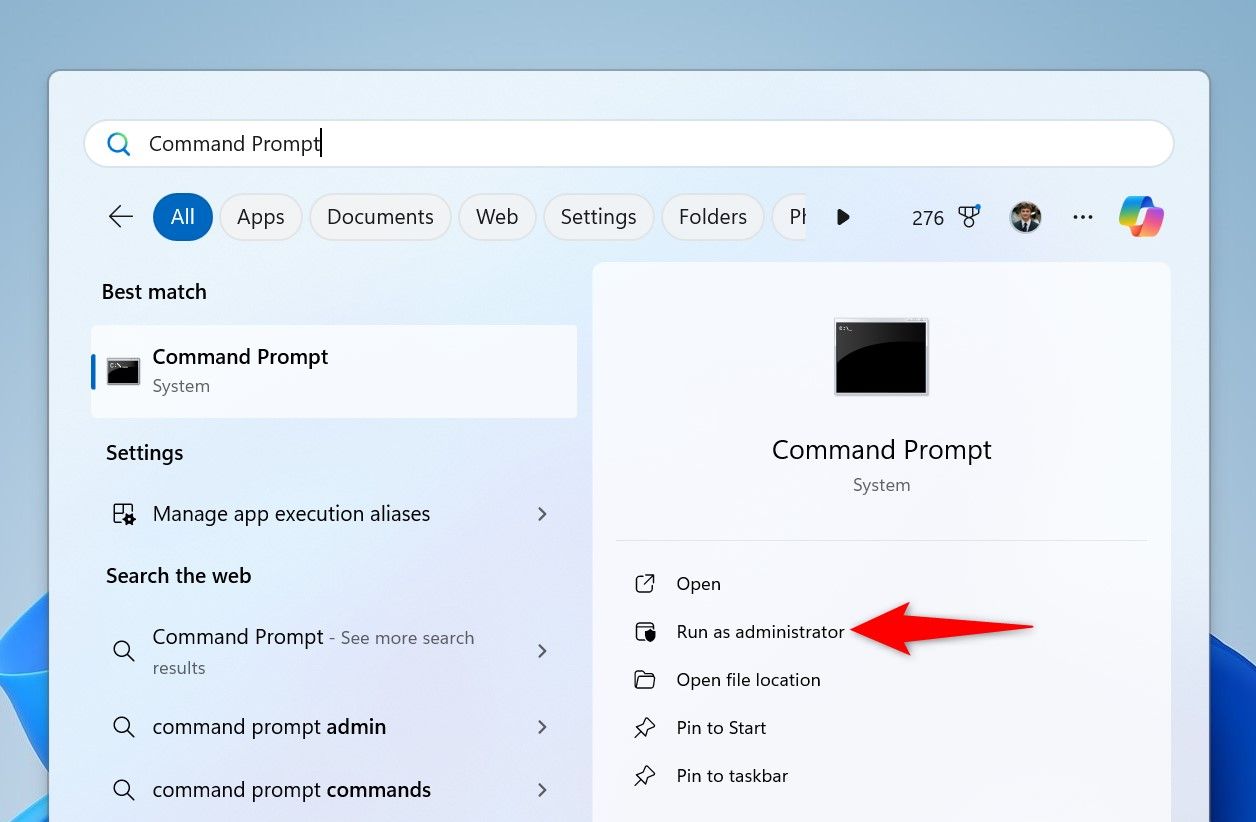
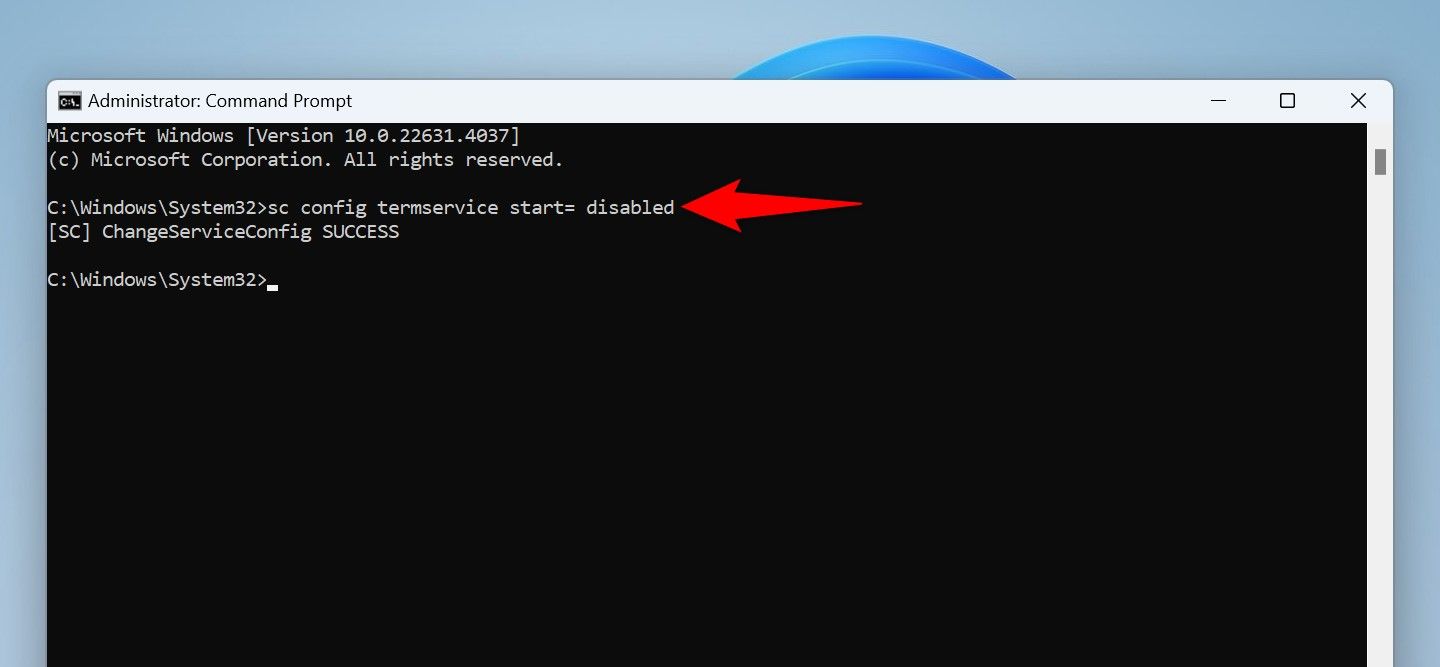
You can use a command in Command Prompt to prevent the Remote Desktop service from launching on your PC’s boot. This doesn’t disable the feature but ensures the feature doesn’t run when your computer turns on. To use this method, access Windows Search, type Command Prompt, and select “Run as Administrator.”
In the User Account Control prompt, choose “Yes”. In Command Prompt, type the following command and press Enter. This command stops the Remote Desktop service.
net stop termserviceNext up, type the following command and press Enter. This command prevents the Remote Desktop service from launching on the PC’s boot.
sc config termservice start= disabled
Leave A Comment?