
Situatie
That “lost your Excel file” moment is scary, but your work is probably still hiding somewhere. From temporary files to hidden recovery folders, Excel and Windows both have safety nets—you just need to know where to look.
The trick to a successful recovery is knowing whether your file was saved to the cloud (OneDrive or SharePoint) or your local hard drive. If AutoSave was on, your recovery is likely to be much easier; if it was off, you’ll need to do some digital digging. Work through these steps (designed for Excel on Windows) from top to bottom to find your lost work.
Solutie
Pasi de urmat
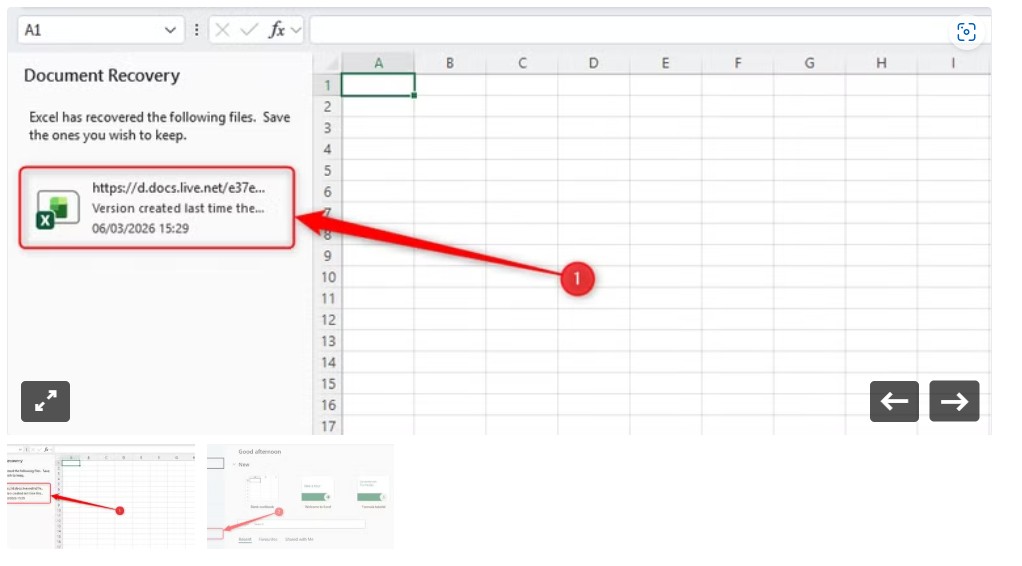
When Excel crashes or your PC restarts unexpectedly, the software tries to protect your progress. Cloud syncing can have a slight delay, so even if you use OneDrive, you should check if the Document Recovery pane has the most up-to-date version.
- Open a blank workbook immediately after the crash, then in the Document Recovery pane on the left, open the version with the most recent timestamp.
- Go to File > Save As to secure it.
This is the panic button for when you accidentally clicked “Don’t Save” while closing a local file that wasn’t synced to OneDrive. Since you technically told Excel to discard the changes, your recent work won’t show up in the Document Recovery pane, but a backup might still be sitting in a hidden cache.
- Open Excel, click File, and select Info
- Click the Manage Workbook button, and select Recover Unsaved Workbooks from the drop-down menu
- A folder will open containing XLSB files. Click the Date Modified column header to sort them by date
- Open the most recent file, and click File > Save As to convert it back into a standard spreadsheet.
If the Recovery Pane didn’t appear automatically, the file might still be sitting in a local AutoRecover folder on your hard drive.
- Press the Windows Key + R to open the Run dialog
- Type (or copy and paste) %AppData%\Microsoft\Excel\ into the box and press Enter. Alternatively, check File > Options > Save > AutoRecover file location to confirm where your unsaved workbooks are stored.
- Click the Date Modified column header to bring the most recent drafts to the top
- Open the files to identify the one you’re looking for, and once you have, click File > Save As.
If you can’t open a file in this list, change the file extension to .xlsb or .xlsx. Windows will warn you about changing the extensions, but go ahead and confirm. This often “unshackles” the data so Excel can read it normally.
If AutoSave was toggled “On” while you were working, you have a built-in time machine. Even if you typically keep AutoSave off in OneDrive-synced files, OneDrive still creates a recovery point every time you manually press Ctrl+S and the file syncs. This is also an ideal method to use if you accidentally deleted a worksheet tab and want to restore it.
- Open the file in the Excel desktop app
- Click the file name in the top title bar and select Version History from the drop-down menu. If it’s not there, go to File > Info > Version History
- Click through the timestamps in the sidebar to preview each version in read-only mode
- Once you find the version you need, click Restore to overwrite your current file, or click Save a Copy to keep both.
Sometimes the desktop app struggles to sync to a corrupted file. If you can’t open the file on your PC, try opening it in Excel for the web. From there, you can still access File > Info > Version History to rescue your data before downloading a fresh copy.
Windows has a built-in backup feature called File History that creates shadow copies of your documents (if it has been enabled). If you accidentally deleted a file or overwrote it with a blank sheet, this is how you get it back.
- Right-click the Excel file in File Explorer and select Properties. If the file has been deleted, right-click the folder where it was stored.
- In the Previous Versions tab, select the folder version from the time your data was safe, then click Open.
- In the separate File Explorer window showing exactly what was in that folder at that specific moment in the past, find your Excel file, right-click it, and select Copy.
- Go to the folder where you want the restored file to be stored, right-click, and select Paste. This is often safer than a full restore because it prevents accidental overwrites.
When Excel’s internal systems fail, fragments of your work may still live in Windows’ temporary files. This is a long shot—temp files can disappear quickly, but it’s sometimes the only remaining trace of a lost spreadsheet.
- Press the Windows Key + R, type %temp%, and press Enter
- In the File Explorer window that opens, type *.tmp into the search box, and when the results appear, use the Sort drop-down to select Date Modified. If you don’t see your file, try searching for ~$* instead.
- Right-click a file that matches the time you were working and has a file size larger than 0KB, select Open With, and click Excel.
- If the data appears, copy it into a new workbook and save it immediately.