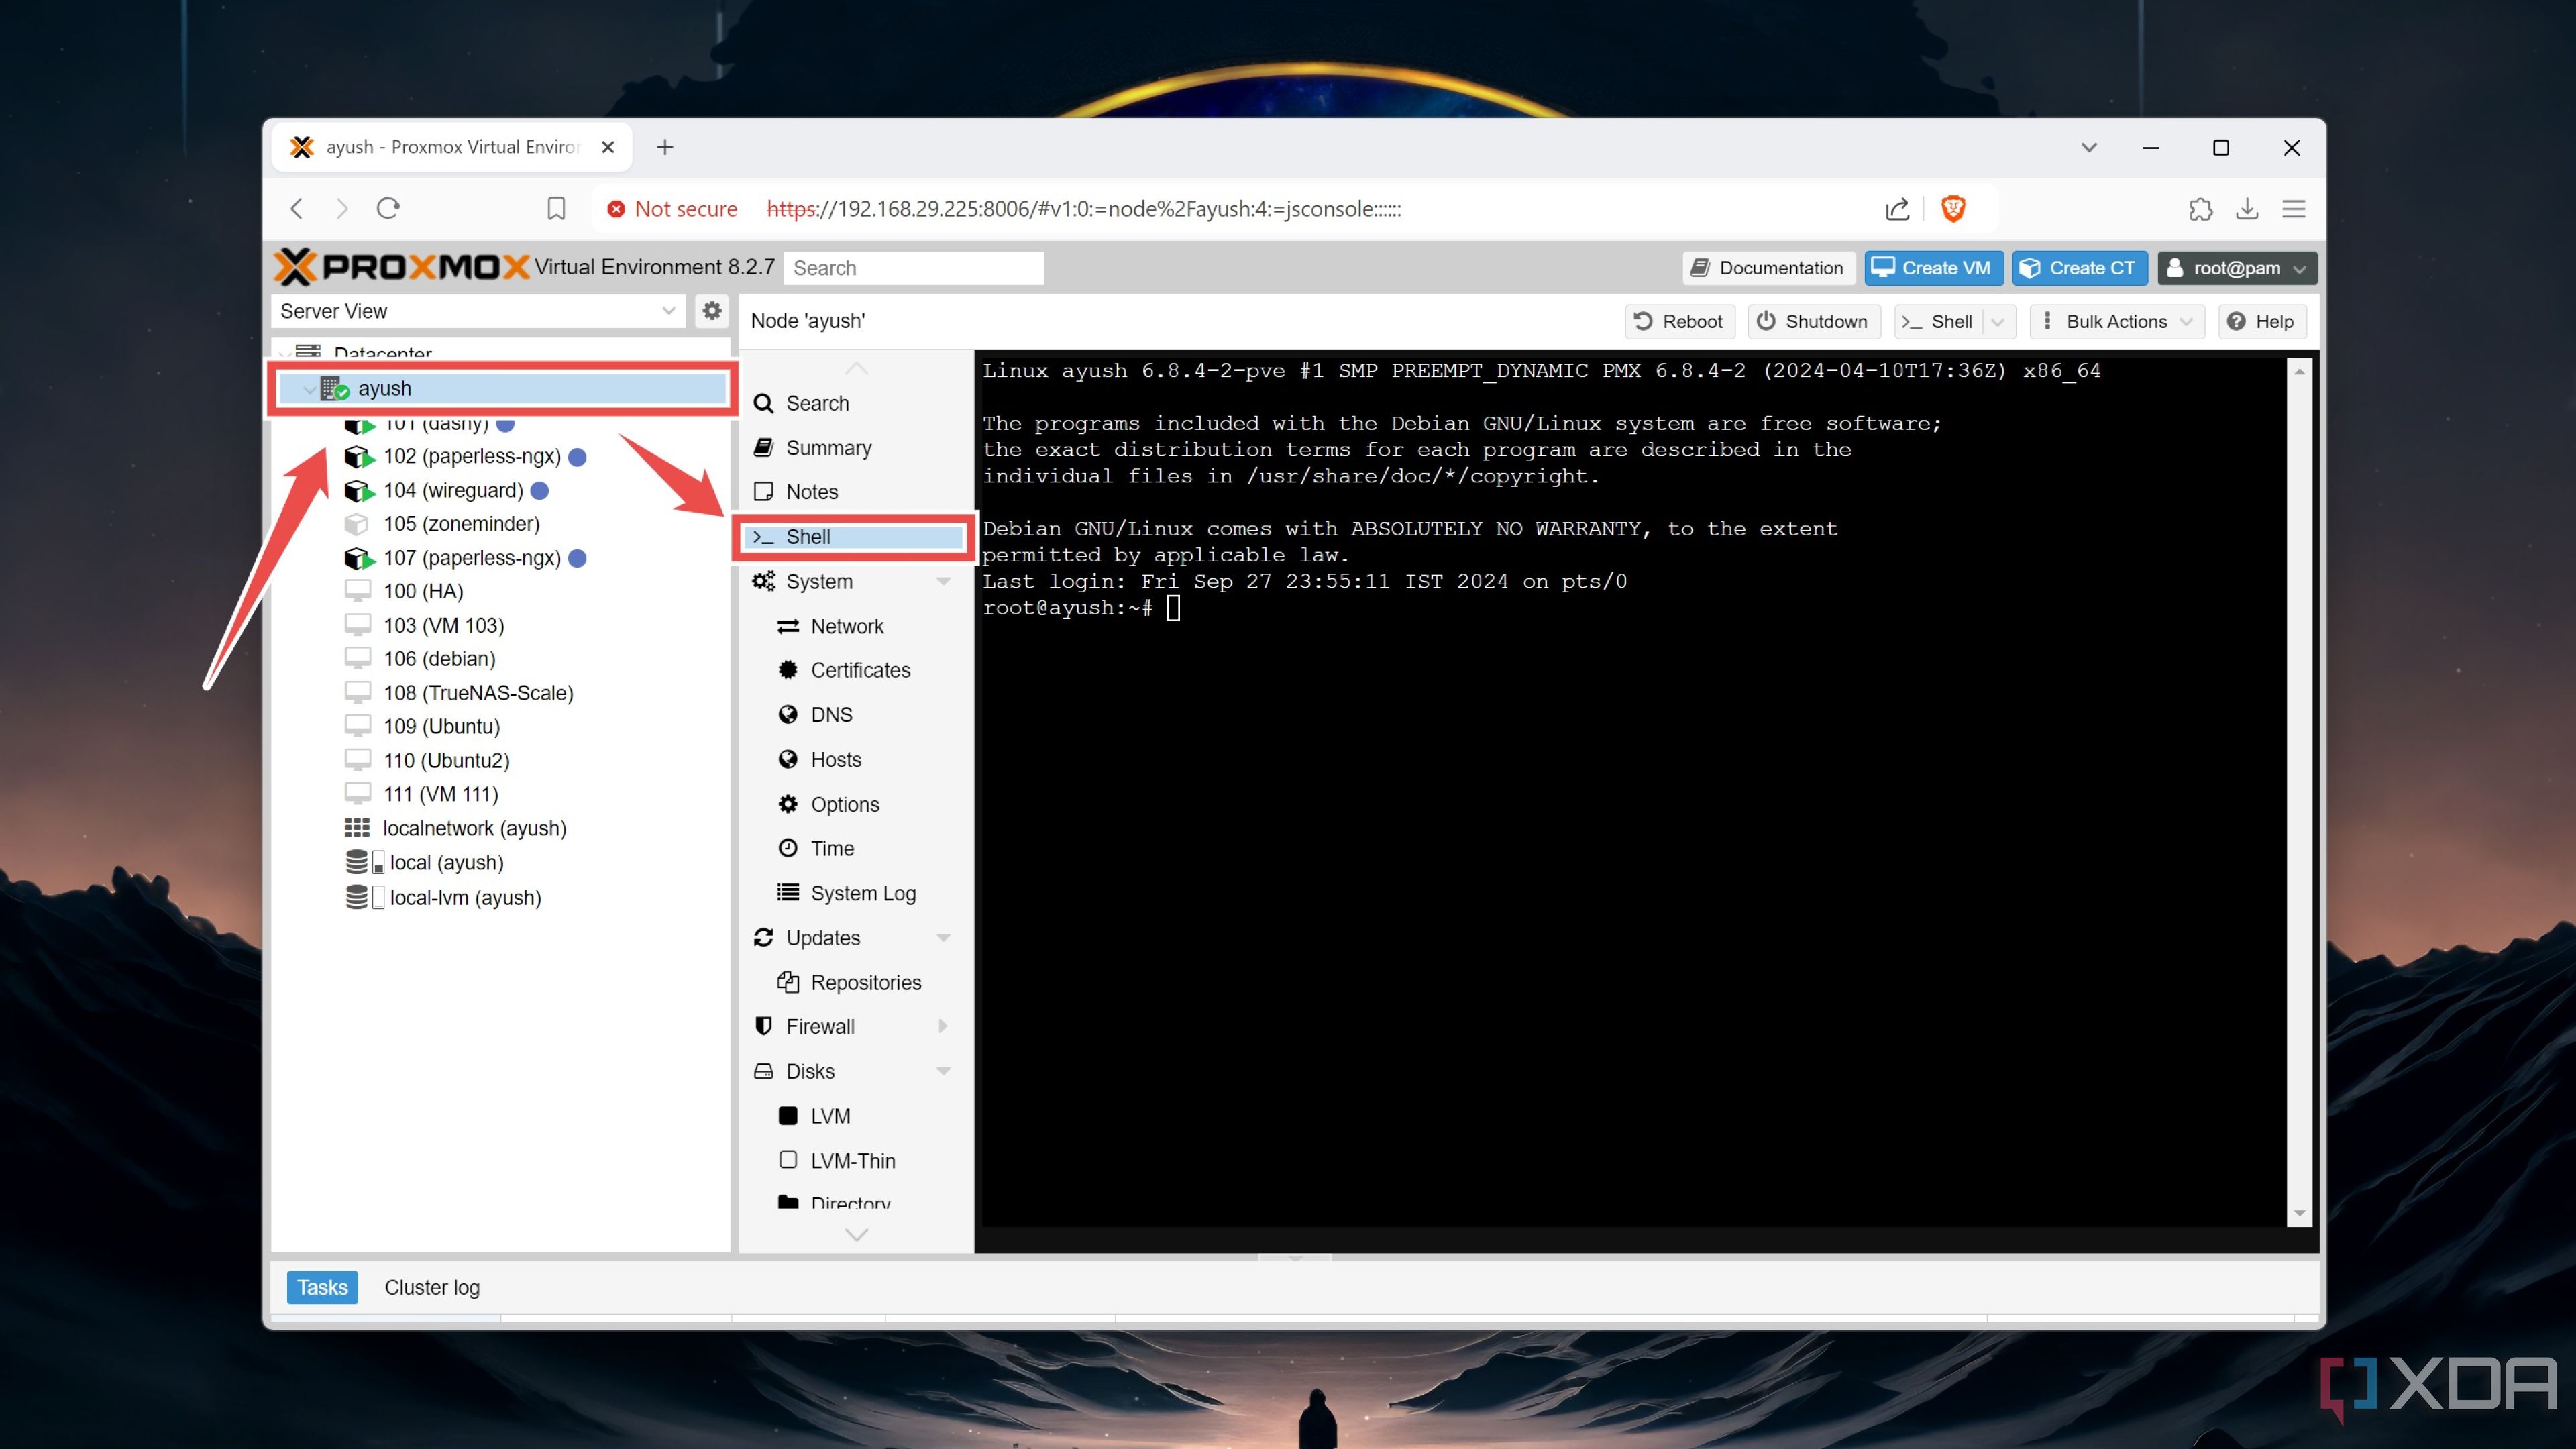
Wireless Guest Network is a very common feature for an Access Point device. In this article, I’ll explain why do we need such network and how exactly it is implemented in a typical access point.
As the name suggests Guest Network is for the guest. Now a days, almost all, if not all, organisation provides wireless network in the office for their employees to connect and access various network resources. However when some external customers, employee’s friend, relatives, interviewee etc comes to visit the office, how the organisation can provide internet connectivity to them? Of Course not, it’s a grave security concern. We need to find a way to allow guest internet access, at the same time deny any access to LAN resources.
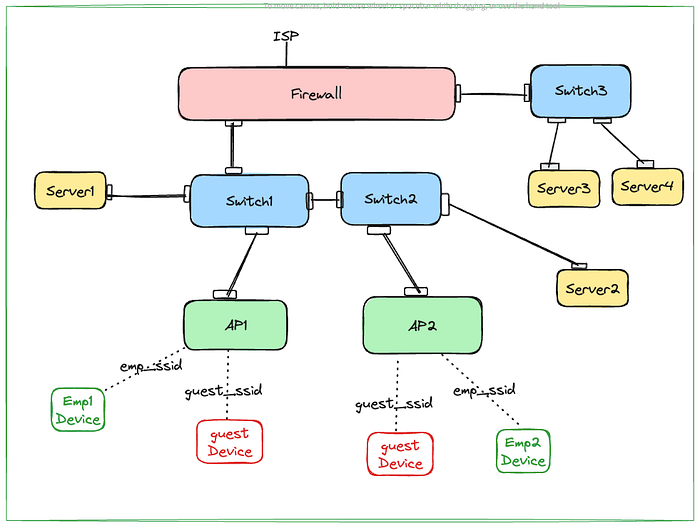
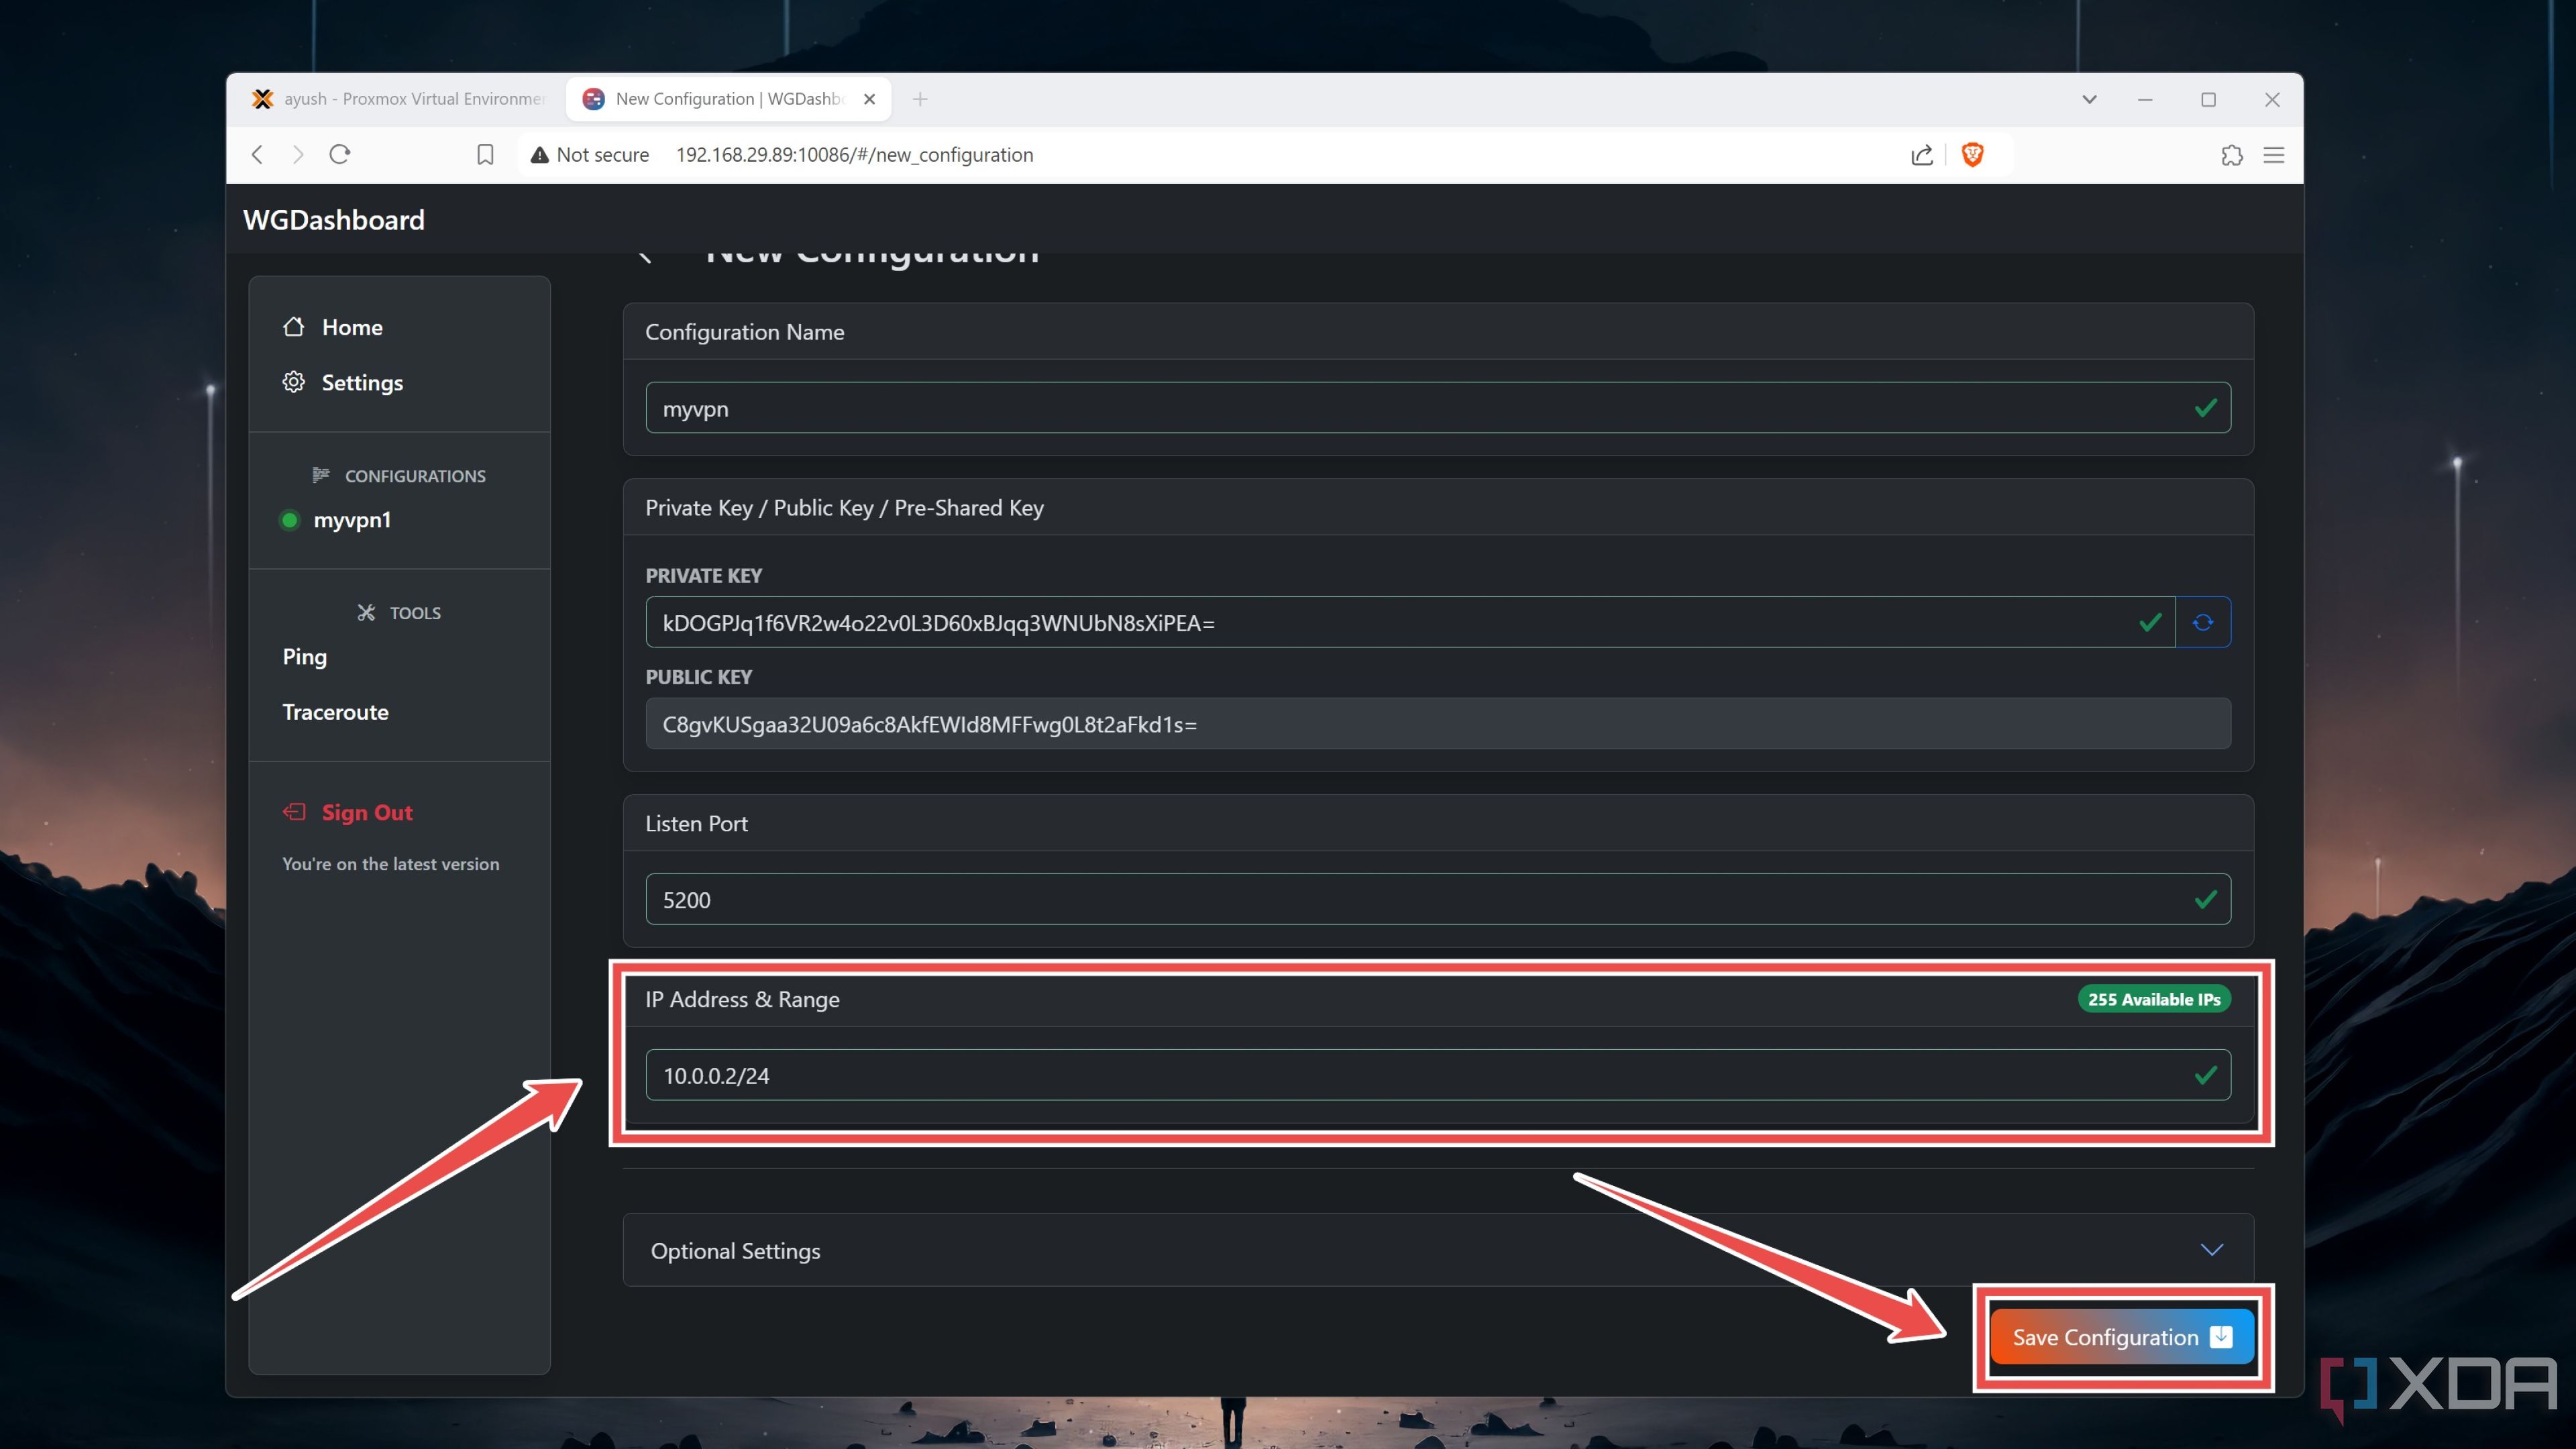
Let’s consider above topology. Real office topology can be way more complex or simpler depending on the size of organisation. My intention here is is just make it complex enough to demonstrate the concept.
Employee connected to emp_ssid should be able to reach to server1, server2, server3, server4 as well as internet. Firewall can do routing when server2 or server3 are accessed Or there can be an L3 switch in the mix or some router also can be there for routing. Let’s assume some magic box is there to route between resources on switch1 & switch2 side and switch3 side. With this assumption, let’s put the requirements for Guest Network (guest_ssid).
- Guest should be able to connect to guest_ssid network with authentication configured in the guest_ssid.
- Guest shouldn’t be able to reach out to any resources on the LAN (server1, server2, server3 , server4 or any other employees devices that are connected to emp_ssid).
- If admin wants, may provide access to specific IP:Port on the LAN. Let’s say server4:port1111 made accessible.
- Guest should be able to get internet connection.
- One Guest Device shouldn’t be able to reach another Guest Device.
Whenever we think about traffic isolation, the default option come to our mind is VLAN. We can isolate guest traffic using VLAN without using guest network feature of access point. Most, if NOT all, access point supports VLAN configuration for a specific network (a.k.a SSID). We can put guest_ssid network on a specific VLAN other than the ones where LAN resources are . But there is a catch here. We have to be very careful about routing part in the magic box. We have to make sure that routing for guest VLAN subnet must not happen to switch3 side.
Even though VLAN can handle the Guest, it requires a certain level of competency. But most of the access point provides a very simple, one click solution for the same.
Press enter or click to view image in full size
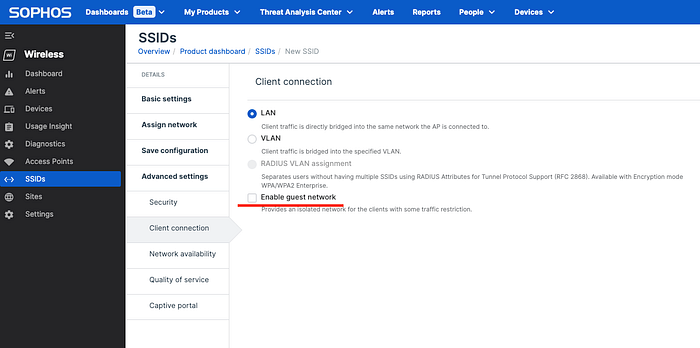
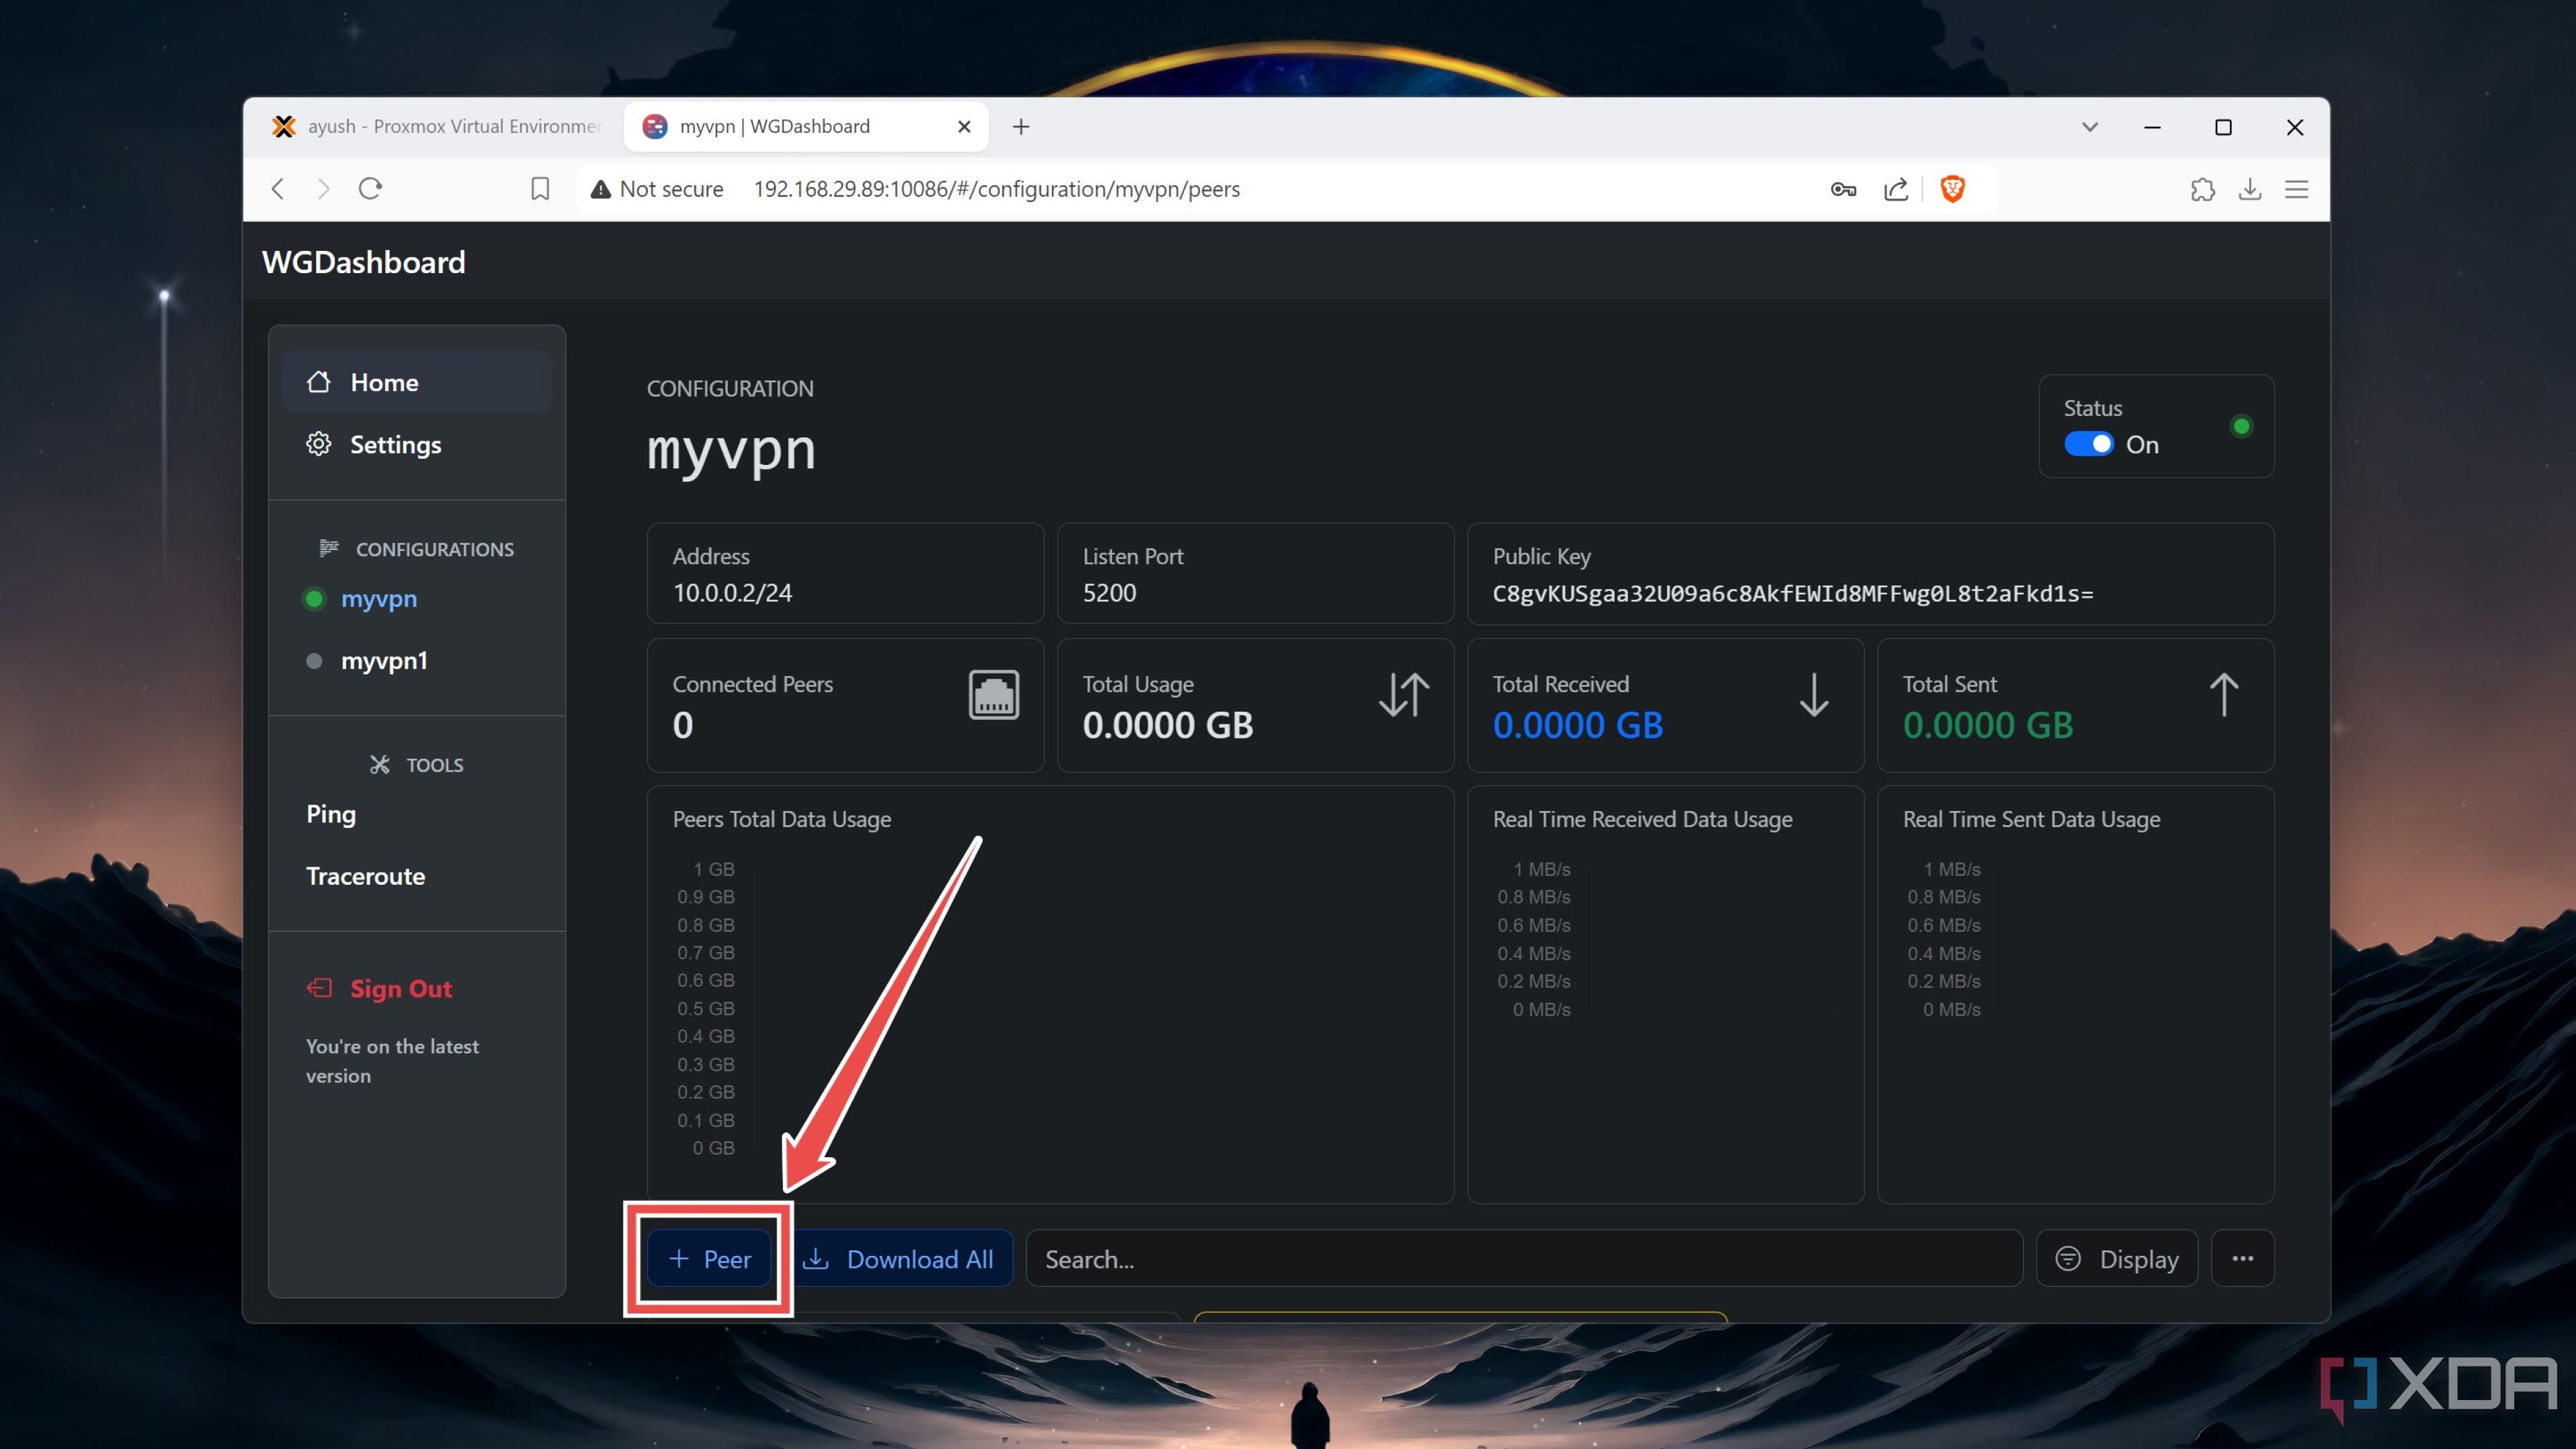
Single click fulfils all of the requirements, but let’s see how all of those requirements are achieved. I have seen two kind of implementation in the access points.
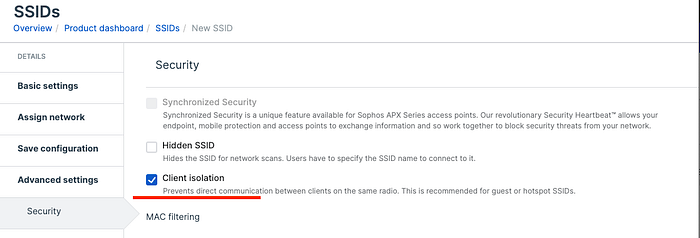
This feature makes sure that clients connected to same AP, can’t talk to each other. Typically, it’s a single click and when guest network is chosen, this is also chosen by default.
Press enter or click to view image in full size
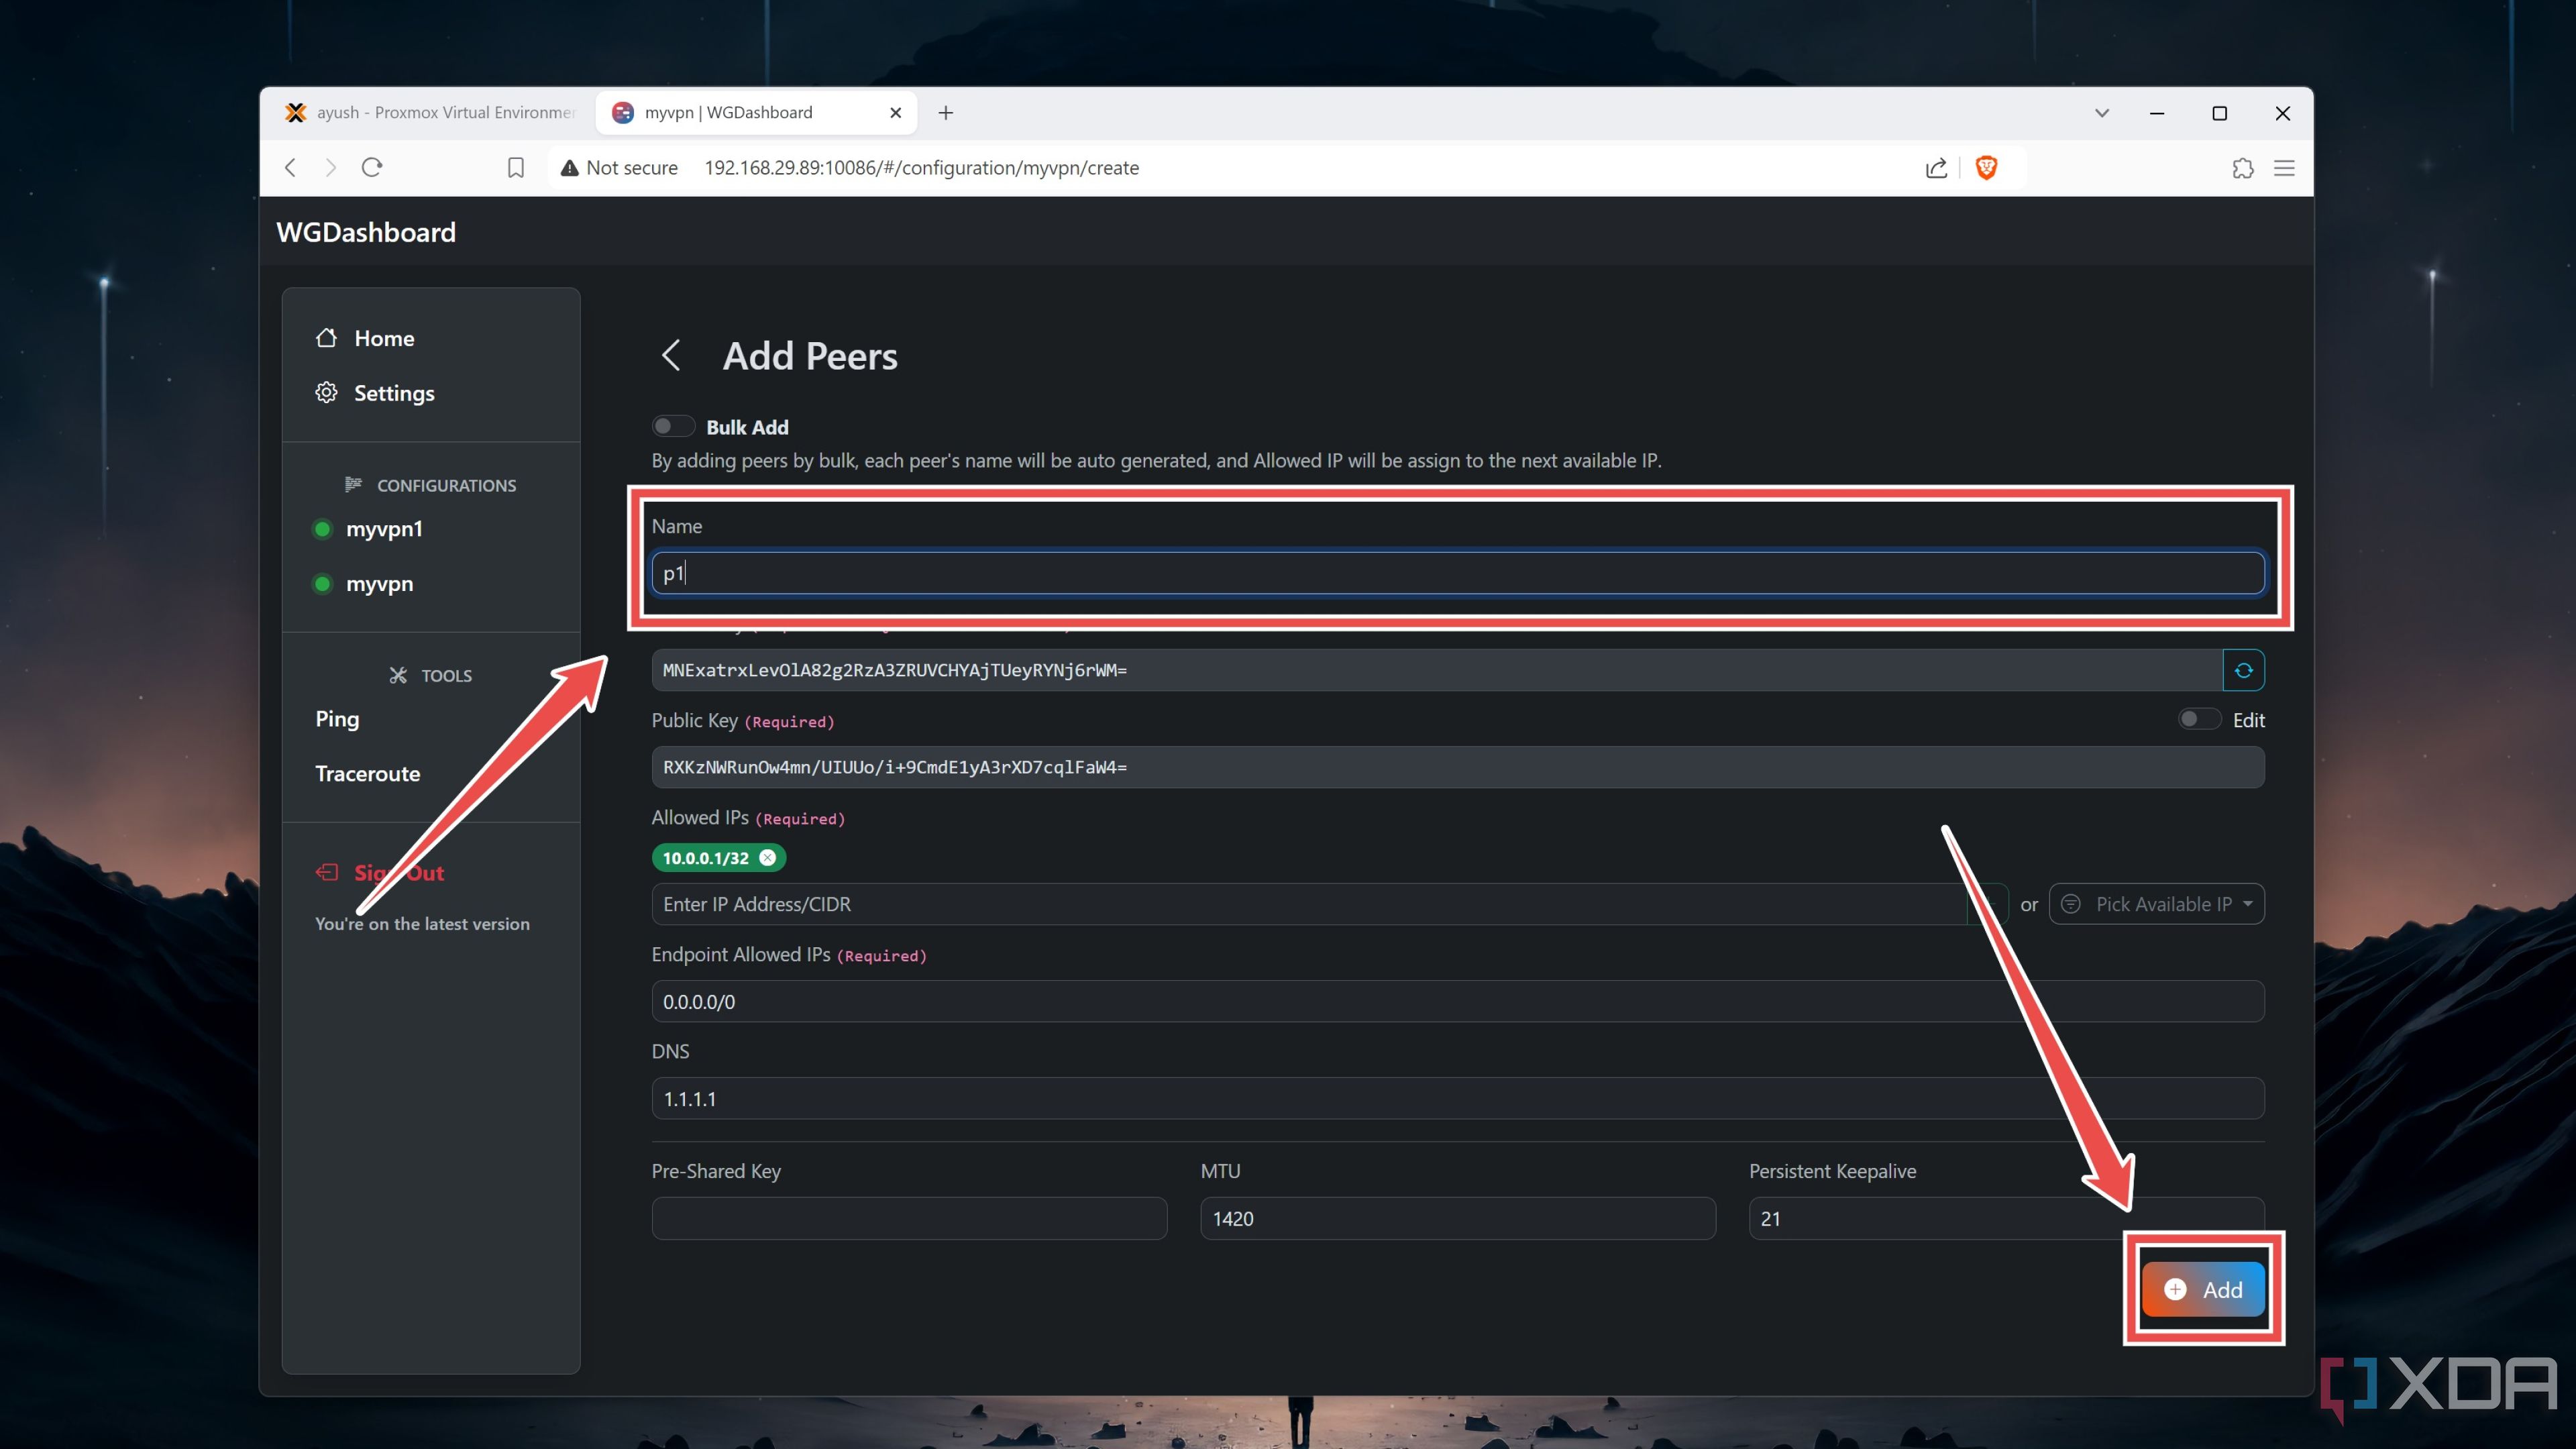
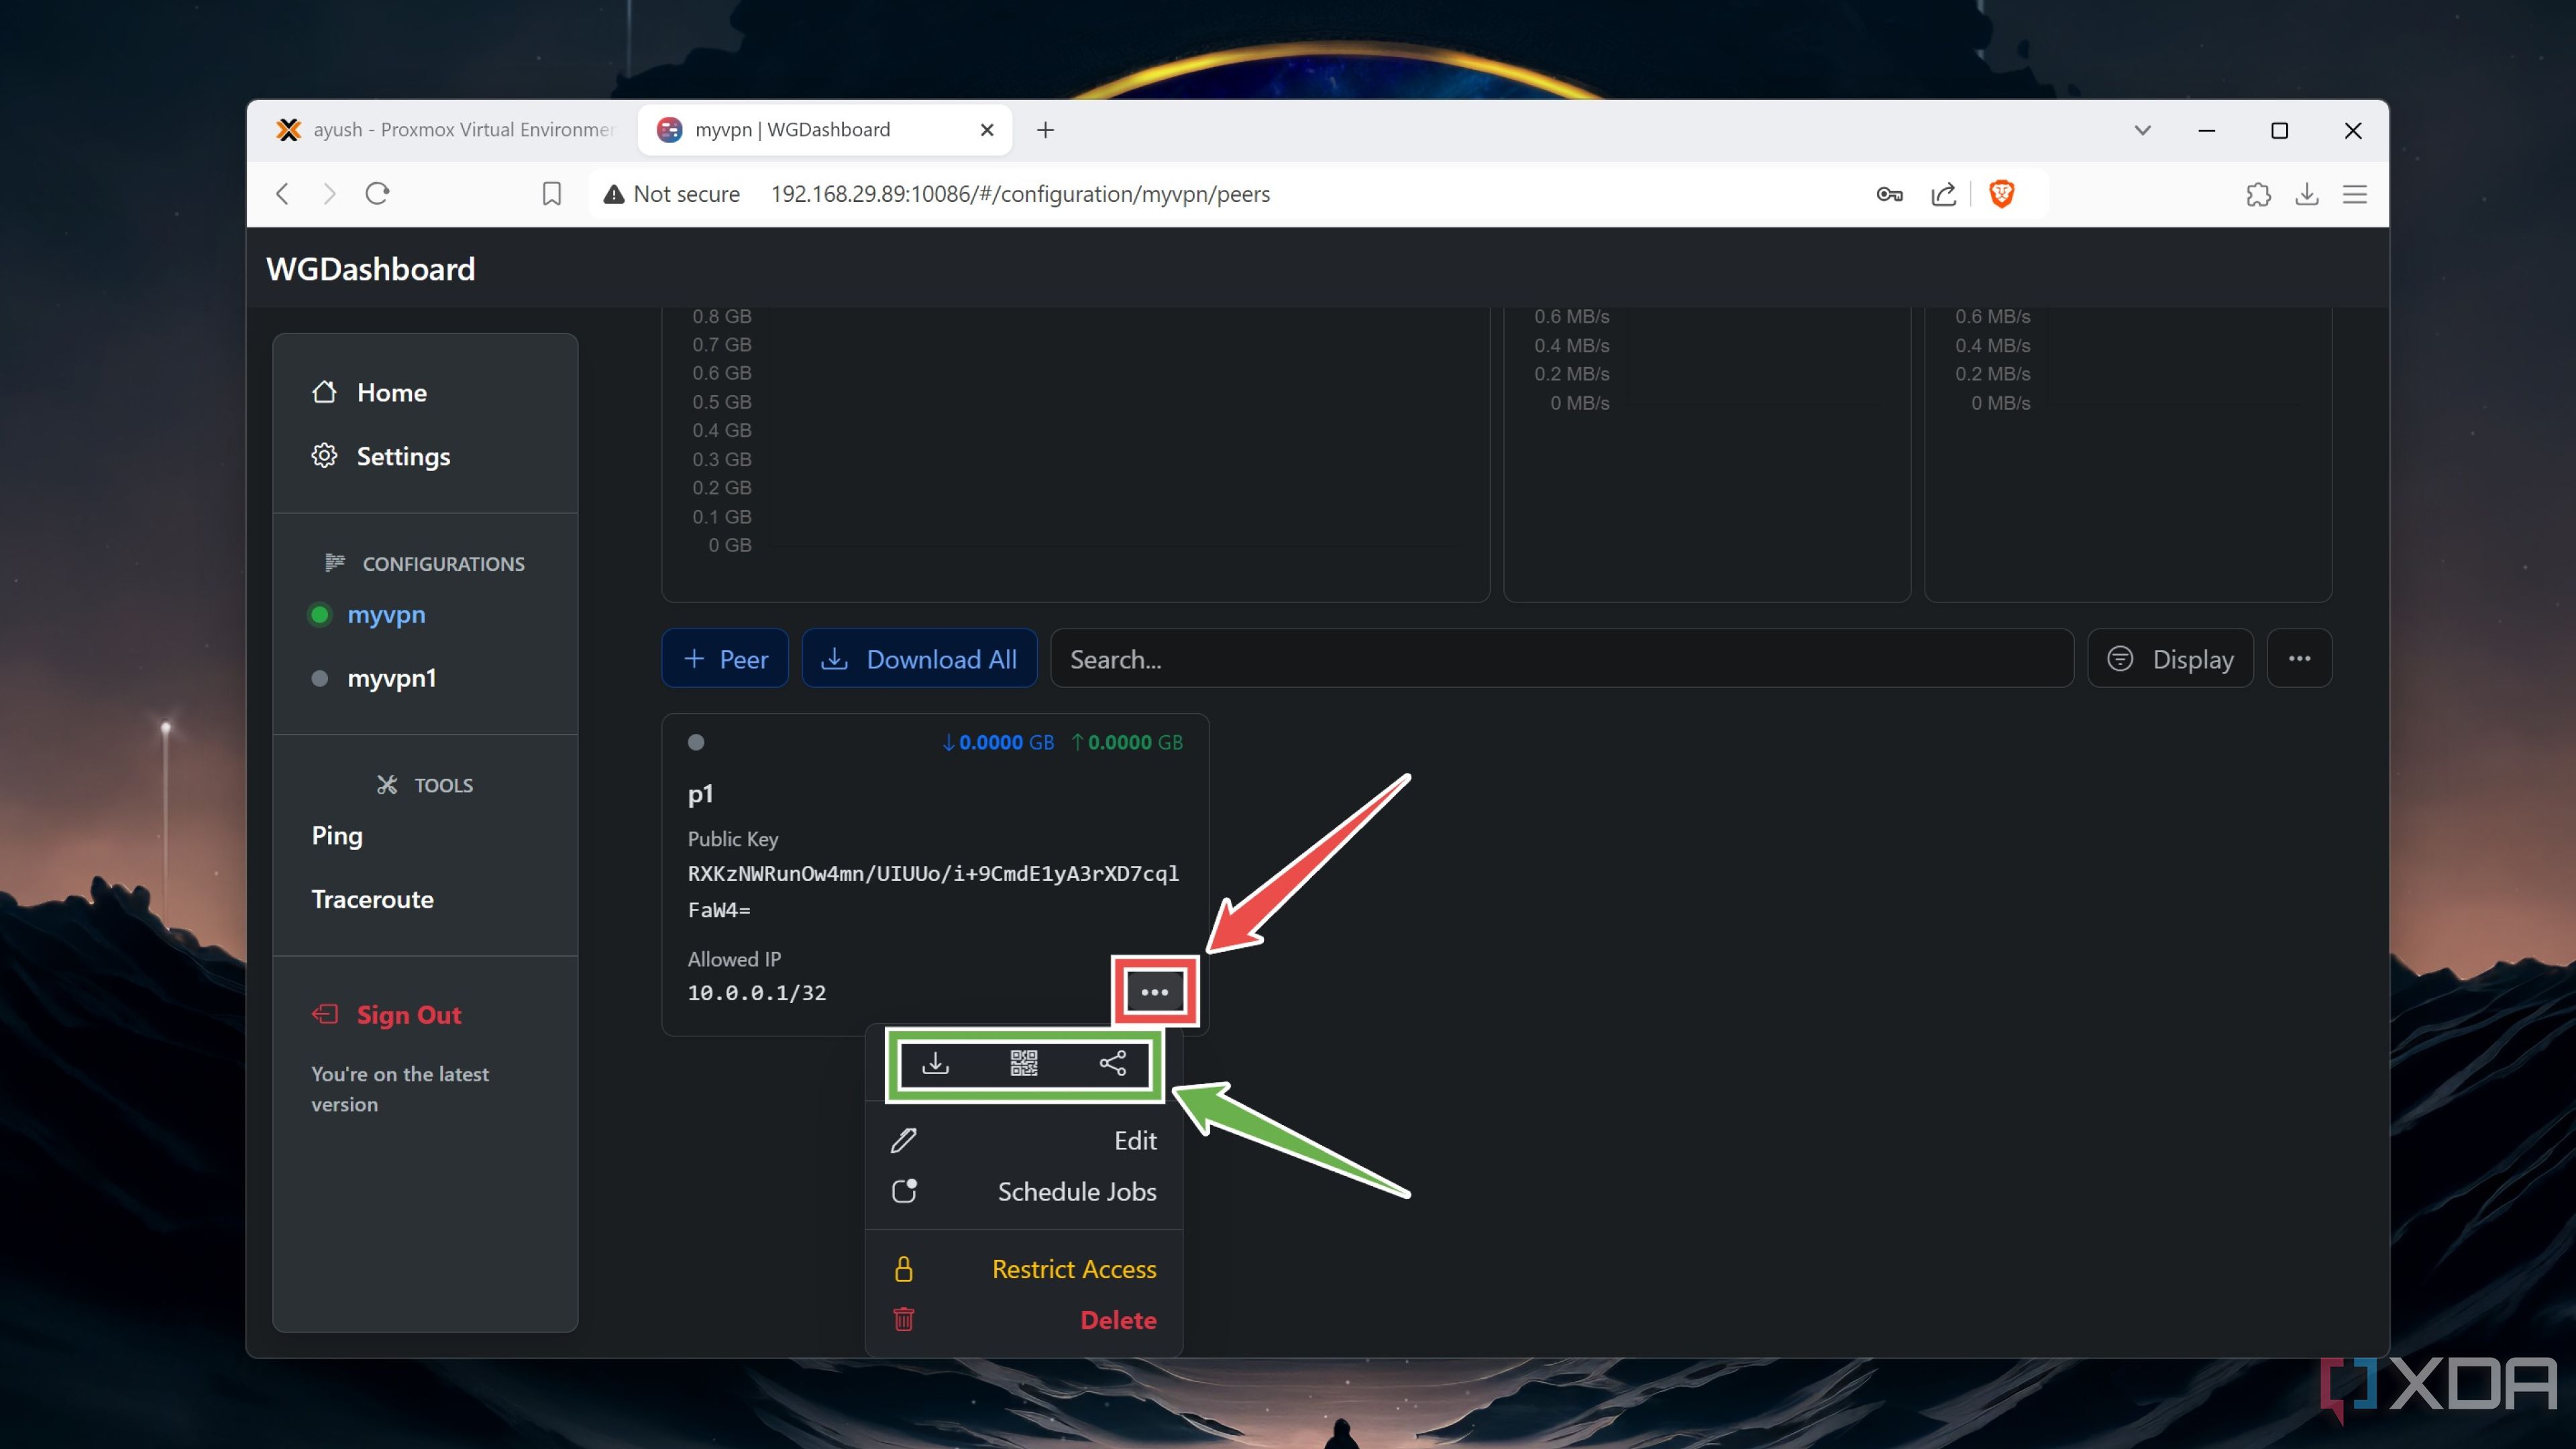
Underlying implementation is done at the wireless driver level. I have found some wireless driver code in github and providing link of the same. Client Isolation selection results in setting up IEEE80211_F_NOBRIDGE flag in the driver. At wireless driver data delivery path there is a check if this flag is set or not. If not set (i.e. client isolation is disabled) then that means bridging within the wirless interface will be attempted. If destination is connected to same interface, data is retransmitted to same, without pushing the packets to network stack. If destination is doesn’t belong to same interface or IEEE80211_F_NOBRIDGE flag is set, packets are pushed to kernel network stack.
Now the biggest question is which method to use for securing the network so that guest can’t access network ?
VLAN is the fundamental element in networking, used for traffic isolation, but it requires a some technical competency. If competency is available, one must use VLAN to isolate guest traffic. On the other hand Guest network, combined with Client Isolation is also a robust mechanism to restrict guest for any other access and configuration is just few clicks and a layman can do it. Any attempt to access private network will be dropped at access point itself.
One must use guest network and if competency is there, guest network with VLAN is the best option.
[mai mult...]