Soluții

Windows nu mai pornește (ecran negru după BIOS)

Situația:

Utilizatorul apasă pe butonul de power, apare logo-ul producătorului, dar imediat după dispare imaginea și rămâne un ecran negru. Nimic nu se mai întâmplă, dar ventilatoarele funcționează.

Cauză frecventă:

  • Actualizare Windows eșuată

  • Driver video corupt

  • Probleme la fișierele de boot (BCD – Boot Configuration Data)

Soluție:

  1. Pornește în Recovery Mode: apasă de 3 ori Reset/Power forțat când Windows încearcă să pornească. Vei ajunge în meniul de reparare.

  2. Alege “Startup Repair” – uneori repara automat boot-ul.

  3. Dacă nu merge, intră în „Command Prompt” și rulează:

    bash
    bootrec /fixmbr
    bootrec /fixboot
    bootrec /scanos
    bootrec /rebuildbcd
  4. Dacă tot nu merge, pornește în „Safe Mode” și dezinstalează ultimul update Windows sau driverul video.

2. Problema: Imprimanta nu mai scanează corect (doar scanează gol, linii sau blur)

Situația:

Utilizatorul încearcă să scaneze un document, dar fie primește o pagină albă, fie o imagine încețoșată, fie doar niște dungi ciudate.

Cauze:

  • Suprafața de scanare murdară (praful e mai periculos decât crezi).

  • Software-ul de scanare e corupt sau outdated.

  • Imprimanta e conectată prin rețea, dar IP-ul s-a schimbat.

Soluție:

  1. Curăță geamul scanerului cu alcool izopropilic și o lavetă moale.

  2. Reinstalează driverele: descarcă cele mai recente de pe site-ul producătorului.

  3. Scanează local: dacă imprimanta e rețea, intră în panoul web al imprimantei și notează IP-ul. Verifică să fie static.

  4. Folosește software alternativ: NAPS2, VueScan sau aplicațiile oficiale HP, Canon etc.

3. Problema: PC-ul pornește, dar nu se conectează la internet – doar local (fără internet)

Situația:

Wi-Fi-ul e conectat, dar apare mesajul „No internet, secured”. Nu se pot accesa site-uri.

Cauze:

  • Adresă IP conflictuală sau neatribuită

  • DNS blocat

  • Antivirus care blochează conexiunea

Soluție:

  1. Deschide CMD ca Admin și rulează:

    bash
    ipconfig /release
    ipconfig /renew
    ipconfig /flushdns
    netsh winsock reset
  2. Dezactivează temporar antivirusul și vezi dacă funcționează.

  3. Schimbă DNS-ul:

    • Control Panel → Network → Properties → TCP/IP v4 → Pune DNS manual:

      • 8.8.8.8

      • 8.8.4.4

4. Problema: Folderul cu poze de pe stick nu mai apare – pare gol

Utilizatorul introduce stick-ul USB, dar folderul cu poze importante pare gol. Totuși, proprietățile arată că spațiul e ocupat.

Cauze:

  • Fișierele sunt ascunse (atribut hidden sau system)

  • Stick-ul a fost infectat și fișierele au fost ascunse de un virus

  • Tableta/TV-ul a corupt indexul

Soluție:

  1. Deschide CMD și scrie:

    bash
    attrib -s -h /s /d E:\*.*

    (înlocuiește E: cu litera stickului)

  2. Dacă nu merge, folosește aplicații de recovery: Recuva, TestDisk sau EaseUS.

  3. Rulează un scan antivirus pe stick.

[mai mult...]

How to upload bulk users in Google Workspace using a CSV file

Download the CSV template – Go to the Google Admin Console and download the blank CSV file

  • Fill in user details – Enter the required fields like first name, last name, email address, password, and organizational unit path
  • Optional fields – You can also add recovery email, phone number, employee ID, and licenses
  • Save and upload – Save the file and upload it back to the Admin Console
  • Verify and confirm – Check for any errors and ensure all users are added successfully.
[mai mult...]

How to view all user Accounts on Windows 11

  • To view all user accounts on Windows 11, go to Settings > Accounts > Other Users. View family accounts at Settings > Accounts > Family.
  • To retrieve the account list using a command-line method, open Command Prompt, type the “net user” command, and press Enter.
  • To view more details about user accounts, in Command Prompt, type the “wmic useraccount get” command and press Enter.

Do you want to find out all the user accounts that exist on your Windows 11 PC? If so, you have both graphical and command-line methods to list existing accounts. I’ll show you the various ways to do that.

[mai mult...]

Microsoft wants to simplify the Windows Subsystem for Linux

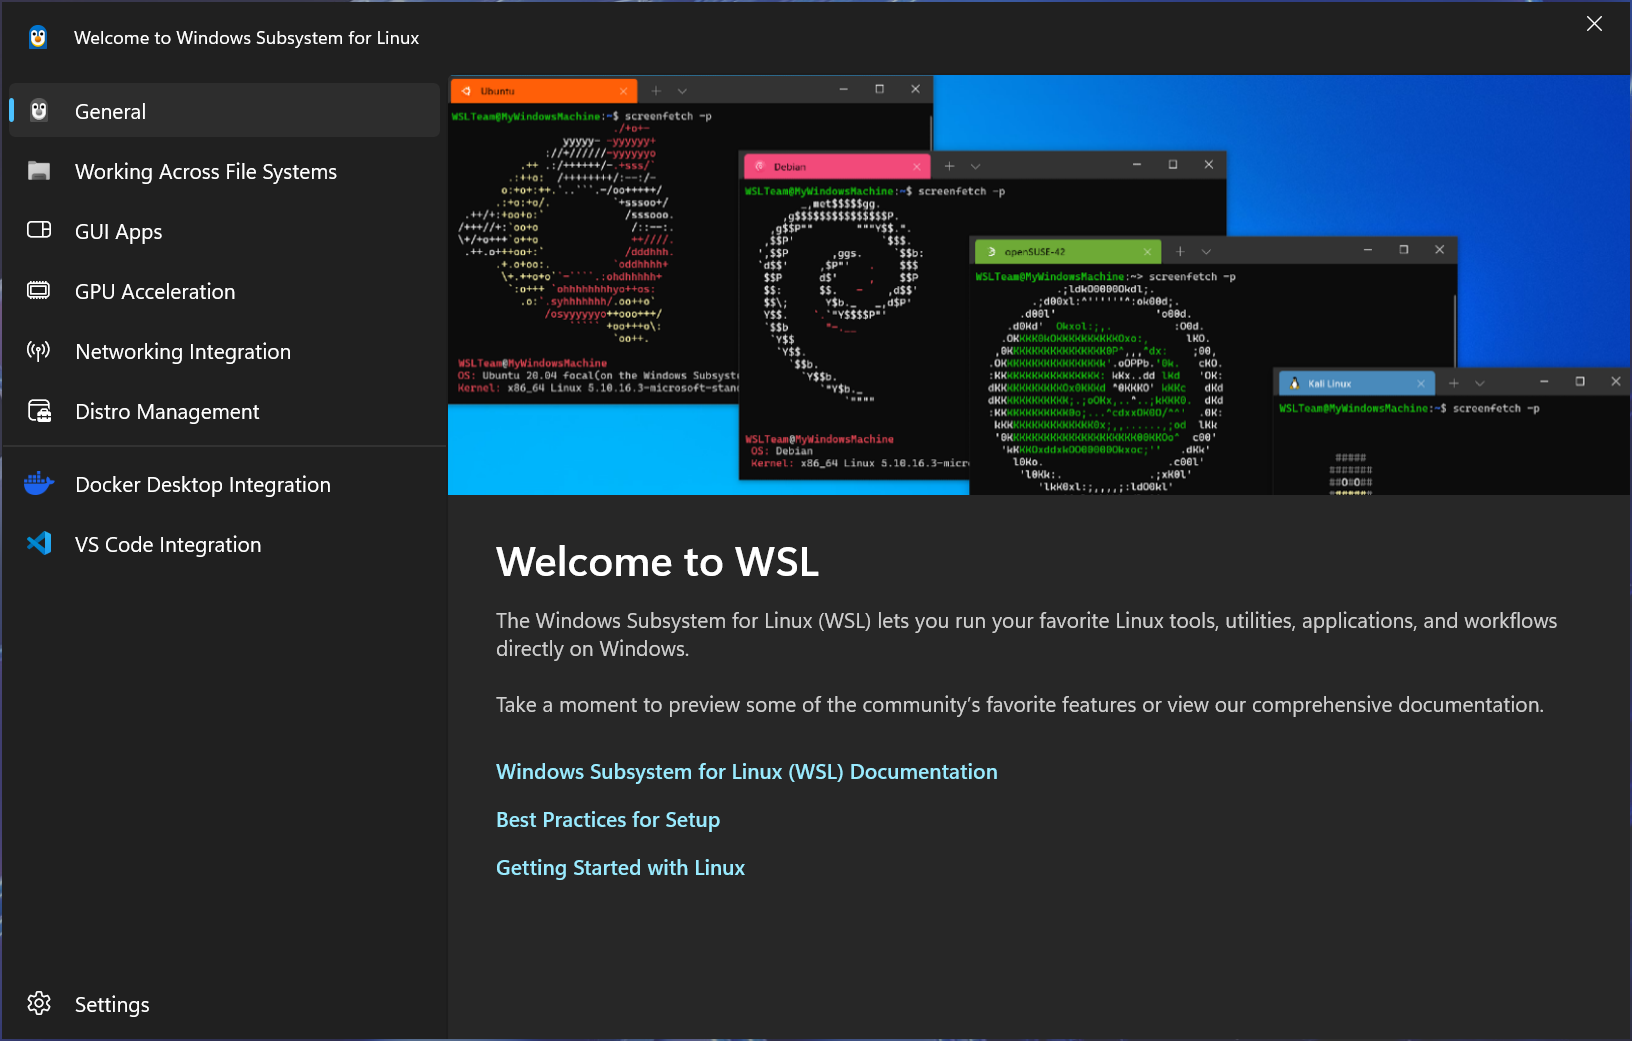
Microsoft just announced a few changes coming to WSL, including a new getting started experience. The first time someone installs and runs WSL, a new window appears explaining what WSL is and some of its key features. The window will also be accessible from the “Welcome to WSL” button in the WSL settings app.

Screenshot of a Welcome to WSL window with tips.

The Windows Subsystem for Linux can be a bit difficult to understand, so any improvement there is welcome. WSL works a lot like a virtual machine (WSL2 is actually just a Hyper-V container), but the Linux VM doesn’t have its own desktop environment, and it shares access to files and other resources from the host Windows PC. Even if you have used Linux before, there can still be a learning curve with accessing and moving files, incomplete USB support, and other important differences.

Microsoft also announced a few other changes coming to WSL. There’s a new way to create WSL distros with simple configuration files and .tar archives, which will mostly be helpful for Linux distro developers and sharing configurations in enterprise settings. You can configure a custom icon, startup command, and name, then package it as a simple file for other people to install.

Finally, Red Hat is now an official WSL distro, so Red Hat Enterprise Linux can be set up from the usual install command. Most people will probably still want the typical Ubuntu or Debian distro, but for developers and companies using Red Hat and Fedora, it’s a helpful improvement.

The new setup experience and distribution packaging formats are available for testing in WSL Preview 2.4.4, and they should roll out to the stable WSL experience once any bugs are ironed out.

[mai mult...]