How to Hide Sensitive Notifications on Android
Your phone or tablet’s lock screen prevents people from getting into your device, but there’s still information that can be gleaned from notifications on the display itself. Thankfully, Android makes it easy to hide content on your lock screen.
Android allows you to hide what it calls “sensitive content” from notifications on your lock screen. The notification will still appear, but the content of it will be hidden. What exactly qualifies as a “sensitive” notification is up to the app developers, so it can vary.
To get started, swipe down from the top of your device’s screen (once or twice, depending on your phone or tablet’s manufacturer) and tap the gear icon to open the Settings menu.
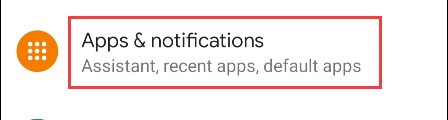
Next, select “Apps & Notifications.”
Now, choose “Notifications.”
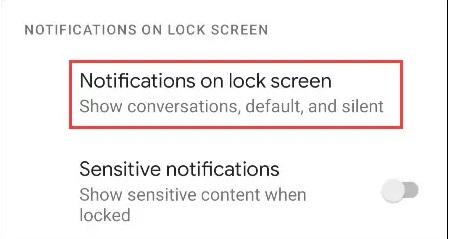
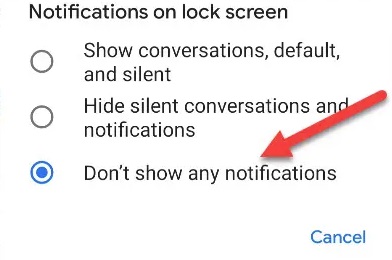
Scroll down to the “Notifications on Lock Screen” section. First, select “Notifications on Lock Screen.”
If you’d like to hide all notifications, select “Don’t Show Any Notifications.” You also have the option to “Hide Silent Conversations and Notifications.”
For a less aggressive solution, toggle the switch off for “Sensitive Notifications.”
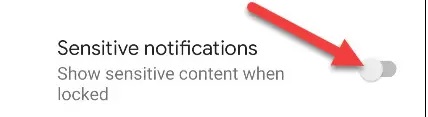
You’re all set! Again, the “Sensitive Notifications” method doesn’t offer a ton of control. What’s considered “sensitive” is completely up to the apps. It may work for the apps that you use, or it may not.
[mai mult...]