Dezactivarea iconitei Realtek HD Audio Manager in Windows 10
Desi iconita Realtek HD Audio Manager ne permite o scurtatura catre setarile sunetului din sistemul de operare, uneori dorim sa detinem o interfata cat mai curata.

Soluții pentru problemele tale IT

Desi iconita Realtek HD Audio Manager ne permite o scurtatura catre setarile sunetului din sistemul de operare, uneori dorim sa detinem o interfata cat mai curata.

Every new device you introduce into your smarthome is another device that can be attacked. You can secure your smarthome with simple steps like locking down your router and taking proper care of the gadgets in your smarthome.

And securing your router should be your first step. You should change your default admin password used access the router. Update the router’s firmware if it’s out of date, and enable encryption. Always use a complicated password unique to your Wi-Fi router. With a standard (not-Mesh) router, you can accomplish all of this from the router’s web interface. All you need is to find your router’s IP address. Mesh routers, on the other hand, don’t have a web interface. You’ll make the changes from an app.
If your router’s manufacturer isn’t offering new firmware anymore, you should consider replacing it. While we usually say most people don’t need a Mesh router for their homes, smarthomes do benefit from them. You gain better coverage for all your Wi-Fi devices, and most Mesh routers automatically update the firmware and offer additional protection services as a subscription.

Many smarthome devices require a password when you set them up. Usually, that involves downloading an app and creating a user account. In some cases, like Z-wave light bulbs, you’ll create a single account for a Hub to use with several devices.
Every device you create an account for should have a unique, complicated password. If you reuse passwords across services and smarthome devices, you run the risk of a single compromised unit leading to additional points of vulnerabilities across your home. If you don’t already, consider using a password manager. Services like LastPass or Dashlane can help you create and keep track of long and complicated passwords. You might think password managers are only for saving website credentials, but you can save any kind of password in them. Additionally, you can store secure notes, files, bookmarks, and more in a password manager.
Turn on Two-Factor Authentication Wherever Available

Two-factor authentication is an extra layer of security beyond the simple password. With two-factor authentication, after you provide your password, you then give additional proof of identity. Typically that comes in the form of a code, either randomly generated by a phone app or sent to you through a text or phone call.
Unfortunately, offering two-factor authentication isn’t very common in smarthome devices, but that’s starting to change. Nest and Wyze both offer two-factor authentication now. Security cameras are the devices most likely to have two-factor authentication, and you should absolutely use it with them. As one couple found out, rather than try to break through your router, an attacker may have an easier time using stolen credentials to log into the accounts associated with your smarthome devices. Two-step authentication can help prevent that from happening. Check the apps associated with your smart devices wherever possible turn it on. We recommend pairing two-factor authentication with an authenticator app, like Google Authenticator for iOS and Android.
Just like your router, you should update the firmware for all your smarthome devices regularly. Firmware is essentially the software built into your hardware—it determines the features and capabilities of your hardware. Manufacturers regularly find problems and patch them, and often add new features along the way.
Generally, you can update most smarthome devices through an app. That includes Z-wave and ZigBee gadgets you connect to a smart hub. You’ll check the smart hub’s app for those updates. If the manufacturer no longer supports a smarthome device you have installed, you should replace it as soon as possible. If you aren’t sure, check the manufacturer’s website.

Most smarthome device you introduce into your home communicate with servers in the cloud. The question is: “who owns those servers?” When you’re looking at a recently released product from an unknown manufacturer, there’s no way to know for sure where it communicates until someone tests it. Unless you’re a security researcher who enjoys the challenge, you probably shouldn’t be the guinea pig.
And besides that, the biggest problem with smarthomes is that your devices might stop working. The company can go under, disappear, or decide to move on to a newer product and end support.
Sticking with a large well-known company doesn’t guarantee that won’t happen, as seen when Lowe’s killed off Iris. But what you do get is a track record to examine. By looking over the company history, you can see how viable it is, and whether or not the company supports its products for mere months or years.
And with an established history, you can even see what a company handles failure. Wyze, the maker of some of the least expensive smarthome products you can ask for, ran into an issue where camera feed traffic went through servers in China. The company explained what happened, why it happened, and how it was going to fix it.
You may not like that it happened at all, but at least you know so you can make an informed decision on whether or not to buy the product, and that’s the point. If you found a product from a new manufacturer, try to find reviews from multiple sites. If all you can find is Amazon reviews, check Fakespot to see if the reviews are real. Try to find any history you can before making the purchase. If you can’t find established history and real reviews, skip the gadget.
Just like you shouldn’t check your bank account from public Wi-Fi, avoid accessing your smarthome from public Wi-Fi. Even if you’re certain you are a legitimate Wi-Fi network, you’re potentially exposing the devices in your home to anyone listening in. It’s best not to do anything sensitive on public Wi-Fi networks. If you need remote access to your home, either use a device with LTE (like your phone) or consider setting up a personal Virtual Private Network (VPN) to connect safely.
[mai mult...]
iOS 13 has a new feature that might just save you from all spam and robocalls. The new Silence Unknown Callers feature will mute all calls coming from a number that’s not in your contact list.
Silence Unknown Callers is a simple toggle that will automatically block unknown numbers from calling you. Your contacts and people you’ve interacted with will still be able to call you, but you won’t be bothered by incoming calls from anyone else.
This feature is one of the biggest reasons we’re excited for iOS 13 when Apple releases it sometime in fall 2019.
The Silence Unknown Callers feature is quite a blunt instrument—it’s a simple toggle in Settings. Once enabled, any call you receive from an unknown number will be silenced. If Siri Intelligence finds the number in the Mail, Messages, or Contacts app, the call will come through.
You can think of it as iOS automatically hitting the Decline button for you. You’ll still get a Missed Call notification, and you’ll find the number in the Recents list in the Phone app.
If you have voicemail enabled, the call will automatically go to the voicemail. This is where the visual voicemail feature will come in handy (availability and charges depend on your carrier).
When you go to the “Voicemail” tab in the Phone app, you’ll be able to listen or read the transcript of the voicemail (as you can see in the screenshot below).

If the message is important, you can choose to call them back. If not, delete the voicemail, and if needed, block the number.
In our testing, we found that if you call the number back, any subsequent calls you get from the number won’t be silenced automatically.
This feature isn’t enabled by default. To enable it after upgrading to iOS 13, open the Settings app and go to the “Phone” section.
Scroll to the bottom of the page and tap on the toggle next to “Silence Unknown Callers” to enable the feature.

What Silence Known Callers feature lacks is nuance and control. If you want to be sure you’ll get incoming calls from someone, add the person’s phone number to your contacts. That’s all you can do to control it.
Unlike the Do Not Disturb feature, a call won’t come through after repeated attempts. With this feature enabled, your iPhone won’t ring even if someone calls you six times in a row.
If you’re concerned you might miss an important or emergency call coming from a payphone or a hospital, then you should not enable this feature.
However, you will still get voicemails from unknown callers. As long as you’re checking your voicemails, you won’t miss anything important.
Some of those unknown calls may be important, and hopefully, those important callers will leave a voicemail for you. You can check voicemails from your missed calls from the Phone app.
If you have voicemail enabled, open the Phone app and go to the “Voicemail” tab. If you haven’t enabled it yet, you can do it from this screen.

You’ll see voicemails from callers at the top. Tap on a voicemail from the list or select the corresponding “i” button to expand the voicemail.

Tap on the “Play” button to listen to the message. If you have the Visual Voicemail feature enabled, you’ll see a snippet of the transcribed text below the number. Tap on the box to expand the text.

If silently blocking most phone numbers in the world sounds too aggressive to you, you have some alternatives that can silence spam calls.
While it’s not the exact same thing, you can set up the Do Not Disturb (DND) feature only to allow calls from Favorites. DND also has an option to allow repeated calls. This means that a second call from the same number within three minutes won’t be silenced.
You can also use a spam blocker app like Hiya to automatically block spam and robocalls, but it’s not a complete fix. The success rate of the app will depend on its database of spam callers, which is never fully complete. While it might not block all spam calls, it should get most of them.
[mai mult...]
This is a complicated topic. It’s true that browsing on public Wi-Fi is much safer and more private than it used to be thanks to the widespread embrace of HTTPS on the web. Other people on the public Wi-Fi network can’t just snoop on everything you’re doing. Man-in-the-middle attacks aren’t as trivially easy as they used to be.
The EFF recently came down on the side of public Wi-Fi being safe, writing that “There are plenty of things in life to worry about. You can cross ‘public Wi-Fi’ off your list.”
That sounds like sensible advice. And it’d be great if public Wi-Fi was completely safe! We’ve certainly used public Wi-Fi ourselves, and we don’t worry about it as much as we used to.
But, if you’re asking us whether Wi-Fi is entirely safe, we can’t say that. David Lindner at Contrast Security wrote a counterpoint to the EFF’s argument, pointing out the risks of malicious hotspots. The community over at Hacker News had quite a few thoughts about the dangers of public Wi-Fi, too. We’ve tried to explain the risks below.
Here’s the bottom line: Random people aren’t going to snoop on your activities on public Wi-Fi anymore. But it would be possible for a malicious hotspot to do a bunch of bad things. Using a VPN on a public Wi-Fi network or avoiding public Wi-Fi in favor of your cellular data network is safer.

Widespread HTTPS encryption on the web has fixed the main security problem with public Wi-Fi. Before HTTPS was widespread, most websites used unencrypted HTTP. When you accessed a standard website over HTTP on public Wi-Fi, other people on the network could snoop on your traffic, viewing the exact web page you were viewing and monitoring any messages and other data you sent.
Worse yet, the public Wi-Fi hotspot itself could perform a “man in the middle” attack, modifying the web pages sent to you. The hotspot could change any web page or other content accessed over HTTP. If you downloaded software over HTTP, a malicious public Wi-Fi hotspot could give you malware instead.
Now, HTTPS has become widespread, and web browsers are branding traditional HTTP sites “not secure.” If you connect to a public Wi-Fi network and access websites over HTTPS, other people on the public Wi-Fi network can see the domain name of the site you’re connected to (for example, howtogeek.com), but that’s it. They can’t see the specific web page you’re viewing, and they certainly can’t tamper with anything on the HTTPS site in transit.
The amount of data people can snoop on has gone way down, and it’d be harder for even a malicious Wi-Fi network to tamper with your traffic.
While public Wi-Fi is now much more private, it’s still not completely private. For example, if you’re browsing the web, you might end up on an HTTP site eventually. A malicious hotspot could have tampered with that web page as it was sent to you, and other people on the public Wi-Fi network would be able to monitor your communications with that site—which web page you’re looking at on it, the exact content of the web page you’re looking at, and any messages or other data you upload.
Even when using HTTPS, there’s still a bit of snooping potential. Encrypted DNS isn’t yet widespread, so other devices on the network can see your device’s DNS requests. When you connect to a website, your device contacts its configured DNS server over the network and finds the IP address connected to a website. In other words, if you’re connected to a public Wi-Fi network and browsing the web, someone else nearby could monitor which websites you visit.
However, snooper wouldn’t be able to see the specific web pages you were loading on that HTTPS site. For example, they’d know that you were connected to google.com but not which article you were reading. They would also be able to see some other information, such as the amount of data being transferred back and forth—but not the contents of the data.
That phishing site wouldn’t be an HTTPS site, but would you really notice the HTTP in your browser’s address bar? Techniques like HTTP Strict Transport Security (HSTS) allow websites to tell web browsers that they should only connect over HTTPS and never use HTTP, but not every website takes advantage of that.
Apps, in general, could also be a problem—do all the apps on your smartphone correctly validate certificates? Is every application on your computer configured to transfer data over HTTPS in the background, or are there some applications automatically using HTTP instead? In theory, applications should be correctly validating certificates and avoiding HTTP in favor of HTTPS. In practice, it’d be tough to confirm every app is behaving correctly.
Other devices on the network could also be a problem. For example, if you’re using a computer or other device with unpatched security holes, your device could be attacked by other devices on the network. That’s why Windows PCs come with a firewall enabled by default and why that firewall is more restrictive when you tell Windows you’re connected to public Wi-Fi instead of a private Wi-Fi network. If you tell the computer you’re connected to a private network, your network shared folders may be made available to other computers on the public Wi-Fi.
While public Wi-Fi is safer and more private than it used to be, the security picture is still messier than we’d like.
For maximum protection on public Wi-Fi networks, we still recommend a VPN. When you use a VPN, you connect to a single VPN server, and all of your system’s traffic is routed through an encrypted tunnel to the server. The public Wi-Fi network you’re connecting to sees a single connection—your VPN connection. No one can even see which websites you’re connecting to.
That’s a big reason why businesses use VPNs (virtual private networks.) If your organization makes one available to you, you should seriously consider connecting to it when you’re on public Wi-Fi networks. However, you can pay for a VPN service and route your traffic through there when you use networks you don’t completely trust.
You could also skip public Wi-Fi networks entirely. For example, if you have a cellular data plan with wireless hotspot (tethering) capabilities and a solid cellular connection, you could connect your laptop to your phone’s hotspot in public and avoid the potential problems involved in public Wi-Fi.
[mai mult...]
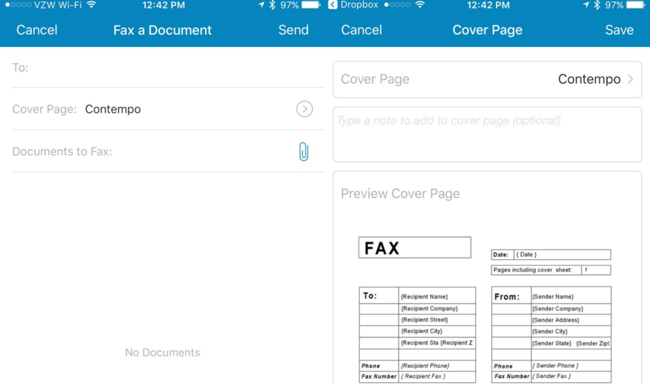
You can sign a PDF document from your phone, tablet, or any other computer and email it off to someone. But some organizations still don’t accept documents via email — you may need to fax documents instead.
No, you can’t use your smartphone’s phone connection as a fax machine or dial-up modem. You’ll need to rely on an app or third-party service that does the faxing for you, just as you would sending the occasional fax from your PC.
You won’t find an app that lets you send an unlimited number of faxes for free. Every app you’ll find here will cost you money to use regularly. Some apps may let you send a handful of pages for free, but that’s it. These services have to maintain phone numbers and interface with the telephone network for you. Your smartphone can’t act as a dial-up modem, so you’re depending on a service’s servers to do the heavy lifting.
But, although this will cost you, it can save you money and be more convenient than the alternative. The alternative is paying to use fax machines at a store, or purchasing your own fax machine and hooking it up to a telephone landline. Both will likely be significantly more expensive if you just need to send a few faxes.This method also lets you do everything entirely electronically. You can sign and fill in PDF documents on your phone and fax them. Or, use your phone’s camera to scan paper documents and fax them.
Search for “fax” on the App Store and you’ll find quite a few options, but none of the apps are actually free, and the few that do provide a few free fax pages are usually limited to just a handful of pages before they start charging you.
But there’s a bigger problem — the vast majority of the time when you need to fax something, you’re faxing a document that contains very personal information — it’s health care and government that tend to require faxing things, after all, and they are also dealing with your personal information.
You should not trust just anybody with handling your personal information in a fax. So we’ve got some recommendations for you.
If you are going to be sending sensitive faxes all the time, or you work for a company and you’re trying to choose a service, RingCentral Fax, which is partially owned by Cisco and AT&T, is probably the best choice for your needs, especially since they have a lot of great security features and support for multiple users with separate fax lines.
They also have a really slick mobile app that’s probably one of the nicest ways to deal with faxing, or you can send faxes through email instead. It has all the other features you can imagine, including integrations with Outlook, Google Drive, Dropbox, Box, and you can even get a toll-free number. It also has a lot of security features that would be useful for businesses or people that are transmitting secure information.
Of course, if you just want to send a few faxes, you can sign up for one of their cheap plans… and then just cancel after a month or two.
Occasional User:
If you just want to send a few faxes every now and then, you can also choose eFax, which is well known as the company that basically invented faxing digitally. They have a nice mobile app that lets you both send and receive faxes.
If you just need to send the occasional fax, we also recommend MyFax, which lets you send up to 10 free pages without having to pay. This doesn’t sound like much, but it’s more pages per month than most people have to fax per year. If you do need to send more pages each month, you can upgrade to a regular plan.
Both of these providers are reputable and owned by the same large company that has been doing this for years. It’s not some fly-by-night operation. They might not have all the security features that RingCentral does, but you don’t need to worry about who has your personal information.

If you’re using Windows Phone, Blackberry, a Fire Tablet, or some other operating system, you can always sign up for RingCentral, eFax, or MyFax and then use their website to send the fax — or you can use their fax by email feature.
Almost all of the providers let you send faxes by emailing a document to the number you are trying to fax to, combined with a custom ending. For instance if you wanted to fax something to 800-555-1212, you would send the document to an email like 8005551212@somefaxservicehere.com (not a real address).
Being able to send faxes over email means that any mobile device can easily send faxes without needing to install an extra app. Ultimately, there’s no single best fax application for everyone. If you need to send quite a few pages on an ongoing basis, a subscription-based service like RingCentral or eFax could be the best. If you want to just send a quick fax, MyFax is probably your best bet.
If you’re using another smartphone platform (like Windows Phone), your best bet is to find a fax service that lets you fax by email, which is generally the easiest and best way to send faxes anyway.
[mai mult...]
Sometimes, you’re using an iPad but the onscreen keyboard doesn’t show up where you expect it. There could be one of several things going on, including trouble with a Bluetooth keyboard or third-party keyboard apps. Here’s what may be wrong—and how to fix it.
Whenever you have a Bluetooth keyboard connected to your iPad, iPadOS automatically disables the onscreen keyboard. That’s because the iPad thinks you don’t need an on-screen keyboard when you have a real one in front of you. But sometimes you have a Bluetooth keyboard sitting nearby that is still connected, and you don’t realize it.
To disconnect your keyboard, open Settings and tap Bluetooth. In the list of “My Devices,” locate your keyboard and tap on the info icon next to it (an “i” in a circle). On the next screen, select “Disconnect.”
[mai mult...]