Situatie
Solutie
Design Gift Tags (Microsoft Word)
We’ve all been there—despite thinking you’ve planned for Christmas meticulously, you’ve run out of gift tags. Well, Microsoft Word has you covered! Not only can you create an endless supply of gift tags from your computer, but you can make them more personal than the generic ones you buy from the shop.
Open Microsoft Word, click “New,” and scroll to the search bar. If you see it, select the “Office” tab before you type anything. Then, in the search bar, type Gift tags, and press Enter.
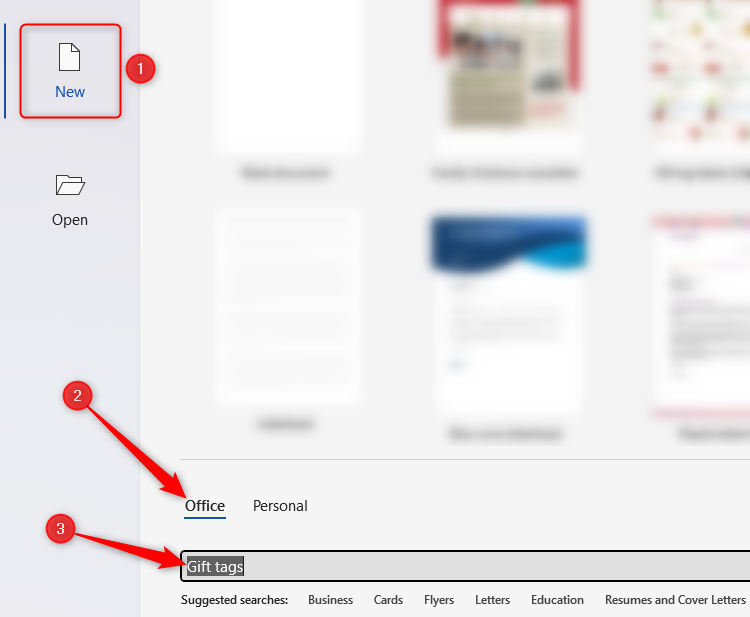
At the time of writing, Microsoft Word only offers one gift tag template, but that’s fine—this template will do the trick, as it contains lots of designs within the one template. If you see others (lucky you!), go for the one that looks the most Christmassy. Whichever one you choose, double-click it to get started.
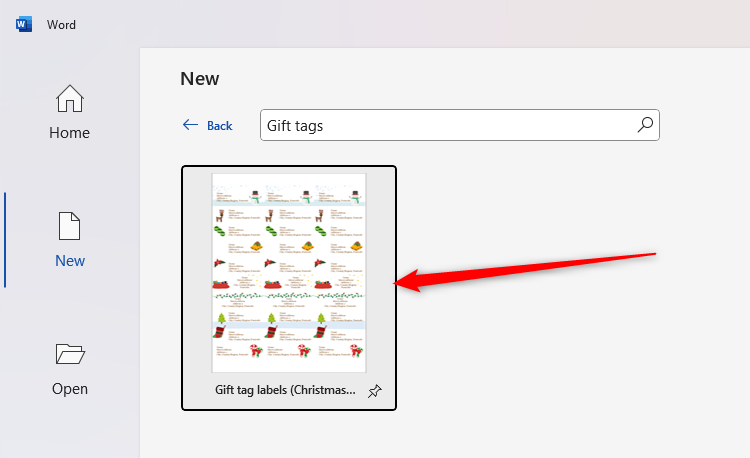
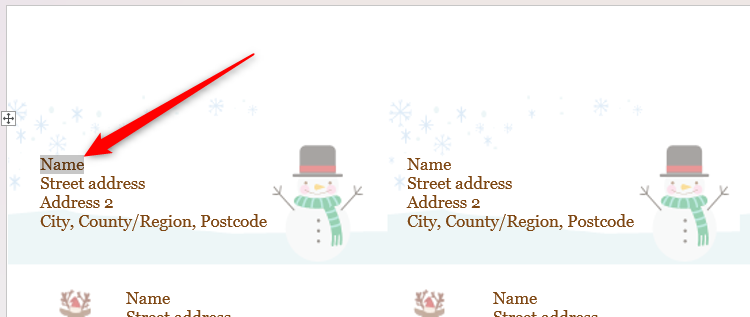
The template that loads already has placeholder text for you to overwrite. You can see that they’re placeholders by selecting one of the words and seeing it turn gray. It’s important you don’t delete these, as when used correctly, the text you add to the placeholders in the top-left design will be duplicated in the remaining designs on the page.
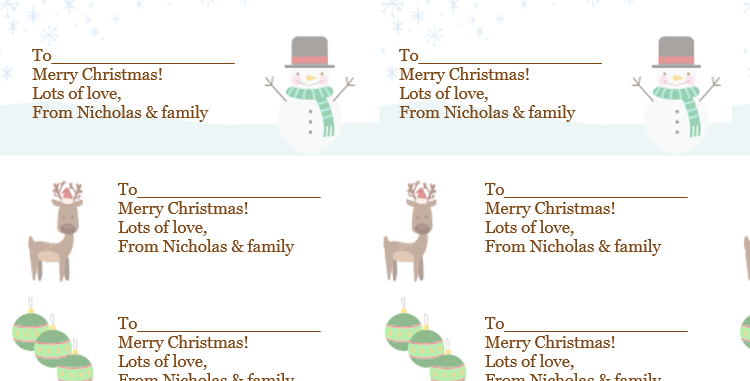
By default, the template assumes you want to add a name and address. However, in my case, I want to tape my gift tags to presents I will deliver by hand, so I’ve used the four lines of placeholder text to create a personalized message instead. After filling in one placeholder line, I selected the next one and filled that in, and so on.
When you’re done, press Ctrl+P, select the correct printer, make sure you’re set to print one-sided and in color, and click Print!
Produce Postage Labels (Microsoft Excel and Word)
The best way to create postage labels for mailing your gifts is through Microsoft Word’s mail merging tool. This means adding the details to an Excel sheet, and then pulling them across to Microsoft Word.
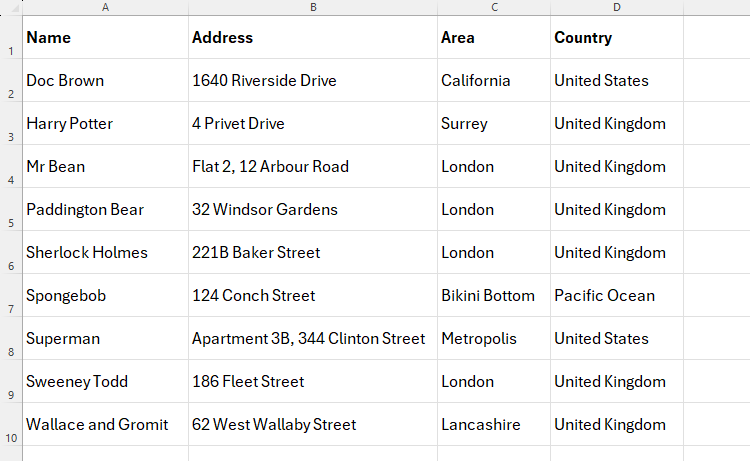
Open Excel, and create your list of names and addresses, making sure to insert column names along the top row and not leave any blank cells in the data.
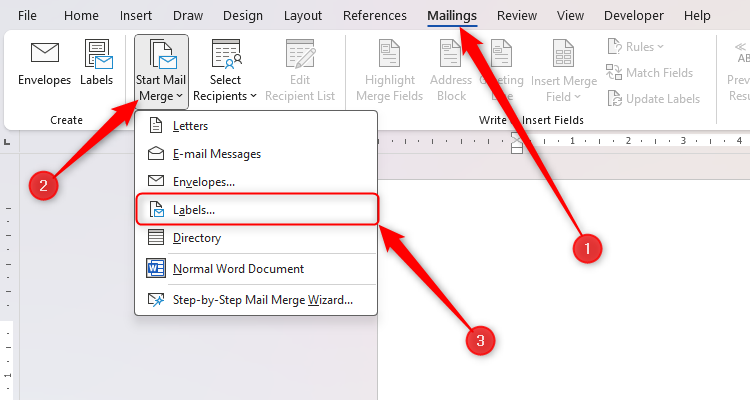
When you’re done, save and close the Excel workbook, and open a new, blank Microsoft Word document. There, click “Mailings,” then “Start Mail Merge,” and choose “Labels”.
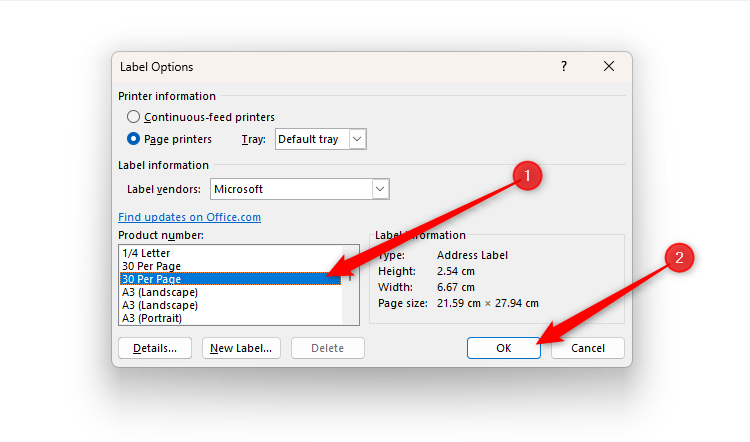
Now, choose an appropriate label size (for example, if you’ve put label paper in your printer, select the type that matches the labels’ measurements). In my example, I’ve chosen a 30-page label layout. Then, click “OK”.
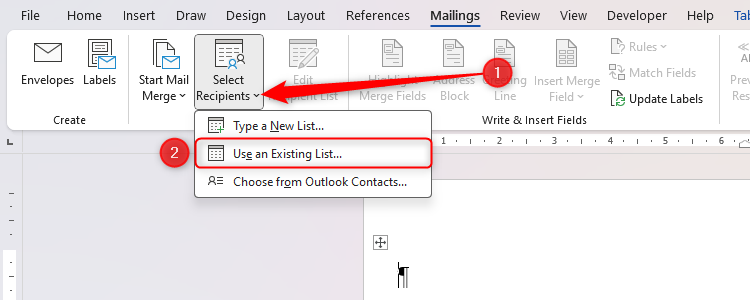
The next step is to import the address list you created in Excel. To do this, with the Mailings tab still open, click Select Recipients > Use An Existing List.
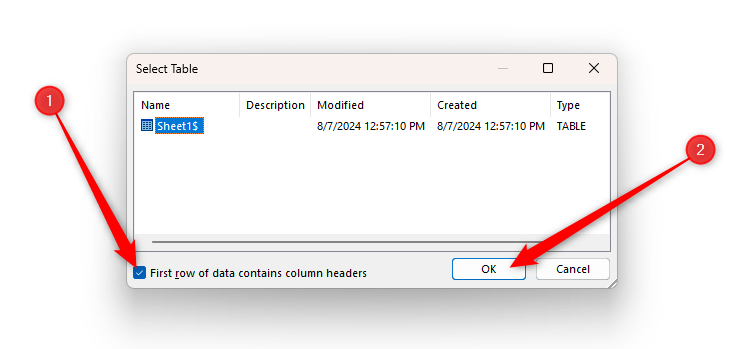
Use the Select Data Source window that opens to locate your Excel file, and click “Open.” In the Select Table dialog box, check the checkbox that tells Word you’ve used headings in your Excel table, and then click “OK.”
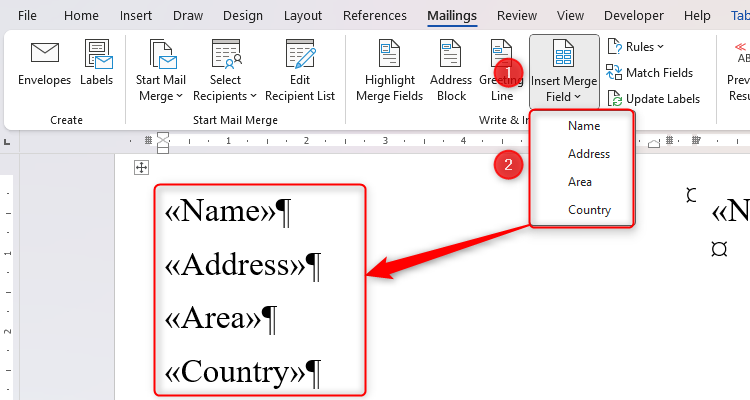
Now, with your cursor on the first line of your first label, click “Insert Merge Field,” choose the detail to sit on the first line, and press Enter.
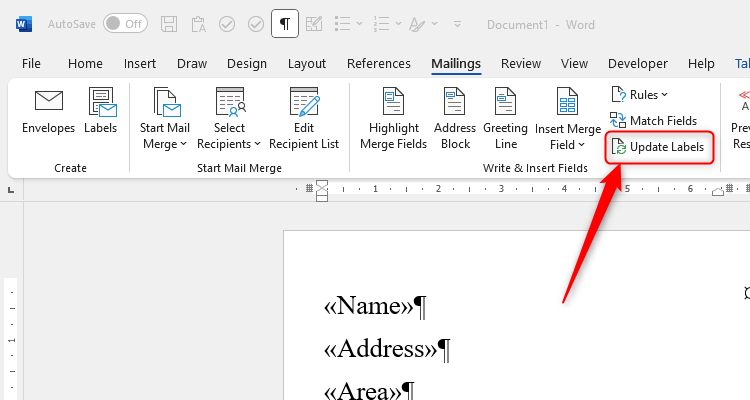
When you have inserted all merge fields, click “Update Labels.” This will apply the merge fields you just added to each of the labels in your document.
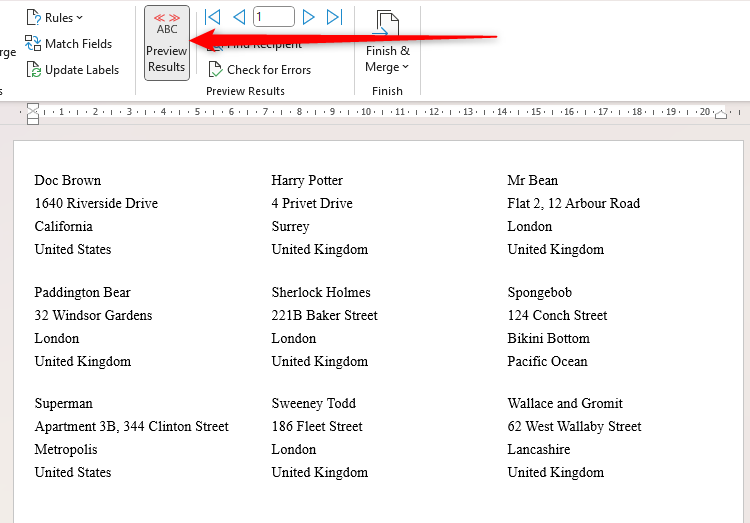
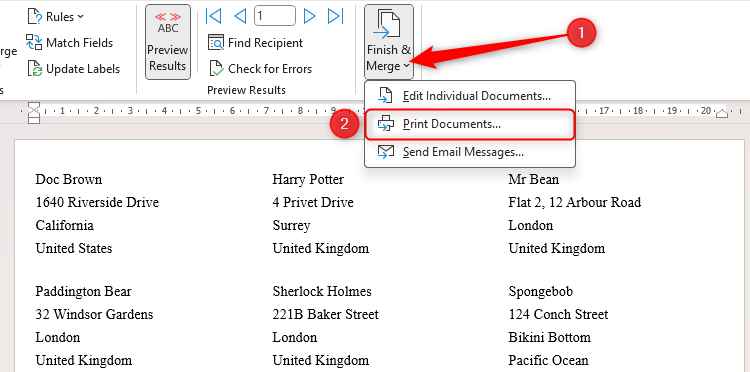
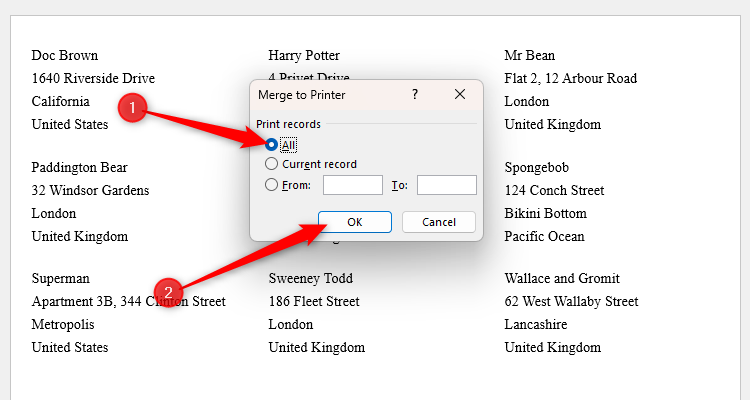
Then, ensure “All” is selected, and click “OK” to launch your print dialog box, where you can adjust your settings as necessary and click “Print”.
Design Festive Social Media Posts (Microsoft Designer)
Is your business open as usual over Christmas? If so, use Microsoft Designer to create a professional social media post and let everyone know! Go to the Microsoft Designer website (you can also use the Designer desktop app if you wish), and type Social into the search bar on the homepage. When “Social Posts” appears as a suggestion, select it.

Then, in the Description field, use plain English to describe what you want the post to contain. Also, use the Images section to upload photos, and click “Size” to determine whether you want to create a square or portrait Instagram post, or a landscape Facebook ad. When you’re ready, click “Generate”.

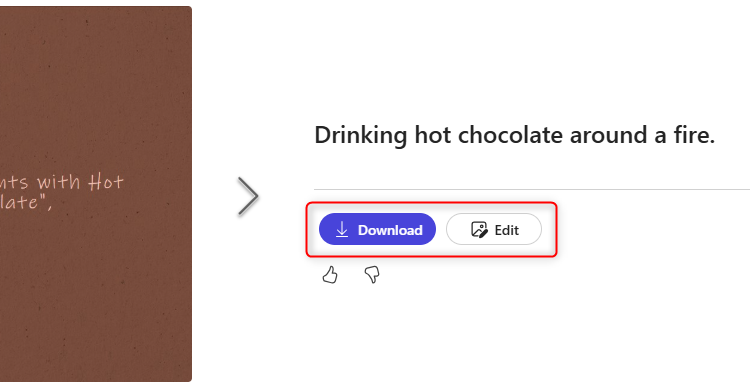
When you find a design that works for you, click it to show the Download and Edit buttons. If you’re happy with exactly what the AI tool offers, download it. On the other hand, to change the text or design, click “Edit,” and download it when you’re done.
Write a Christmas Newsletter (Microsoft Word)
Whether you run a local community group, are a manager at work, or want to create an annual family tradition, Microsoft Word has a great template for a festive newsletter.
Open Microsoft Word, click “New,” and scroll to the search bar. Then, type Christmas newsletter, and press Enter.
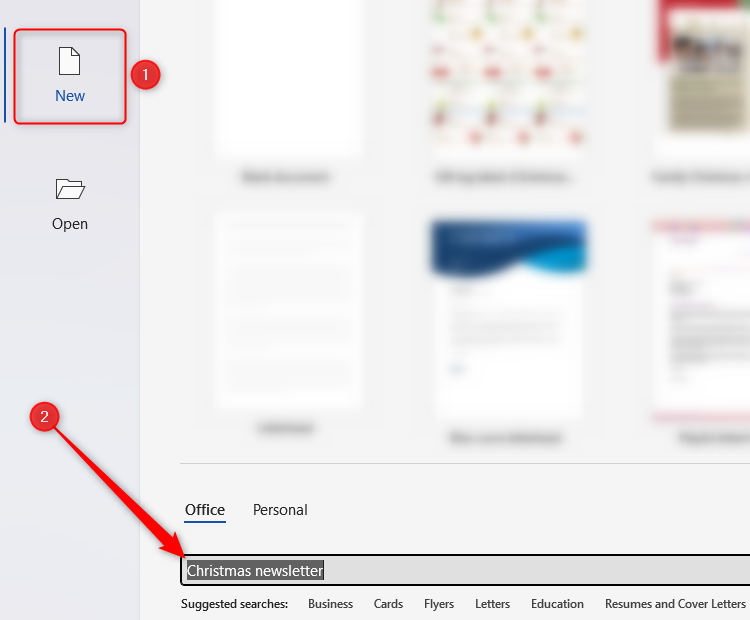
Microsoft Word only has one Christmas-themed newsletter (a family-based one), but it’s perfect for what we need and easy to edit into a newsletter for other scenarios if needed. Double-click this template to open it.
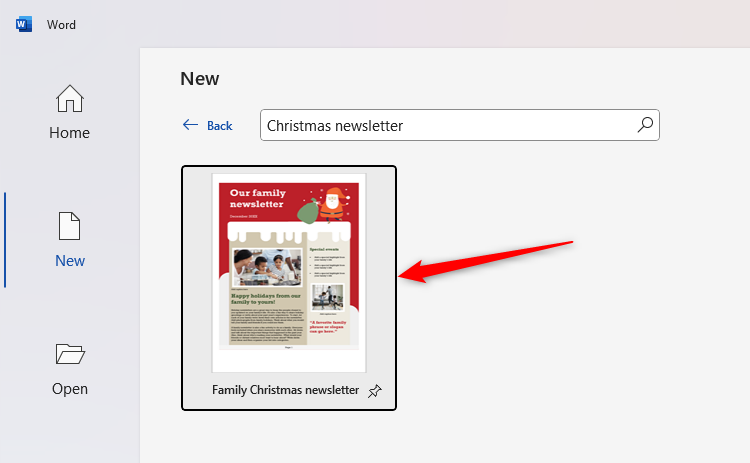
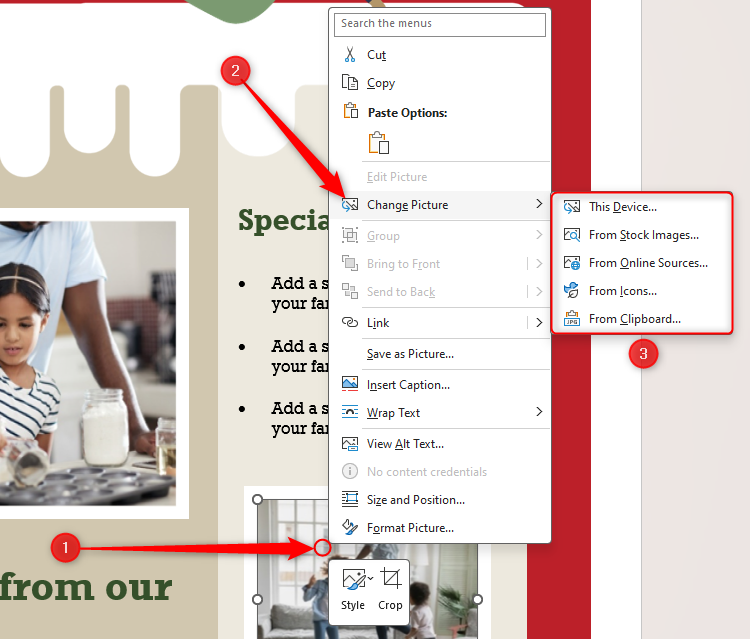
This template has four pages, which is great for choosing the layouts that work for you if you only need one or two pages. Click any of the text placeholders to type there, or right-click any of the images and hover over “Change Picture” to select an image from another destination.
Once you’ve finished your newsletter, press Ctrl+P, choose which pages you want to print, and adjust the other print settings to suit your needs. Then, click “Print.”
Manage Your Budget (Microsoft Excel)
As well as using Microsoft 365 to design things at Christmas, you can also use it to keep yourself organized. More specifically, with the inevitable emptying of one’s purse that comes with the festive season, it’s important to keep on top of your budget using an Excel spreadsheet.
Whether you create a personalized budget spreadsheet from scratch using functions such as SUM, SUMIF, MIN, MAX, COUNT, DAYS, NETWORKDAYS, and TODAY, or use one of Microsoft Excel’s budgeting templates, the program can help you balance the bucks.
Here’s an example of a budget in a spreadsheet.

I used checkboxes in column C to mark an item as purchased, and then in column D, I used an IF formula to determine how much I still need to spend based on whether the corresponding checkbox is checked. This is what I typed in cell D2, before using the fill handle to apply the formula to the other cells in column D:
=IF(C2=TRUE,"PAID",B2)
In column G, after typing my budget in cell G1, I used the SUM function to work out the total cost, how much I’ve spent so far, the total I have left to spend, and whether I’ll have any money left at the end of the holidays.
Other Ways to Use Microsoft 365 This Christmas
The ideas above are just a handful of the ways you can use Microsoft 365 this festive season. Here are some others you can try:
- Create checklists with deadlines using Microsoft Excel’s checkboxes.
- Keep on top of your shopping list using Microsoft To Do.
- Catch up with your friends and family across the globe on Microsoft Teams.
- Use Microsoft PowerPoint to create a Christmas-themed gallery on a loop for displaying when you have guests.
- Design and edit videos containing highlights of the year in Microsoft Clipchamp.

Leave A Comment?