Situatie
Solutie
The simplest way to hide files on your Mac is by using the principle of security through obscurity. Essentially, this means your files are hidden in plain sight. You just store them in a less obvious location or give them a name that makes them difficult to recognize.
For example, you might rename your folder of “Top Secret Financial Data” to something super generic like “stuff” or “untitled folder 3” so that it doesn’t stand out to anyone snooping through your files. You can then store it inside a packed Documents folder, or even put it in the hidden Library folder to make it harder to find.
Security through obscurity is the least reliable way of hiding files. But if someone in your household has occasional access to your Mac, and you have some non-essential files you don’t want them to stumble upon by accident, it might be all you need.
Hide Files and Folders With Terminal
macOS has a few built-in methods for hiding files or folders. One of them works via a command in Terminal, which is not as complicated as it might sound.
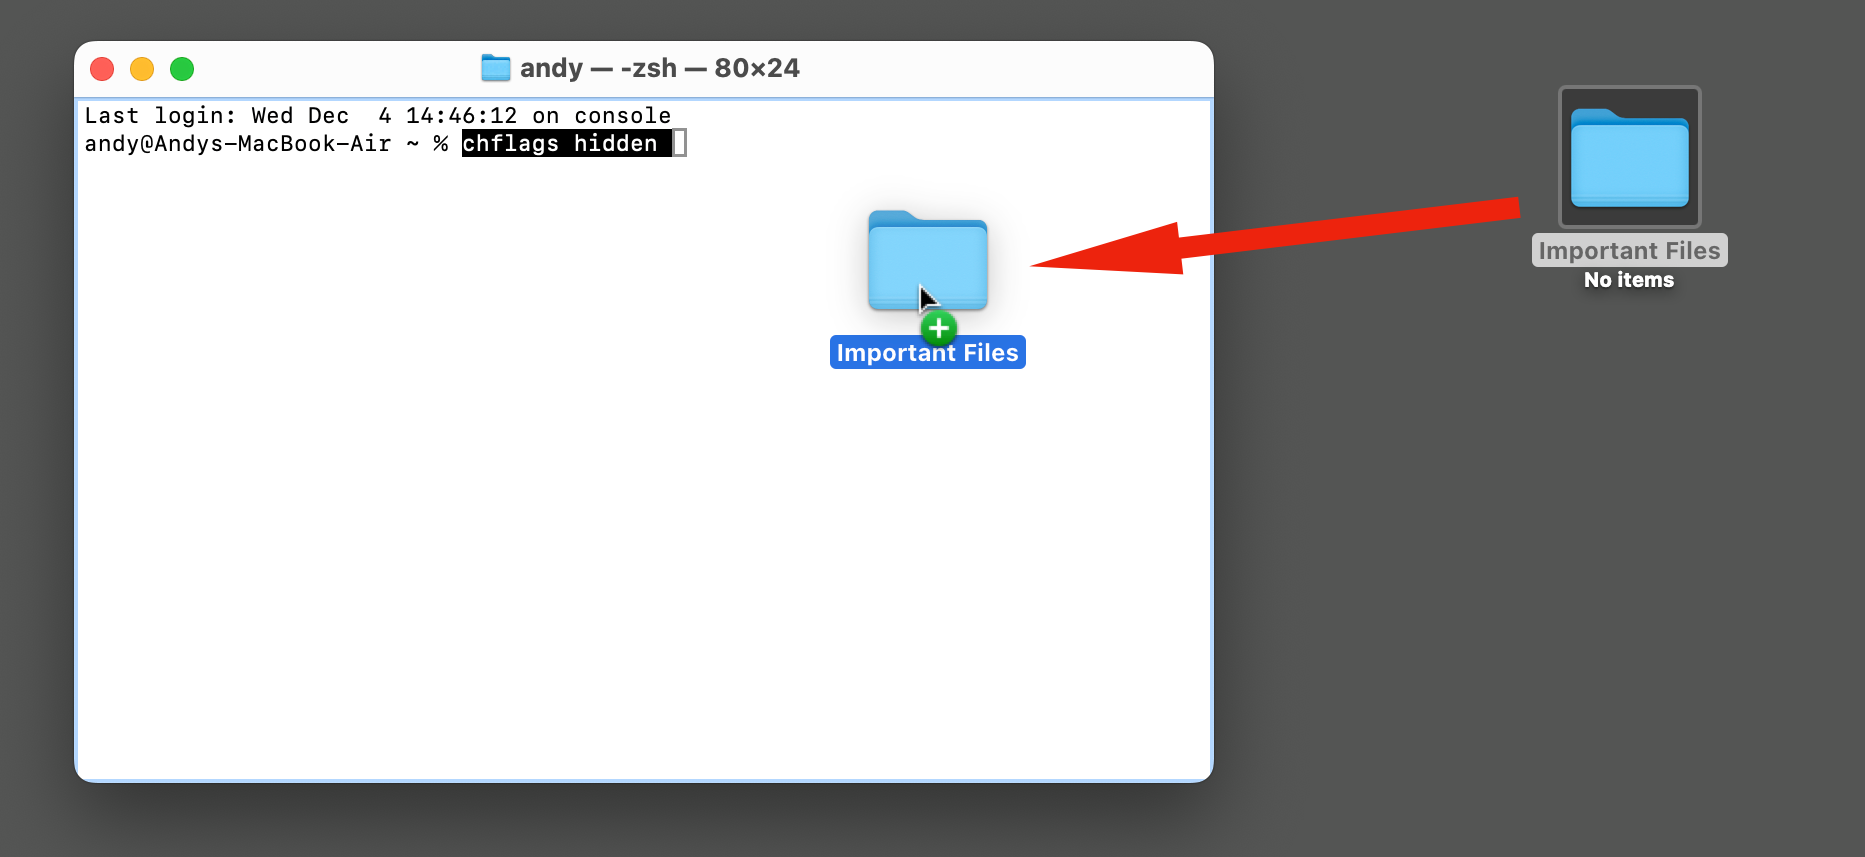
Open Terminal using Spotlight by hitting Command+Spacebar and typing “terminal.” In the window that opens, type the following:
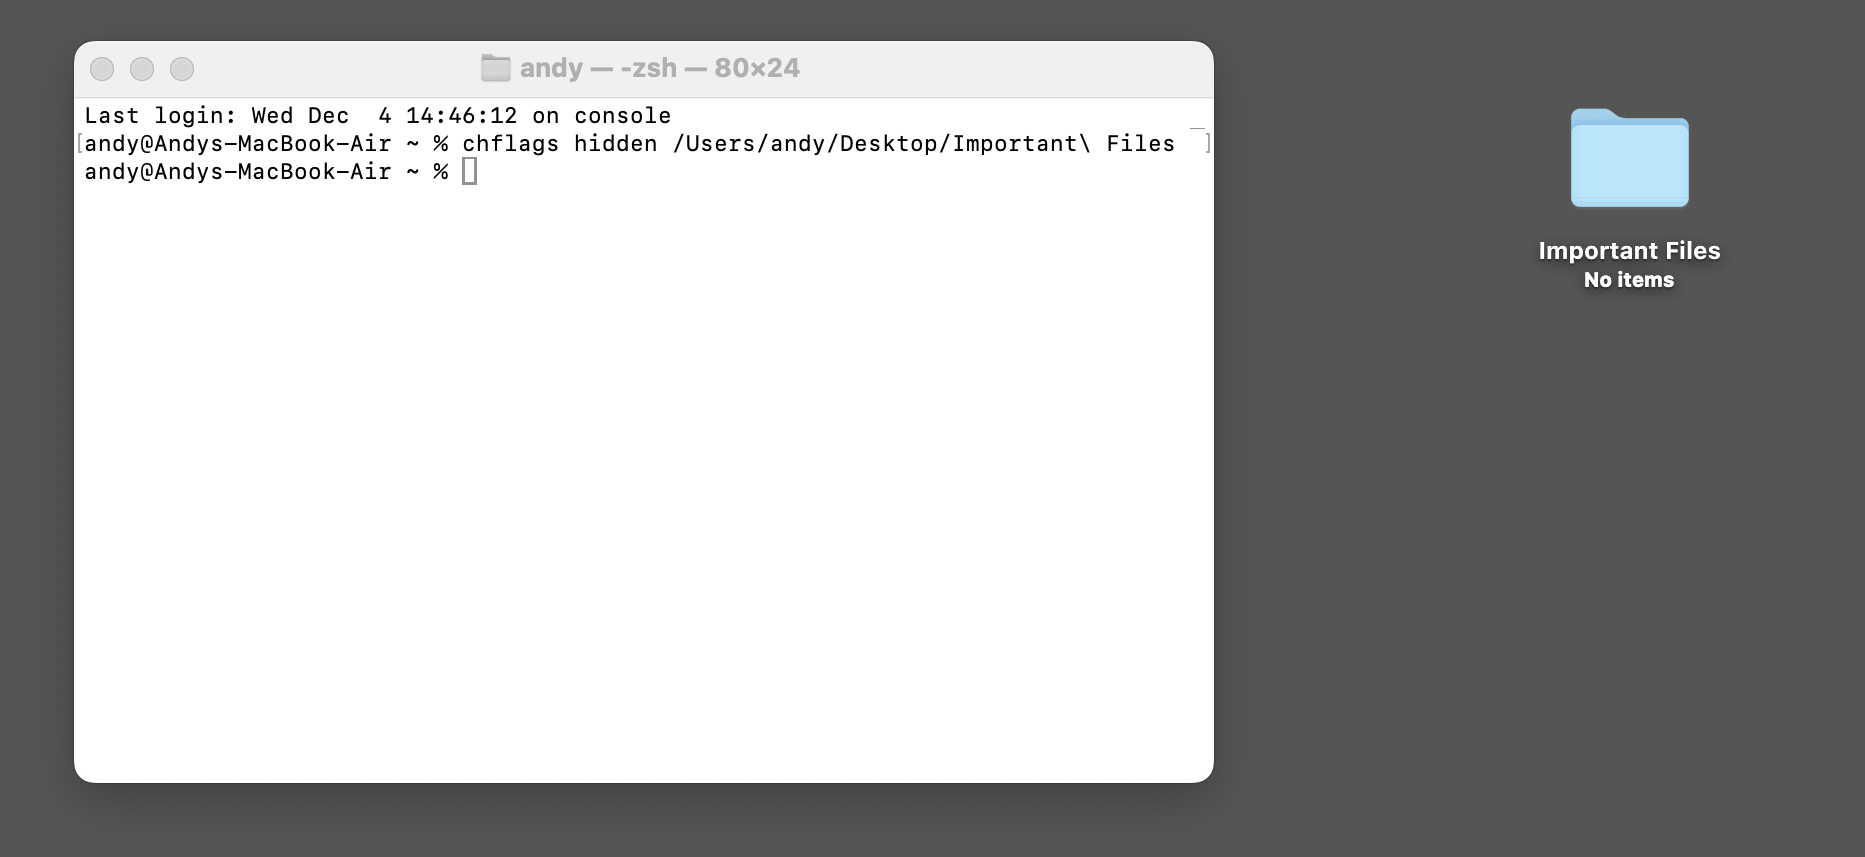
chflags hidden
Make sure to leave a space at the end of the command. Now drag the file or folder you want to hide into the terminal window. This will add the path to that file to the end of the command. Finally, hit Enter.
The file will now disappear.
To view the file or folder while keeping it hidden, press Shift+Command+. (dot). This is the key combination to show all hidden files on a Mac and will make your newly-hidden files visible—they will appear with a grayed-out icon. Repeat that key combination to hide them again once you’re done.
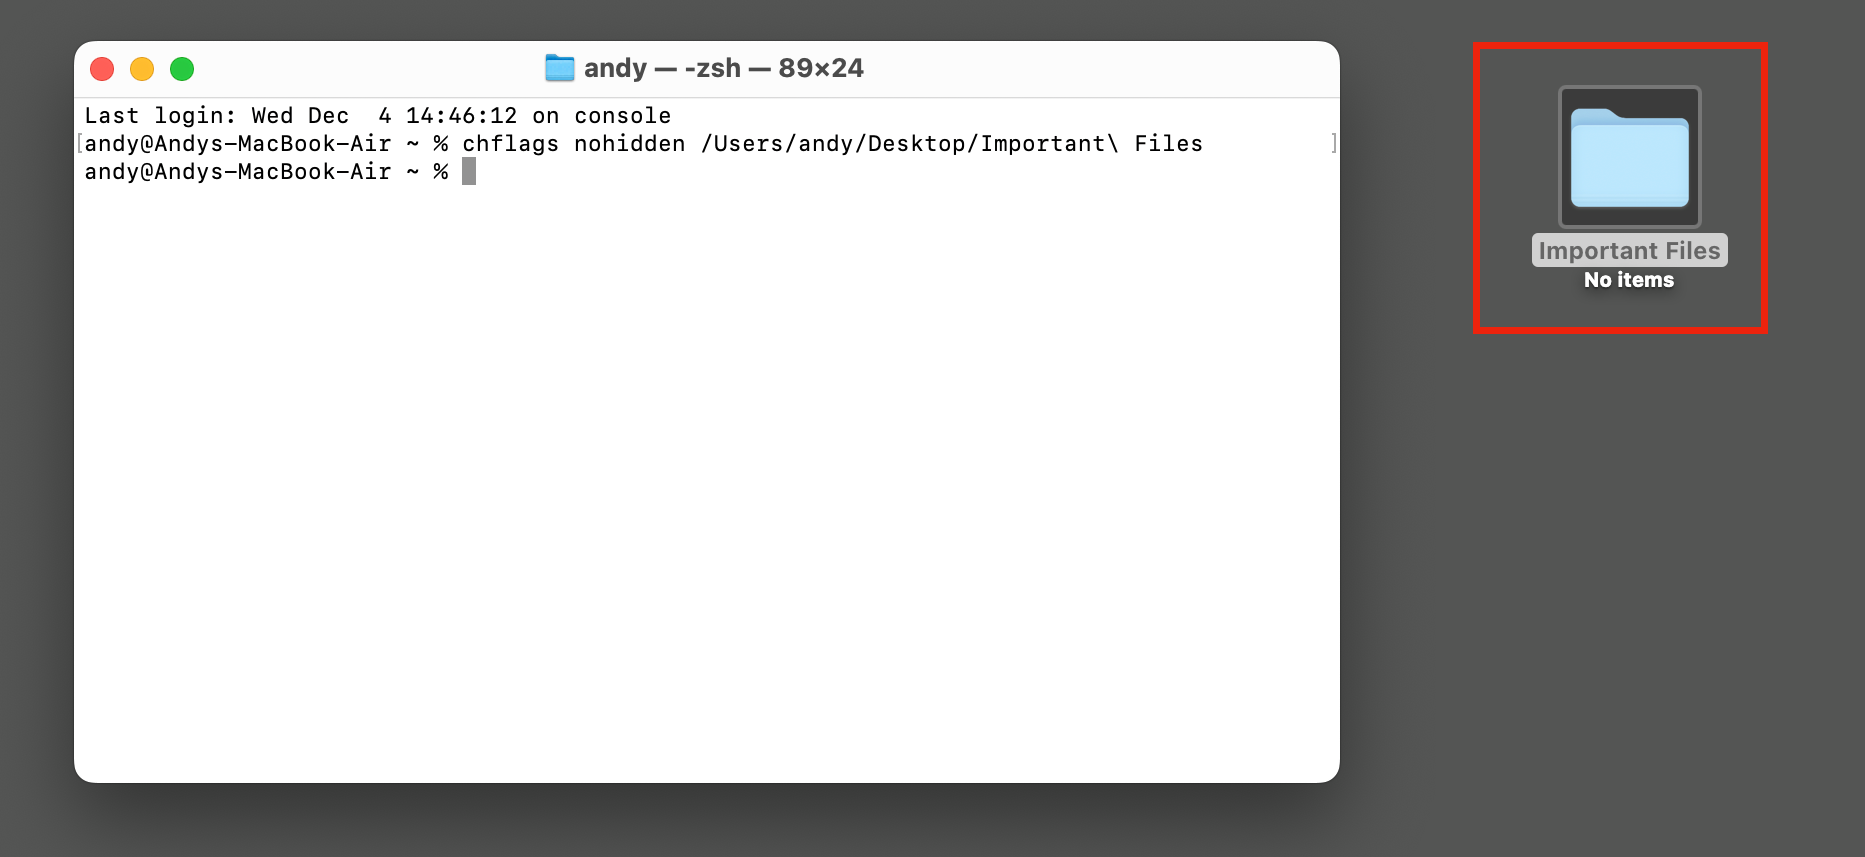
To unhide the file permanently, repeat the process with the Terminal command “chflags nohidden” followed by the path to the file. Hit Enter, and the file will be visible again.
Files that are marked as hidden in macOS don’t show up in a Spotlight search. Make sure you store the files in a memorable location if you want to be able to find them again!
Don’t want to use Terminal? macOS automatically hides any files or folders whose names start with a dot. These so-called dot-files are normally system files that the user doesn’t need to be able to see, but it’s also a neat trick for hiding other things.
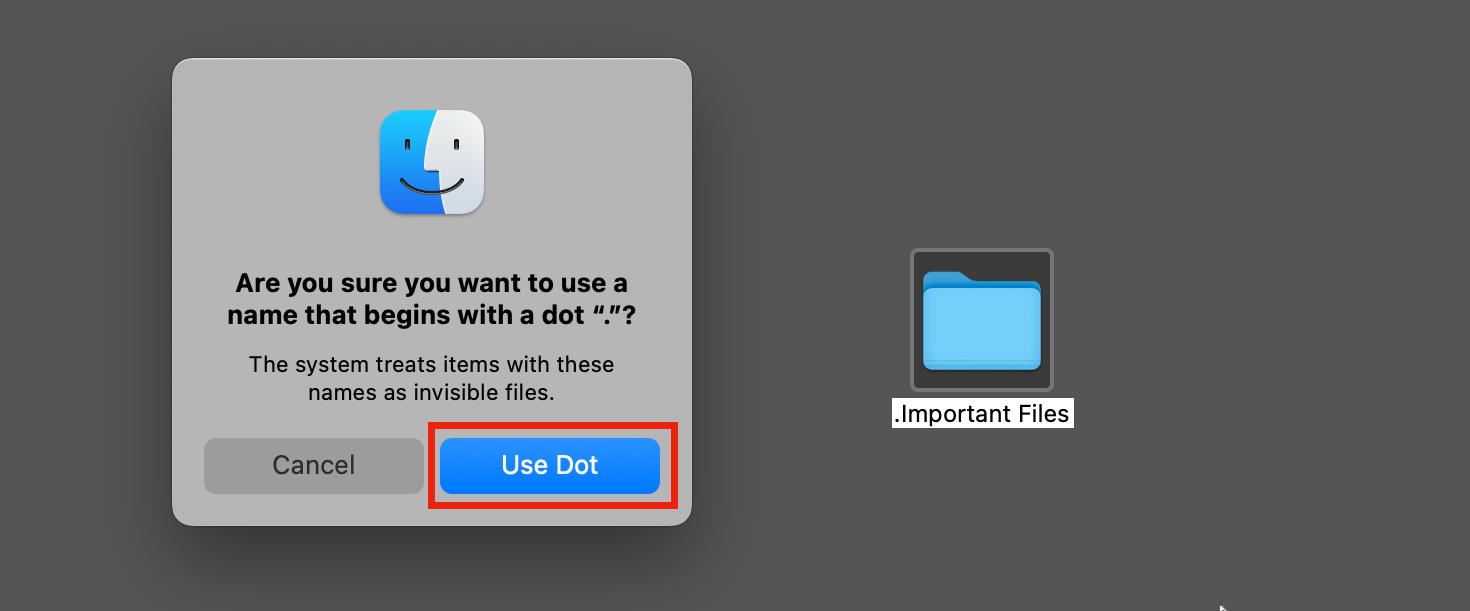
You can’t simply add a dot to the start of a filename. Do that, and you’ll see an error message.Instead, use the key combination Shift+Command+. (dot) to show hidden files. Then, select the file or folder you want to hide, hit Enter, and add a dot to the start of its name.
This time, you’ll see an “Are You Sure?” message. Click “Use Dot” to confirm and hit Shift+Command+. (dot) to hide the files again.
You don’t need to do this with every file you want to hide—just create a hidden folder instead. Everything you put inside it will become hidden.
Press Shift+Command+. (dot) to make your hidden files visible whenever you want to access them. To un-hide them permanently, do this and then remove the dot from the filename.
Sometimes, files might not disappear immediately or might appear grayed out even after un-hiding them. To fix this, restart the Finder. Click the Apple icon in the top left corner of the screen, and go to Force Quit > Finder > Relaunch.
Create a Secure Disk Image
The methods we’ve seen so far hide your files, but provide no protection if someone finds them. The best way to protect your files is to place them inside a secure disk image. This is shareable with other people, but they will always need the password that you add to open it.
A disk image uses the DMG format. You’re most likely to have encountered one if you’ve ever downloaded a Mac app to your desktop. DMG files are typically compressed, and in our case will be password-protected. When you open it, it opens as a new volume, as if it is a whole separate disk. When you’re done, you need to eject it to close it down.
To set up a disk image, press Command+Spacebar to open Spotlight, then type “Disk Utility.” Go to File > New Image, and you’ve got two options.:
- “Blank Image” lets you create an empty disk image of a specified size, into which you can add and remove files.
- “Image From Folder” turns an existing folder into a disk image. This will be read-only, so you won’t be able to edit the files inside.
The steps for both are largely the same. When you choose Blank Image, you need to set a size. This will be the size of the file, even if it’s empty, so don’t give it too much space.

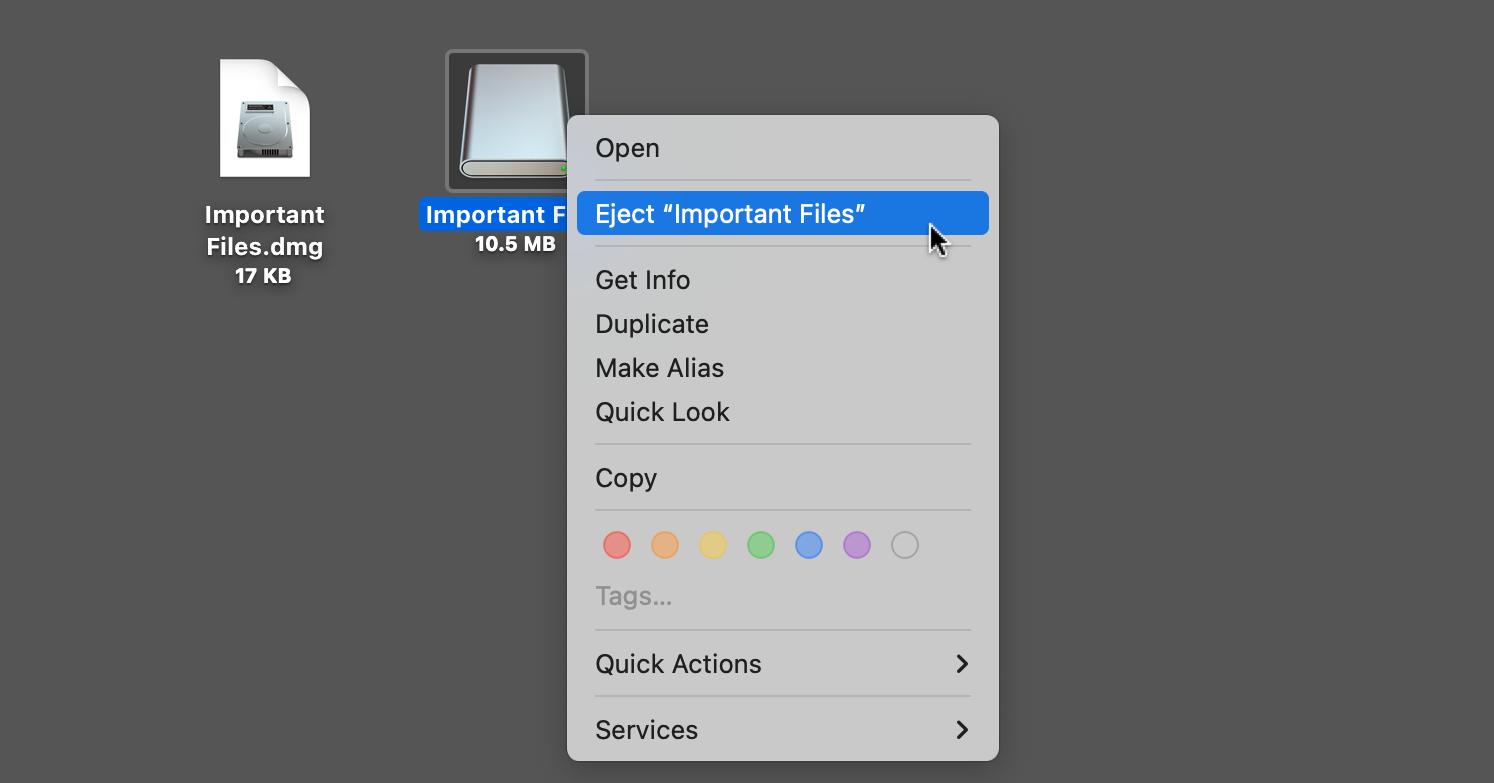
For encryption, choose “256-bit” and then add a password and click “Save.” When it’s done, you’ll see the DMG file on your desktop (or wherever else you saved it). Double-click it to open, then enter your password when prompted. Right-click on the disk image and select “Eject” when you’re finished.

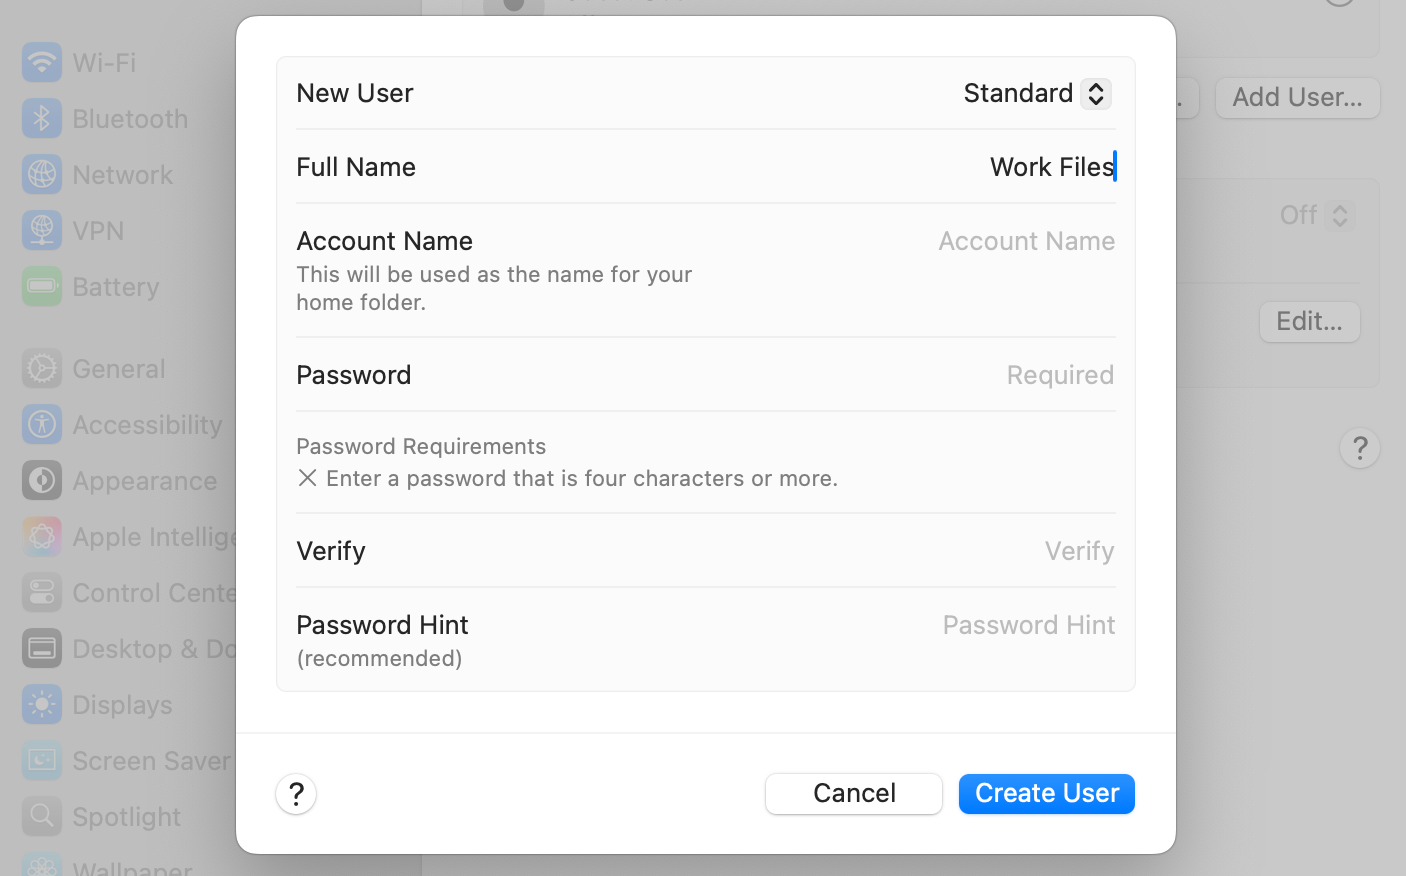
User accounts can be a handy way of securing files and folders. It’s a given that anyone who uses your Mac should have their own account so that files are kept private. But even if you’re the only user, there’s still some value in extra accounts.
An obvious example is when you use your Mac for work and personal use. Having a separate account just for work will help to keep your important files separate, and securely protected behind a password.
To create a separate account, go to System Settings > Users & Groups > Add User, and then fill in the details.
The main account on your Mac, an Administrator account, will be able to reset the password to access this new account, so it isn’t foolproof security.
If you need to secure files not against prying eyes, but against accidental editing or deletion, you can lock them instead. For a simple method, select the file by clicking on it, then hit Command+I to open the Get Info window. Click the “Locked” checkbox to lock it.
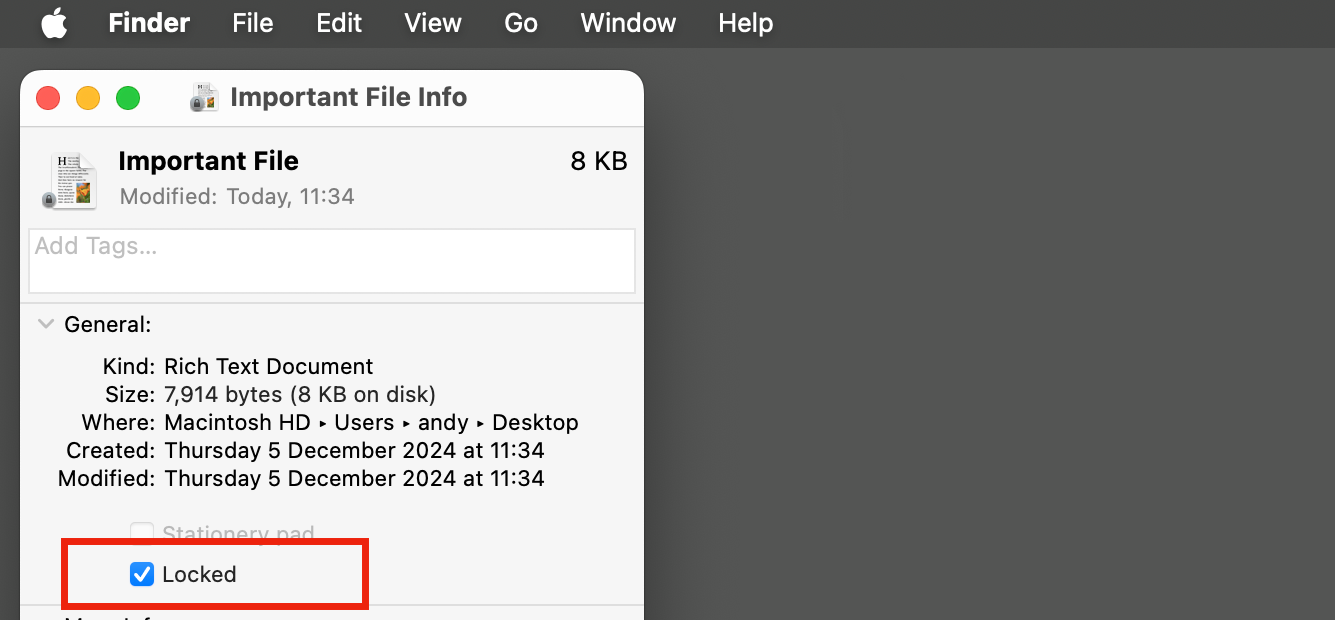
You can copy files out of a locked folder, but not edit, remove, or add them. You’ll see an error message if you try to edit locked files. You need to unlock the file to delete it.
Change Folder Permissions
Finally, if your Mac is on a network, or you share content with other people who have their own user accounts, you can set permissions to control who can access files and folders.
Select the file and hit Command+I to open the Get Info box. Scroll down to the “Sharing & Permissions” section. You can add users here (click “+” plus), and set their privileges to “Read only,” which means they can view the file, or “Read & Write,” which allows them to edit it, too.
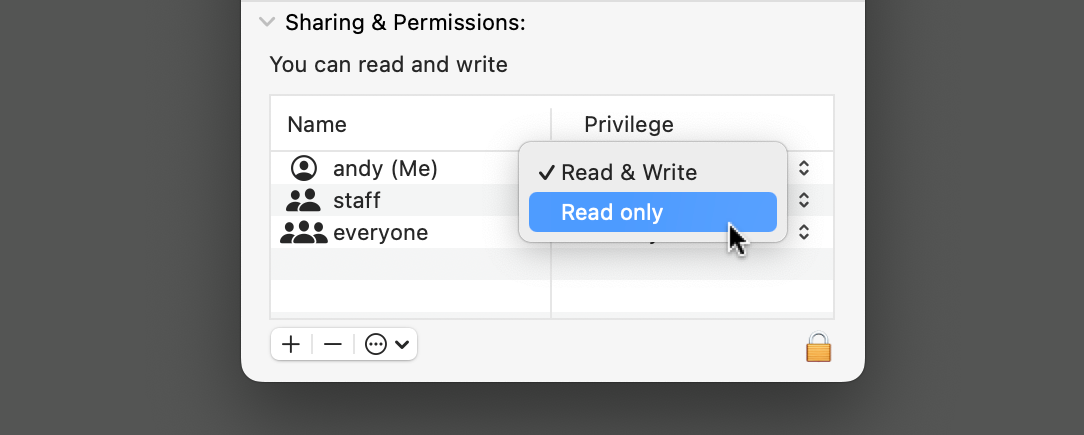
You can also set your own permission for a file to “Read only,” and then you’ll be prompted to unlock it before you can edit or delete it. And if you’re changing permissions on a folder, you also have the option to create a drop box (“Write only”). This enables you to add files to a folder, but not actually open it to see what’s inside.
macOS has a lot of ways to lock down files and folders. Whether you just need to hide a folder so that nobody chances upon it, lock a file to prevent accidental editing, or encrypt and password-protect important data, you can do it all without needing any third-party apps.
Leave A Comment?