Situatie
When you need to change your mail settings of display.
Backup
Use the display settings to control the appearance of the message list, reading pane, and conversation view.
- In a web browser, sign in to Outlook Web App using the URL provided by the person who manages email for your organization. Enter your user name and password, and then select Sign in.
- In the navigation bar at the top, select Mail, and then select Settings
 > Display settings.
 - Select the feature you want to choose display settings for and select the settings you prefer. Select
 OK to save your changes or
  Cancel to return to mail without making any changes.
Display settings are:
- Message list Normally Outlook Web App shows three lines of information for each message in your inbox: sender, subject, and part of the first line of text. Use this option to show the sender or subject on top, and show or hide the preview line.
- Conversations Show newest or oldest messages on top, and show or hide deleted items.
- Reading pane Choose options for the following:
- Reading pane position (right, bottom, or hidden completely)
- What to select when Outlook Web App opens (the first message, or you select the message)
Select the check box Apply to all folders if you want your choices for the Reading pane to apply to every folder.
-
Outlook Web App version You can switch between the standard and the light version of Outlook Web App. If you have a low-bandwidth connection, the light version may be a better choice than the standard version of Outlook Web App. Also, the light version of Outlook Web App works better with assistive technologies such as screen readers. The light version also works with browsers that don’t support the standard version of Outlook Web App.
Solutie
1) When composing a new message in Outlook on the web you will see that your Rutgers Domain Email Address is listed in the From section of the email message.
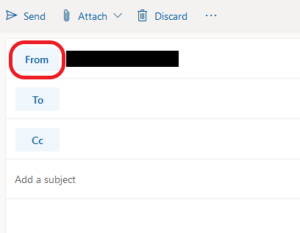
2) When you click on From other email addresses will be listed that you can send from. You can also click on Other email addresses… to see other options you may have access to send from.
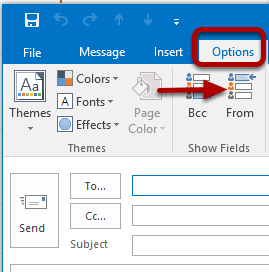
1) By default, the From field will not be displayed when you compose a message. To display the From field click on the Options tab and select From in the Show Fields section. Now the From field will be displayed when composing a message in the future.
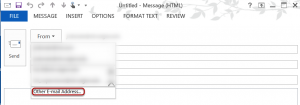
2) When composing a message click on the From in the drop-down box and select Other E-Mail Address.

3) Click on From.
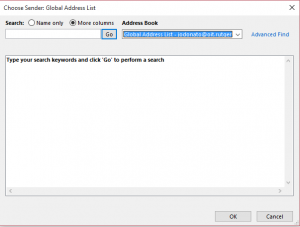
4) Choose More columns and make sure Global Address List is selected. Search for the address you want to send from and click OK.

5) Once you have entered the Alternate Email Address you would like to use and click OK.
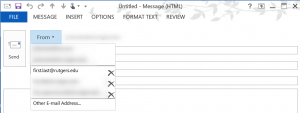
6) The next time you compose a message the Alternate Email Address will be available from the From Drop Down Box.
1) By default, the From field will not be displayed when you compose a message. The From field will only be displayed after you set up a delegate for your account.
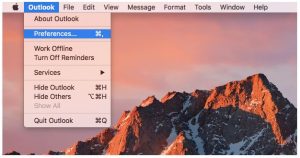
2) Navigate to the Outlook option on the upper left-hand side of the screen and select Preferences.
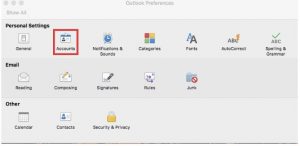
3) Select the Accounts option.
4) Select the Advanced button.
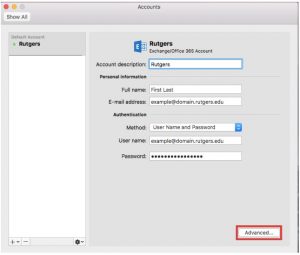
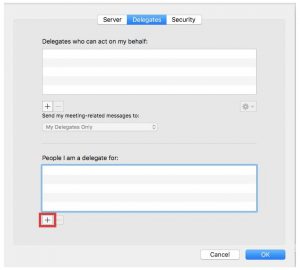
5) A new window will pop up that has three sections. Navigate to the center option labeled Delegates. On the bottom half of the pop-up, there will be a section titled People I am a delegate for. Select the “+” sign to add a new address that your account can send from.
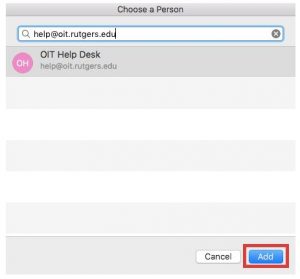
6) A new box will pop up. Search the directory to find the address you wish to send from. (If the address is hidden from the directory, you will be unable to set up your Outlook for Mac to be able to send from the address.) Hit the Add button.
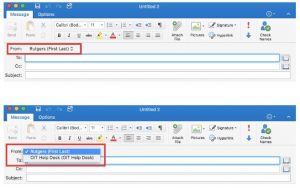
7) The next time you compose a message the Alternate Email Address will be available in a drop-down menu located in the From field.

Leave A Comment?