Situatie
Solutie
Meet Quickemu
Quickemu is a command-line program that uses scripts to automate the process of downloading, setting up, and optimizing a virtual machine on your Linux or Mac device. If you haven’t guessed by its name, it uses the QEMU emulator and virtualizer on the backend, and that’s what will be running when Quickemu launches your VM.
All Quickemu is doing is automating the installation and initialization. It configures everything for you; there’s no need to worry about managing virtualized components. You just choose the operating system you want, and after the scripts do their job, you can start working in it.
You’re also not limited to Windows desktops. Quickemu automates the setup of hundreds of operating systems, including Windows Server, macOS, Ubuntu, Fedora, and FreeBSD.
Installing Quickemu
First, you’ll need to install Quickemu. At the time of writing, its availability in common repositories is limited, but you can check the official installation instructions for updates.
On Linux
Quickemu is easiest to install when you’re on Ubuntu or Debian. On any Debian derivative, you can download the latest DEB package from the Quickemu release page, then use this command to install it:
sudo apt-get install ./quickemu_*.*.*-1_all.deb
On Ubuntu and its derivatives, you can instead add the Quickemu PPA to your repositories:
sudo apt-add-repository ppa:flexiondotorg/quickemu
sudo apt update && sudo apt install quickemu
Quickemu is also available in the AUR, so Arch users can install it using yay:
yay -Sy quickemu
If you’re using a different Linux distro or don’t want to use the AUR, see Quickemu’s guide to installing from source.
On a Mac
In macOS, you can install Quickemu and its dependencies using Homebrew:
brew install bash cdrtools coreutils jq python3 qemu usbutils samba socat swtpm zsync
Then you’ll want to clone the repository:
git clone https://github.com/quickemu-project/quickemu
And finally enter the repo to begin operations:
cd quickemu
You’re now ready to start using Quickemu commands.
Command 1: Download an OS Image
To get Windows, you first need to download Windows 10 or Windows 11 ISO image. You could go get that image yourself, but Quickemu automates this for you with a single “quickget” command. You just need to name the version you want.
For example, I’ll get the latest Windows 10 ISO with this command:
quickget windows 10
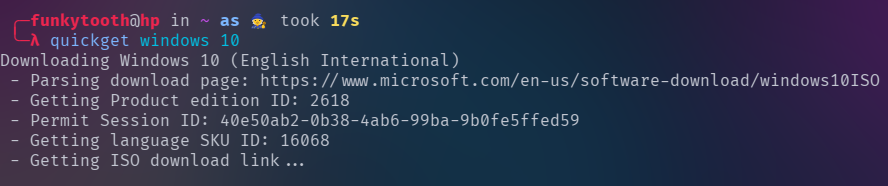
If everything went according to plan, you’ll see a message saying the download was successful, and you’ll be returned to the command line.
Command 2: Run your Virtual Machine
Now it’s time to launch your VM. All you need to know is the name of the configuration file (with a .conf extension) that Quickemu created, which it tells you after the installation. In my case, it was “windows-10.conf”
quickemu --vm windows-10.conf
You might get a few odd-looking screens at first, but just wait while the application does its work. Soon you should see a Windows initialization screen.
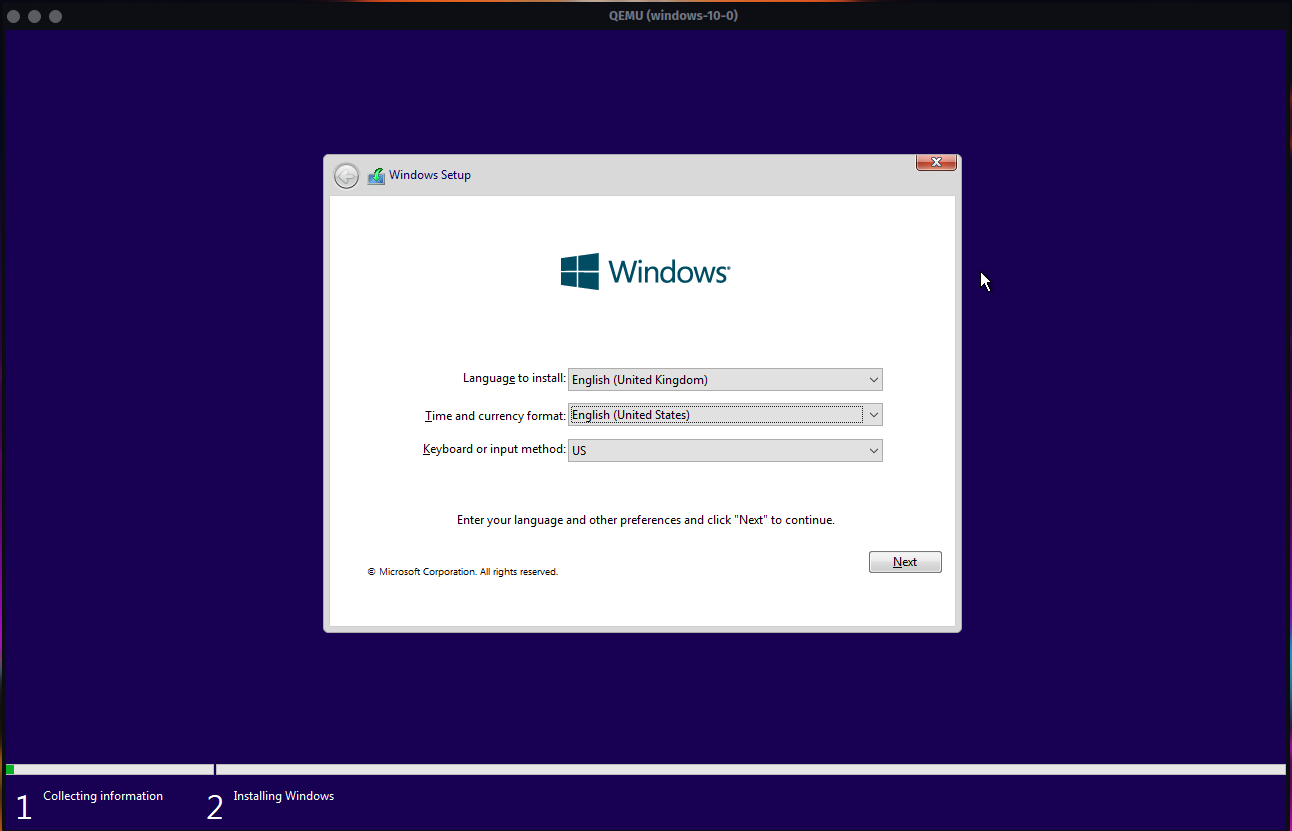
Follow the prompts to agree to terms, and Quickemu will take care of the rest of the installation. Soon you’ll arrive on your Windows desktop.
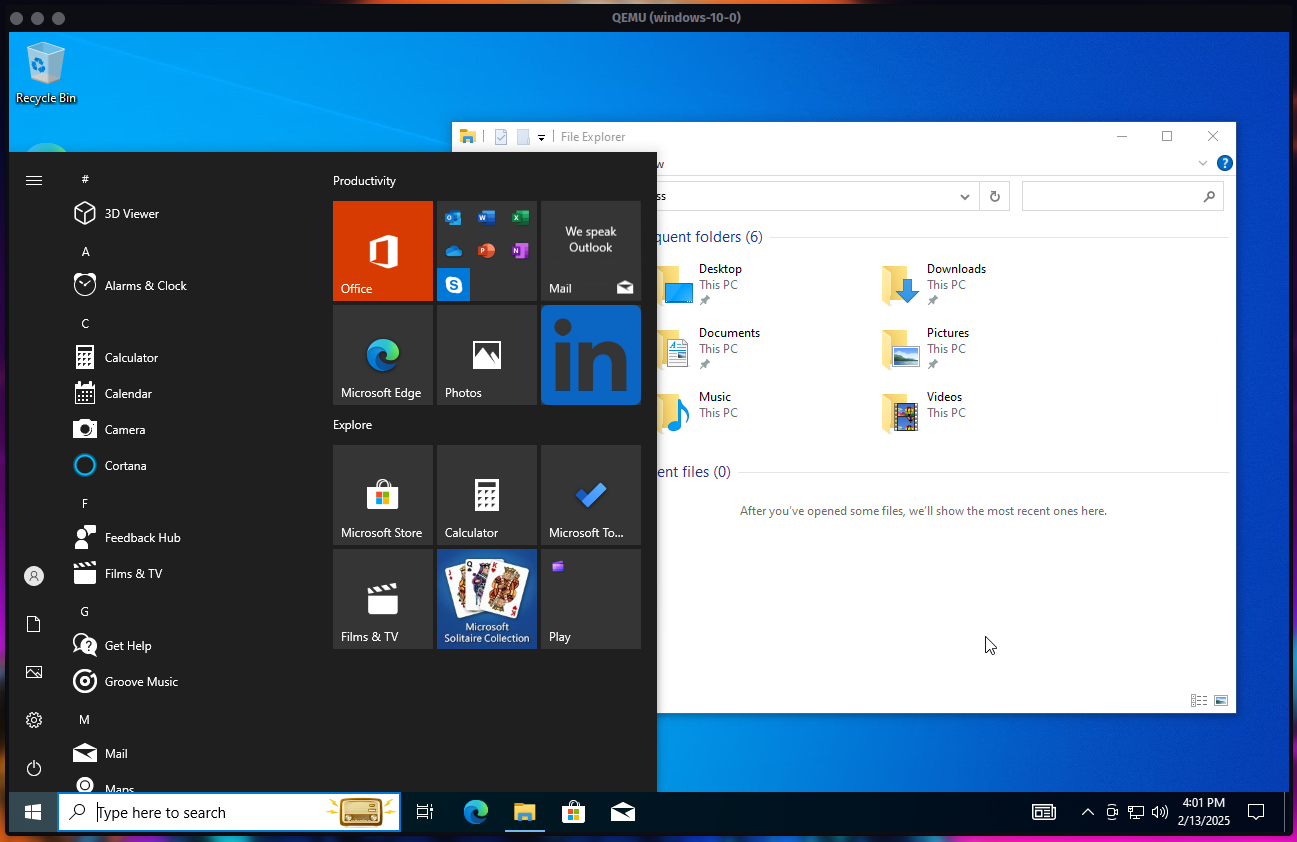
Play around with it, and when you’re done, shut it down like you normally shut down Windows. In the future just reuse that command to launch it. You could even create an alias to make launching your VM even faster:
alias windows='quickemu --vm windows-10.conf'
Then you’d just need to type windows into your terminal and you’ll be cruising Microsoft-style in no time.
Start Exploring VMs
Quickemu can do a lot more, including downloading specific editions. For example, Quickemu by default downloads the “English International” edition of Windows 10, but you can get the US edition with this command:
quickget windows 10 "English (United States)"
You can also get your preferred version of macOS (though you should refer to Quickemu’s full guide to macOS VMs because they can be a bit tricky):
quickget macos catalina
quickget ubuntu 22.04
Leave A Comment?