Situatie
Solutie
You can also export an Office document to a PDF file and password protect that PDF file. The PDF document will be encrypted with the password you provide. This works in Microsoft Word but not Excel, for some reason.
To do this, open the document in Microsoft Word, click the “File” menu button, and select “Export.” Click the “Create PDF/XPS” button to export the document as a PDF file.
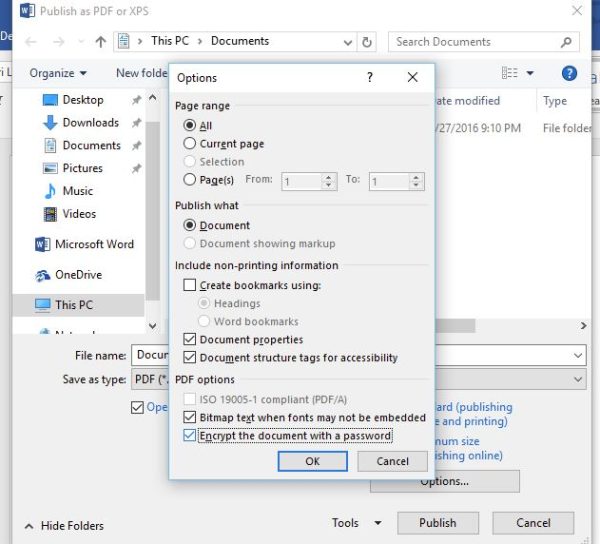
Click the “Options” button at the bottom of the save dialog window that appears. At the bottom of the options window, enable the “Encrypt the document with a password” option and click “OK.”
Enter the password you want to encrypt the PDF file with and then click “OK.”
When you’re done, enter a name for the PDF file and click the “Publish” button. Office will export the document to a password-protected PDF file.
Warning: You won’t be able to view the PDF file if you forget the password. Be sure to keep track of it or you’ll lose access to your PDF file.
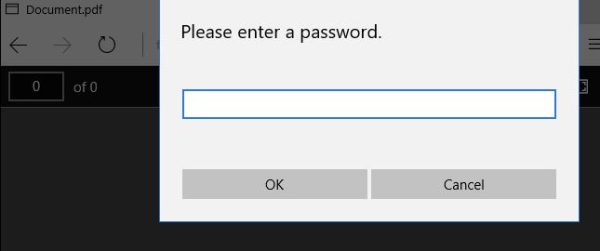
You’ll have to enter the PDF file’s password when you open it. For example, if you open the PDF file in Microsoft Edge–Windows 10’s default PDF viewer–you’ll be asked to enter the password before you can view it. This also works in other PDF readers.
This feature can help protect particularly sensitive documents, especially when you store them on a USB drive or in an online storage service like Microsoft OneDrive.


