Situatie
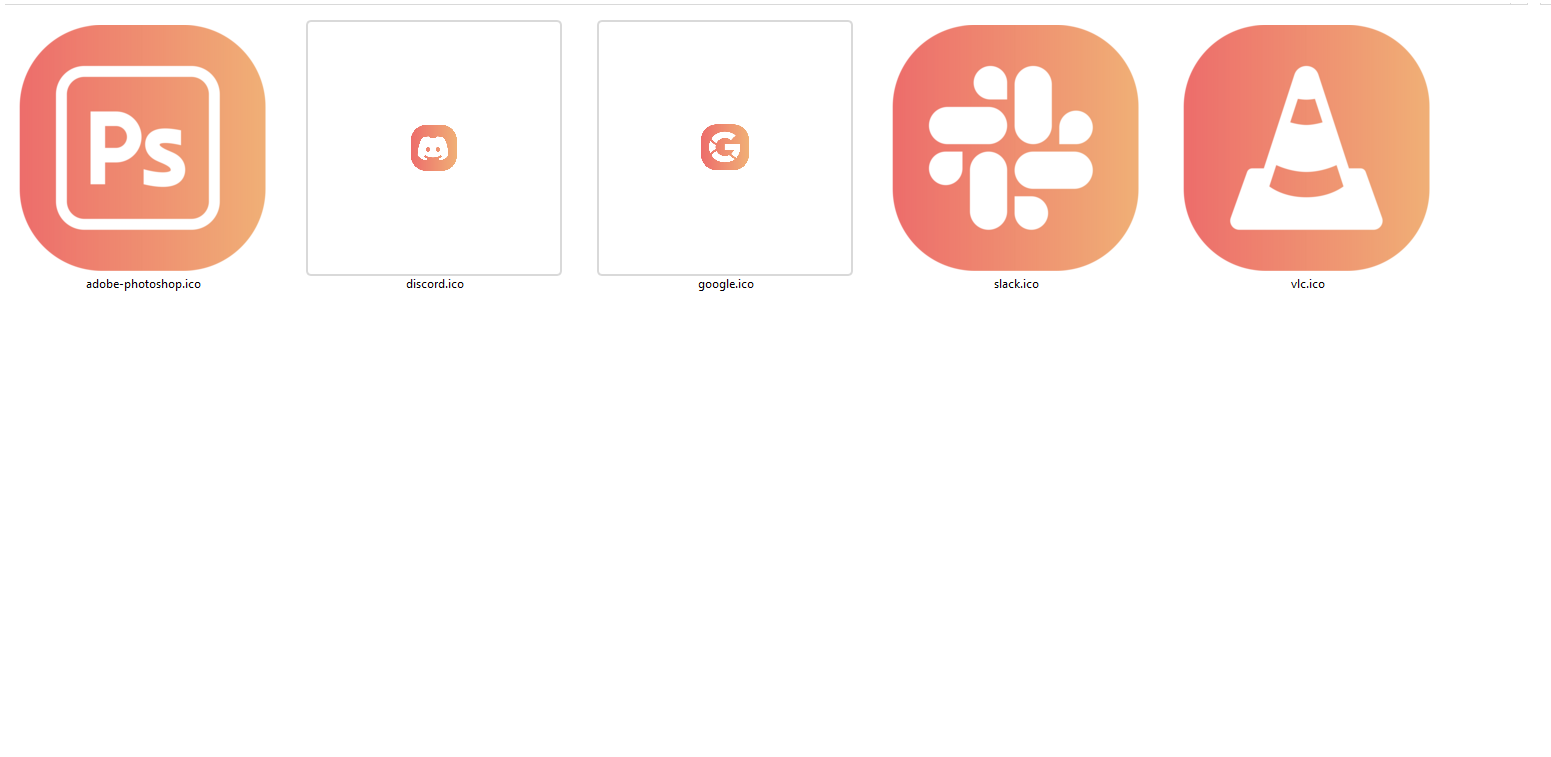
Technically, the only thing you need to swap the default app icons on the taskbar are the icon files. Some apps come preinstalled with extra icons that you can use. Most don’t, so you’ll have to find custom icon files online, put them all in a folder, and then individually change the app icons.
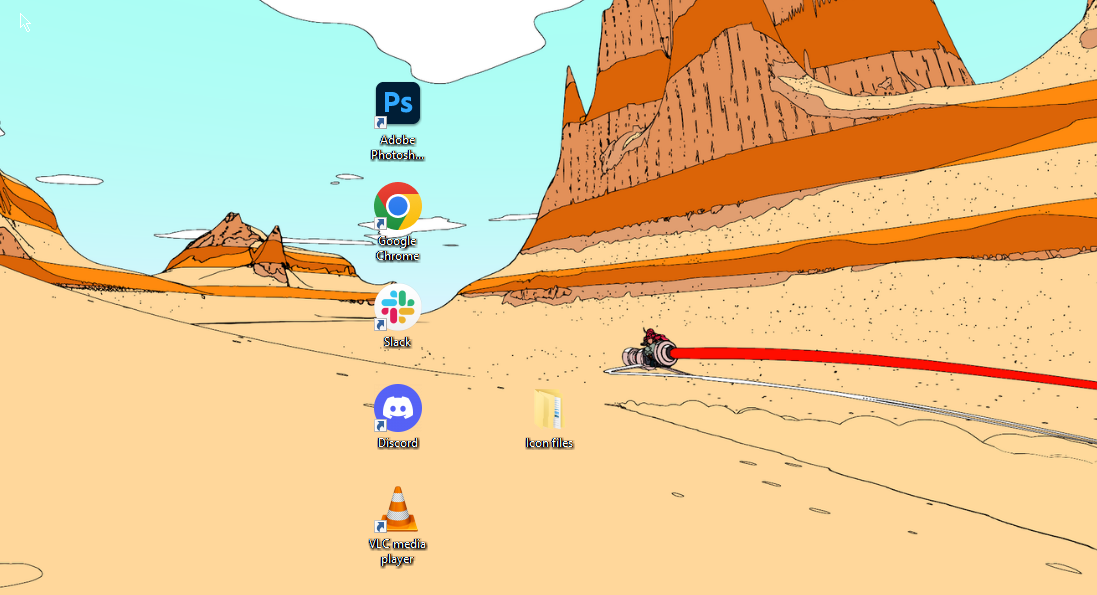
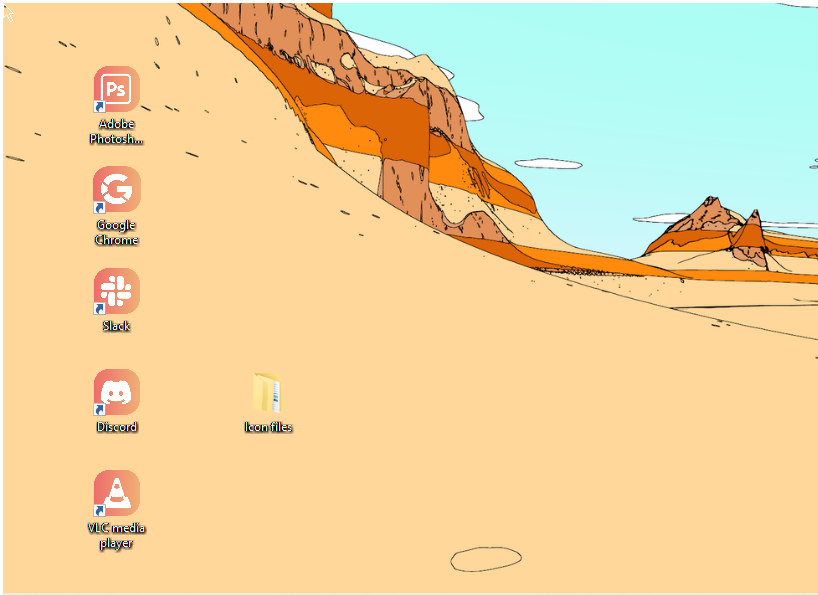
You’ll need to find the shortcuts for every app that’s going to be pinned on the taskbar, and place them all on the desktop. Depending on your chosen theme, you can create a theme pack for the taskbar that matches the overall design. This is what my selection looks like.
To break it down simply, you need two things:
- A folder with all the icon files for your taskbar apps. The file has to be in ICO, EXE, DLL, or ICL format.
- Move all the taskbar app shortcuts to the desktop.
Where to Get the Icons
You can download the icon files from any number of online libraries, some paid, others free. Icons8 and IconsScout are two free libraries. But there are dozens more available online.
Whichever source you pick, be sure to download the icons in one of the recommended file formats. The most popular format is ICO, and that’s the format in which I’ve downloaded the icons. Once you have downloaded all your icon files, place them in one folder for easy access.
Secondly, you want to get the app shortcuts in one place. I’ve collected them on the desktop for ease of use. If the shortcut isn’t already on the desktop, just create a new one.
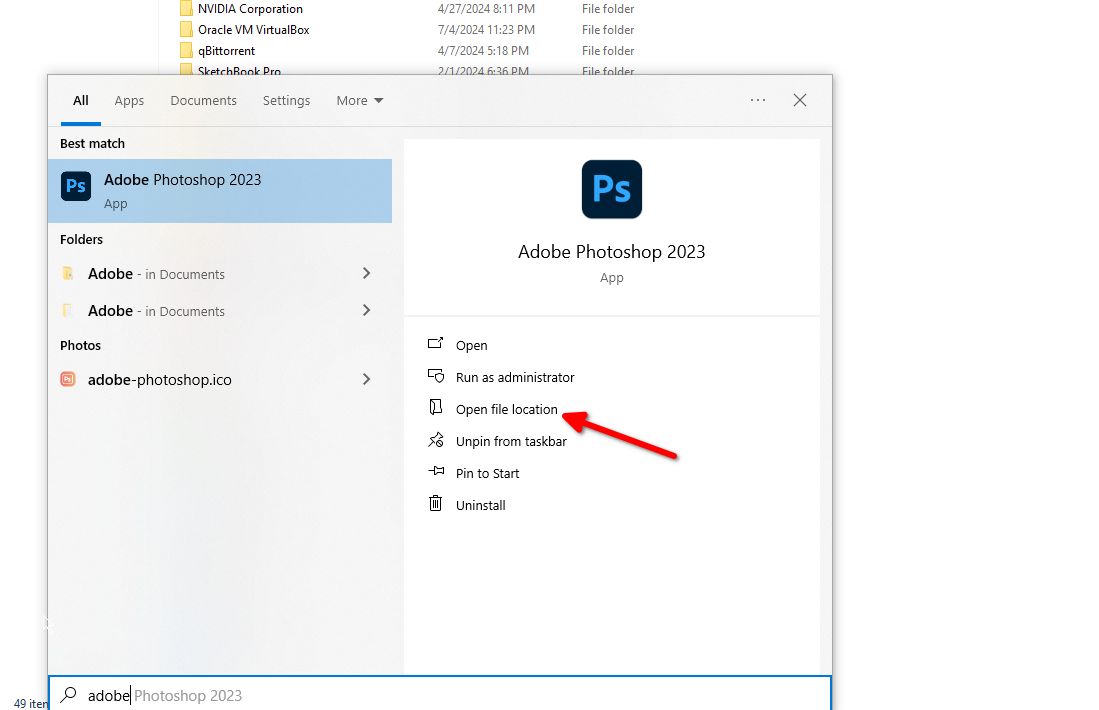
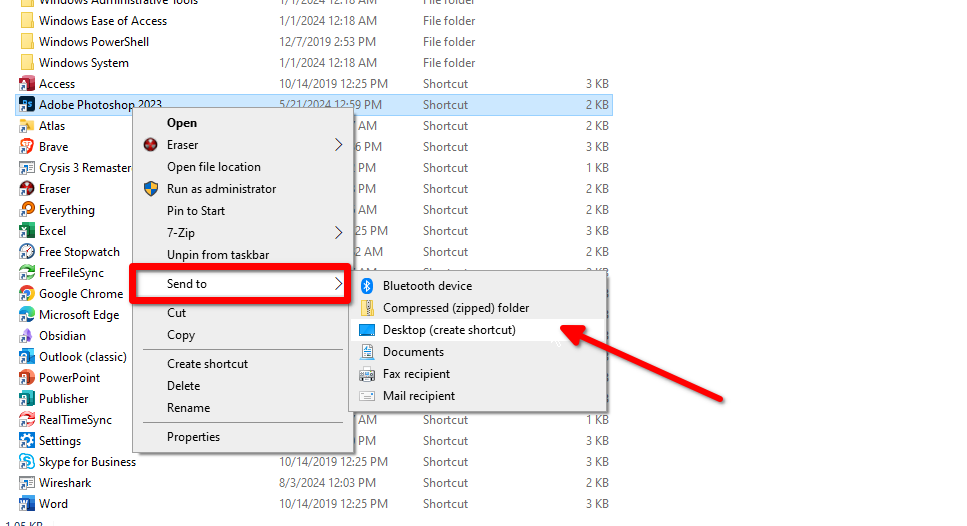
Search the app name (press the Windows key on the keyboard or click the button in the corner). Click “Open File Location” and find the EXE file in the directory. Right-click on the EXE file and select “Send To” and pick “Desktop.” It should pop up on the desktop right away.
After that, your shortcuts and icon files are good to go.
Changing Taskbar Icons
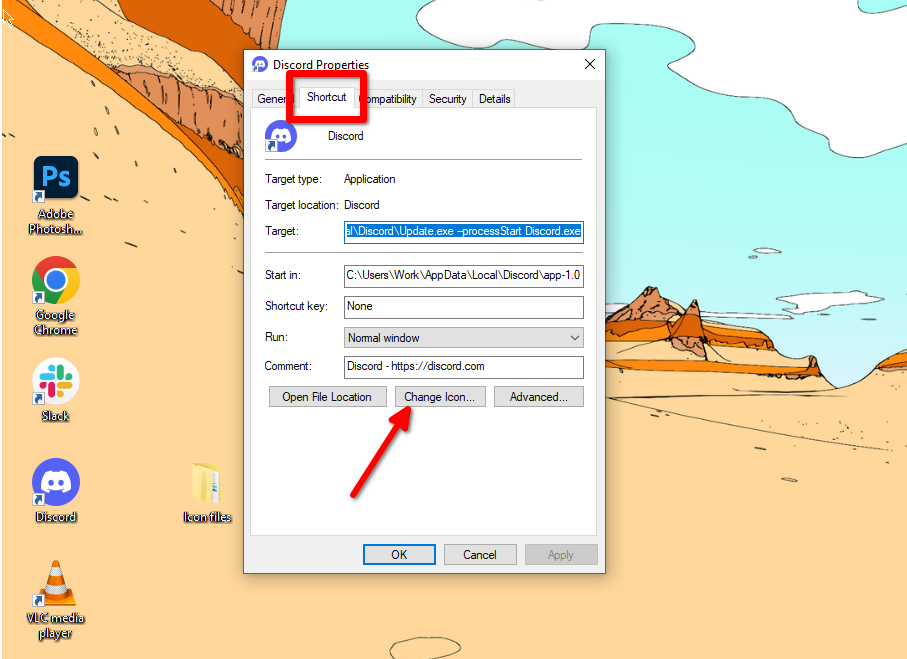
Now you’re ready to replace the icons on your taskbar. Right-click on a desktop shortcut and click “Properties.” Head to the “Shortcut” tab and click “Change Icon.”
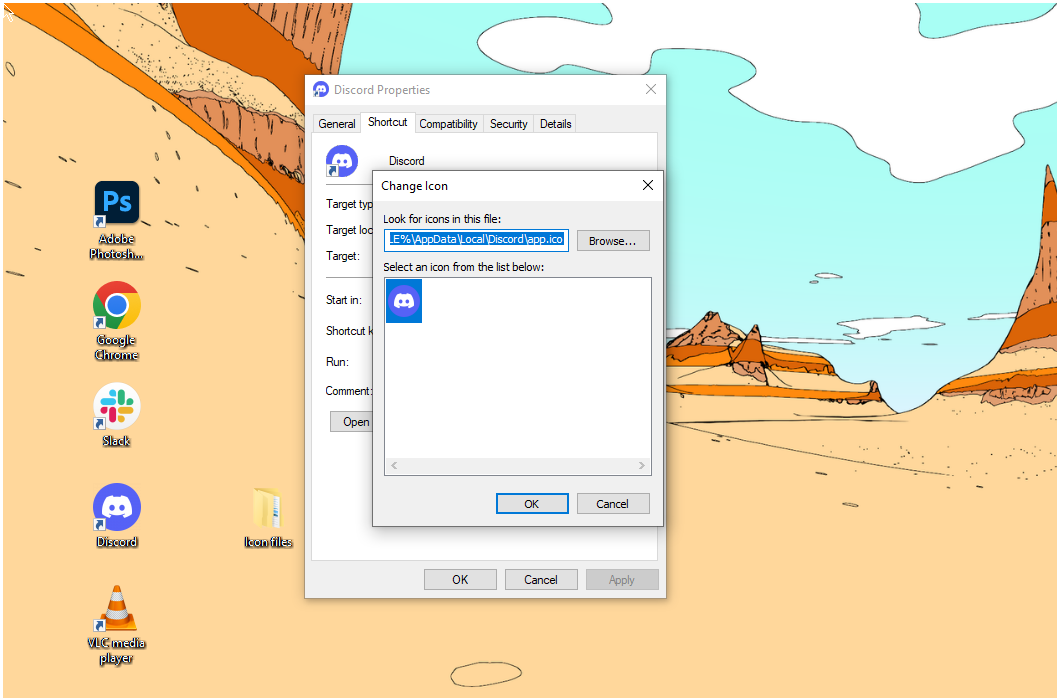
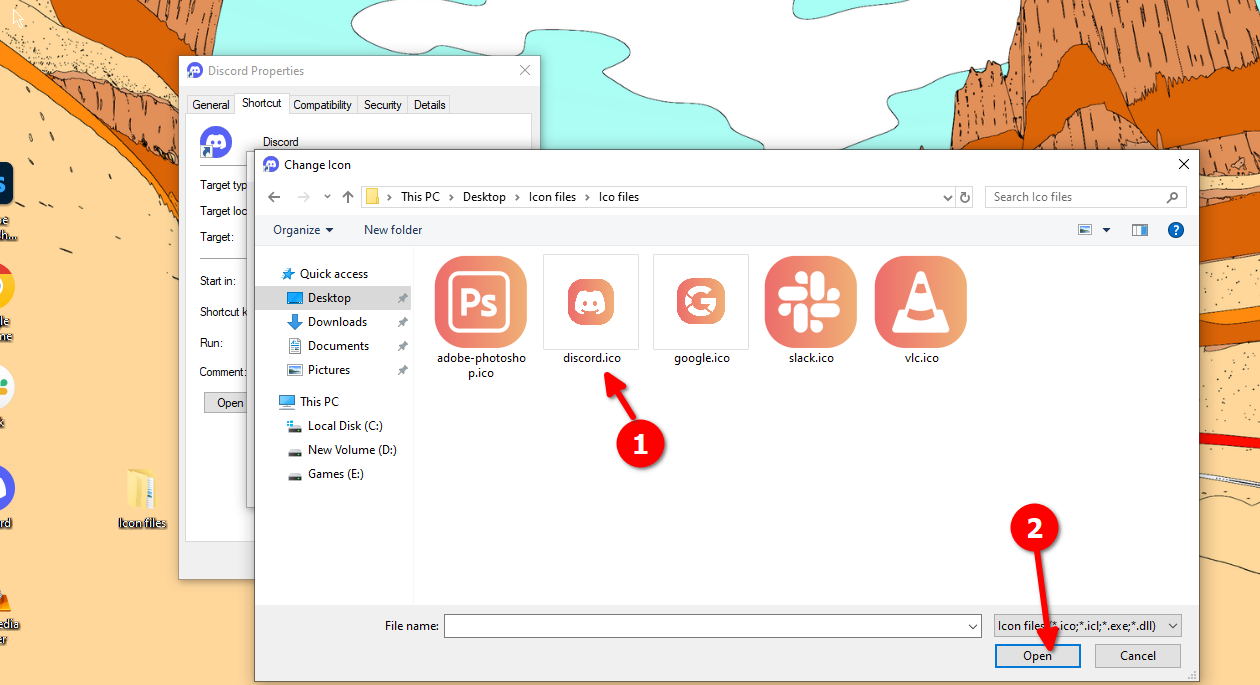
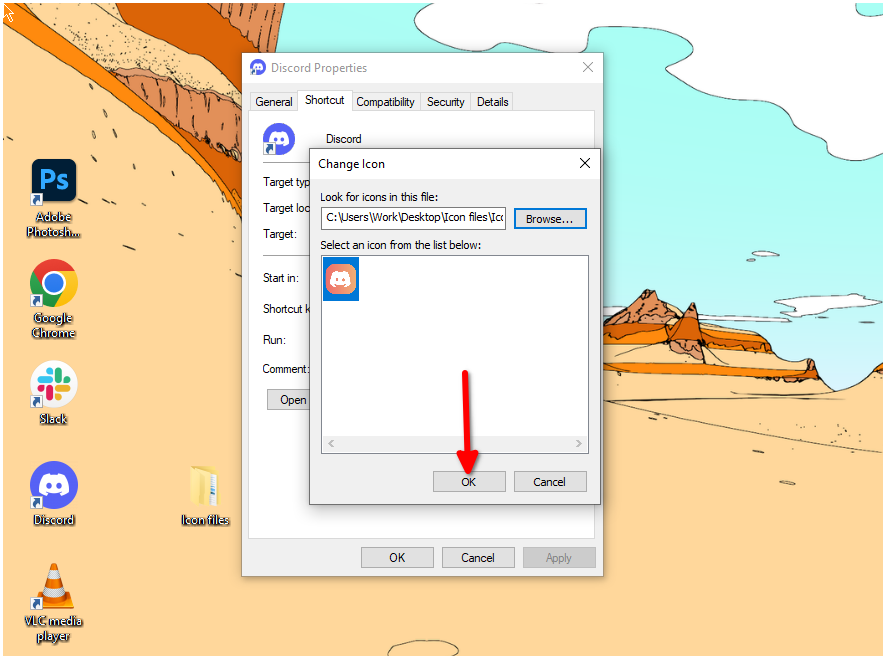
Here you’ll be able to upload a new icon file that replaces the original. Click “Browse” and locate the folder where you’ve saved all your custom icon files. Select the right icon and click “Open.” Click “OK” on both windows after that, and the desktop icon should change.
Repeat these steps for all the desktop icons. When you’re done, the desktop shortcuts should look something like this (except you’d be replacing them with your own icons).
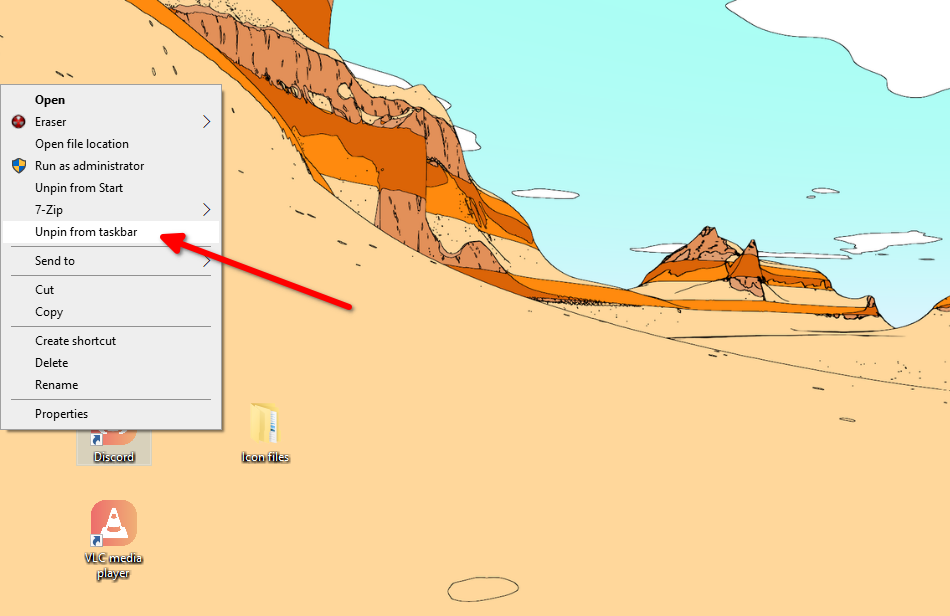
When you’re done, right-click on the desktop shortcuts one by one, select “Unpin from Taskbar.” Then right-click again and select “Pin to Taskbar.”
After you’ve changed the desktop icons and repinned the taskbar icons, you’re all done. Here’s what my taskbar looks like after the changes. You can repeat these steps with other ICO files to get different results. You can also change the taskbar color.
Revert Changes
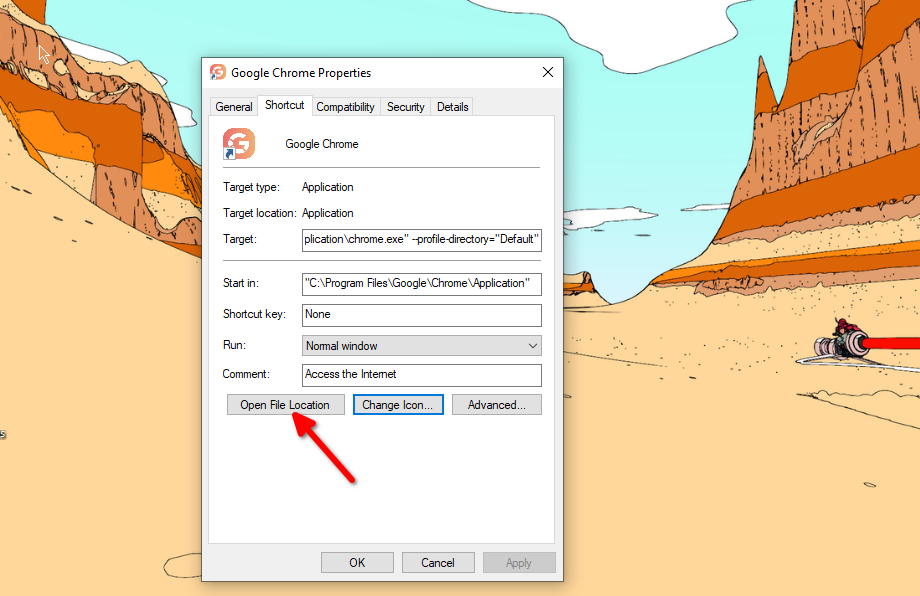
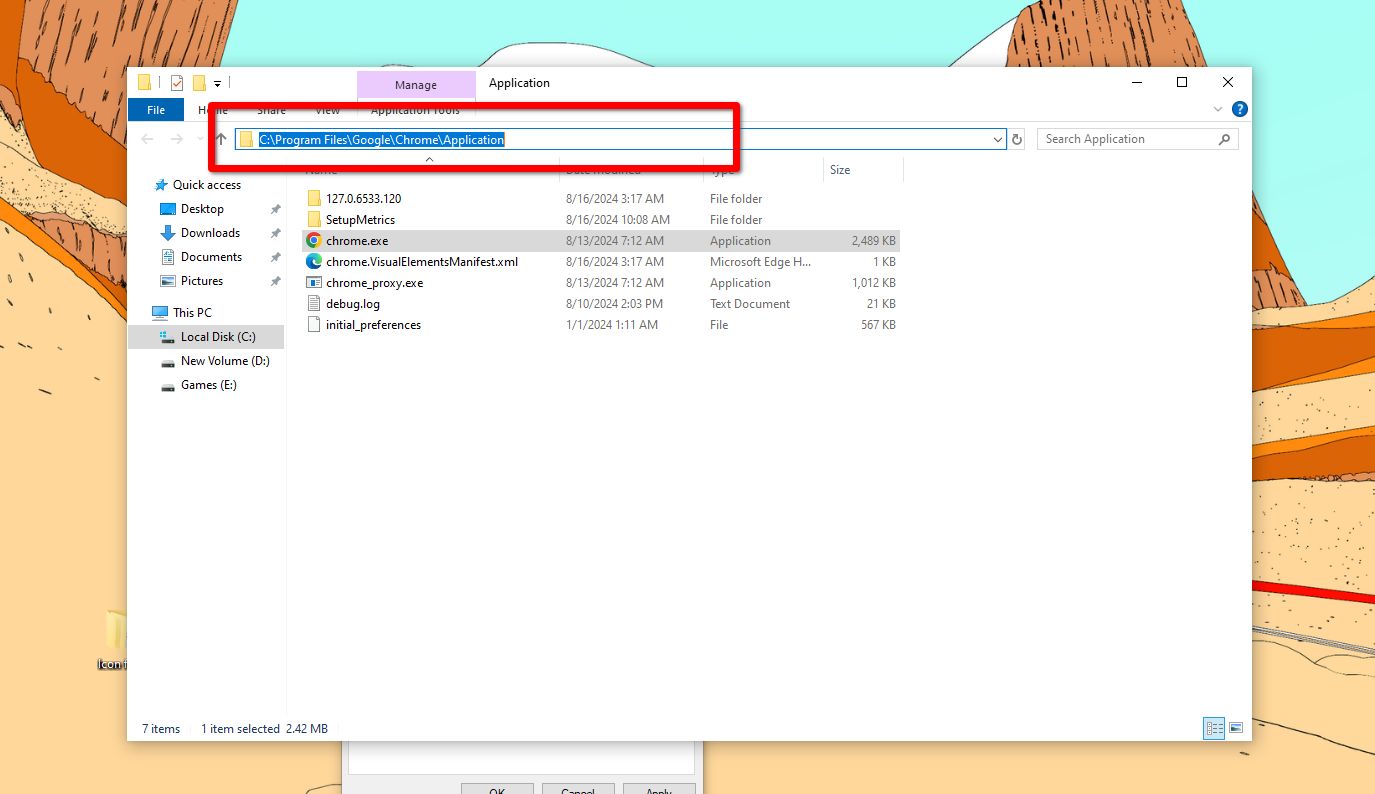
Reverting the changes and restoring the original icons is just as easy. Once again, right-click on the desktop shortcut and select “Properties.” In the “Shortcut” tab on the properties panel, you’ll find a button labeled “Open File Location.” Click it and copy the program address (you’ll need it later).
Now go back to the “Shortcut” tab under Properties and click “Change Icon” and then “Browse.” Paste the directory you copied earlier in the Explorer address bar. Select the EXE file, click “Open.” You’ll be presented with the default available icons. Pick one and click “OK.”
To change the icon in the taskbar, we’ll use the same trick. Right-click on the desktop shortcut, click “Unpin from the Taskbar.” Then right-click again and click “Pin to Taskbar.” The taskbar icon should change right away. Repeat these steps for the remaining taskbar icons to get back to the default look.

Leave A Comment?