Situatie
Solutie
Many of the best laptops, particularly gaming laptops or those aimed at content creators, come with two GPUs inside. This is because laptop processors, such as those from AMD or Intel, always have an integrated GPU, which is necessary for the display to function as you’d expect. Gaming laptops may also have discrete GPUs from Nvidia or AMD to enable higher performance in games, but the integrated GPU is still there.
A discrete GPU is much more powerful, though, so it may sometimes be beneficial to run a specific app using the discrete GPU. This usually happens automatically, but if you’re having trouble and apps are running slower than expected, you can force Windows 11 to run a specific app using a discrete GPU. In this guide, we’ll show you how to do just that.
Forcing an app to run on a discrete high-performance GPU can be done easily through the Windows 11 Settings app. Nvidia also offers this option through the Nvidia Control Panel, but using the Settings app makes things a bit more unified and easier. Here’s what you need to do:
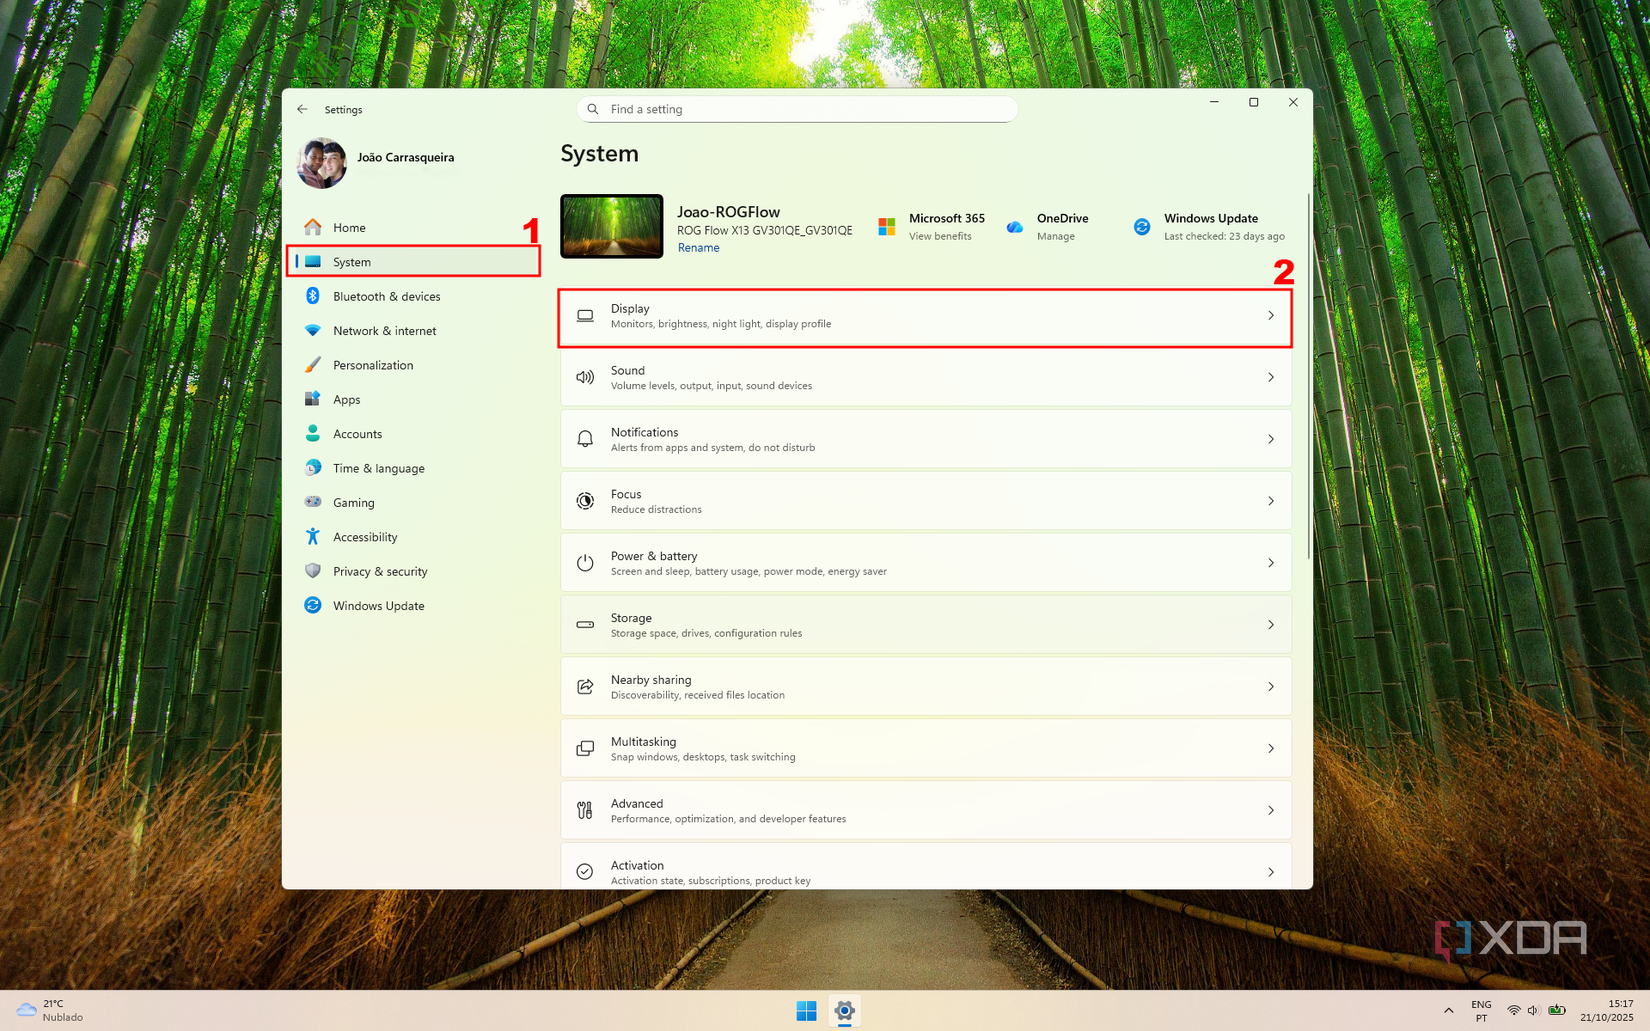
- Open the Settings app
- In the System section, choose Display.
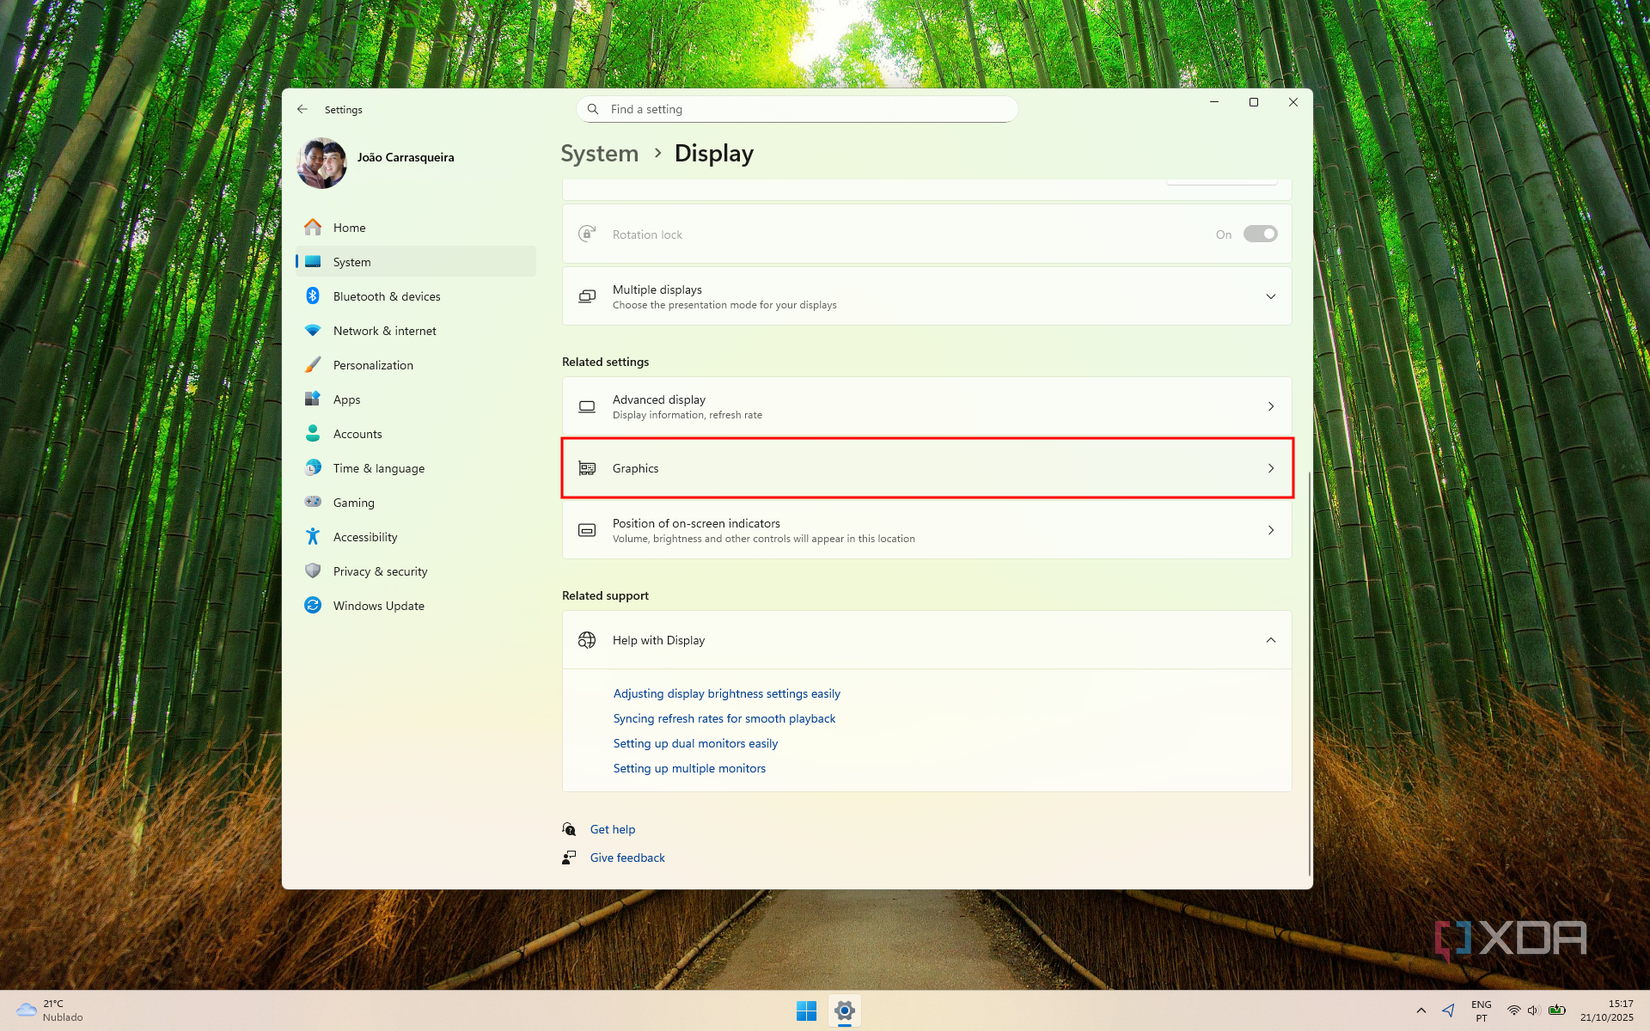
- Scroll down and choose Graphics.
- A few apps are already listed. To change the GPU settings for one of the apps on this list, skip to step 6. If the app you want isn’t listed, click Add a desktop app or Add a Microsoft Store app.
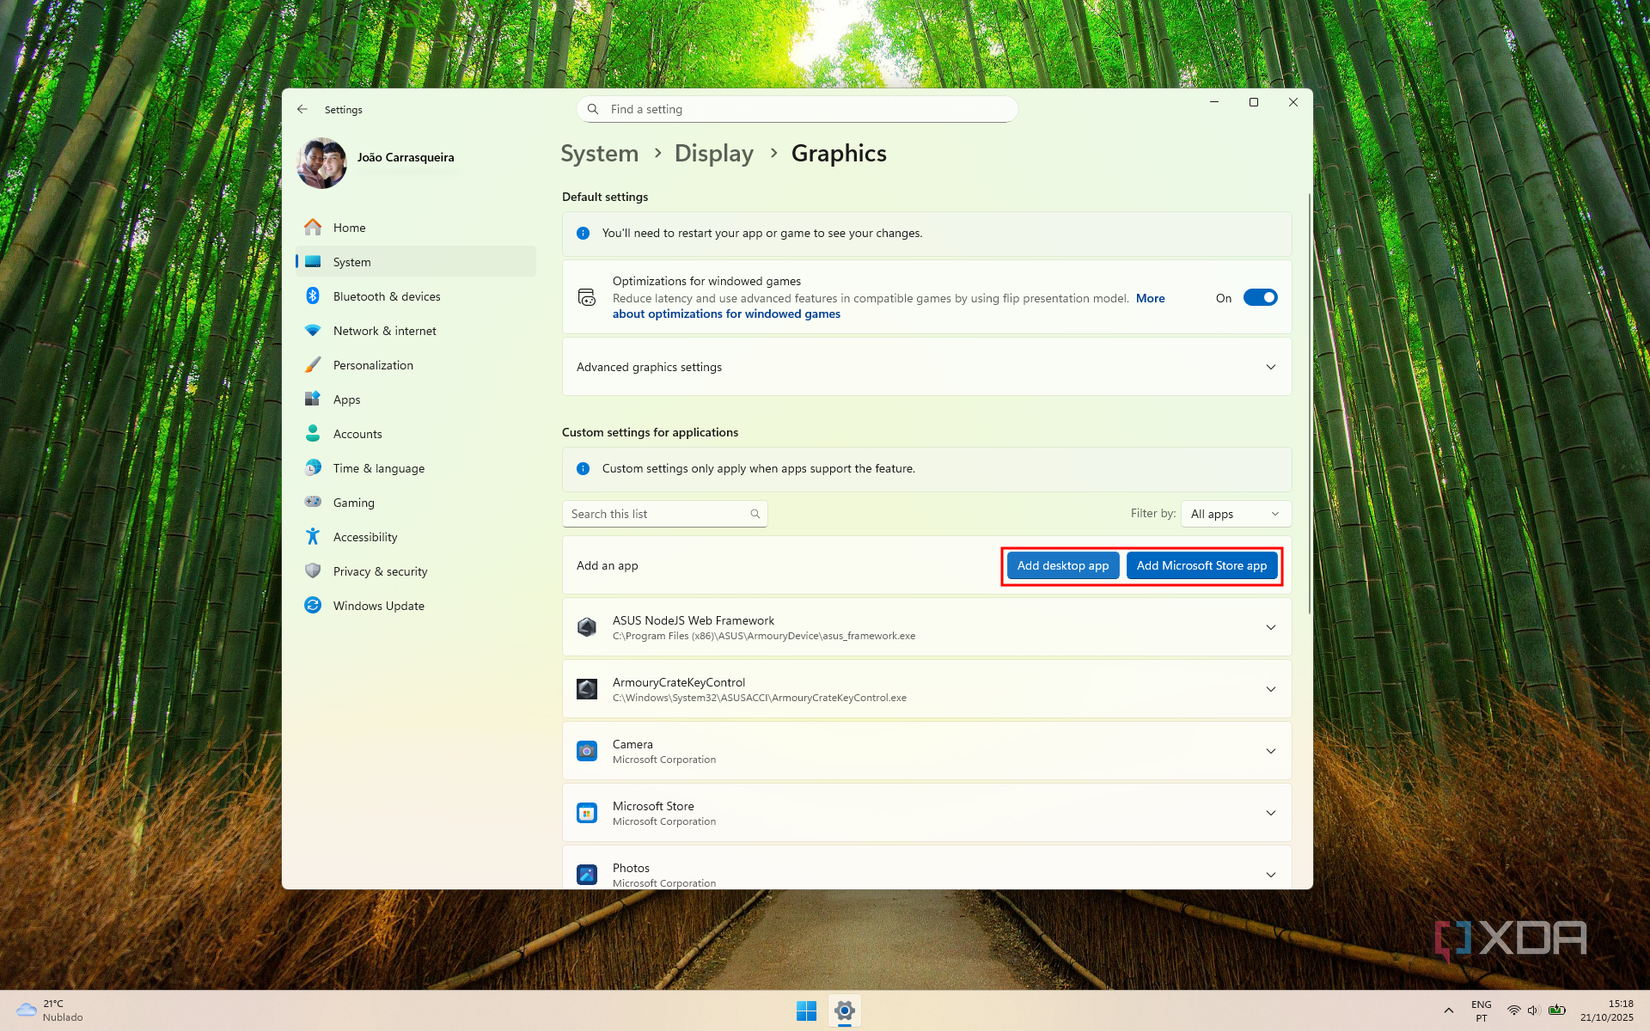
- For desktop apps, navigate to the folder where the game or program is stored. For Microsoft Store apps, you’ll see a list of all the apps installed on your PC. Choose the app you want to add.
- Once the app is added to the list, expand it with the arrow button on the right, then use the dropdown menu to select the GPU you want to use. If you want to use a discrete GPU, you’ll generally want to pick High Performance.
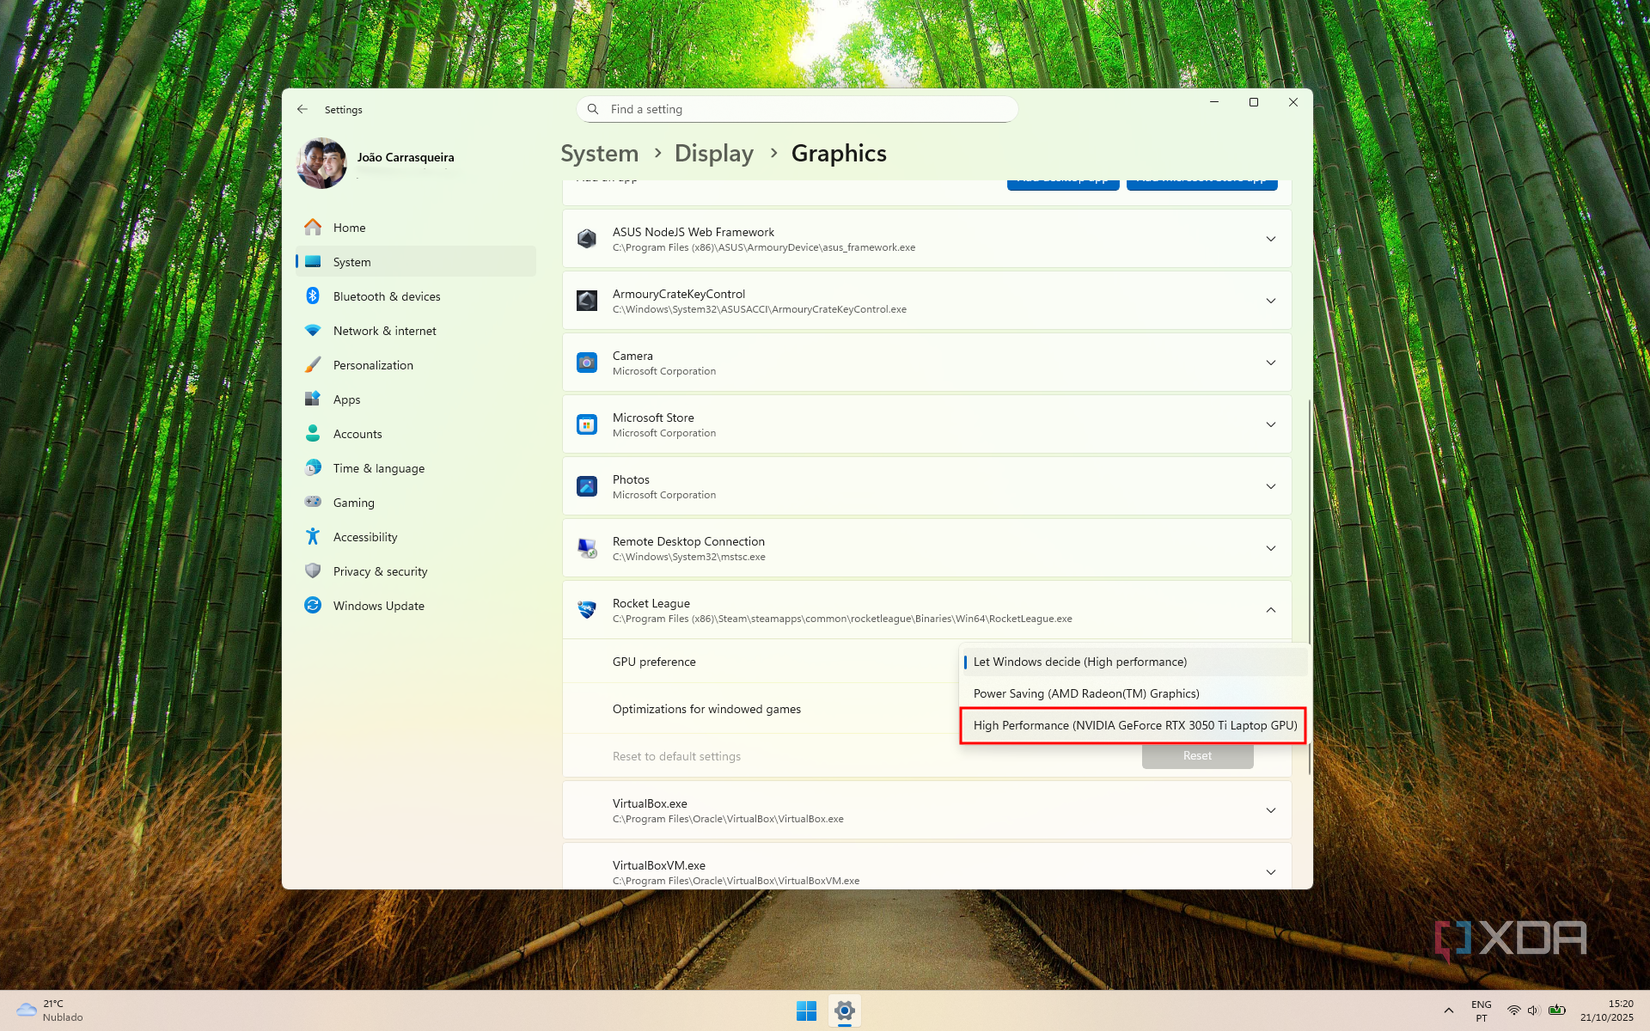
- Click Save.
Choose the GPU using Nvidia Control Panel
An alternate method
The option above should work for all modern PCs, but if you’re on an older version of Windows (which we really don’t recommend) and can’t follow those steps, you can also choose to do this using the Nvidia Control Panel. For this to work, you’ll need to have installed the appropriate GPU drivers from Nvidia’s website.
Once that’s done, follow these steps:
- Open the Start menu and search for Nvidia Control Panel. You can type in the name in the search bar to make it easier.
- Open the Manage 3D Settings section on the left side of the app.
- In the main pane, switch to the Program settings tab.
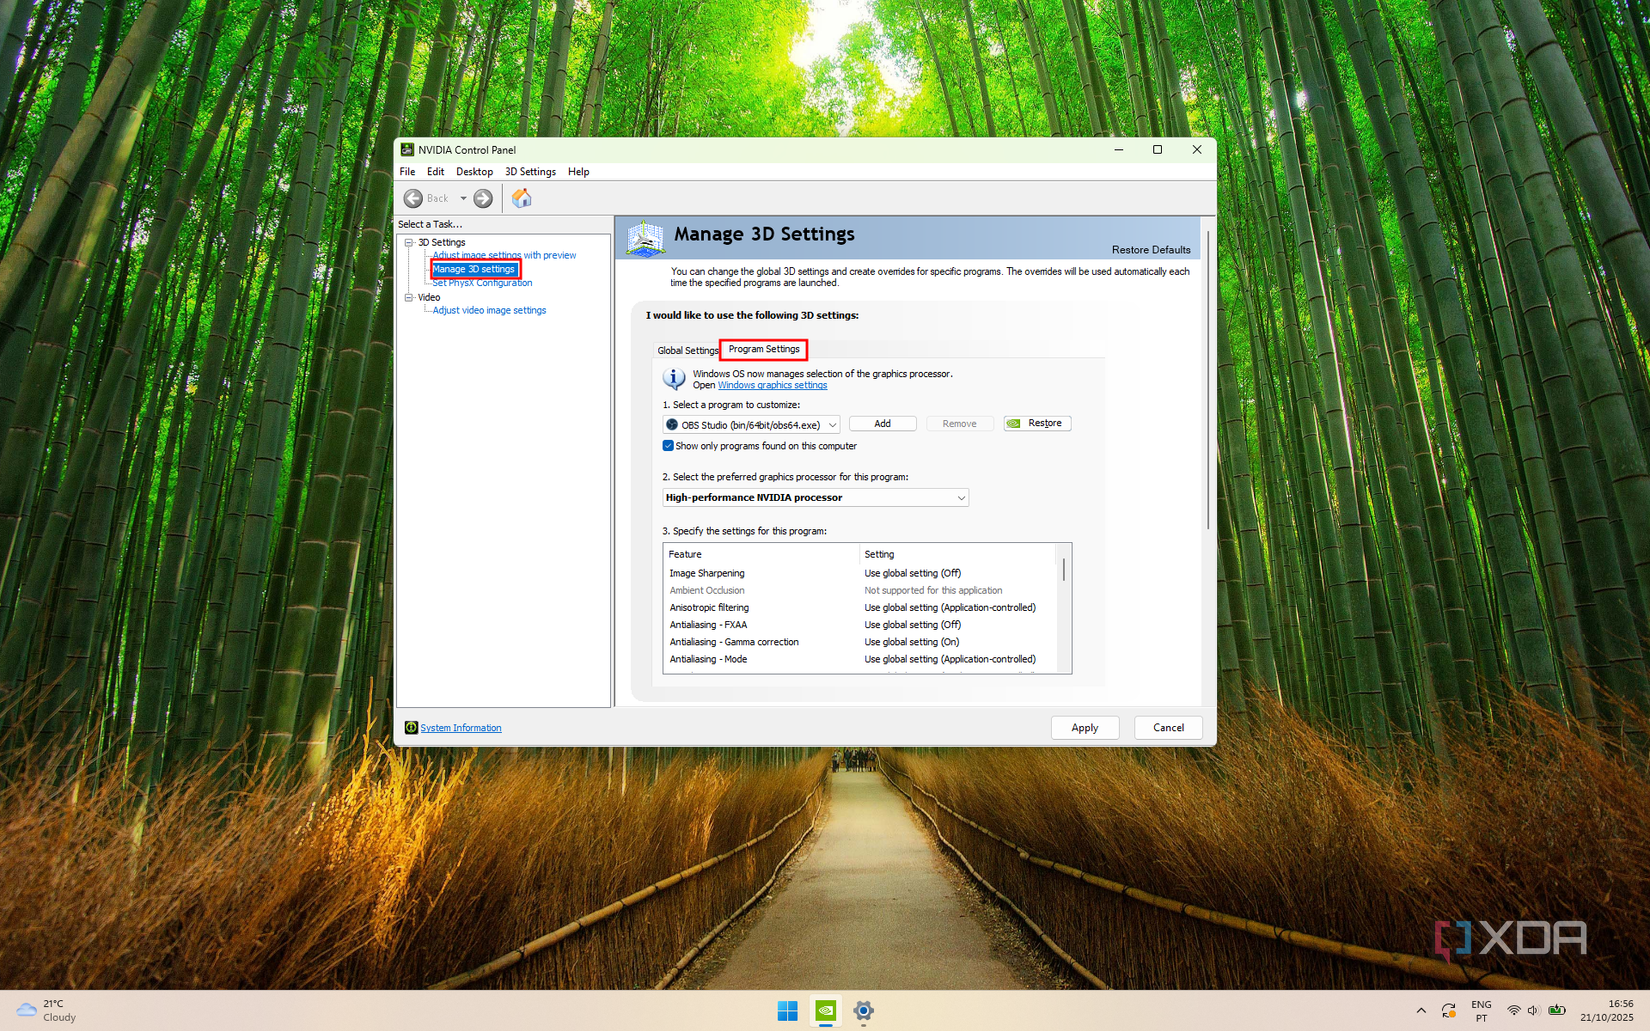
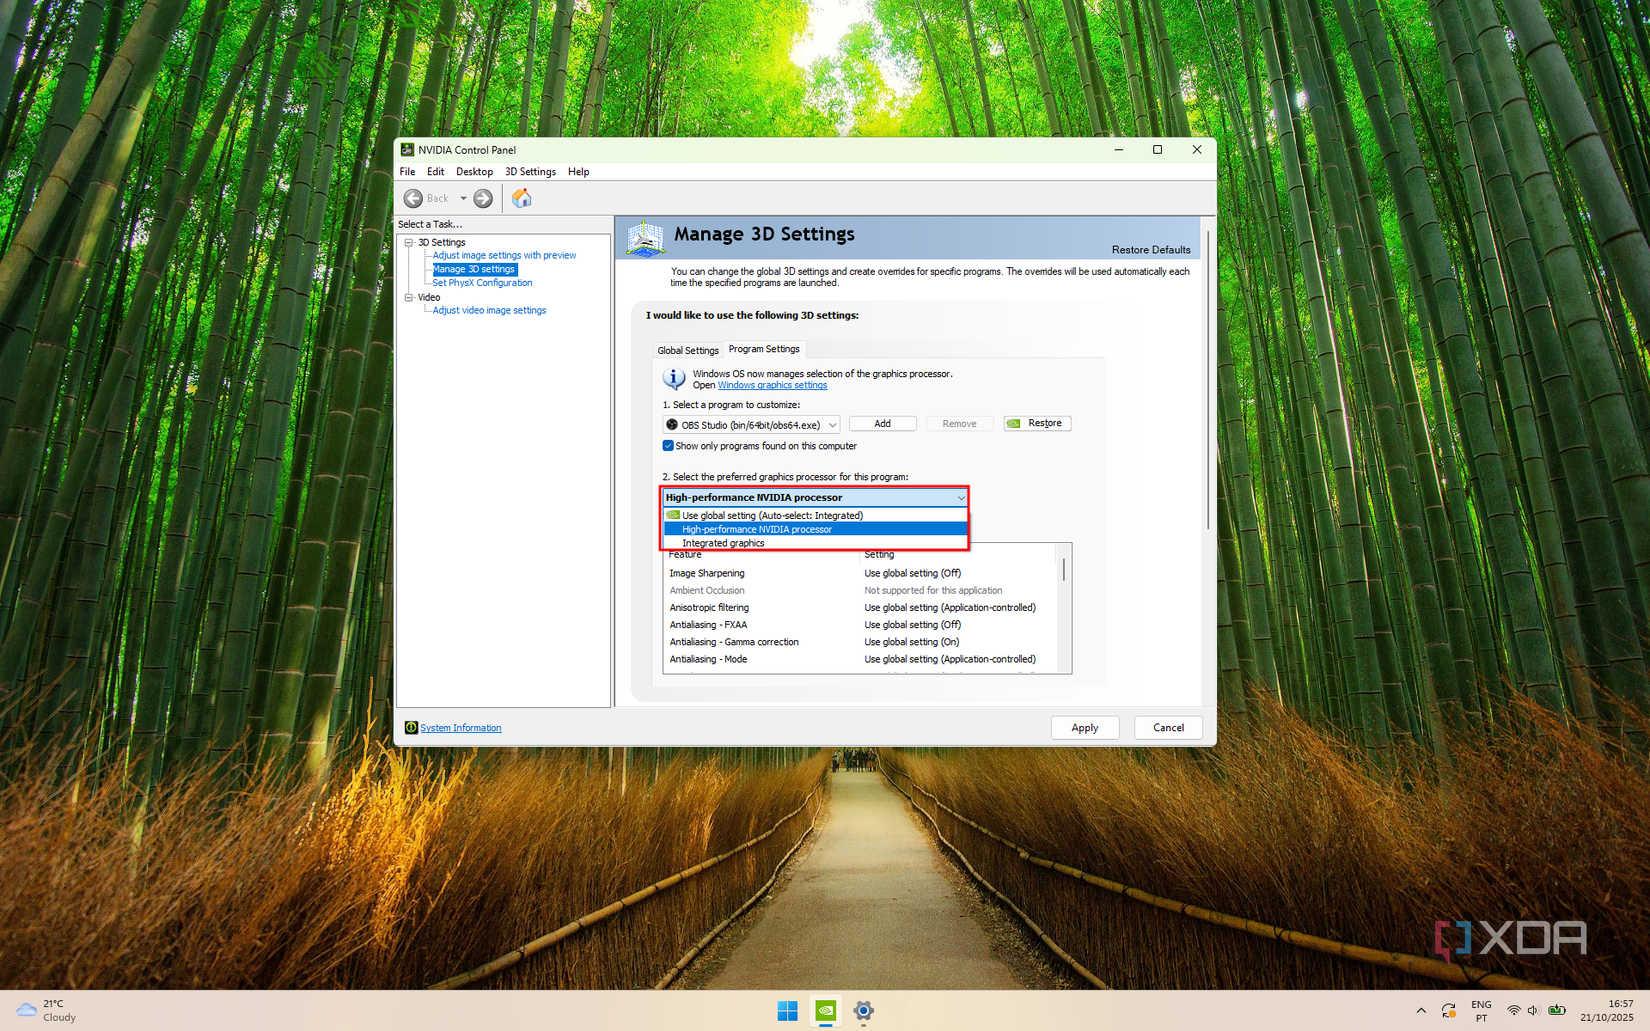
- Use the dropdown menu to pick an app to change settings for, or click Add if the app you want to configure isn’t detected.
- From the second dropdown menu, choose High-performance NVIDIA processor.
- (Optional) You can select various rendering settings using the menu underneath. This is particularly useful for games but you don’t need to change it.
- Click Apply to save your changes.
Regardless of what method you use, you can repeat this process for any app you want to run using the discrete GPU, or you can also force an app to run using the power-saving GPU if you don’t need that much performance and you want to save battery. This option can even be useful in some desktop PCs if they have two or more GPUs. It’s unlikely, but the option is always there.
Now that you know how to do this, you may be wondering if you really have to, and the answer to that is most likely no. As you’ll see when using either of the methods above, your computer automatically detects which GPU to use in each instance, and it tends to do a good job of determining which GPU to use for each program. The vast majority of users shouldn’t need to force these settings.
However, this can come in handy in some situations where programs may unexpectedly render with issues, or simply offer worse performance due to the integrated GPU not being good enough. It shouldn’t be as much of a problem these days, but many years ago, I recall having a game that didn’t display any content when it tried to run using the integrated Intel GPU, showing a completely white screen instead.
Scenarios like this are why this option exists, and it’s good to have it. But unless you know you need to do it, these settings can be left alone. And while we’re focused on using the discrete GPU, in some cases, the opposite might be more desirable. If something performs completely fine with integrated graphics, you may be able to reduce power usage by switching to the integrated GPU instead of the discrete one. It’s up to your personal needs and the hardware you have.
Leave A Comment?