Situatie
Solutie
One of the most important things to be aware of when migrating Windows 11 from one drive to another is that the migration process will transfer all the contents of the drive to the new one. For example, if you have Windows installed on your C drive and want to move it to an SSD labeled as the F drive, all the content from the C drive will be migrated to the F drive. This means you can’t simply move the Windows folder from the C drive to another drive.
All the information that Windows needs to run properly isn’t contained in the Windows folder on the C drive; the required data is spread across different folders on the C drive.
Another thing to be aware of is that the total used space on the drive where Windows 11 is installed must be less than the total capacity of the drive you’re moving the installation to. For example, if your C drive, where Windows 11 is installed, has 300 GB of used space, the new drive should have more than 300 GB of available space.
There are several tools you can use to migrate Windows 11 installation to a new drive, but I prefer using the DiskGenius tool. To start, visit the DiskGenius website and download the tool. Then, double-click the downloaded executable file (.exe) to begin the installation process.
While installing the application, make sure you’re not installing it on the drive where you plan to move the Windows installation, as this could result in data loss. Once the installation is complete and you’ve connected the drive where you want to move the Windows installation, open DiskGenius. In the left sidebar, you’ll see all the devices connected to your computer.
- Click the “OS Migration” option in the top menu, select your target disk in the Select Target Disk dialog box that appears, and click “OK.”
- DiskGenius will then prompt you with a confirmation box, asking for permission to wipe all data on the drive where you’re moving the Windows installation. Click “OK” to confirm.
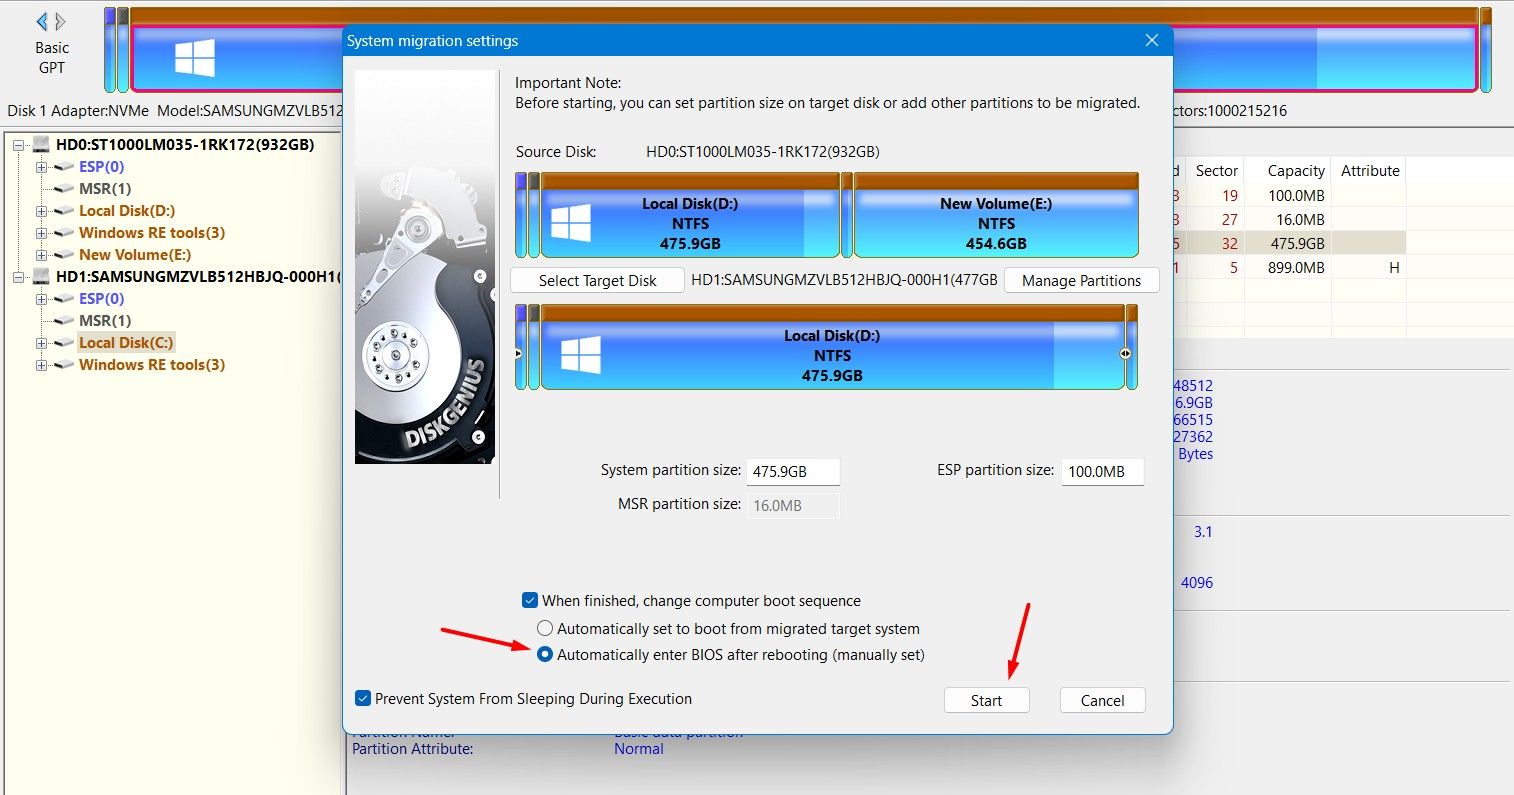
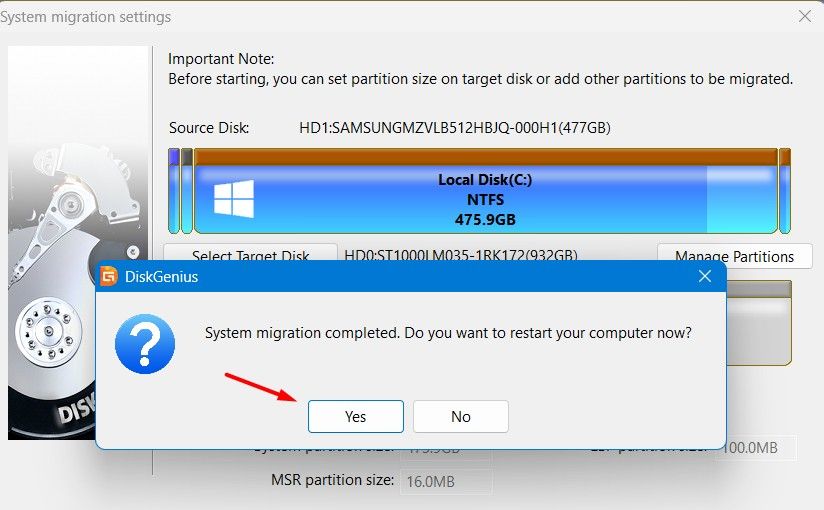
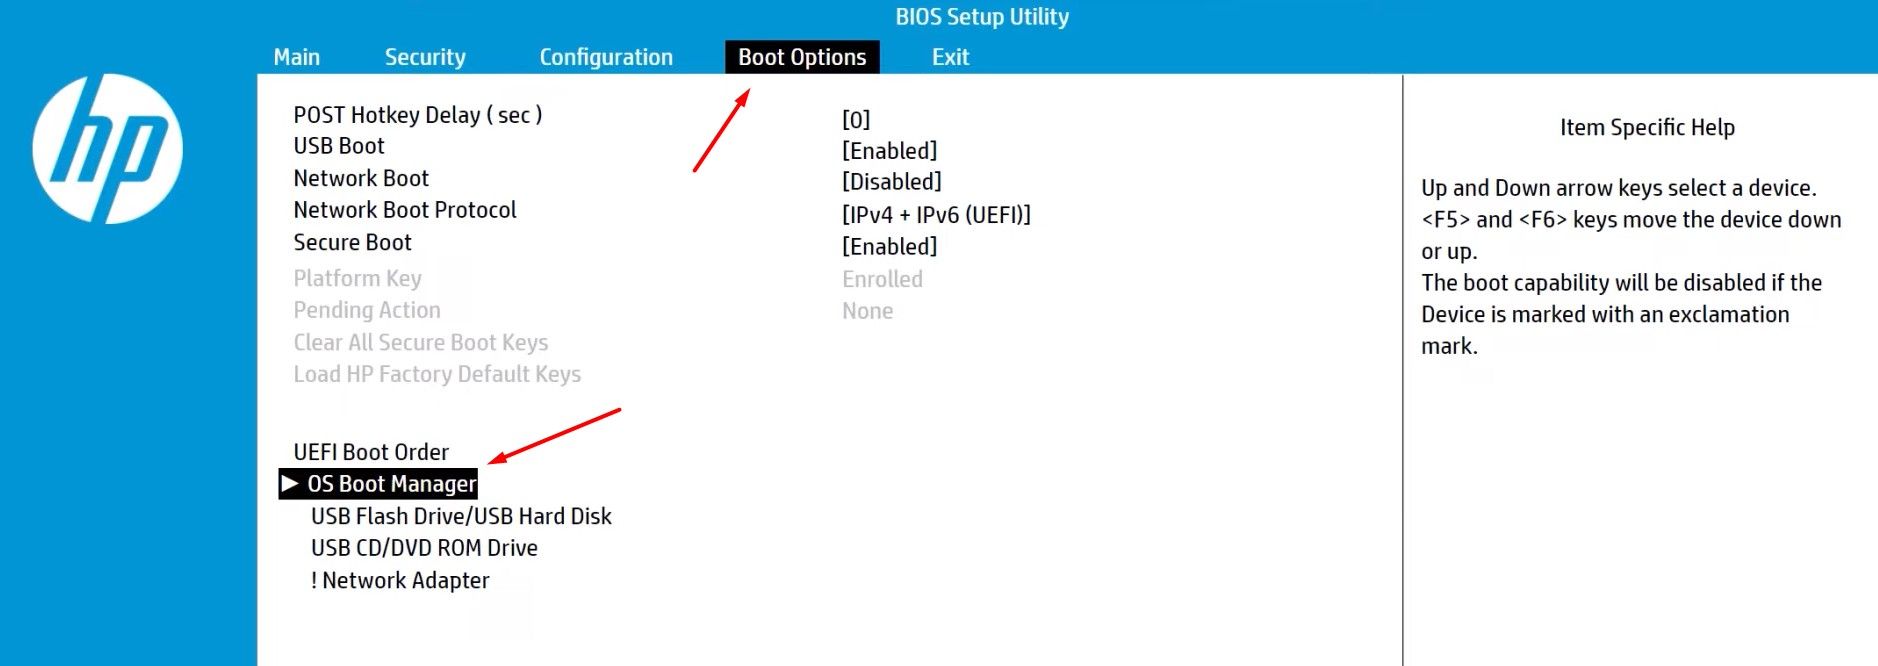
In the System Migration Settings window, you’ll be prompted to choose whether you want DiskGenius to automatically change the boot order or if you prefer to do it manually. While both the methods works well, I recommend doing it manually so that you can understand what exactly happens behind the scenes. Select the option “Automatically enter BIOS after rebooting (manually set)” and click “Start.” DiskGenius will remind you again that all data on the target drive will be erased. Click “OK” to proceed.


Leave A Comment?