Situatie
Solutie
Dolphin has been around for quite some time. It’s a FOSS emulator, or free open-source software emulator. You can download the latest version from the Dolphin website, or compile it yourself from the source code.
There are two branches to choose from when downloading: the stable branch and the development branch. The stable branch is, well, stable. This will be the most “tested” version of the latest code to help alleviate any bugs or crashes, though those could still happen. The development branch is much more bleeding edge and could break at any time due to a simple missing semicolon in a code push to GitHub.
If you like to live life on the edge and try the latest features now, then go with the development branch. If you prefer stability, then stick with stable.
Once downloaded, Dolphin is essentially a self-contained application on Windows. You don’t have to move anything or let installers run to use it. Simply unzip the download and launch Dolphin.exe. The emulator will open right up.
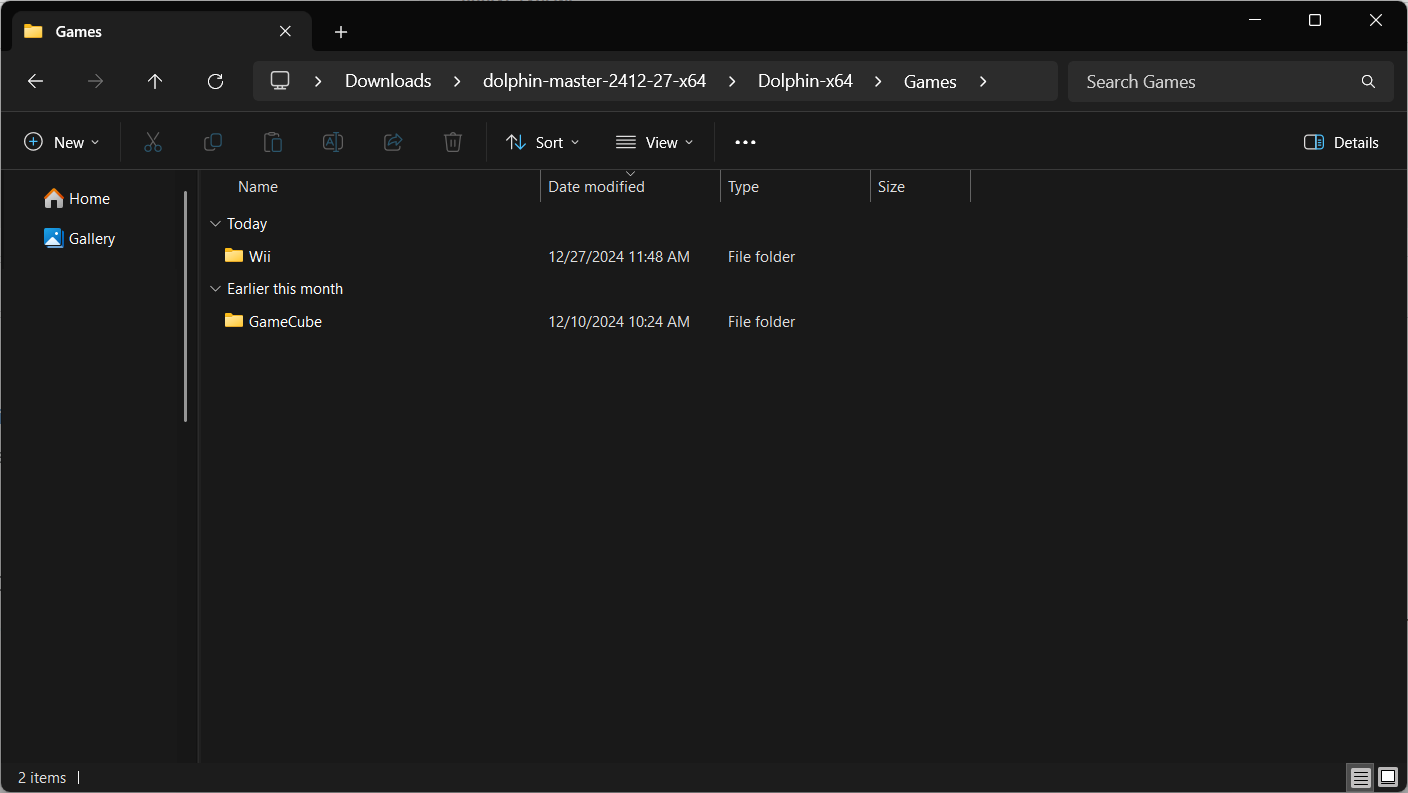
You can set up a games directory anywhere on your hard drive. I chose to set my games directories up within the main Dolphin folder. I did this to keep everything neat and tidy so I wouldn’t have to try and go find where I put my games folder in the future.
What I did was make a folder called “Games” (sans quotes) at the root level of the folder. Then, under the Games folder, I made two sub-folders: Wii and GameCube. This isn’t necessary at all, and you could put all of your games in one folder. It just helps my brain to keep things separate so I know where to look if there’s something missing.
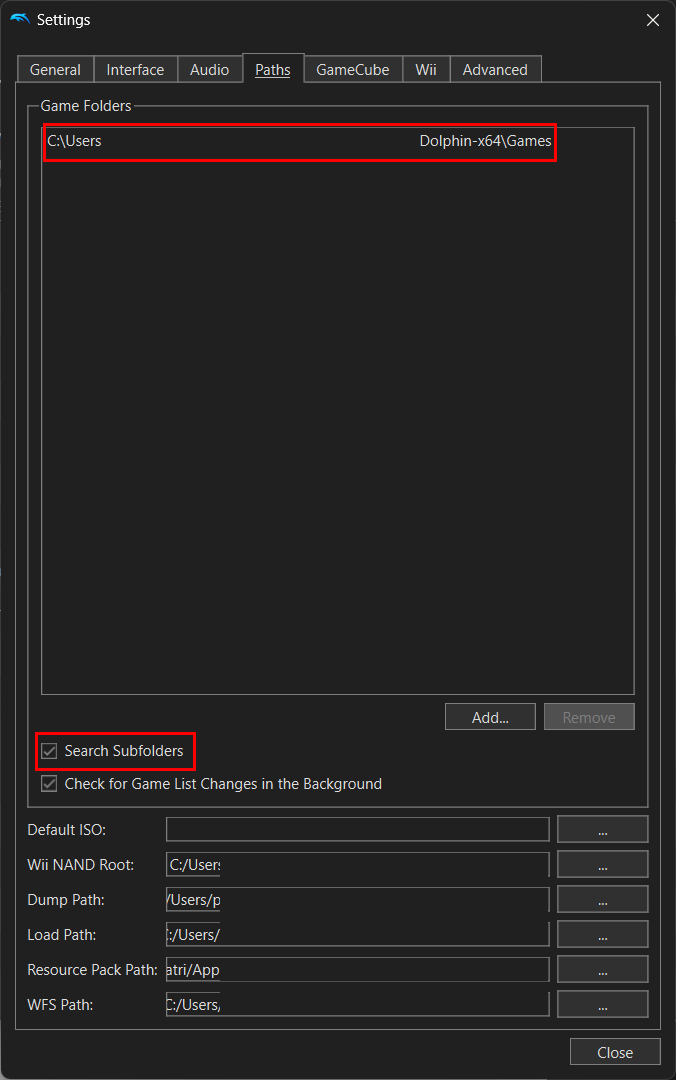
Once you have your folders made (either individually or as a single folder), click the “Config” button at the top of Dolphin.
Then, head on over to the “Paths” tab.
From here, click “Add” at the bottom of the screen and input the folders that you want Dolphin to look at for games. Also, be sure to tick the “Search Subfolders” button here. This allows even further organization if you want.
Downloading games that you don’t own is always illegal, and there’s no way around that. We have a more in-depth article on whether it’s ever okay to download retro video games, so I won’t belabor that point here.
There’s only one main tried-and-true method for ripping your own games: a Wii. Some older computers with certain types of disc drives can rip some games, and Wii U and GameCube consoles can sometimes do it too. But if you want a reliable way to rip, use a Wii with the Homebrew channel to install CleanRip.
This allows you to rip your games to an SD card and move them to your computer. Nintendo still doesn’t like this method, and legally it’s still a grey area. So, proceed at your own risk.
Dolphin has an in-depth guide on how to rip games. Simply install CleanRip through the HomeBrew channel, and it can rip any Wii or GameCube game to the Wii’s SD card. From there, you can transfer the game to your computer and put it in one of the game directories that you set up above.
The ripped game will be in one (or multiple) ISO files. Dolphin can package the file into RVZ format (or compile multiple ISO files to one ISO) to save space and keep things tidy. Simply right-click on a game in the games list and select “Convert File” to do this.
Dolphin’s documentation goes in-depth on performance, but I want to take a few moments to point out a couple of settings that I think you should change for the best experience. These settings are located under either Config or Graphics, and I’ll break each one up into its own section so you know where to find the various options.
Settings to Change in Config
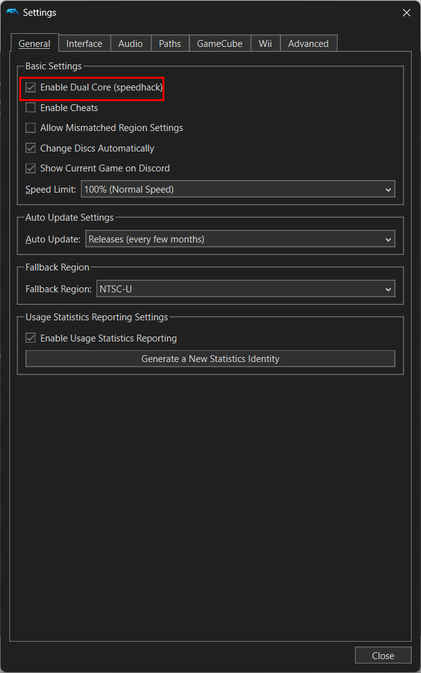
For starters, make sure that “Enable Dual Core” is selected on the General tab. This will help to improve your game’s performance on most newer computers.
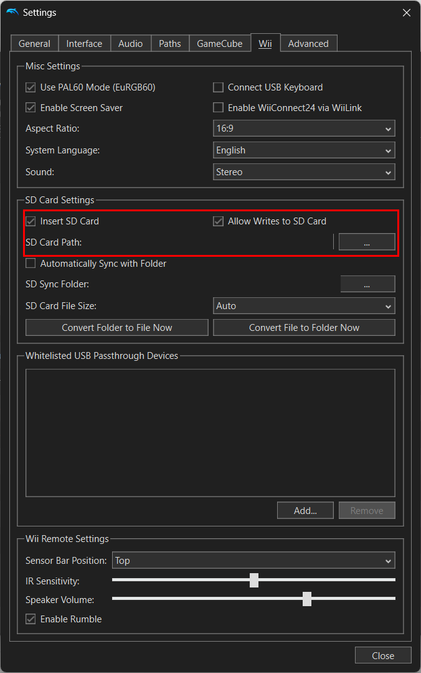
Make sure that on the Wii page, you enable both “Insert SD Card” and “Allow Writes to SD Card.” These should be toggled on by default, but it never hurts to check. The Wii saves game data to an SD card sometimes, so having one virtually inserted means this function won’t be broken in games that require it.
Outside of this, there’s not much else to specifically change within the Config panel. Dolphin comes with the best options already selected for most systems, so you should be pretty good to go.
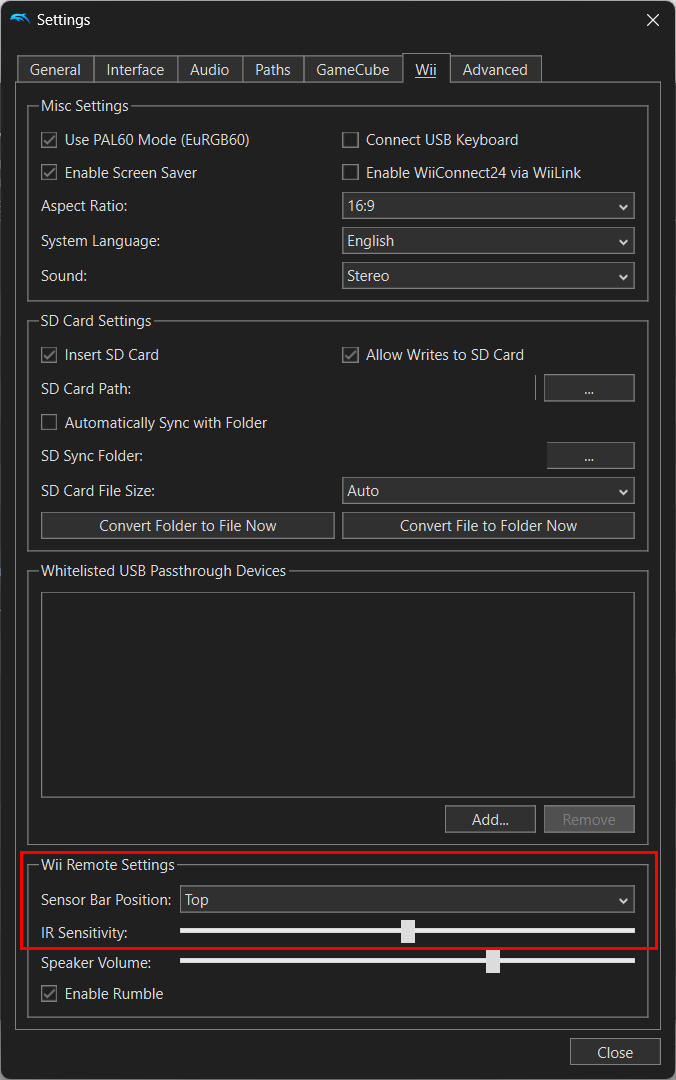
The sensor bar position is something else to check here. Whether you’re using an actual IR emitter or two candles, you should update the sensor bar position. Something I didn’t originally know is that the Wii sensor bar was simply an IR emitter, and it didn’t actually “sense” anything. The remote does all the actual sensing.
If you want to mimic the sensor bar and you don’t have one, you can simply set up two candles below your TV to emit IR light that the controllers can pick up. Or, there are USB-powered IR emitters that can replace the sensor bar.
Another option would be to simply plug in a Wii (if you have one), and plug the sensor bar in with the Wii powered on. This is what I did, and I made sure to change my sensor bar position to be below the TV as that’s where I had it sitting during my gameplay.
![]()
The “Graphics” tab is where I made the most changes. Not because I had to, but simply because I wanted gameplay to look better and be smoother. I will note that my desktop has 48GB of RAM, an i9-13900K, and an RTX 3080 12GB GPU, so it’s relatively beefy.
However, I think that even on a lower-end system, you could trial turning up the graphics settings to what I use as most Wii and GameCube games were designed to run at an extremely low resolution compared to what modern computers function at.
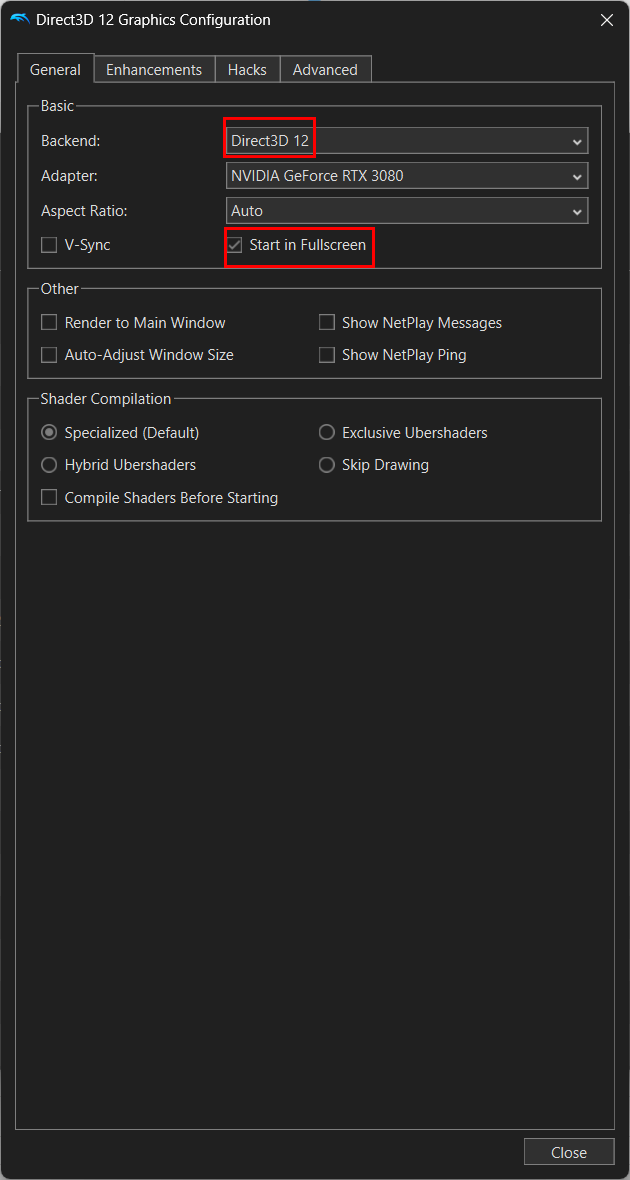
To start with, I made sure my backend was set to “Direct3D 12.” There are several other options here, and each one has its pros and cons, so you might want to start with “Direct3D 11” if you’re unsure. But, most newer graphics cards should be able to do “Direct3D 12” or “OpenGL”.
I also made sure to tick the radio box for “Start in Fullscreen” because I want to enjoy these games full screen instead of windowed. That’s a personal preference, so do with that as you will. Also, I disabled V-Sync, but I never use V-Sync in any games I play.
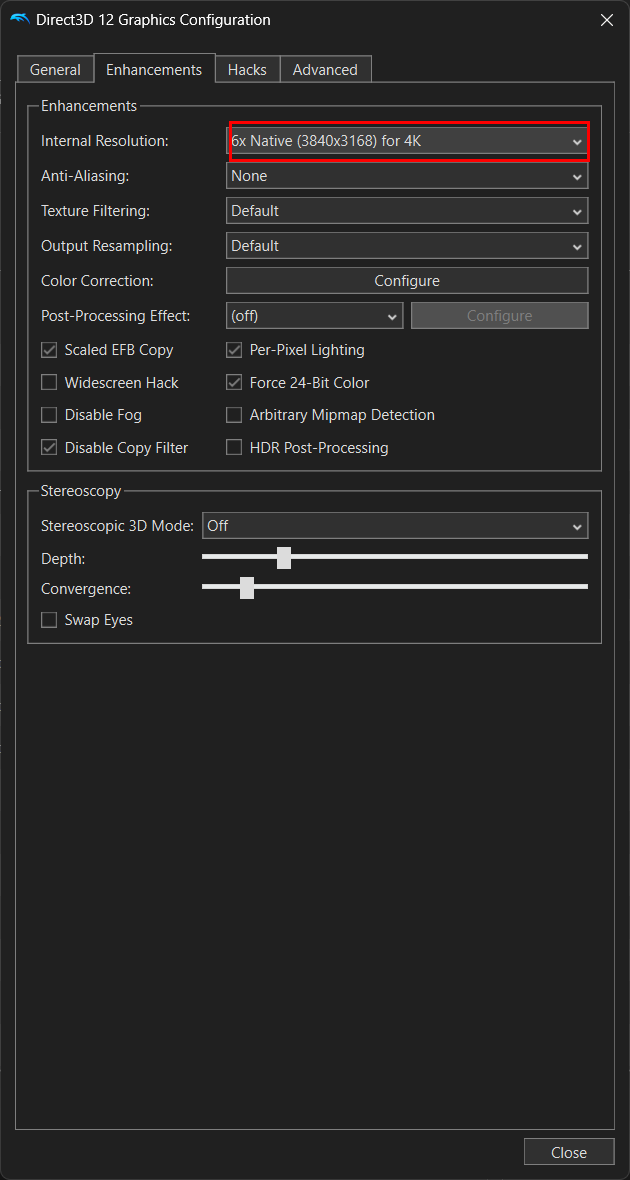
Under the “Enhancements” tab, I personally chose to change the internal resolution to “6x Native” for 4K gaming since I game on a 4K monitor. However, if you’re unsure what to choose, the auto option worked well for me too. Whatever you do, don’t leave this on “Native.” Your eyes will thank me later. The rest of the enhancements tab I left as-is.
There are plenty of other options to play with here, but I personally didn’t find that I needed to tweak anything. The internal resolution is what made the largest difference for my gameplay. It helped the game to look semi-modern, while still being just as nostalgic as ever.
Wii controllers are easy to use with Dolphin on your Windows PC, as long as you have Bluetooth. To pair your Wii controllers with your PC, simply go to the “Controllers” interface and click “Refresh” or toggle on “Continuous scanning.” I opted for continuous scanning, as that’s constantly looking for new controllers and makes pairing easier.
Now hit the sync button on the back of your Wii remote if it’s a -TR model, or click the 1+2 buttons if it’s an older version. This puts the Wii remote into pairing mode, and it should vibrate after a moment to indicate it has connected properly. You’ll also need to tell the software whether you’re using a real Wii remote or an emulated one for each player.
Leave A Comment?