Situatie
Solutie
Step 1: Take and Copy a Screenshot
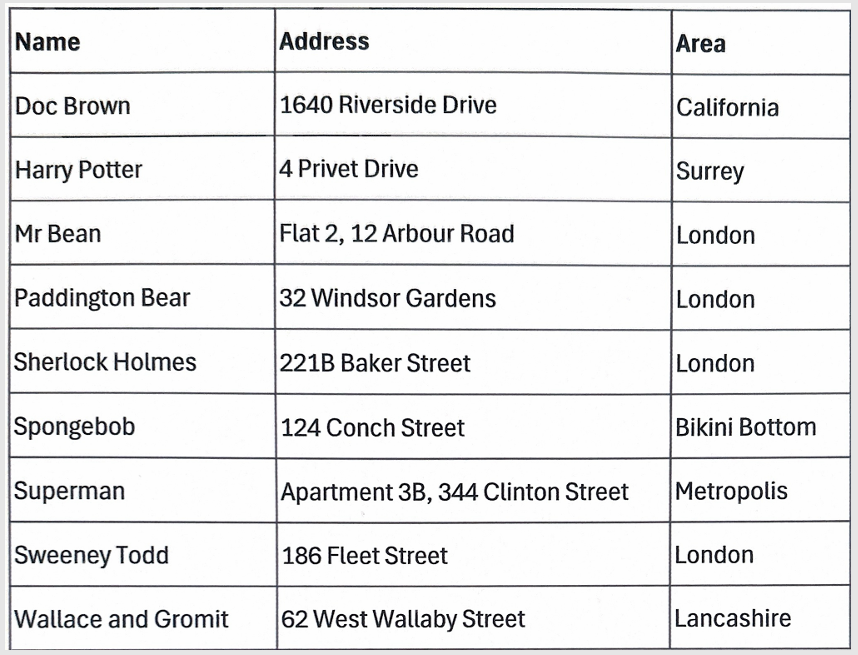
Let’s say you have been sent the PDF below—a scan of a table containing various characters’ names and addresses—and you want to import and edit the data in Microsoft Excel.
To follow along as you read, download a free copy of this PDF. After you click the link, you’ll find the download button in the top-right corner of your screen.
Because the file is a scanned PDF, you can’t simply select and copy the text, as the content is stored as image data rather than “real text” data. You might also face the same issue when copying data from a website—if it was uploaded as an image, there wouldn’t be any real text for you to copy and paste.
Instead, you can take a screenshot of the data and import it into your Excel worksheet. With the PDF, image, web page, or other source open, press PrtScn on your Windows keyboard. If you don’t have a PrtScn key, press Win+Shift+S, or if you’re using a Mac, press Shift+Cmd+4.
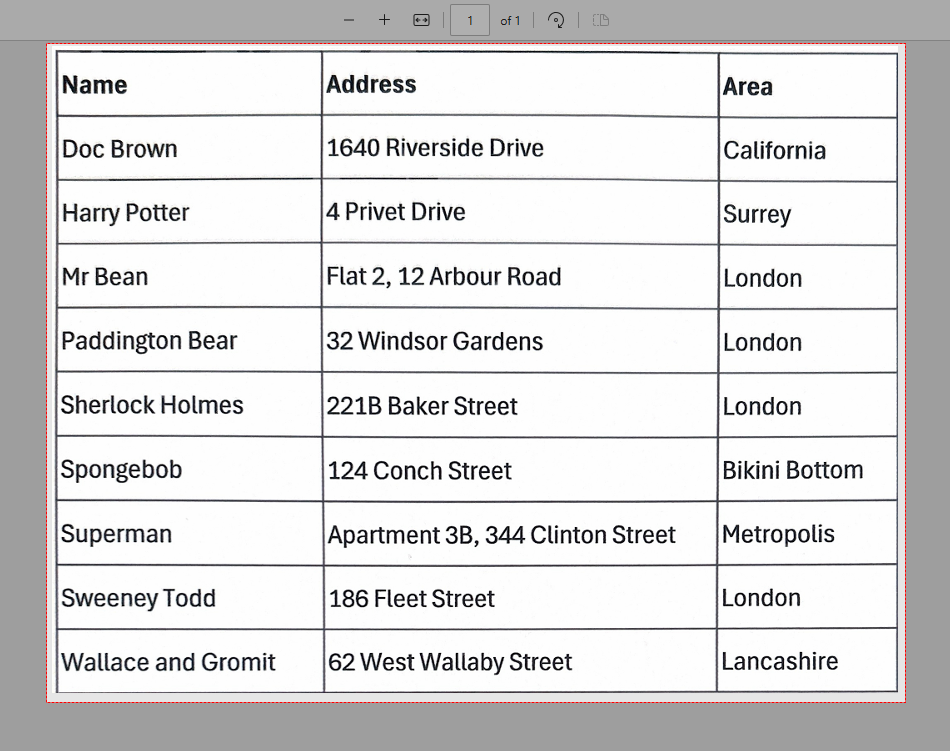
The final part of step 1 involves locating the screenshot you just took, and copying the image to your clipboard. In my case, I’m using the default Windows 11 screenshot editor—Snipping Tool—and the copy icon is in the top-right corner.

Now, with the screenshot saved to your clipboard, you’re ready to head to Excel.
Step 2: Import the Image as Data
Open the Microsoft Excel file where you want the data to go. This can be a new workbook or tab, or a worksheet that already contains data.
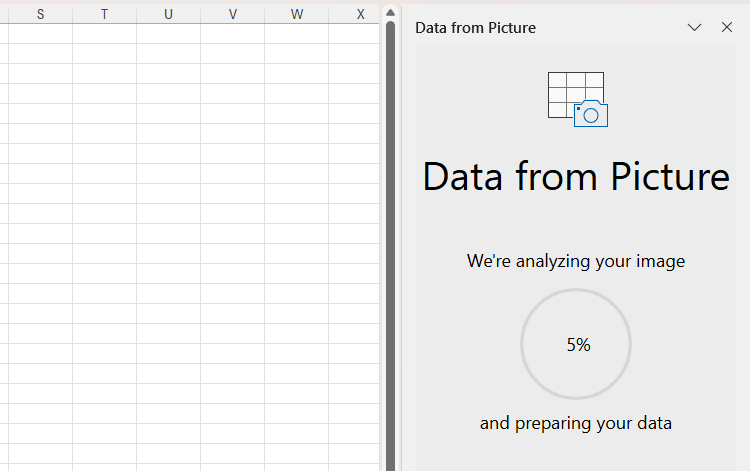
Then, with the copied data still on your clipboard, open the “Data” tab on the ribbon, and click “Get Data.” From there, hover over “From Other Sources” and “From Picture,” and then click “Picture From Clipboard.”

At this point, Excel analyzes the data you selected as the source in the Data From Picture sidebar. This can take a few extra seconds if the screenshot contains lots of data, but even then, the process shouldn’t take too long.
Step 3: Address Issues and Insert the Data
Once Excel has finished optimizing your imported screenshot in the Data From Picture sidebar, it will highlight any potential issues where it isn’t quite sure whether it has copied the data correctly. This is more likely to happen if the image you captured contains unclear text or broken lines.
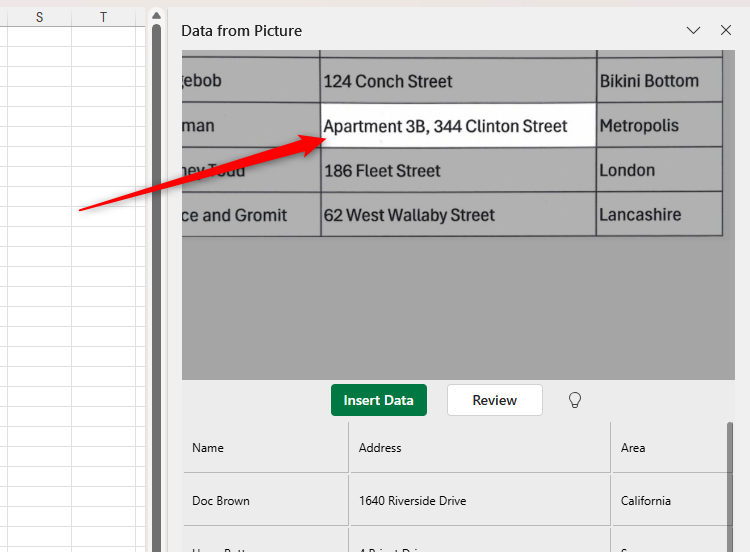
Click “Review” to address the first issue, and if you need to make any changes, select the relevant cell in the sidebar, and edit the text field that appears. When you’re happy with this change (or if no changes are necessary), click “Accept,” and move to the next query by clicking the right arrow.
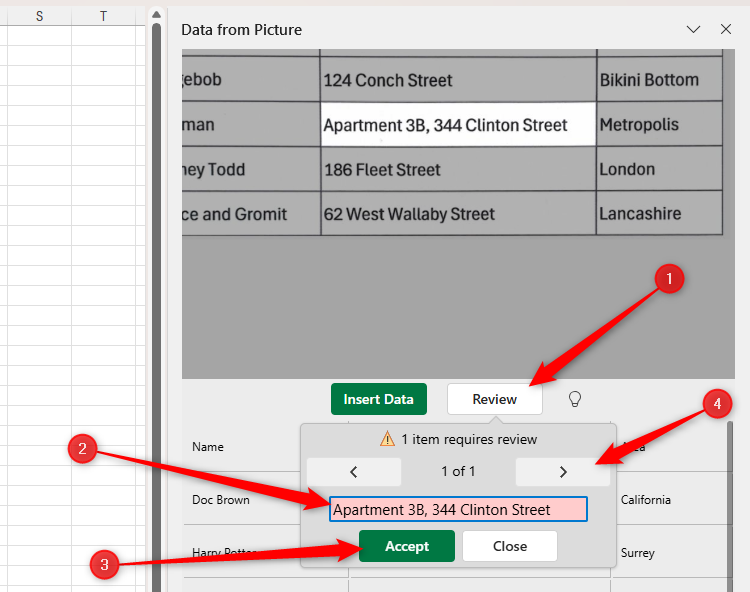
Once you’ve reviewed all the issues, the Review button turns gray, and the data is ready to be inserted into your spreadsheet. To trigger this process, after selecting the cell in your worksheet where you want the upper-left cell of the copied data to go, click “Insert Data”.
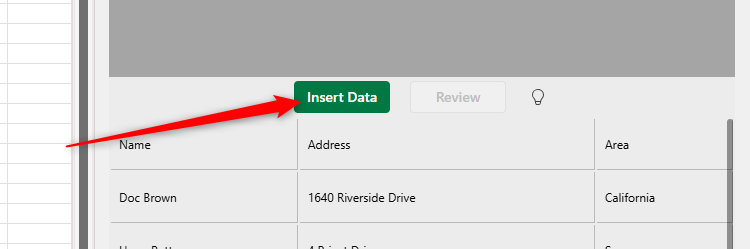
If Excel detects that the imported data is going to override existing data in your worksheet, the program will automatically insert extra columns or rows to prevent this from happening.
Step 4: Format and Use the Data
At this point, the data-importing process is complete!
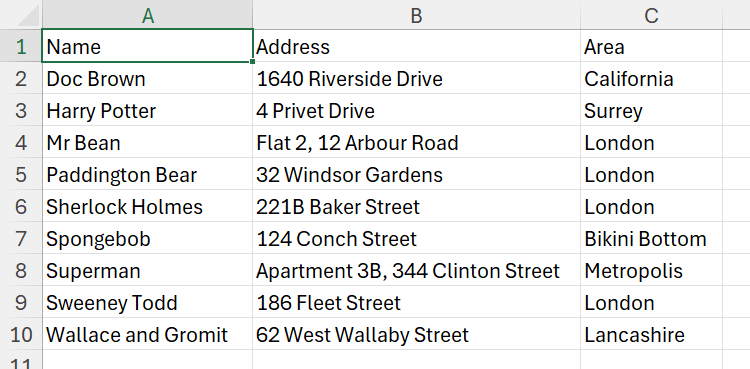
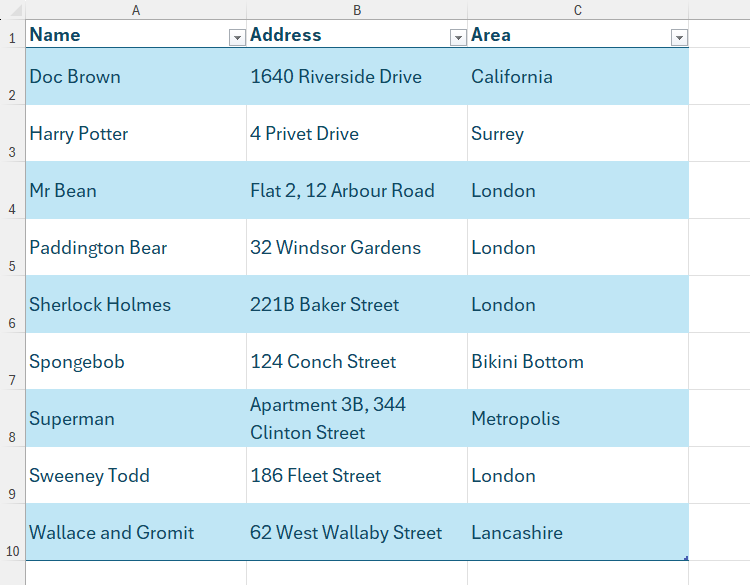
It’s now up to you to decide how you use this data. Personally, the first thing I always do at this stage is format the data as an Excel table, so that I can easily filter the information and use the column names in formulas. You could also change the cells’ number formatting, so that Excel recognizes numbers as numbers, dates as dates, text as text, and so on.
Points to Note When Converting Screenshots to Excel Data
Before you go ahead and convert screenshots to Excel data using this method, take a moment to note these final pointers:
- Data imported into Excel from a screenshot adopts any formatting you have already applied to the relevant cells of your spreadsheet.
- When I tested this method in various scenarios, I found that the process works best when the copied data has visible borders between each cell.
- Any cells in the copied image containing data that runs over one line within the same cell will convert into a continuous line in Excel. To fix this, use the TEXTSPLIT function or Excel’s Text To Columns tool.
- If the source table is formatted as text, such as in a PDF saved through Microsoft Word, use your mouse to select the data you want to copy, and press Ctrl+C to copy it. Then, in Excel, press Ctrl+Alt+V if you’re using a Windows computer, or Ctrl+Cmd+V if you’re on a Mac, and click “Text” in the Paste As Special dialog box.
- Always check copyright restrictions or referencing requirements before copying other people’s work.
Leave A Comment?