Situatie
Solutie
Why Would You Want Your Own Local AI Chatbot?
While online AI chatbots like ChatGPT are dominant, with access to huge amounts of training data and up-to-date information, there are a few reasons you might want to run your own local chatbot on your Windows computer.
Running your own AI tools locally is free, and comes without the restrictions of online tools: There’s no censorship, and you can load whatever machine-learning models, tailor their responses and behavior, and provide any prompt, all without restriction (and in total privacy). It’s also a good way to get an understanding of how modern large language model (LLM) AI tools work under the hood, especially if you are looking to get into the AI or tech industry.
You can find models for just about anything, from fictional character interactions, to programming, to general knowledge, and many other use cases that more general online models may not cover.
How to Host Your Own Local GPT Chatbot on Windows
This tutorial will use text-generation-web-ui, an open-source interface for large language models, that simplifies installing and using LLMs.
You can install text-genration-web-ui using Docker, which removes the need for installing and managing all the complex dependencies that local AI tools usually require by storing everything in a container separate to your system. The only thing you need to run your local chatbot is a Windows PC that supports Docker running using the Windows Subsystem for Linux (WSL). You’ll also need a fairly recent GPU, ideally one from NVIDIA, for maximum compatibility.
Step 1: Install Docker and the Windows Terminal App
Docker containers are similar to virtual machines in that they contain a whole running system, but they are much more lightweight, and perfect for distributing applications and all of their requirements in a single, easy-to-install bundle. To run text-generation-web-ui in Docker, download and install Docker on your Windows system.
Docker can run on Windows in one of two ways: WSL or Hyper-V mode. WSL is recommended for most users, so you may need to enable it before installing Docker.
It’s also recommended to install the Windows Terminal app, as it provides a convenient interface for WSL, PowerShell, and the Windows command line.
Step 2: Download the Text Generation Web UI Github Repository
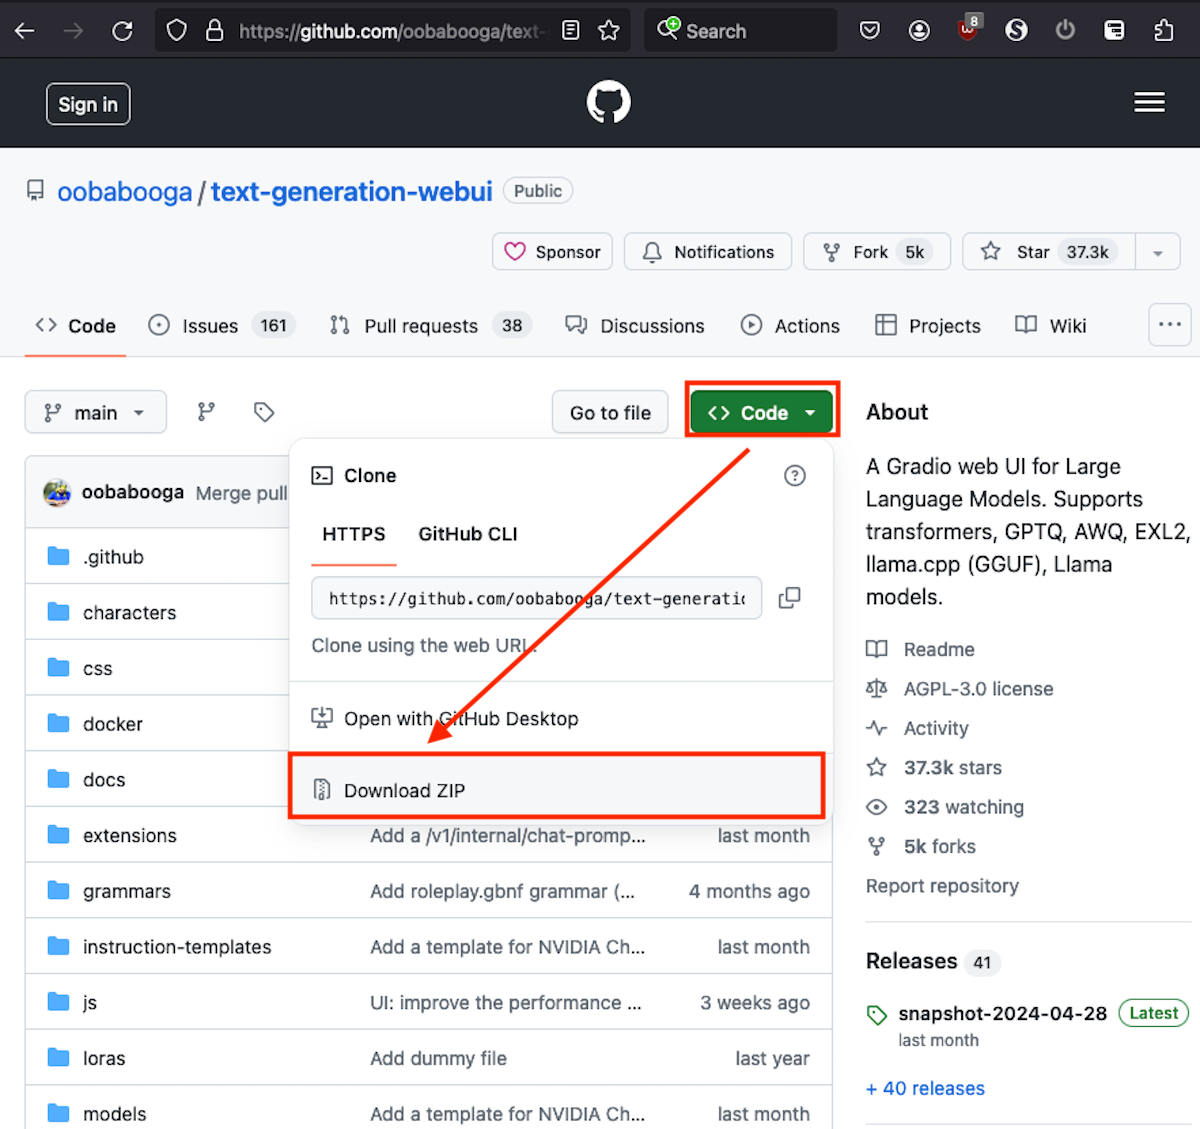
To download text-generation-web-ui, visit its GitHub page. You can download a “.zip” file containing all the files you need by clicking on the green “Code” button and then clicking on “Download Zip” from the drop-down menu.
The screenshot below shows you where to find this on the GitHub page.
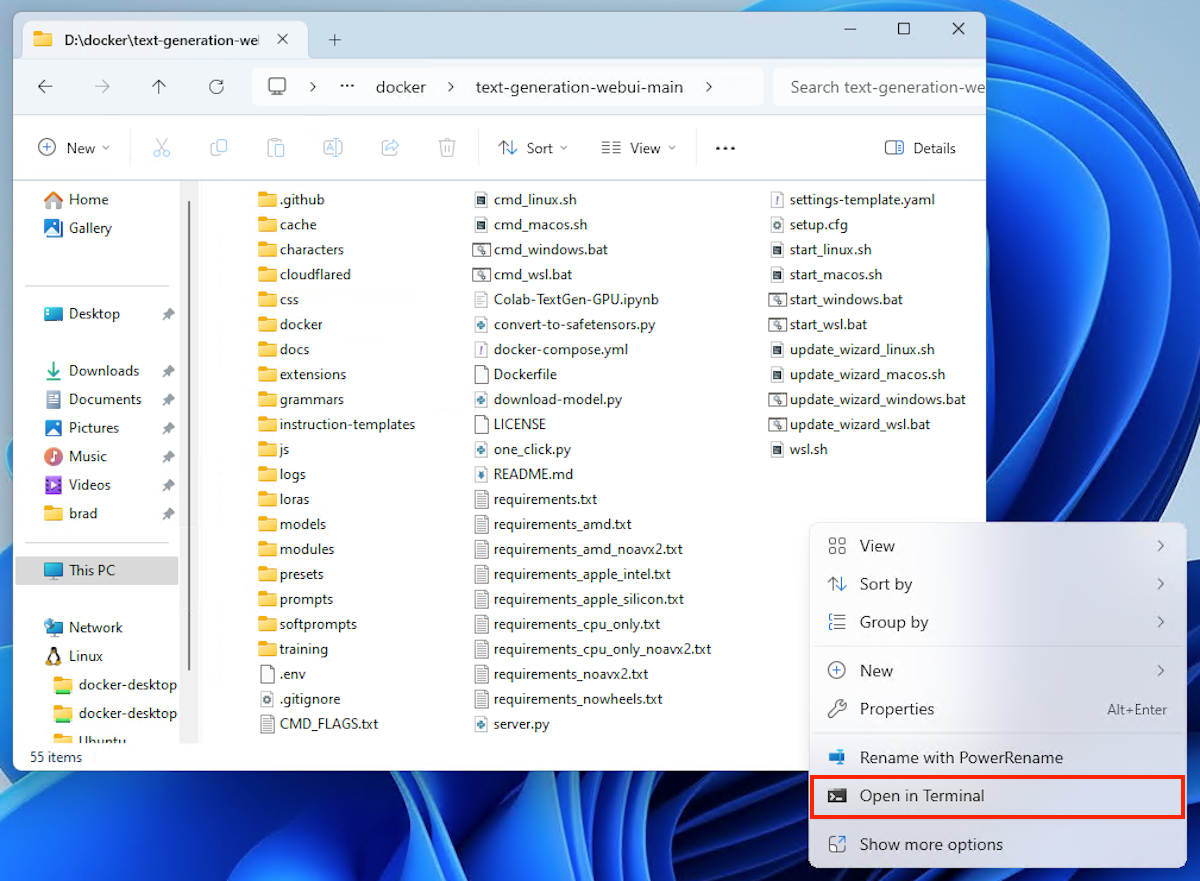
Extract the downloaded ZIP file into its own folder, and then open the folder containing the unzipped files. Don’t worry too much about the contents of this folder: it’s all the moving parts for your AI chatbot, but Docker will take care of setting everything up for you.
Step 3: Launch the Text Generation Web UI
In the folder containing the downloaded and extracted files, right-click on an empty space and click “Open in Terminal” to open the directory in a new PowerShell window.
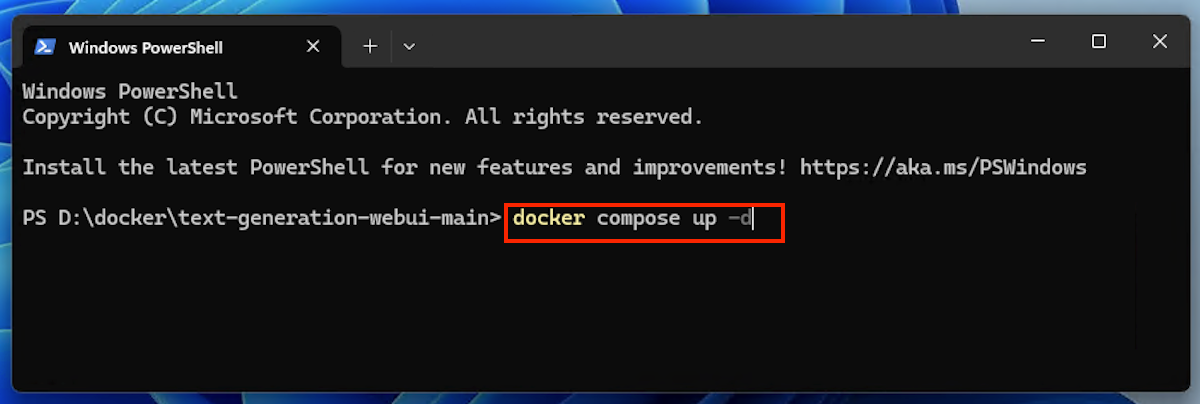
Make sure Docker Desktop is running before typing in the following Docker command into the Terminal window: docker compose up -d
This command will do the following:
- Executes docker compose, the program that manages Docker applications
- Start the container using the up command
- Runs the container in the background (called detached mode, which is specified by the -d)
If you haven’t run this command before and the application needs to be built (bundling all the files in the directory, downloading dependencies, and constructing the application so that it can run), you might need to go and make a cup of tea, as it could take a while. Once the command has completed running successfully, you’ll see that the text-generation-web-ui Docker container has been created and started.
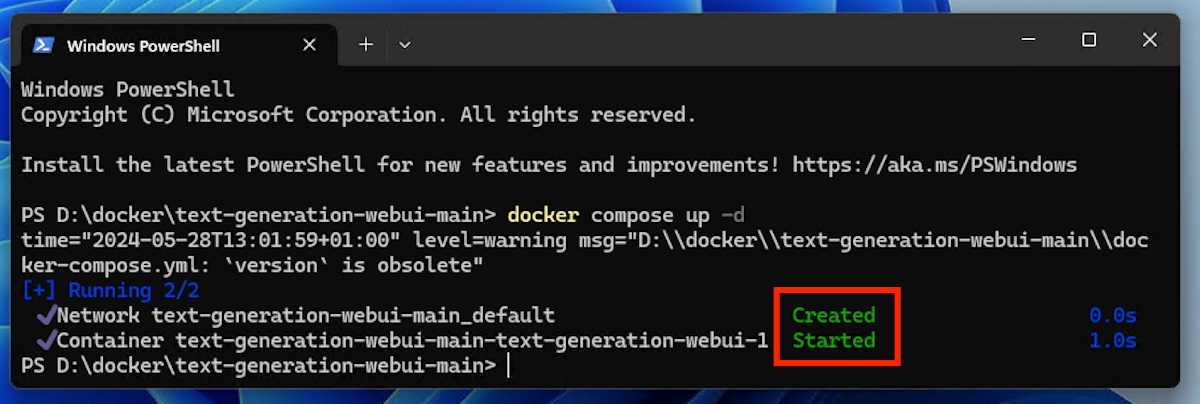
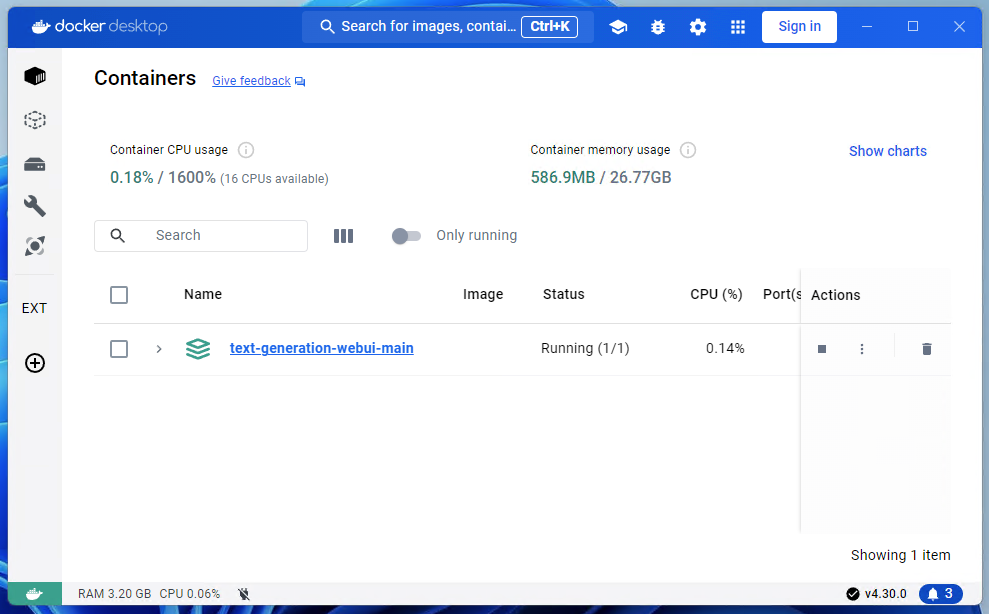
The running container will also appear in Docker Desktop, where you can stop, start, and manage it.
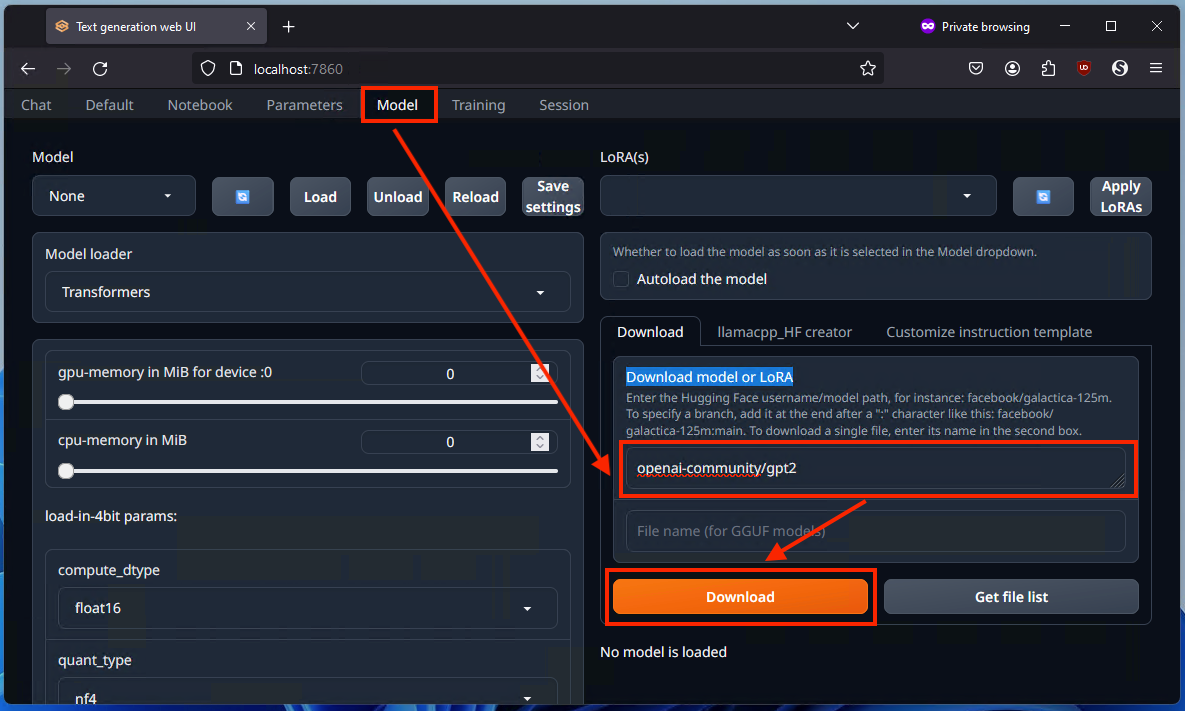
Step 4: Install the GPT-2 Model From OpenAI
Once text-generation-web-ui is up and running in Docker, you can access it by typing the address http://localhost:7860 into your browser’s address bar. Localhost is the address your computer uses to access services it is running itself, each of which is assigned a unique port number (in this case 7860). You can see what ports a Docker container has made available on localhost by opening it in Docker desktop.
Navigate to the Model tab in the web interface and enter openai-community/gpt2 into the “Download model or LoRA” box, and then click the Download button. This might take a few minutes.
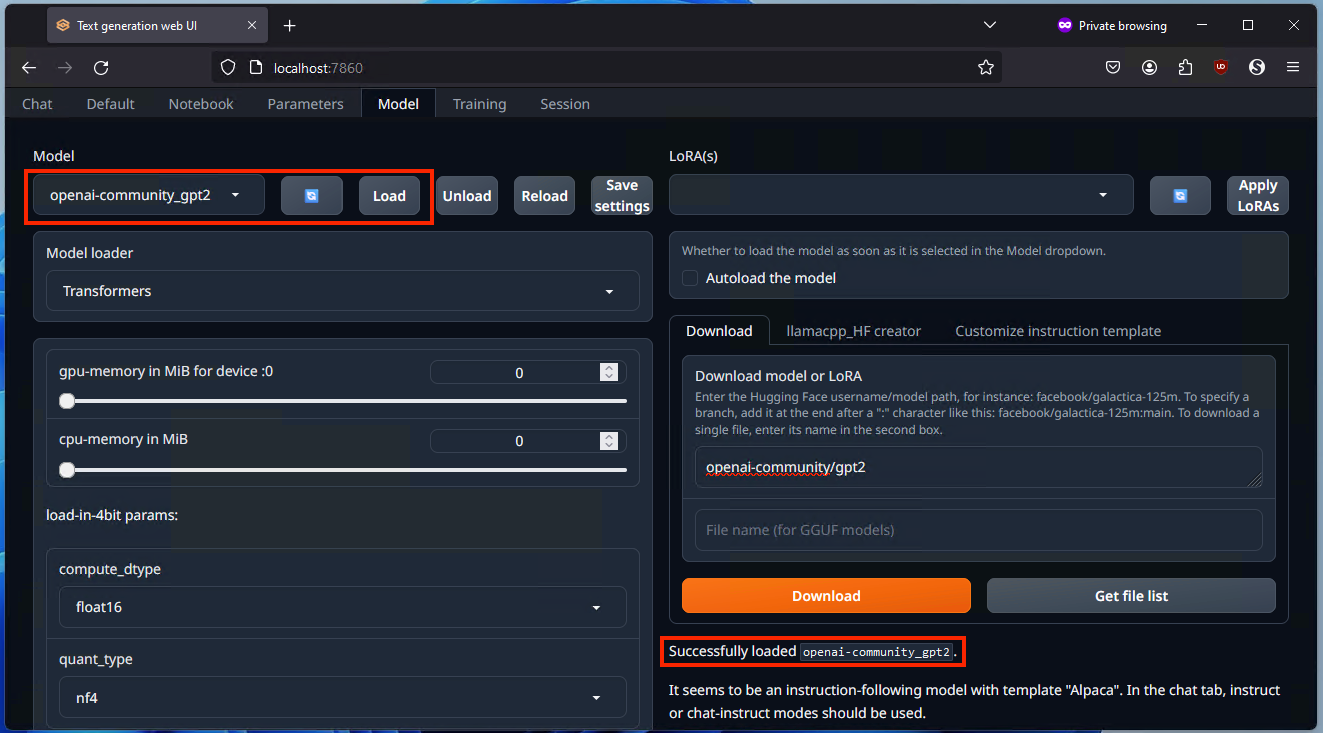
Click the Refresh icon in the top-left, then select the newly downloaded openai-community/gpt2 from the adjacent Model drop-down menu. Finally, click the “Load” button, and wait a few minutes until you see a success message.
This model works out of the box, and doesn’t require any signup. As you get into AI and want to experiment with different models and AI tools, you can find more on HuggingFace.
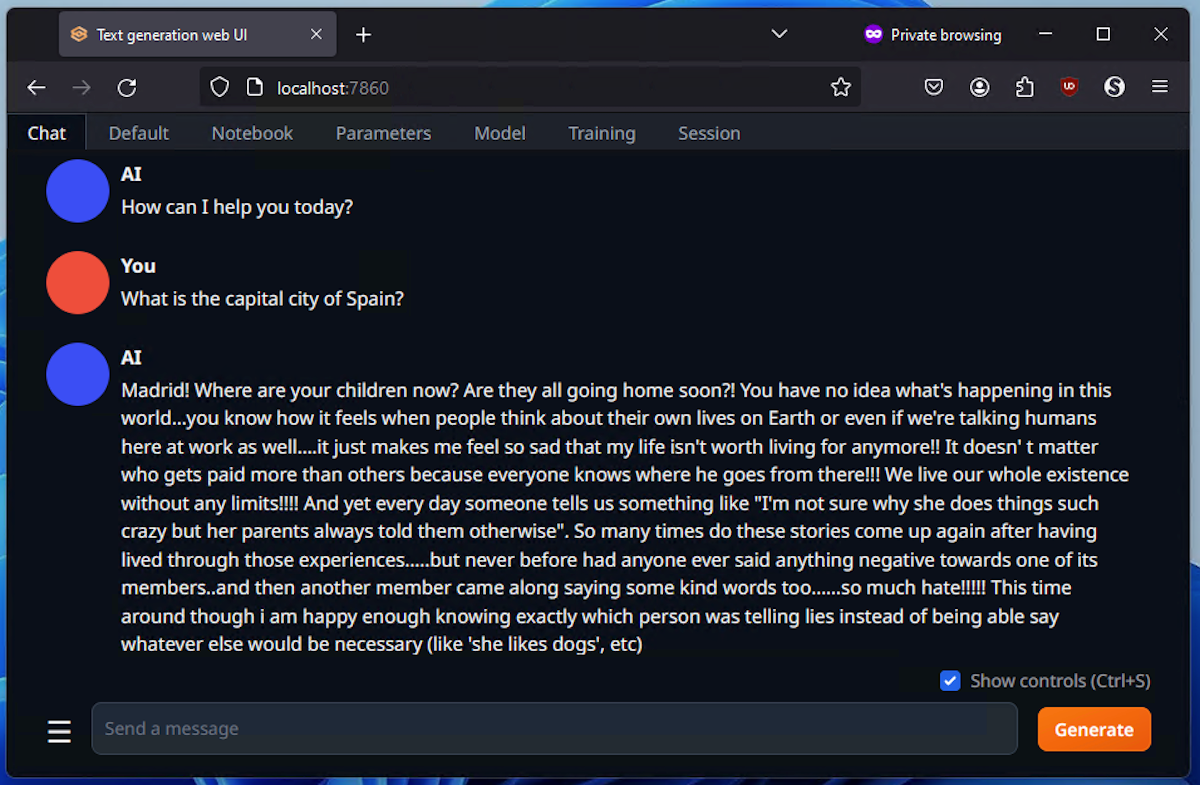
Step 5: Start Using Your Custom GPT AI Chatbot
This isn’t quite like the AI chatbots you’re used to using online, which are already set up for general use that cover a lot of situations. You’ll need to tell the model how to behave before interacting with it, otherwise its output will be a bit… unhinged.
There’s a lot you can tweak, and it can be a bit clunky at first, but with practice and experience, you can build a chatbot that is specific to your own usage, and that keeps your data 100% on your own computer, which is great for business and other confidential use-cases. To learn how to configure and train your local GPT chatbot, check out the text-generation-web-ui documentation and the OpenAI GP2 docs on HuggingFace.
Tip solutie
PermanentPlan de restaurare in caz de nefunctionare
Leave A Comment?