Situatie
Solutie
Your script is ready. You’ll now schedule it with Task Scheduler so it runs at the specified interval, automatically clearing your PC’s temporary files. To do that, open Windows Search (press Windows+S), type Task Scheduler, and launch the utility.
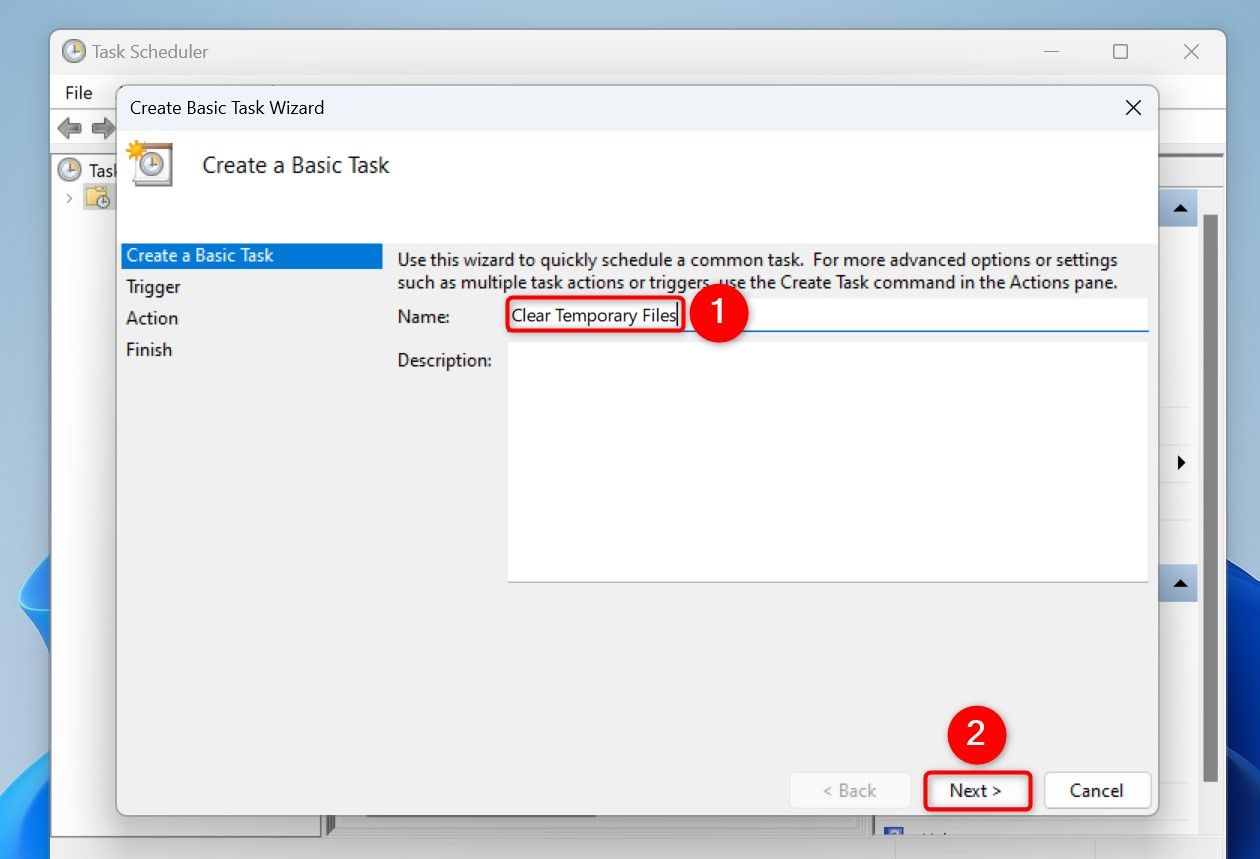
In Task Scheduler’s right sidebar, click “Create Basic Task.” Choose the “Name” field and type something like Clear Temporary Files. Then, select “Next”
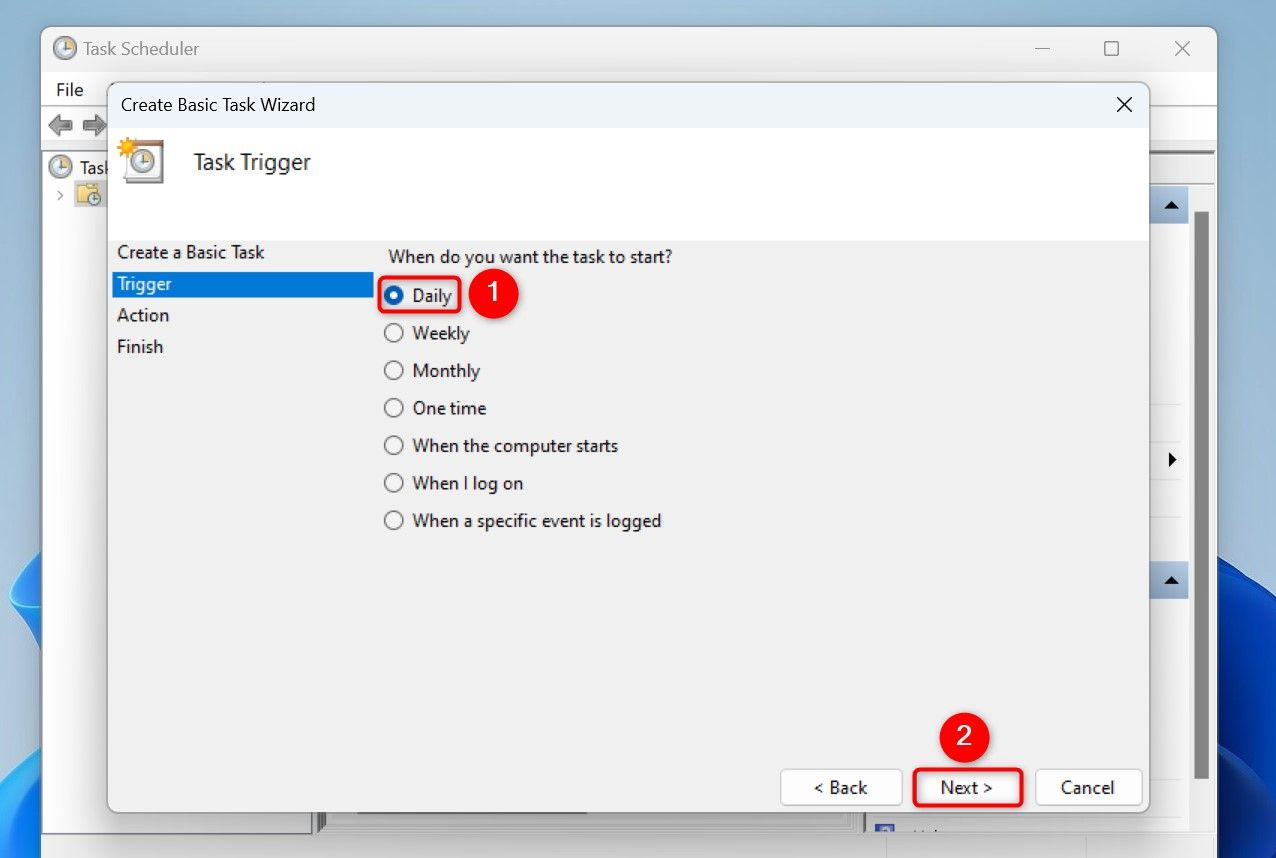
Select how often you want to run your script. To clear the temporary files every day, select “Daily.” Then, click “Next”
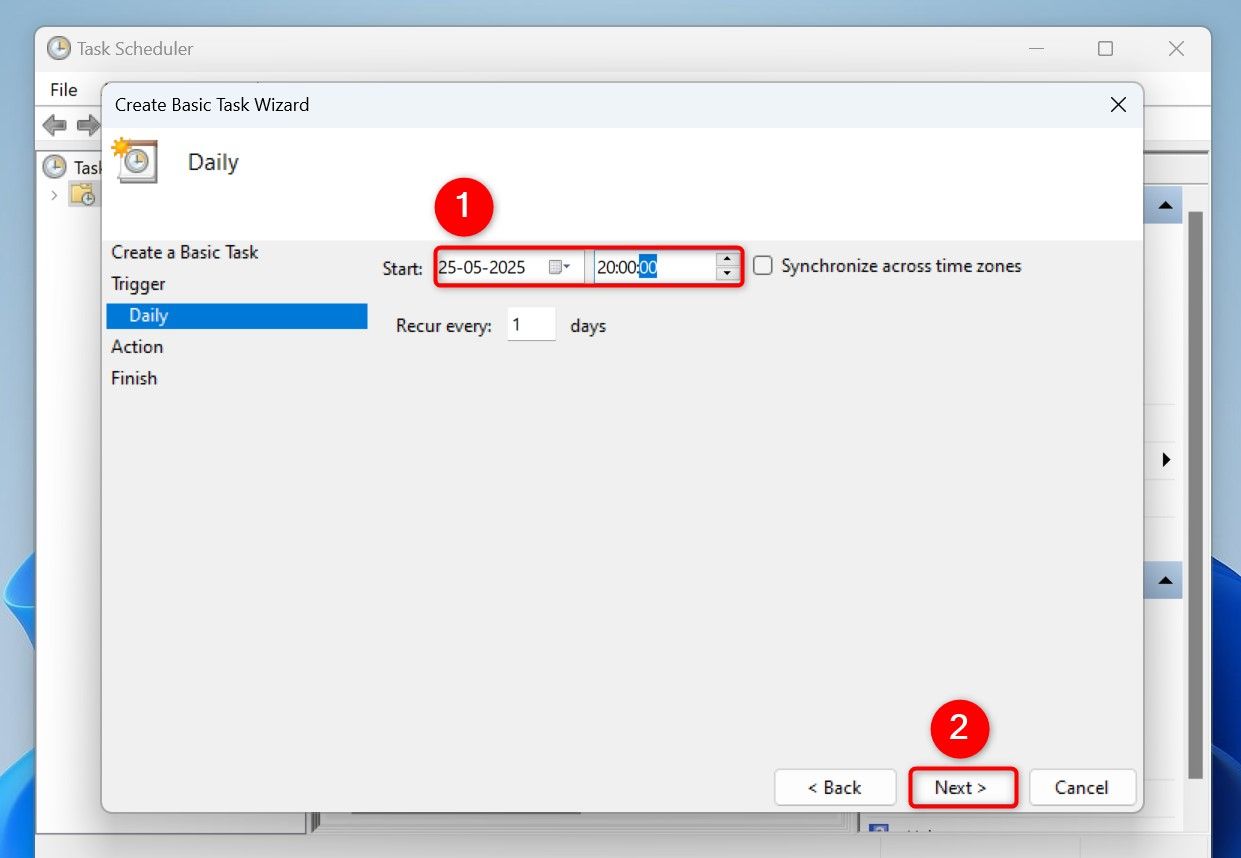
Choose the “Start” field and select the date when the task should start occurring. Specify the time the task should run. Then, click “Next”
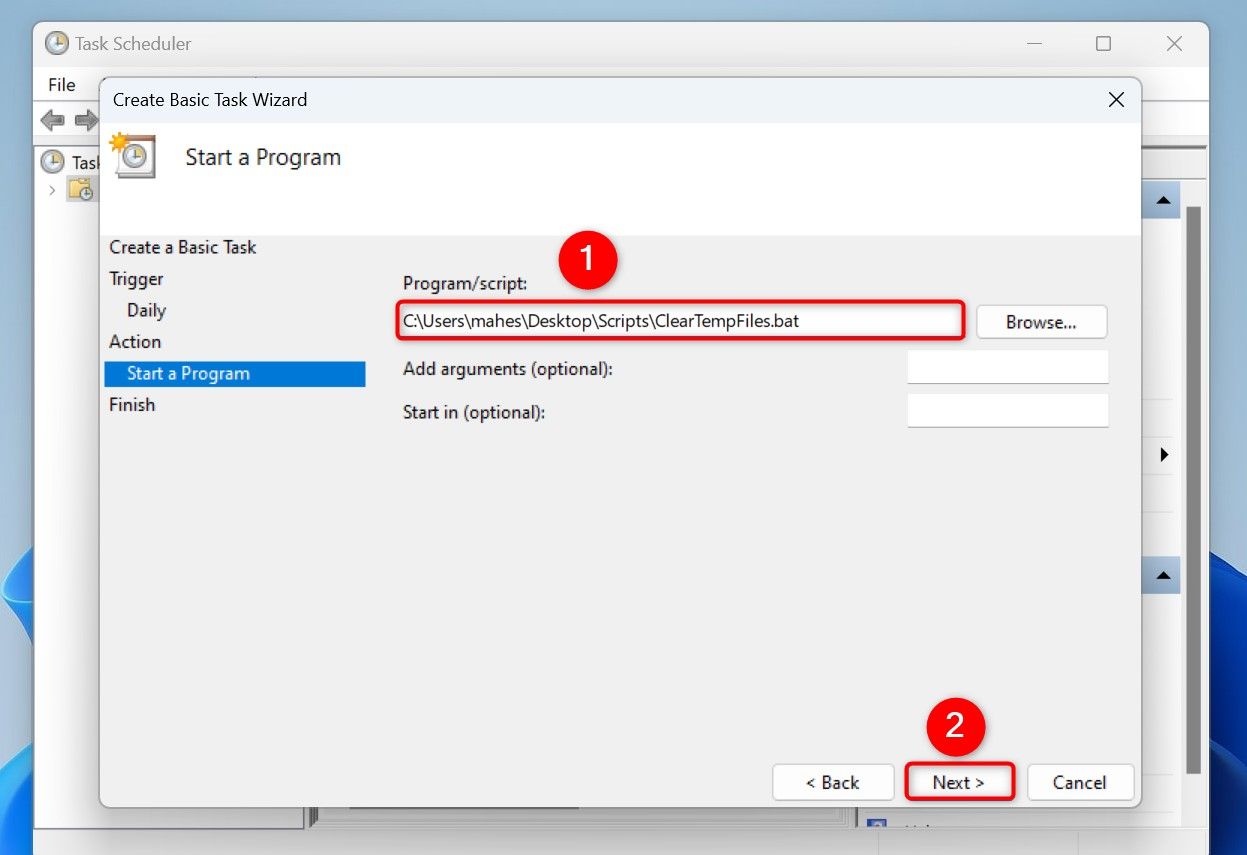
Choose “Start a Program” and select “Next.” Click the “Program/Script” field and type the full path to the script you created earlier. Then, click “Next”
On the final screen, enable the “Open the Properties Dialog For This Task When I click Finish” option. Then, click “Finish.” On the open window, at the bottom, turn on the “Run With Highest Privileges” option. Then, click “OK”.

From now on, Task Scheduler will automatically run your script at the specified time, clearing temporary files. If you want to turn off the functionality anytime, right-click your task in Task Scheduler and choose “Disable. To remove the task for good, right-click it and choose “Delete”.
Leave A Comment?