Situatie
Solutie
HDDs and SATA SSDs are largely following the same upward price trend as their faster NVMe counterparts, making upgrades not feasible for most people. So, when adding a new drive isn’t an option, uncovering and reclaiming hidden gigabytes of space on your disk can be just as effective—and best of all, completely free.
Start with Windows’ built-in tools
Windows has a couple of ways to help you manage your storage. One of my favorite Windows tools of all time is Disk Cleanup.
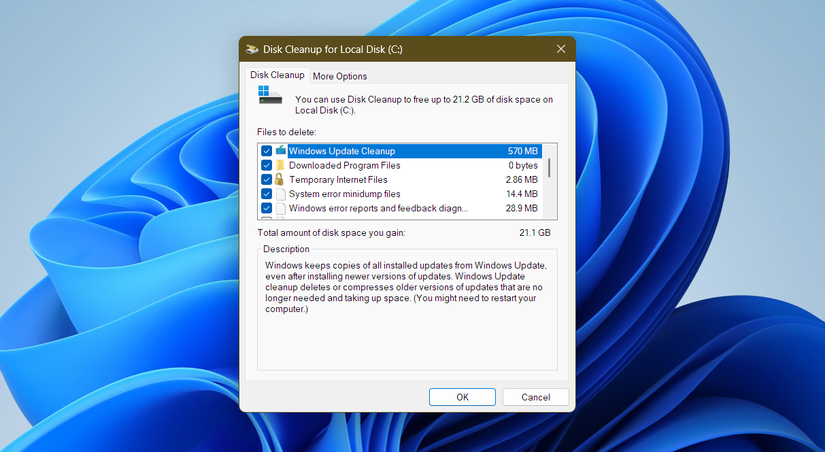
Disk Cleanup does several things to free up space: it deletes temporary files created by Windows and apps that aren’t needed anymore, empties your Recycle Bin, removes old Windows update installation files, and clears caches and old system logs. It’s helped me free up gigabytes of storage space on multiple occasions over the years. Just recently, I was able to free up over 20GB using the tool, largely because I’d forgotten to empty my Recycle Bin for a while.
If you’ve owned a Windows system for years but never used Disk Cleanup before, you’re potentially sitting on gigabytes of old files that could be cleaned up with a single click.
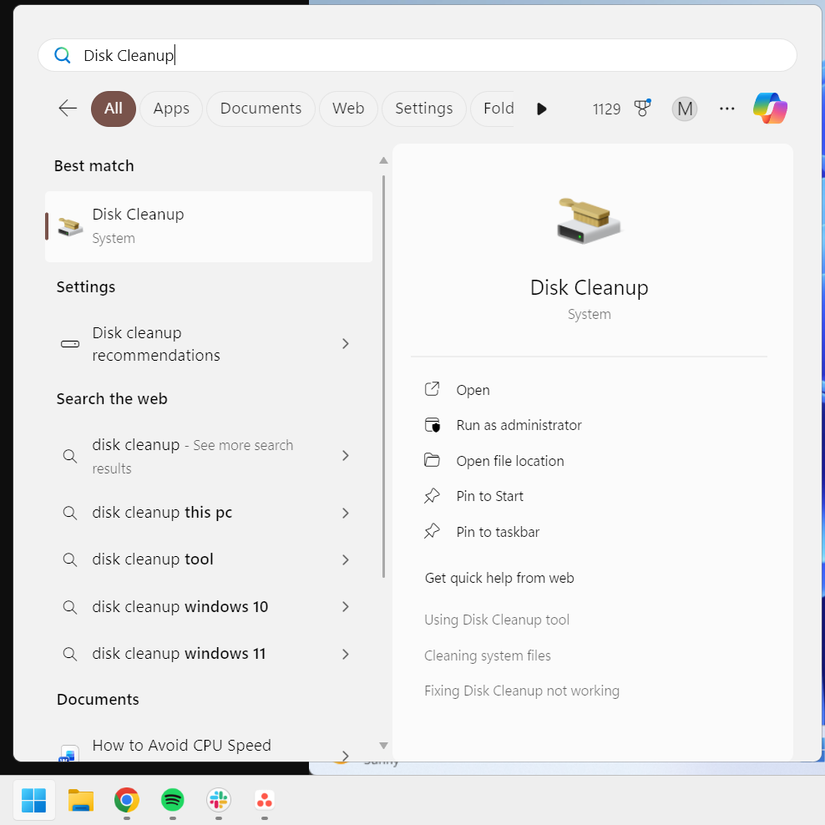
To run Disk Cleanup on your system, head over to Start > type “Disk Cleanup” > click on the tool.
Select the drive you want to clean up and check “Clean Up System Files.” This allows the tool to delete old Windows update files, memory dumps, logs, and other temporary files you no longer need.
Allow the tool to finish scanning—this can take a while if you’ve never run it before or if you have a large, slow HDD. When the scan is complete, check the boxes next to the file types you want to delete, focusing on the large items that take up gigabytes of space.

Then hit “OK,” let the tool finish cleaning, and just like that, you’ve freed up plenty of extra space. But what if you could automate this functionality? Well, you can (kind of) with the help of Storage Sense. It’s essentially a smarter version of Disk Cleanup that automatically deletes temporary system and app files, which are some of the biggest unnecessary data hogs in Windows.
It can also automatically delete files in the Recycle Bin and the Downloads folder that so many people forget to clean out.
By default, Storage Sense occasionally cleans up temporary files, but the user-generated content cleanup feature only activates when disk space is low.
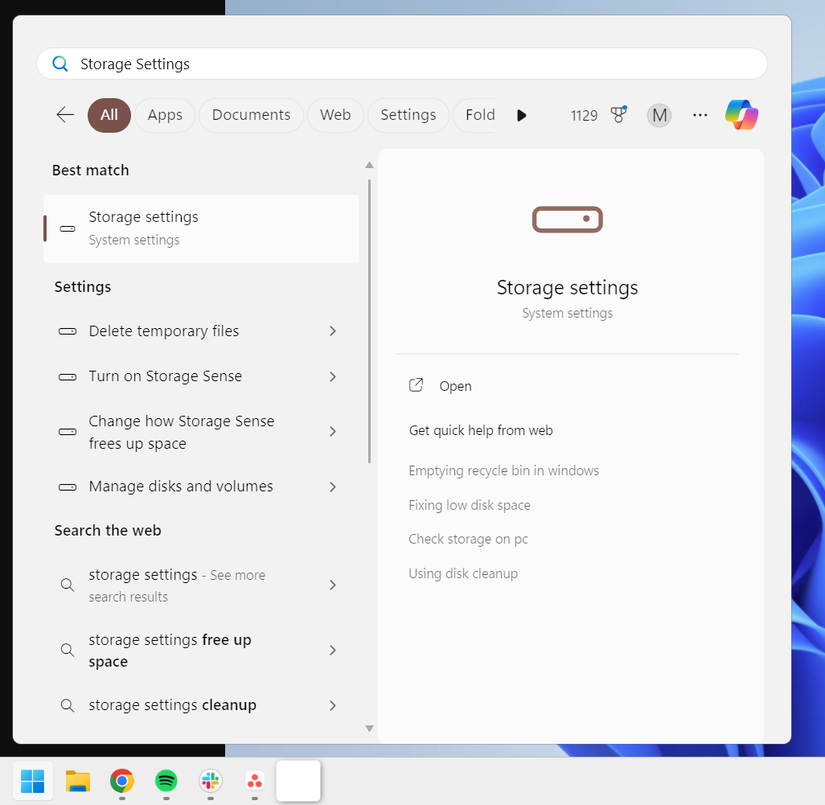
Whether you want to confirm that Storage Sense is enabled on your system or adjust its settings, you can access the feature by opening Start and typing “Storage Settings”.
Under “Storage Management,” you’ll see the option “Storage Sense.” Make sure it’s enabled.
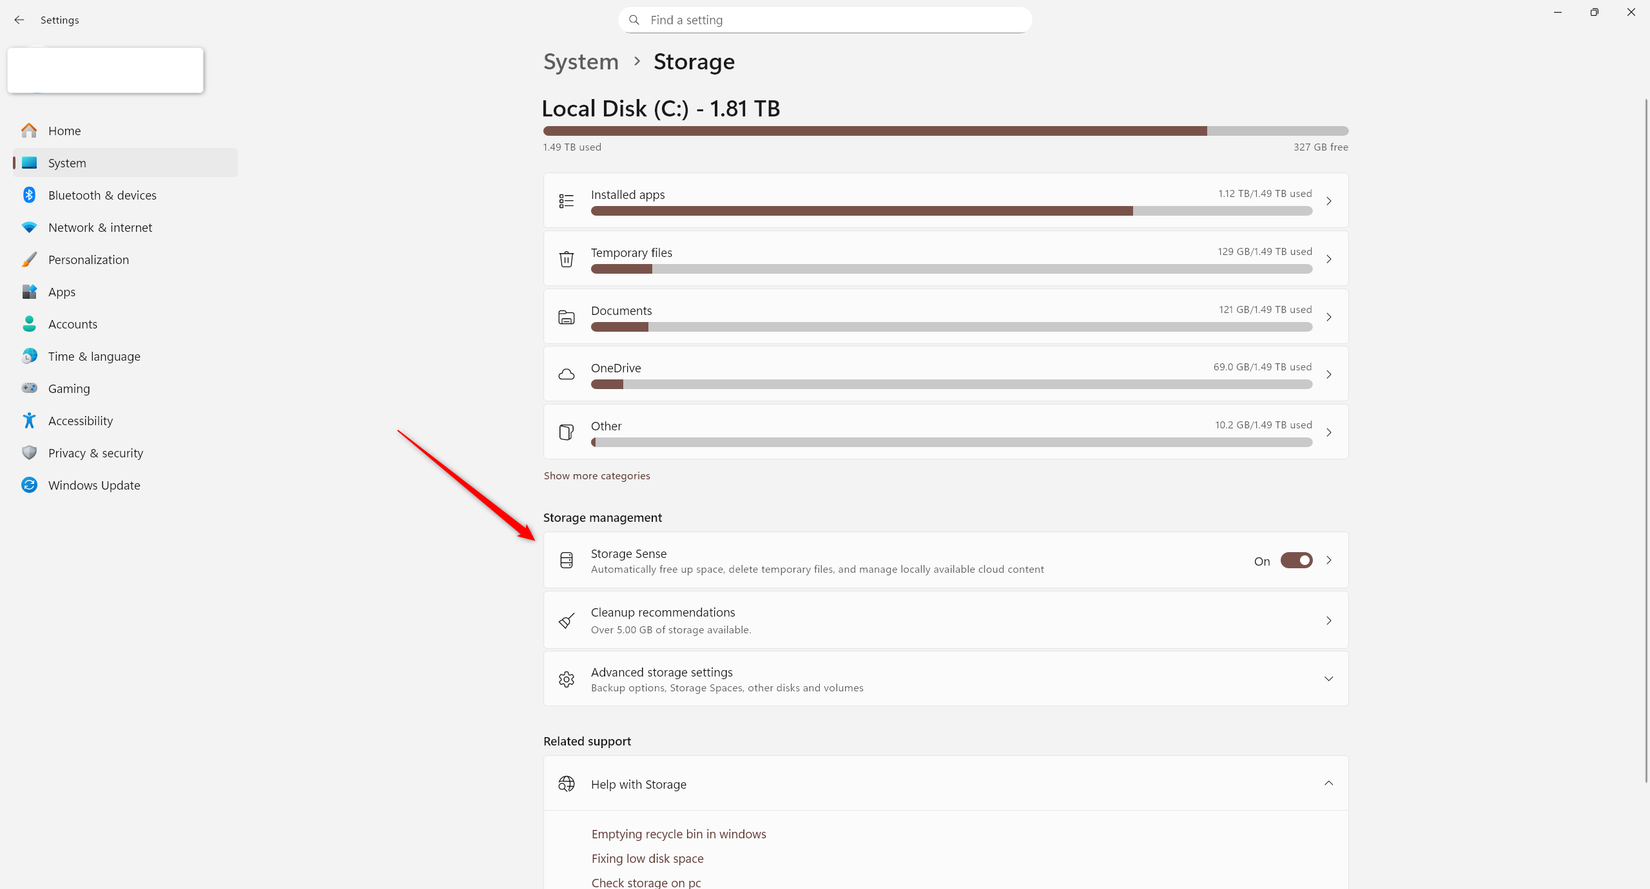
To configure it, click the option window, and you can then fine-tune how the tool behaves.

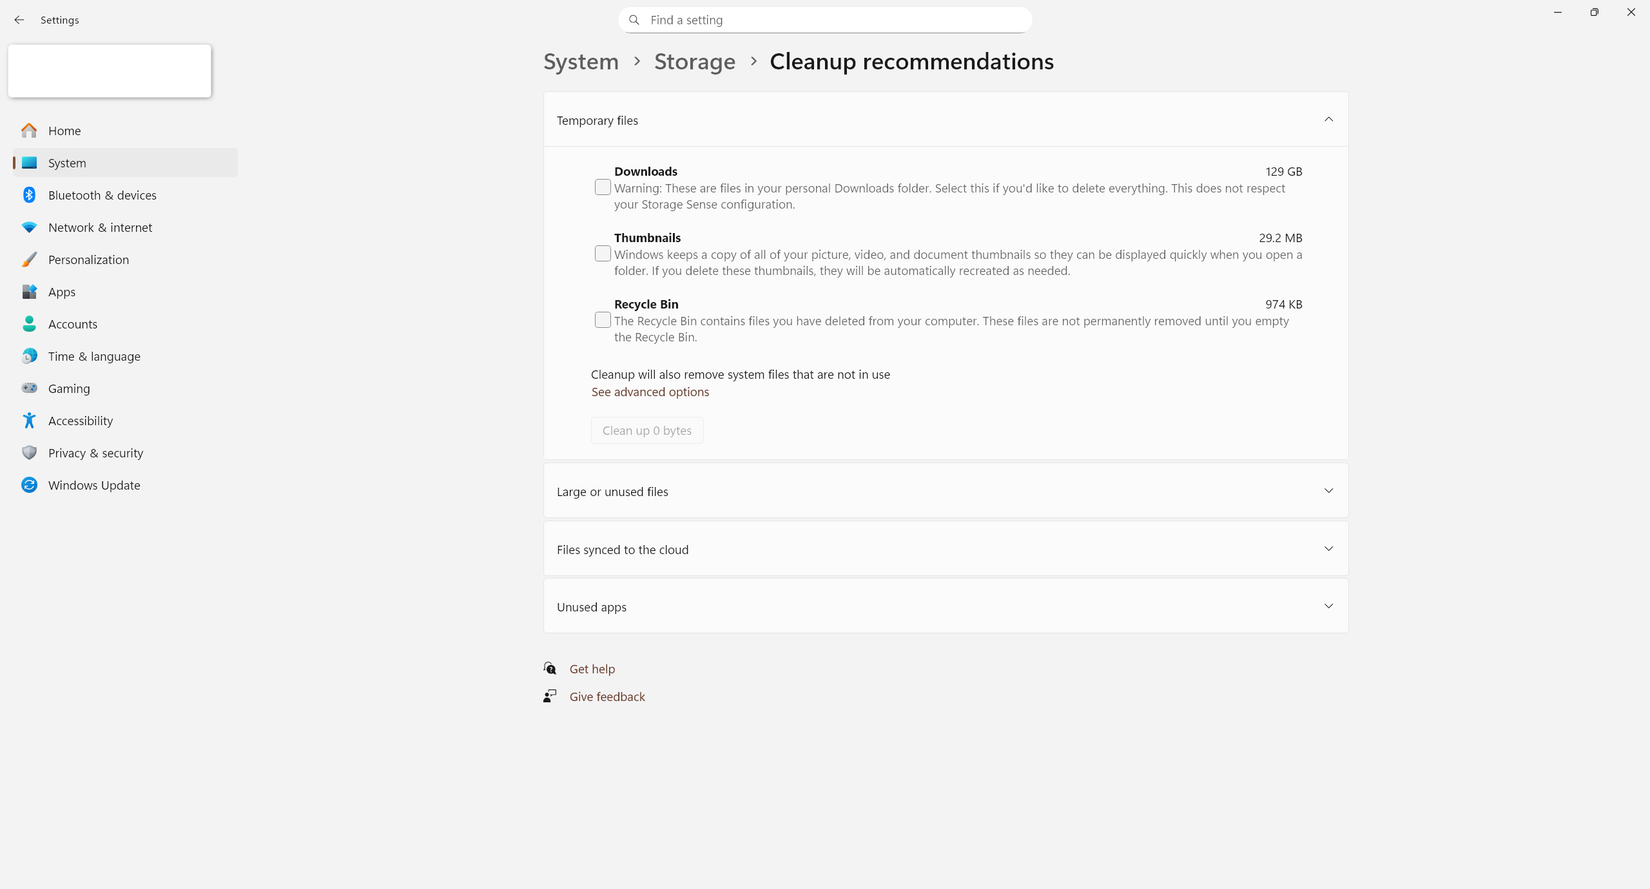
Storage Sense isn’t the only interesting option in Windows’ Storage Settings, though. You might have spotted the “Cleanup Recommendations” option underneath Storage Sense, and that’s exactly where we’ll head next.
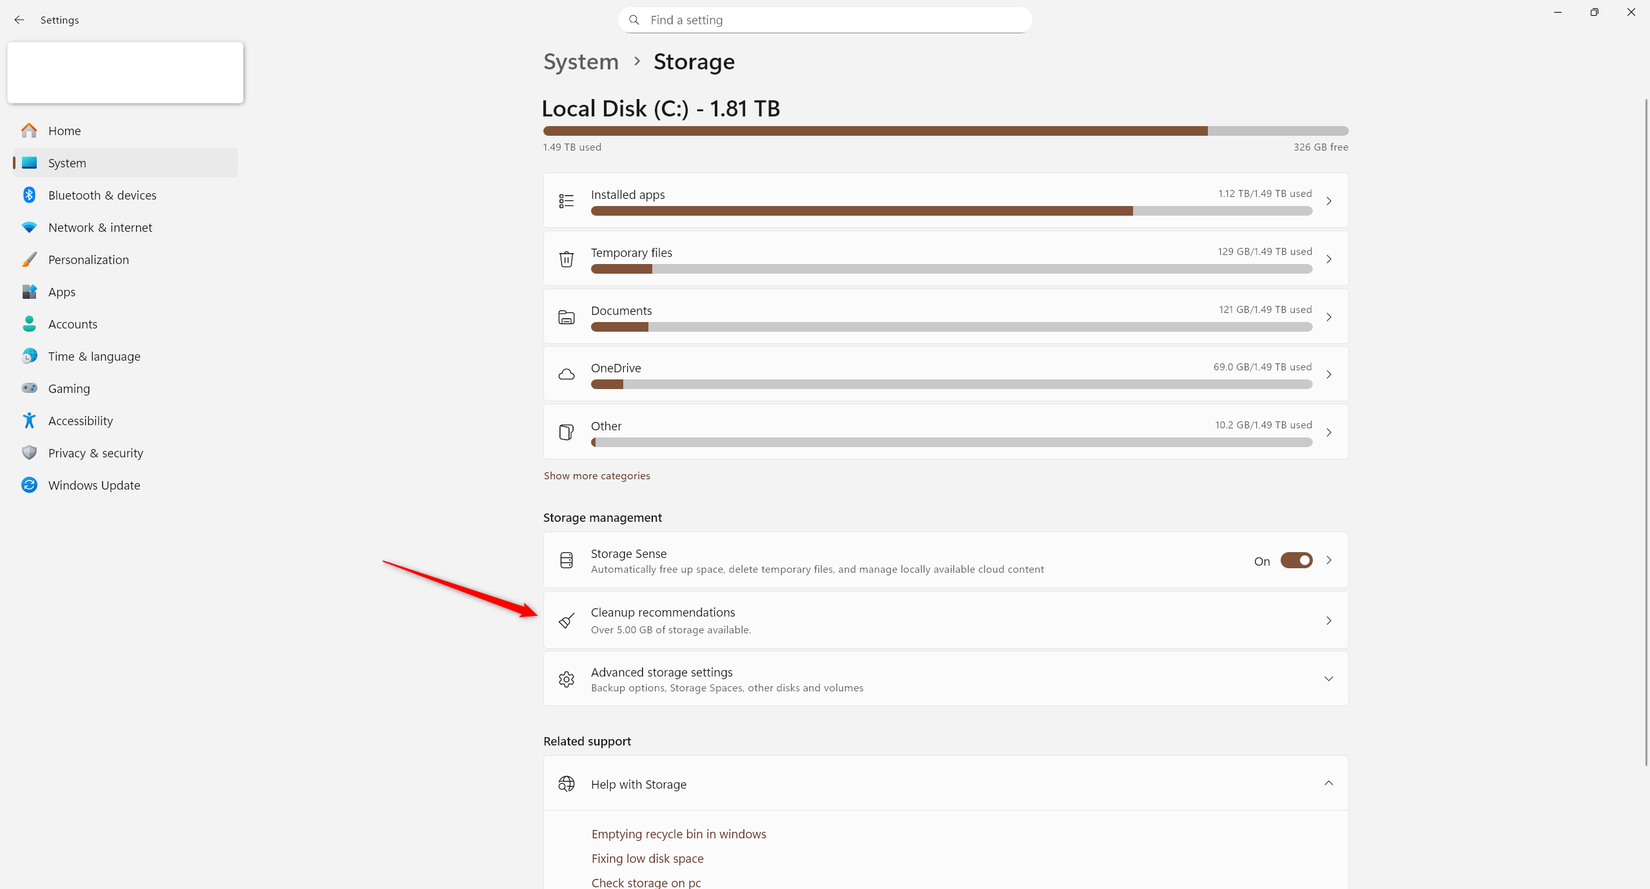
This storage management solution gives you an easy way to delete temporary files, large or unused files, files you’ve synced to the cloud, and unused apps. It’s not perfect (more on that in a second), but it’s a good place to start removing files you no longer need.
Another intuitive way to save a few gigabytes of space on your drive is to use OneDrive. Whether you like it or hate it, you can’t argue that it’s a convenient solution since it’s already integrated into Windows.
Windows allows you to mark files as online-only, effectively offloading at least a portion of your data to the cloud while still keeping easy access to those files within the system. The last tip might be obvious, but you should probably consider deleting unused apps and games if you want to free up potentially hundreds of gigabytes on your drive.
Leave A Comment?