Situatie
Navigating the BIOS can feel overwhelming, with so many settings to consider. But there are a few simple tweaks you should make in the BIOS to boost the performance and stability of your system.
Solutie
1. Password Protect Your BIOS
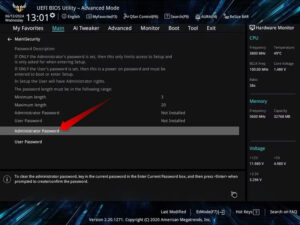
While we’re careful to password-protect our user accounts, we often overlook securing the BIOS. This oversight can enable anyone to enter your computer’s BIOS and alter system security settings, even if your user account is password-protected. By setting up a password for your BIOS, you can mitigate these risks and protect your data if the device gets stolen.
To set up this security feature, restart your computer and press the designated key(s) to access the BIOS setup utility. Then, locate the security settings section, where you can set up a password, usually labeled as “Supervisor Password,” “Administrator Password,” or “User Password.” Save the changes and exit the BIOS.
From now on, whenever you need to modify a BIOS setting, you’ll need to confirm your identity by entering the password.
2. Change Fan Control Settings
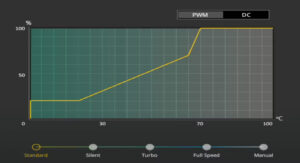
If your PC overheats or struggles with heat dissipation (which is most noteably a problem with laptops), one effective solution is to increase the fan speed. Conversely, reducing the fan speed can prolong its lifespan. Since Windows lacks built-in options to control fan speed, users often turn to third-party software. If you don’t want to go that route, you can adjust fan speed in BIOS.
Enter the BIOS setup, and locate the hardware monitoring section, which might be named “Hardware Monitor,” “PC Health Status,” “Fan Control,” or similar. Within this section, go to the fan control settings. Here, choose from predefined fan profiles like “Silent,” “Standard,” “Turbo,” or more. You can also manually control the fan curve.
Not all manufacturers include fan control options in their BIOS settings, particularly on laptops. Desktop computers typically offer more flexibility in fan speed management.
3. Change the Boot Order
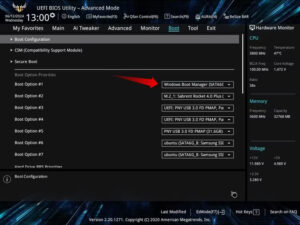
The boot order refers to the sequence in which a BIOS or UEFI searches for a bootable operating system during startup. If multiple storage devices are installed and your primary operating system resides on a lower-priority drive, your computer might expend unnecessary effort searching for a bootable OS on other drives.
To optimize boot time and minimize the risk of encountering boot errors, you should prioritize your primary operating system at the top of the boot order list in BIOS settings. To modify the boot order, open BIOS and go to the “Boot” section. If your primary OS drive isn’t already at the top of the boot order, make sure to select it as the first boot option.
After you’ve made these adjustments, save the changes, exit BIOS, and restart your computer. You may experience a noticeable improvement in boot time. Even if you don’t get a performance improvement, changing your boot order to include a Windows recovery USB or other utility programs is an important part of troubleshooting a malfunctioning PC.
4. Overclock Your RAM
Although you can adjust other parameters, overclocking RAM primarily involves increasing data transfer rates and refining timings to enhance overall device performance, especially for tasks that require substantial memory usage. These adjustments reduce latency, which makes applications more responsive and snappy.
To overclock your RAM, open the BIOS and navigate to the memory or overclocking section. Manual RAM overclocking lets you adjust memory frequency, timings, and voltage settings. However, it demands caution, as improper configuration can cause system instability or even damage your hardware, though that is very unlikely.
To mitigate these risks, you can use pre-configured profiles such as XMP (for Intel systems) or DOCP or AMP (for AMD systems), which provide safe overclocking options. The preset overclocking options available through XMP, DOCP, or AMP are usually pretty stable, but there are no guarantees that every specific setting will work with every hardware configuration.
5. Disable the unused Integrated Peripherals
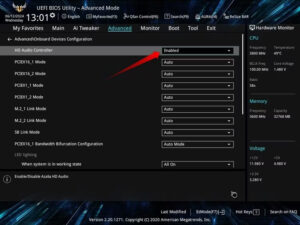
Turning off unused integrated peripherals through the BIOS can yield several benefits. For instance, disabling onboard audio when using a dedicated sound card can prevent conflicts between audio devices and improve audio performance. This doesn’t just apply to sound cards—dedicated and integrated hardware trying to do the same thing usually increases the chances of bugs occurring.
Likewise, deactivating other peripherals, such as unused RAID controllers and ports, can reduce power consumption and potentially improve system stability.
To implement these adjustments, navigate to the BIOS and locate the section labeled “Integrated Peripherals,” “Onboard Devices,” or “Advanced.” Within this section, turn off the peripherals that are not in use. However, don’t turn off integrated peripherals unless you’re certain you have a dedicated alternative installed in your system. Otherwise, you may encounter problems with any programs that require that hardware to work. More importantly, disabling something essential will lead to system instability.
6. Optimize CPU Performance
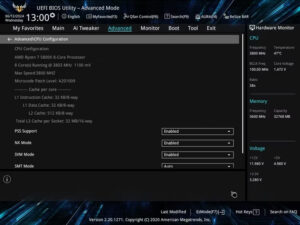
Most manufacturers, particularly in desktop computers, offer BIOS settings that can improve CPU performance. Features like Hyper-Threading, which enables CPU cores to handle two threads simultaneously, boost performance in multi-threaded applications such as video editing and rendering.
Similarly, Turbo Boost (for Intel CPUs) and Precision Boost (for AMD CPUs) raise the CPU’s clock speed beyond its base frequencies, ensuring it can meet processing demands as they escalate. Some manufacturers offer additional features to maximize CPU performance when processing demands increase.
However, these features typically increase power consumption. Disabling them, if unnecessary, can help reduce power usage. Conversely, you can enable them if you want better performance. To turn these features on or off, access the BIOS settings and navigate to the “Advanced,” “CPU Configuration,” “Performance,” or a similar tab.
Adjust the settings according to your requirements. Once configured, remember to save the changes and exit the BIOS.

Leave A Comment?