Situatie
Generally, API level means the Android Version. This determines which version the developers are targeting their application and what is going to be the minimum level of the android version in their application will run. For setting the Minimum level and Maximum level android studio provides two terminologies.
- minSdkVersion: This means the minimum Android OS version that will support the app and
- targetSdkVersion: This means the version for which the developers are actually developing their application.
The app will be compatible with all the versions of android which is falling between minimum level SDK and target SDK. Sometimes during development, there is a need to change the API level of the Android Studio. So to change the API level we have two methods.
Solutie
Pasi de urmat
This method is very simple and very straight forward. One needs to stay very alert while making changes here.
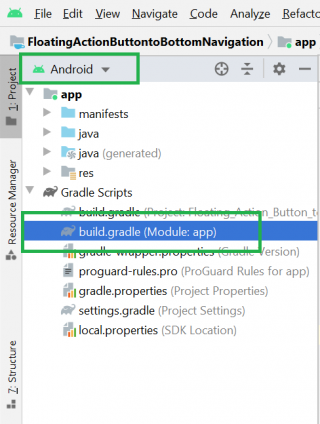
Step 1: Open your project in Android mode then go to Gradle Scripts > build.gradle(Module: app) as shown in the following image.
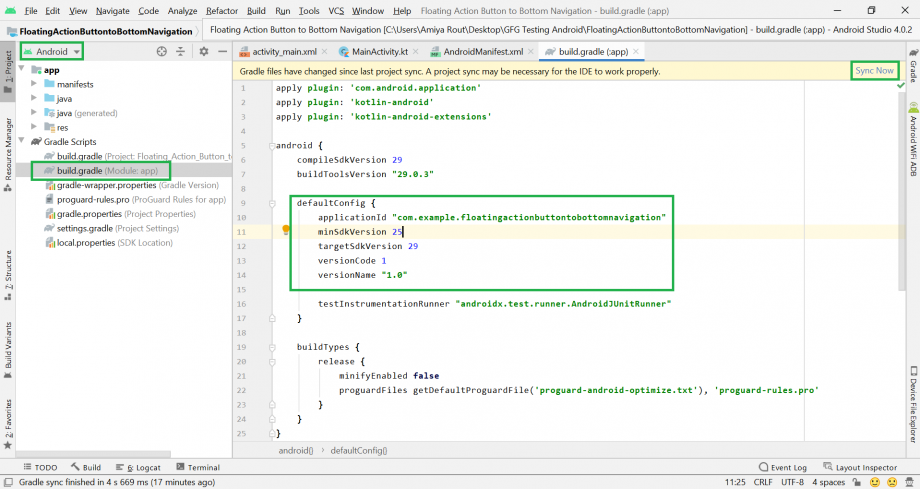
Step 2: Refer to the below image and here you have to change the minSdkVersion and targetSdkVersion as per the requirement. After changing as per the requirement then you have to click on the Sync Now button and you are done.
Method 2
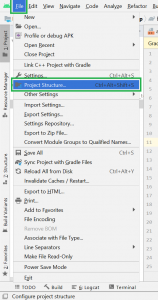
Step 1: Open Android Studio and go to File > Project Structure as shown in the below image.
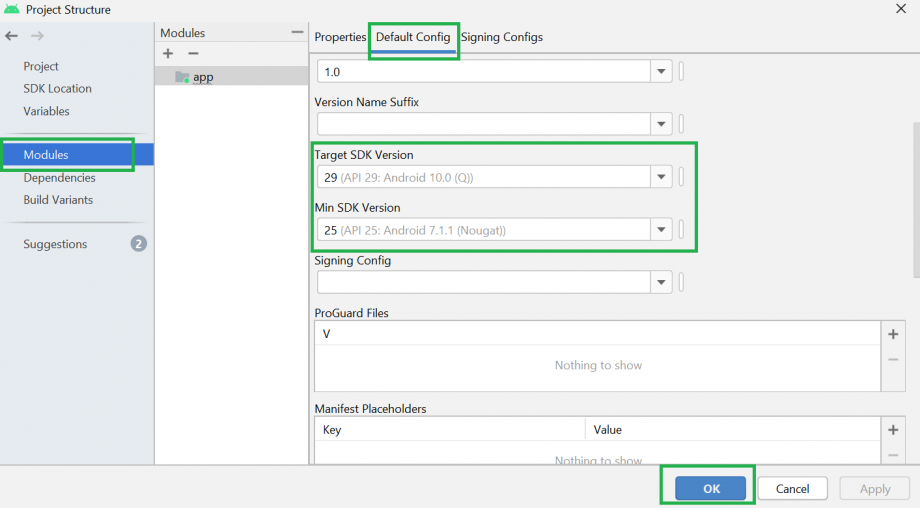
Step 2: A pop-up screen will arise like below. Now select the Modules > Default Config and scroll down and you can see two sections as shown in the below image in Default Config. There you change the SDK version as per your requirement and then click on the OK button below. And you are done.


Leave A Comment?