Situatie
To create a virtual machine with support for TPM and Secure Boot, use these steps:
Solutie
- pen VMware Workstation.
- Click the File menu and select the New virtual machine option.
- Click the Next button.
- Select the latest virtual machine hardware compatibility option.
- Click the Next button.
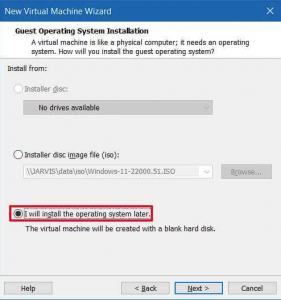
- Select the I will install the operating system later option.
- Click the Next button.
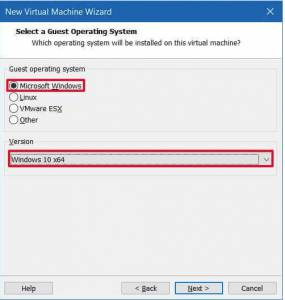
- Under the “Guest operating system” section, select the Microsoft Windows option.
- Under the “Version” section, select the Windows 10 x64 option. (If available, select the Windows 11 option.)
- Click the Next button.
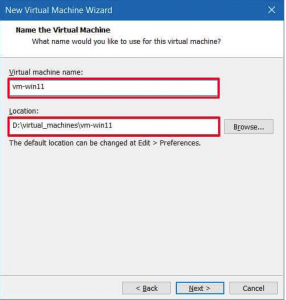
- Confirm a name for the Windows 11 VM.
- Confirm the location to store the virtual machine
- Click the Next button.
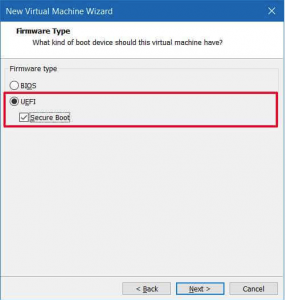
- Under the “Firmware type” section, select the UEFI option.
- Check the Secure Boot option.
- lick the Next button.
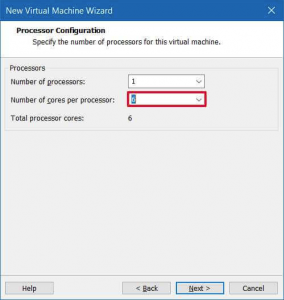
- Select the number of processor cores (two or more).
- Click the Next button.
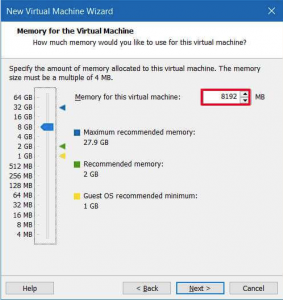
- Specify the amount of RAM (4GB or higher).
- Click the Next button.
- Select the preferred network connection.
- Click the Next button.
- Use the default I/O controller types option.
- Click the Next button.
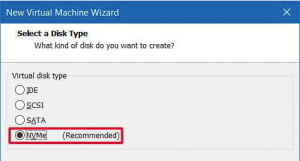
- Select the virtual disk type option. (NVMe is usually recommended, if available.)
- Select the Create a new virtual disk option.
- Click the Next button.
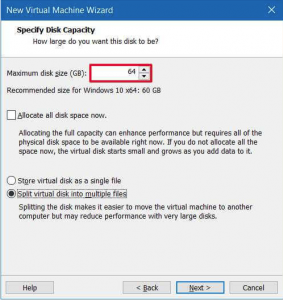
- Specify the disk size in gigabytes (64GB or higher).
- Use the default settings for the rest of the settings unless you want to use different options.
- Click the Next button.
- Click the Next button again.
- Click the Finish button.
- Select the virtual machine.
- Click the VM menu and select the Settings option.
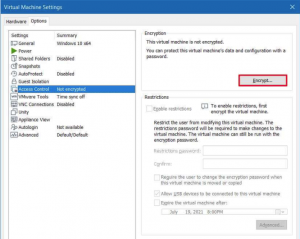
- Click the Options tab.
- Select the Access Control option.
- Under the “Encryption” section, select the Encrypt button.
- Create an encryption password.
- Click the Encrypt button.
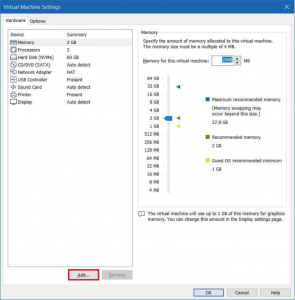
- Click the Hardware tab.
- Click the Add button.
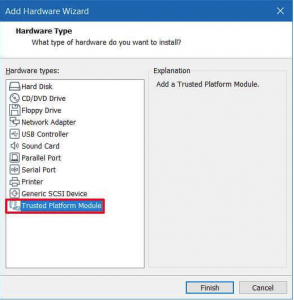
Select the Trusted Platform Module option.
- Click the Finish button.

Leave A Comment?