Situatie
Do you have an M1 Mac that you’d like to factory reset as if it were brand new? The process of factory resetting the M1 Mac line to restore the Mac to factory defaults basically erasing all data and reinstalling a blank macOS.
Before you go ahead with the steps mentioned below, make sure you back up the Mac and all the important files and data you want to keep as they will be permanently erased during the factory restoration. Without a backup, you will not be able to get those files back.
- Entering recovery mode is different on Apple silicon Macs. You need to shut down your Mac and then hold down the Touch ID/power button until you see “Loading startup options”. Now, choosing “Options” will take you to macOS Utilities. Here, select “Disk Utility” and click on “Continue” to get started.
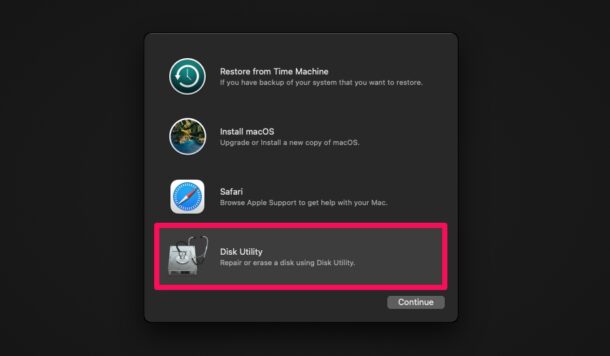
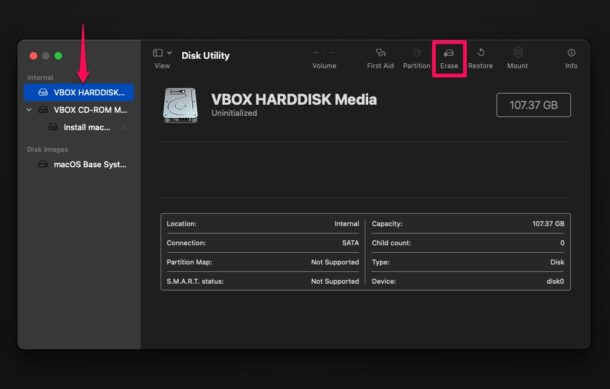
- Next, select the hard drive where macOS is currently installed from the left pane, typically “Macintosh HD”, and click on the “Erase” option located at the top of the window.
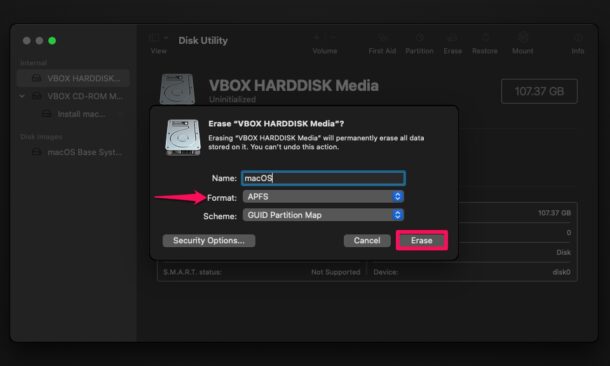
- Next, select the drive format as “APFS” and click on “Erase Volume Group” (or “Erase” if that is not available).
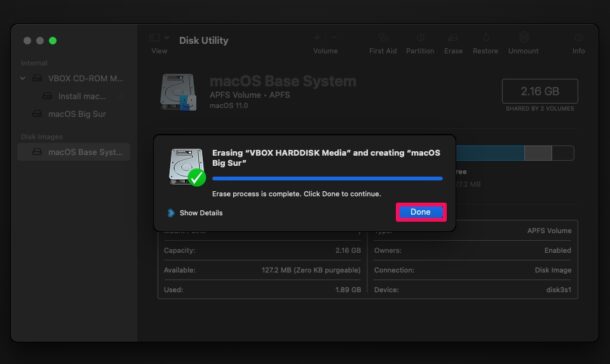
- This will initiate the drive wipe. It may take a few seconds to complete. Click “Done” to continue.
- Now, go back to the macOS Utilities screen, select “Install macOS” and click on “Continue”. You’ll be prompted to select the drive where you want to install macOS. Make the selection and click on “Install” to begin installing the factory version of macOS.
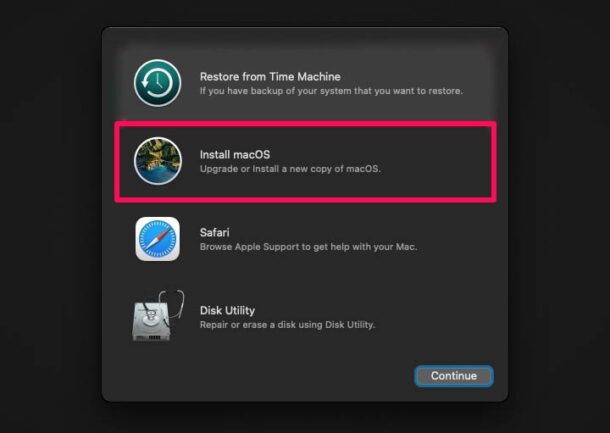
That’s all you need to do to perform a factory reset. At this point, you just need to patiently wait for the installation process to complete which could take a while. After the factory reset, you’ll need to go through the initial set-up screen like it’s a brand new Mac.

Leave A Comment?