Situatie
Solutie
Most laptops and desktops have the TPM (Trusted Platform Modules) chip integrated into the motherboard and have enabled it by default. If it’s not enabled, you will see an error message when you run the PC health check tool. Alternatively, you can check if TPM is running or not by following the steps below:
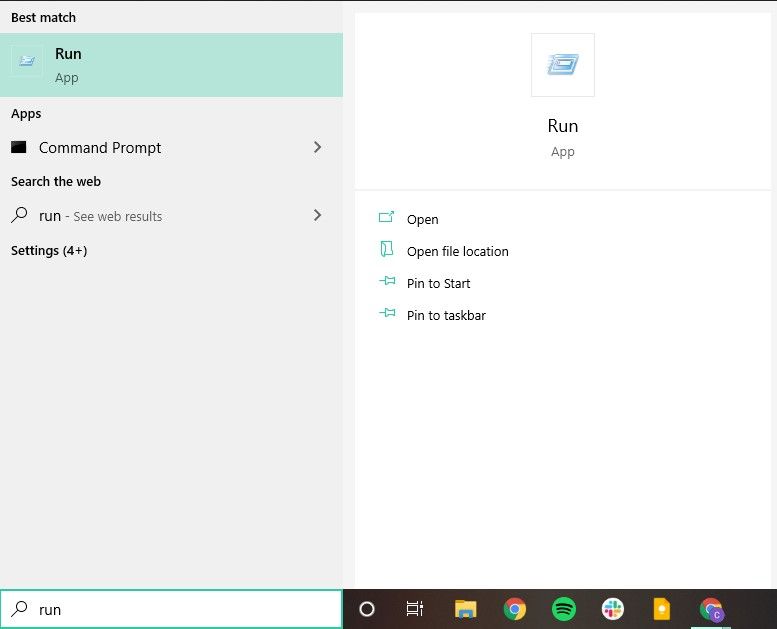
1. Open Start and search for Run utility or press the shortcut key – Windows+R
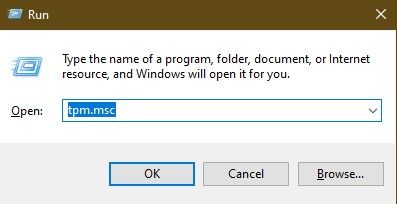
2. Type tpm.msc in the text box and press Enter.
3. Check the TPM status and specification version.
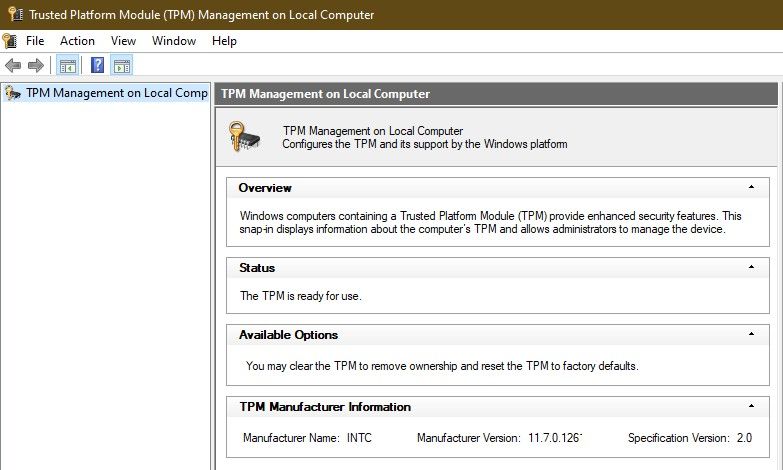
If you don’t see the status as “The TPM is ready for use”, it’s possible that TPM was disabled by default in the BIOS.
- How to Enable TPM 2.0 for Windows 11
It’s possible that your PC is capable of running TPM 2.0, however it is not set up to do so. In that case, you will have to enable TPM manually in the BIOS settings.
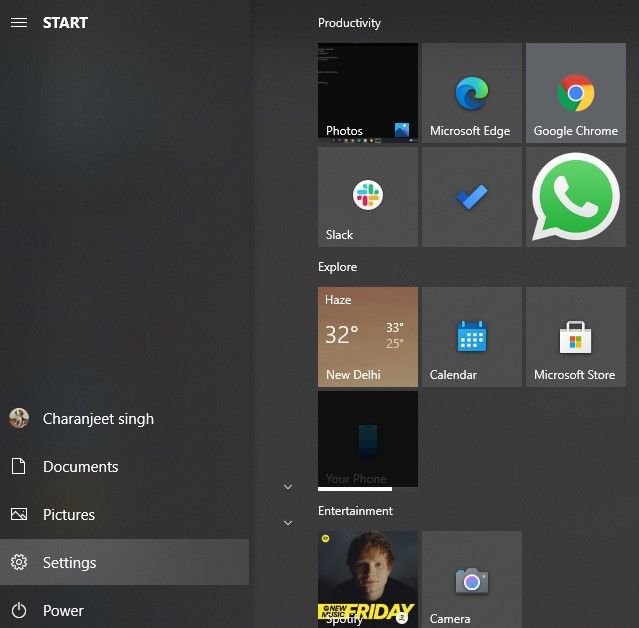
1. Go to Start and open Settings.
2. Click on Update and Security.
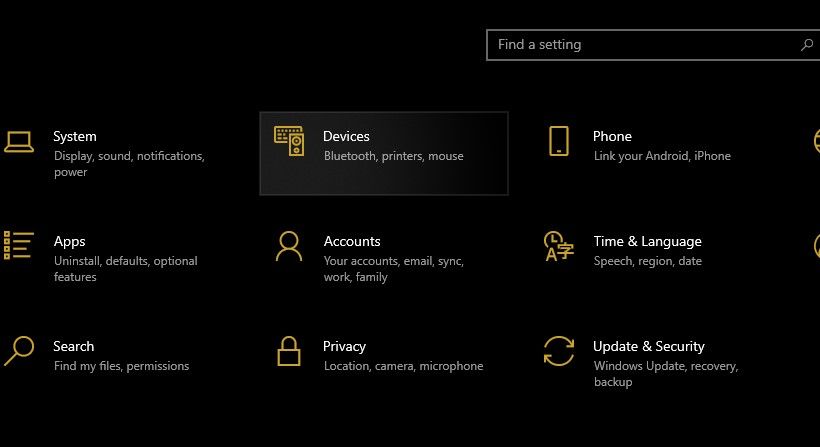
3. On the sidebar, click on Recovery.
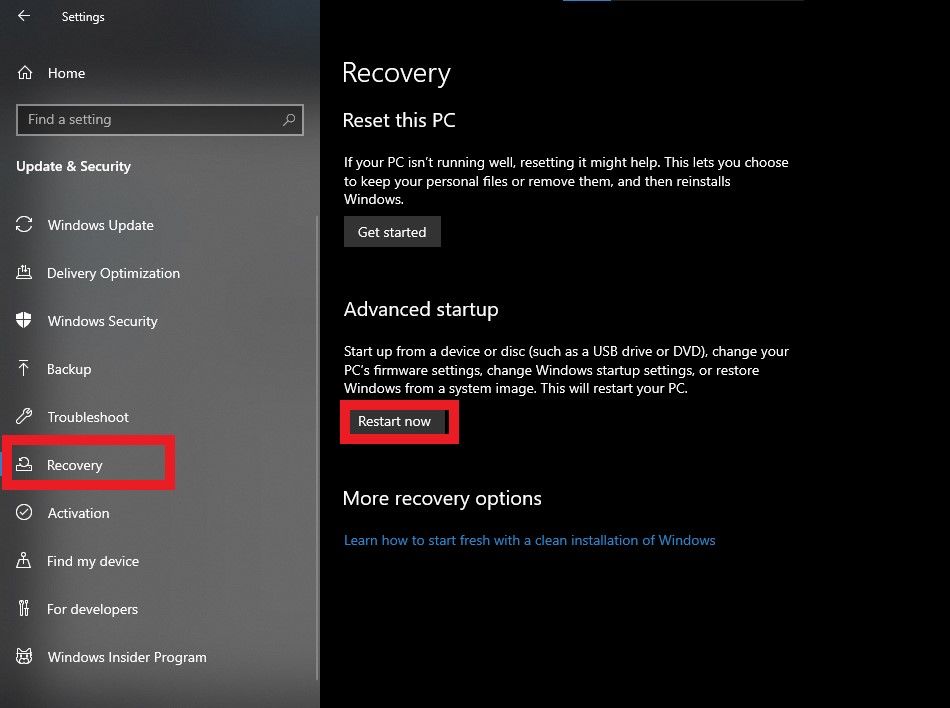
4. Click on Restart Now under the Advanced Startup section.
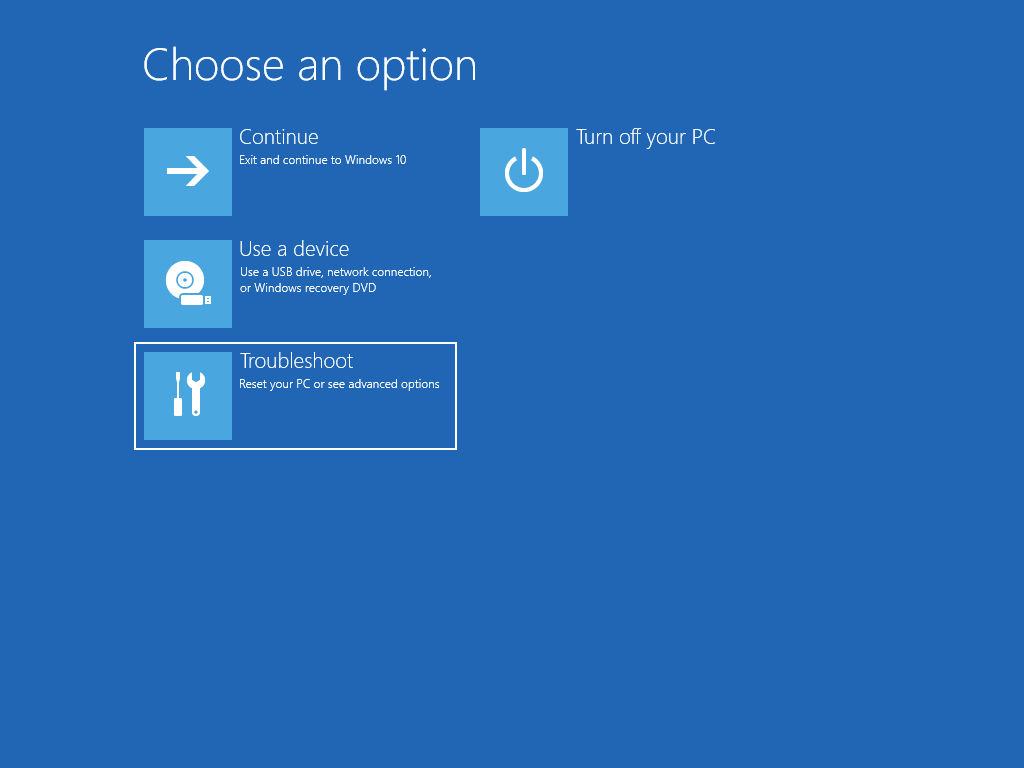
5. Click on Troubleshoot and then click on Advanced options.
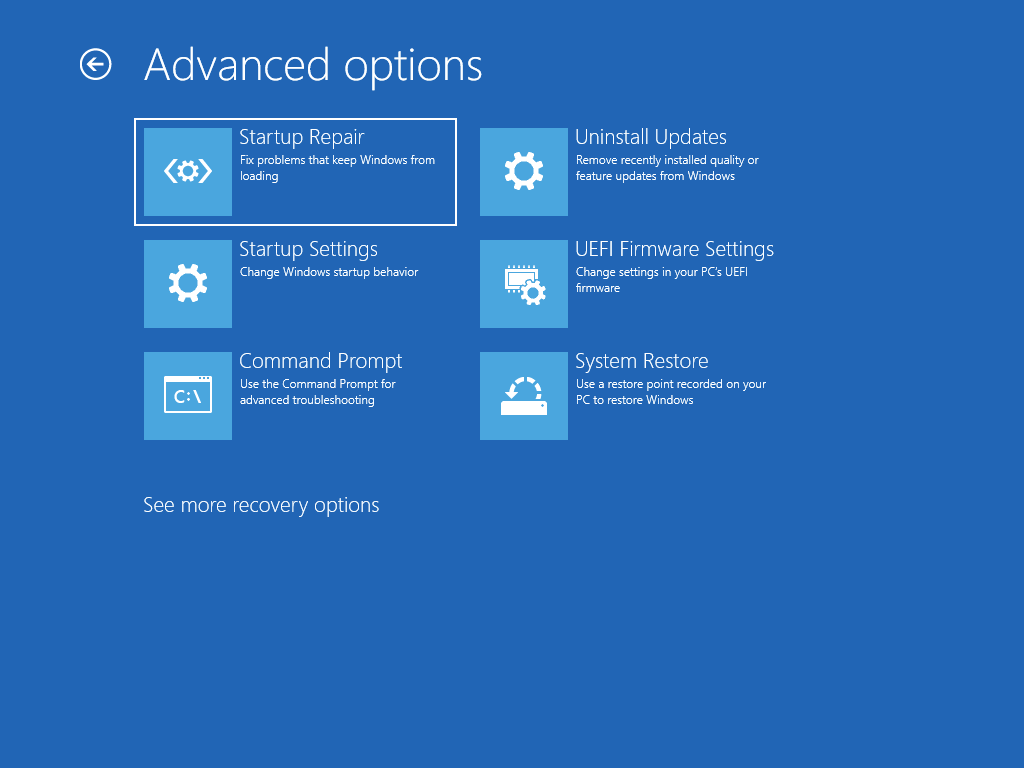
6. Click on the UEFI firmware settings and click on Restart.
7. In the BIOS screen, go to the Security tab.
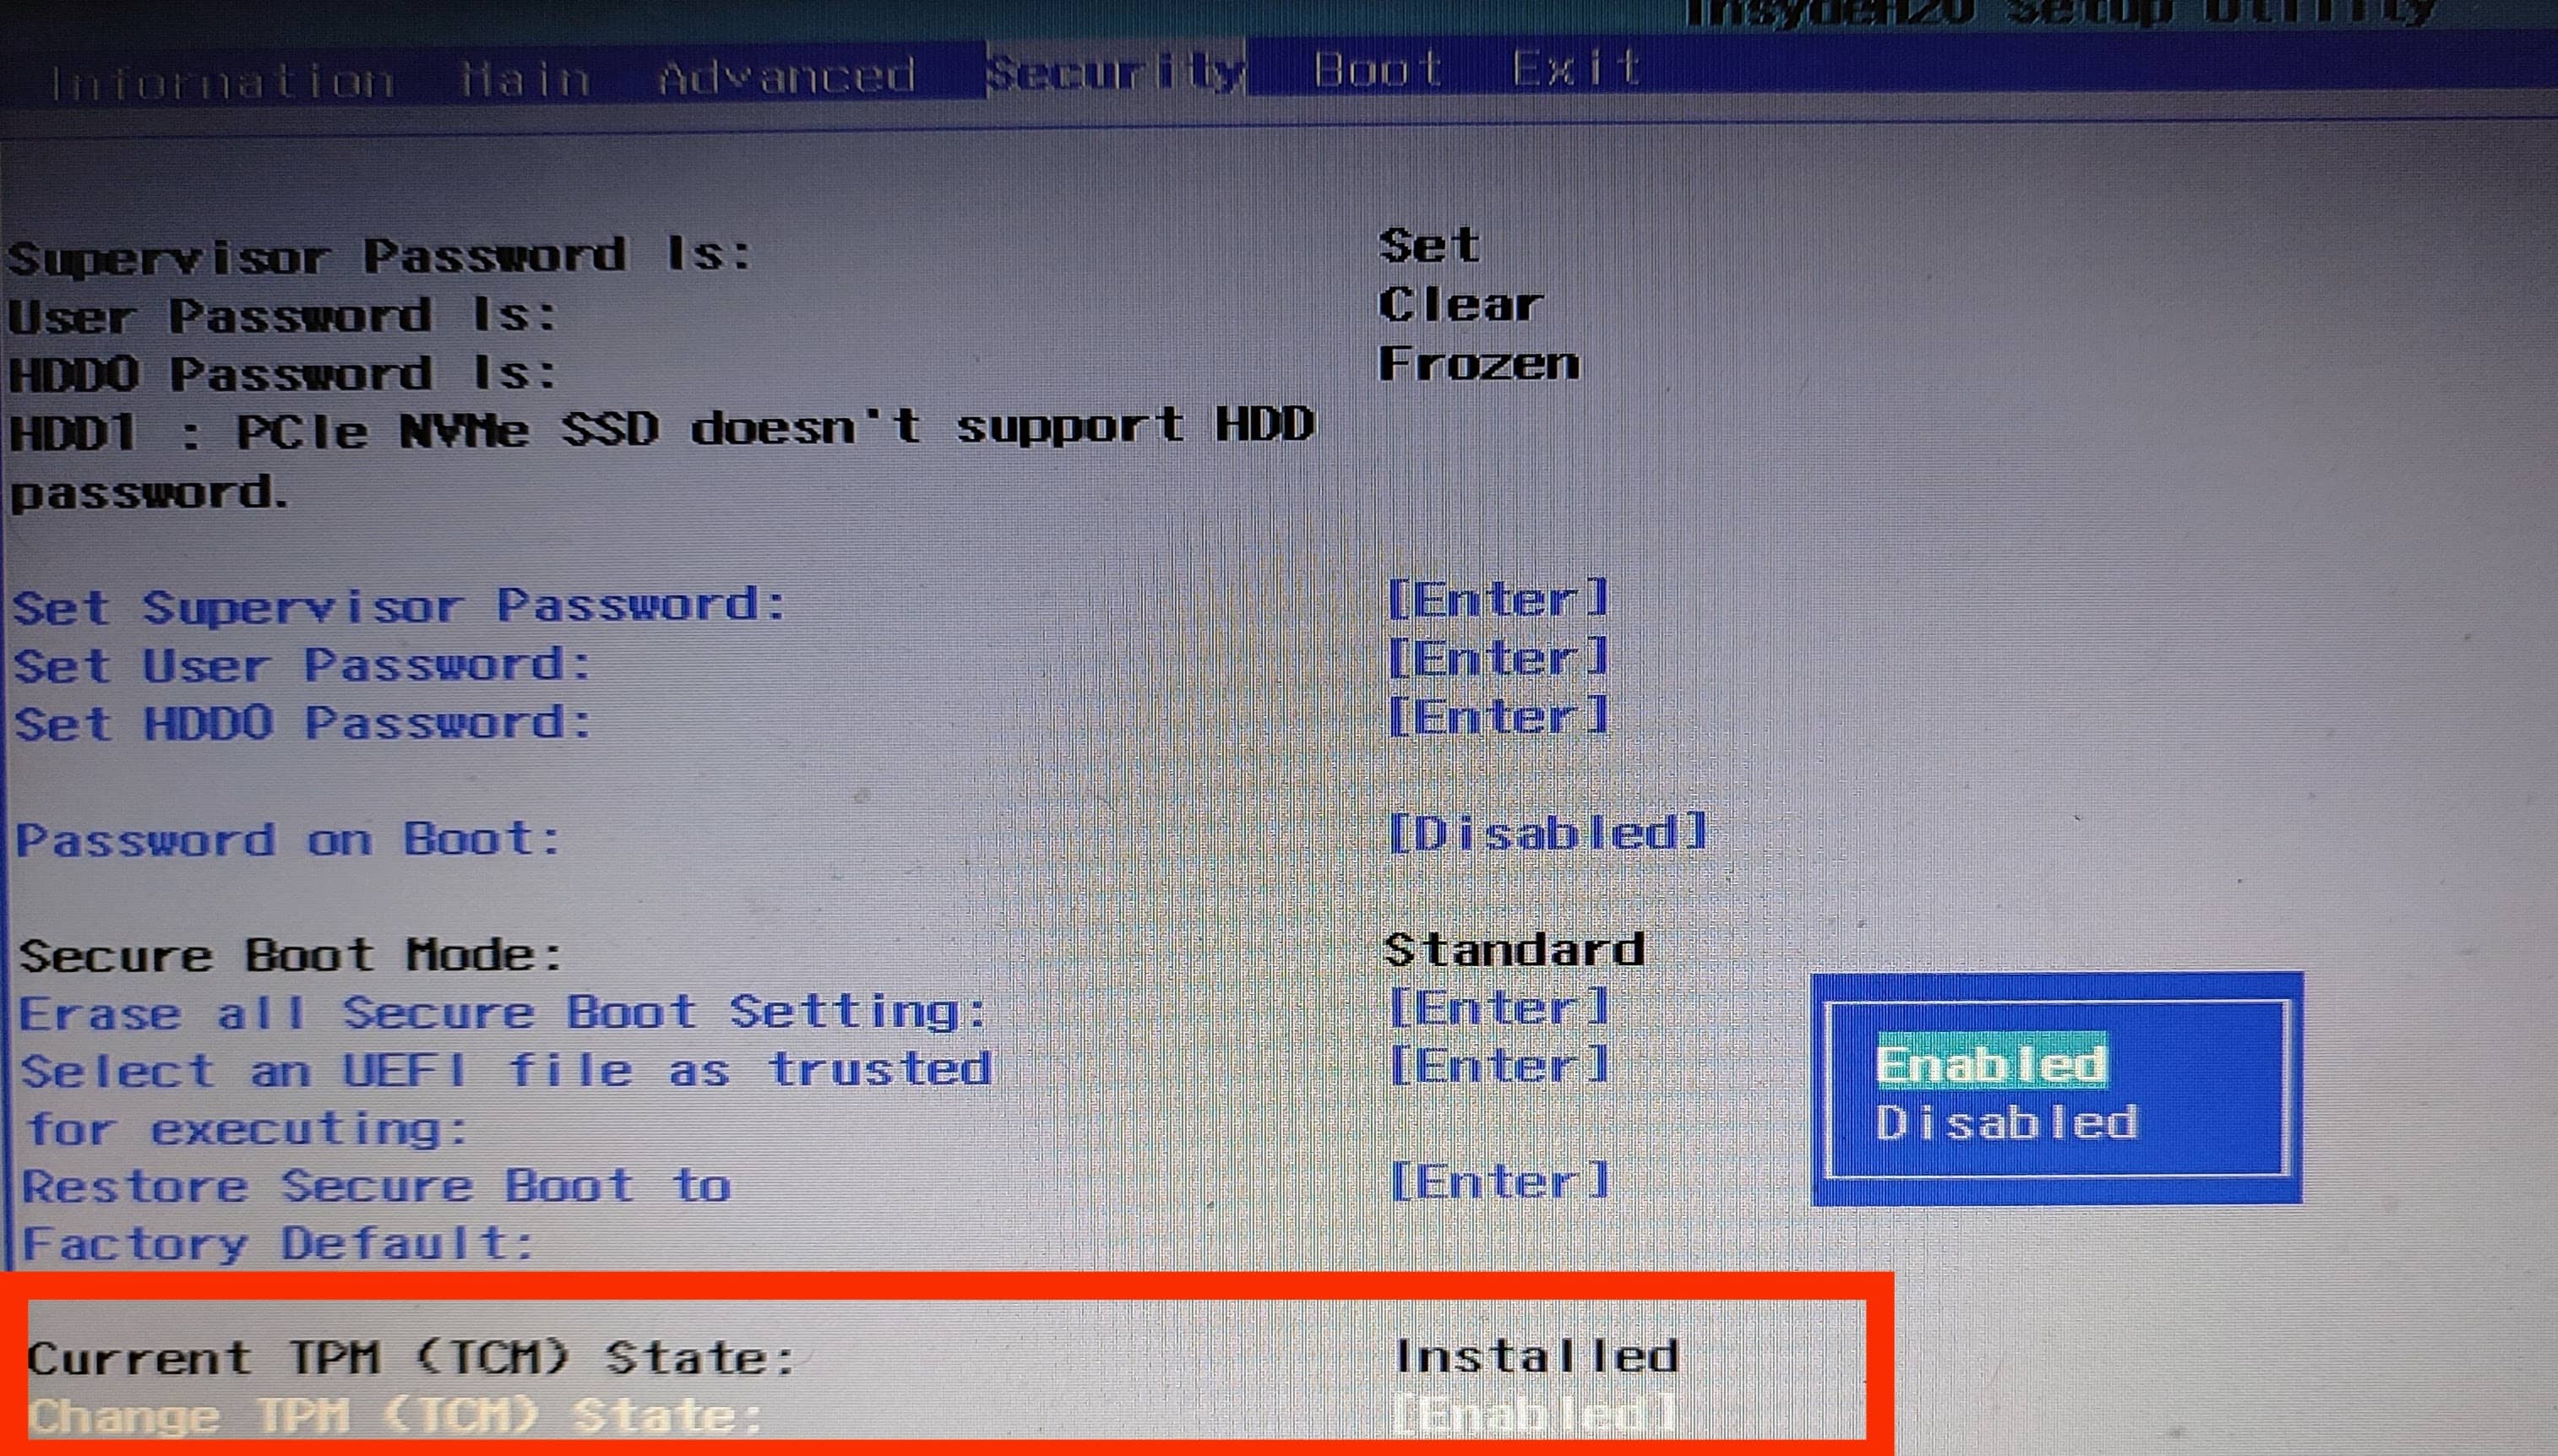
8. Go to Change TPM state and press Enter. Select Enabled.
Alternatively, you can access the motherboard firmware settings by pressing the F12 key multiple times as soon as your PC starts. It might be a different key to open the firmware settings depending upon the device manufacturer.

Leave A Comment?