Situatie
Calibrating your HDR display in Windows 11 is crucial for optimizing the visual experience. Proper calibration enhances color accuracy, shadow detail, and overall immersion by adjusting brightness, contrast, and color settings. However, it’s important to note that some monitors labeled as “HDR” may not meet the necessary standards, rendering calibration ineffective. Additionally, Windows 11’s handling of HDR for regular desktop usage may not be satisfactory.
HDR (High Dynamic Range) is a technology that expands the color and contrast range of digital displays, promising a more immersive and realistic visual experience. However, to harness its full visual potential, you need to calibrate your HDR settings correctly.
Solutie
Pasi de urmat
Calibrating an HDR display in Windows 11 requires a few steps, including installing the Microsoft calibration app, enabling HDR on the monitor, and using the app to calibrate the display.
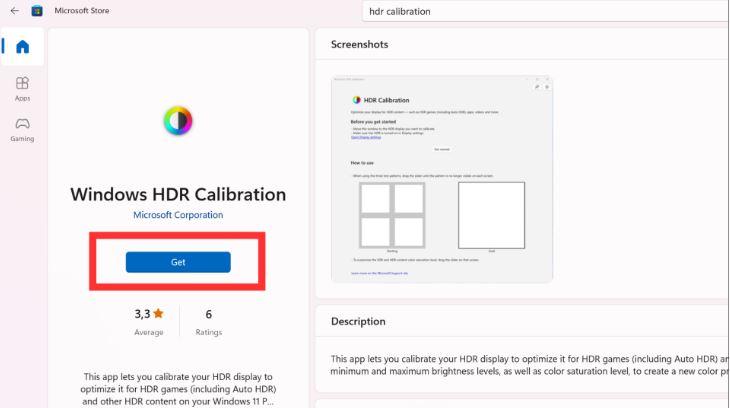
First, Install the HDR Calibration App. Open the Windows HDR Calibration tool store page by searching for it in the Microsoft Store, click “Get “, and wait for the installation process to complete.
Next, Enable HDR. Assuming you have an HDR-capable display, right-click anywhere on the desktop, and select Display Settings from the menu that pops up.

Select the HDR monitor.

Scroll down to find the “Use HDR” option.

Optionally, if you click the little arrow to the right of “Use HDR” you’ll get more fine-grained control over how HDR operates and looks. However, since we’re going to do.

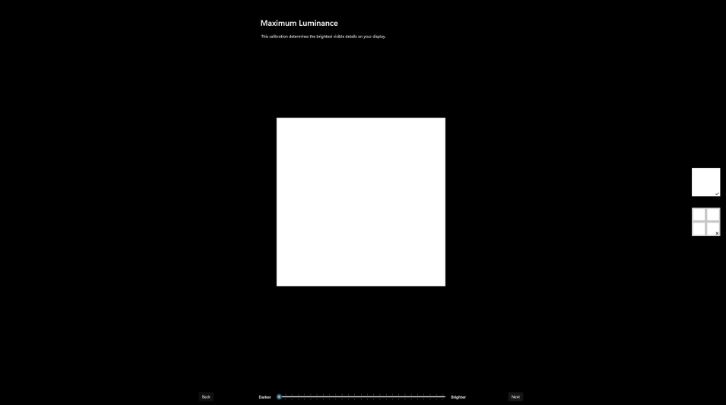
Now, calibrate Your HDR Display. Open the Windows HDR Calibration app and click the “Get started” button.

You will then be prompted to adjust several settings. For each setting, drag the slider left or right until the pattern is no longer visible to calibrate the screen, then click the “Next” button.
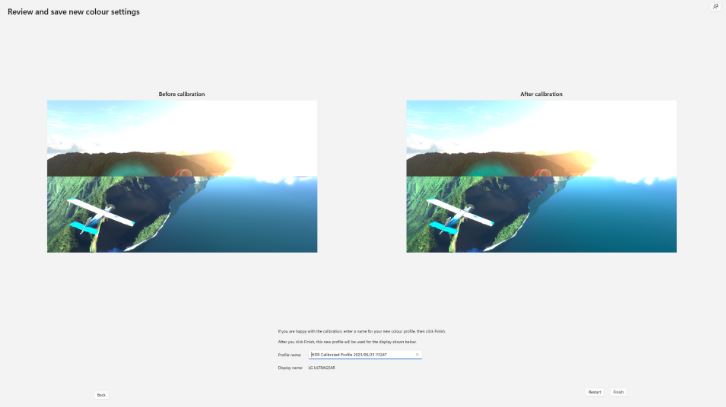
Finally, confirm a profile name and click the “Finish” button, followed by the “OK” button.
Leave A Comment?