How to Backup and Restore the Windows Registry

Configurare noua (How To)

Situatie

Solutie

Backing up and Restoring Sections of the Windows Registry

For the most part, all you need to know is how to back up and restore sections of the registry, especially the sections you might be trying to edit. Fortunately, this process is pretty simple and works quite well most of the time.

You can also back up sections of the registry related to application settings. Just open the Registry Editor and navigate to “HKCU\Software” or “HKLM\Software” and find the key that represents the application manufacturer you’re trying to back up.

Not all applications store their settings in the registry, but for those that do, you can often save their settings to a backup file using this method. Then, if you need to reinstall your computer, you can reinstall the application and just restore the settings by double-clicking the registry backup file. It’s worth noting that this isn’t a foolproof process, but I’ve used it a lot over the years.

For example, if you were messing around in “HKEY_CLASSES_ROOT\*\” to try and remove some items from the Windows Context menu, you probably wouldn’t want to make any serious changes without having a backup.

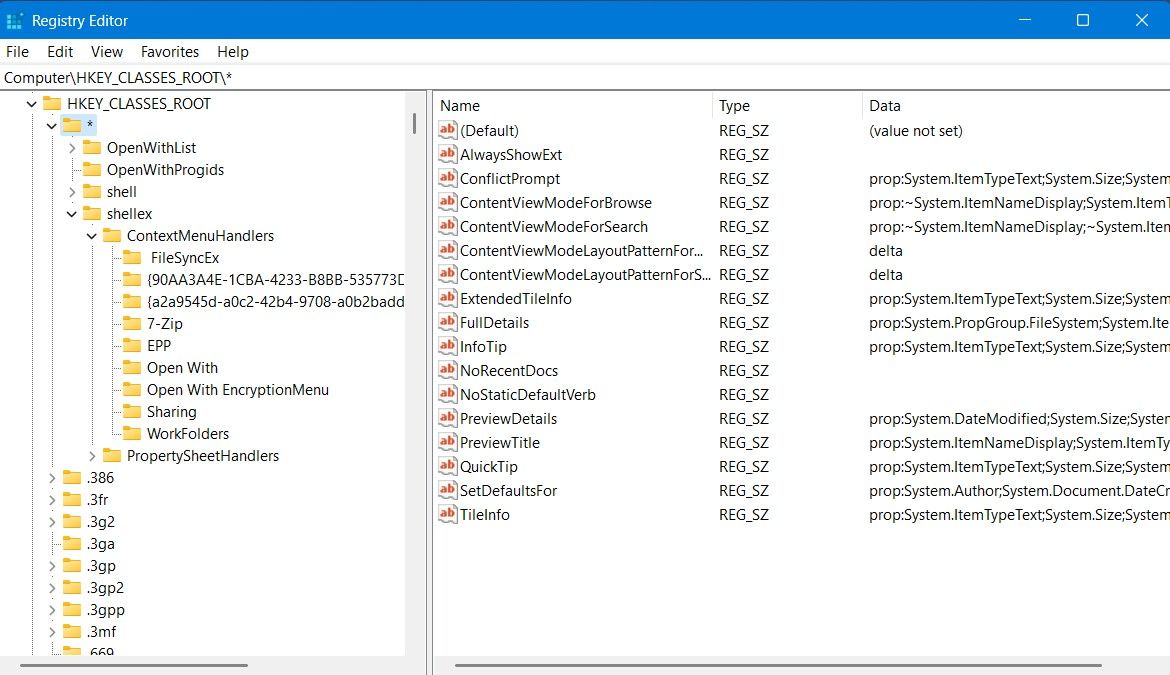
Contextmenu keys in the Registry Editor.

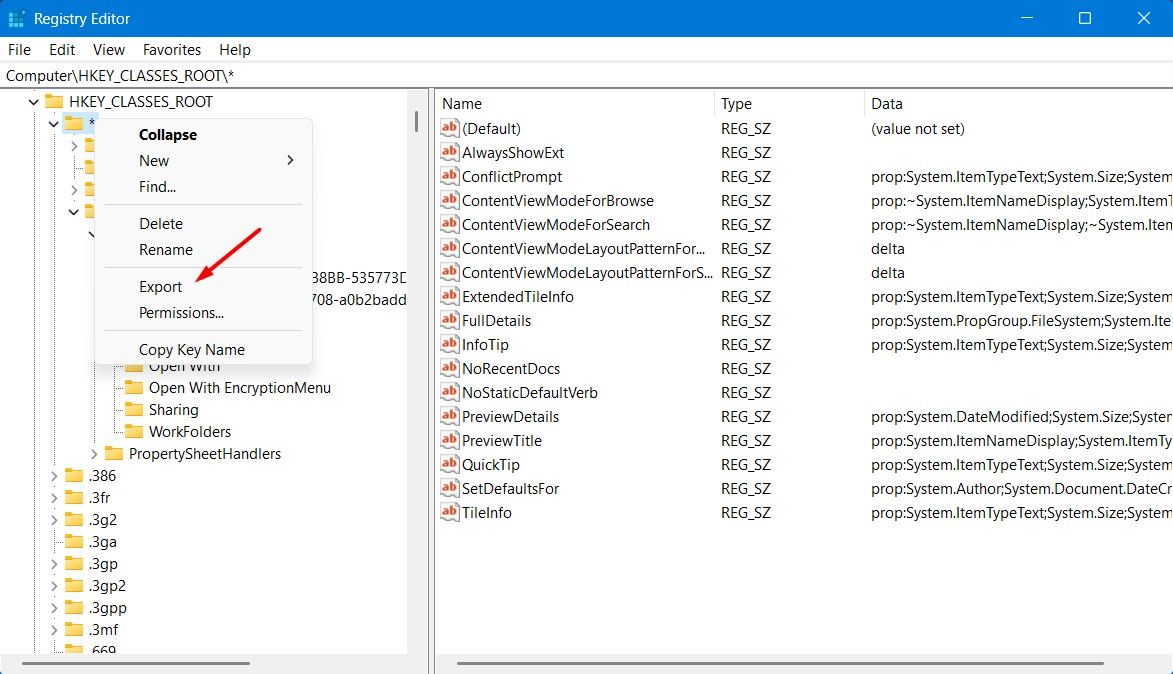
To back up that section of the registry, just right-click on the key on the left-hand pane and choose “Export” from the menu, saving the file with a name that you’ll recognize later. I’ll save it as HKCRstar.reg.

Export option in the Registry Editor.

Now you can go ahead and make whatever changes you’d like to test from underneath that key, because you have a backup file.

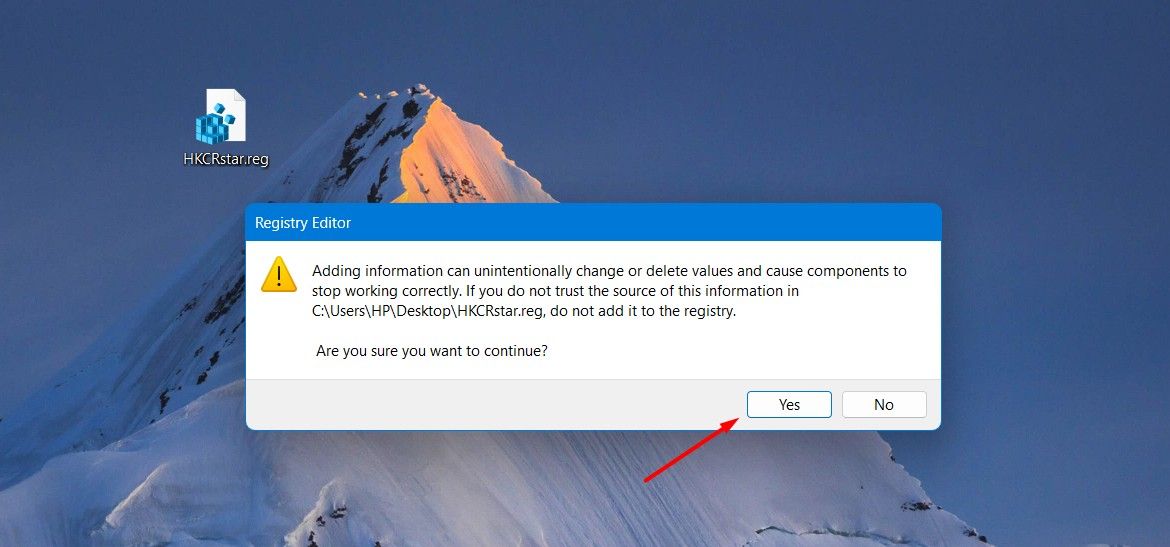
Restoring that backup is as simple as double-clicking on the icon and clicking “Yes” to restore the information to the registry.

Registry Editor dialog box.

You can use the same technique for anything in the registry you’d like to back up… but you can’t use this to restoring the entire registry.

Backing Up the Whole Registry to a REG File

You can absolutely make a whole copy of the registry as a REG file by exporting from the root node. To do this, right-click “Computer” in the left sidebar, and choose “Export.”

Export option for the Computer node.

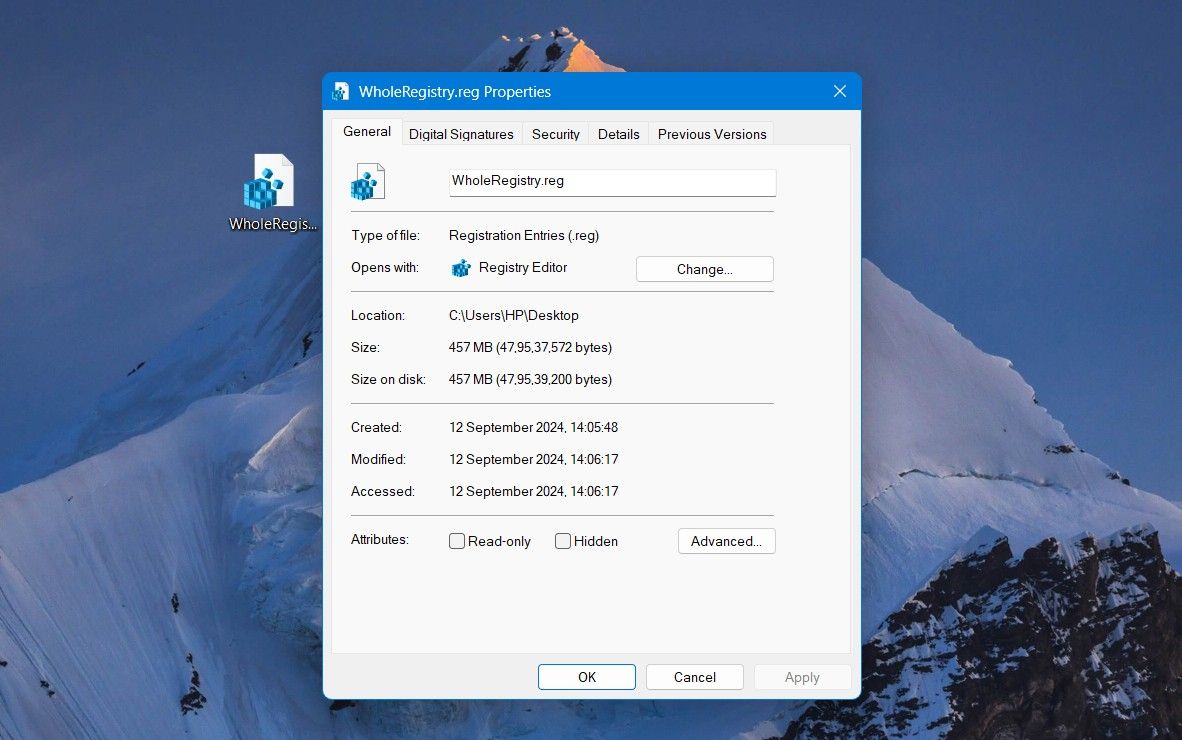
The resulting file will be enormously gigantic, and you probably don’t want to open it up in Notepad.

Registry file properties window.

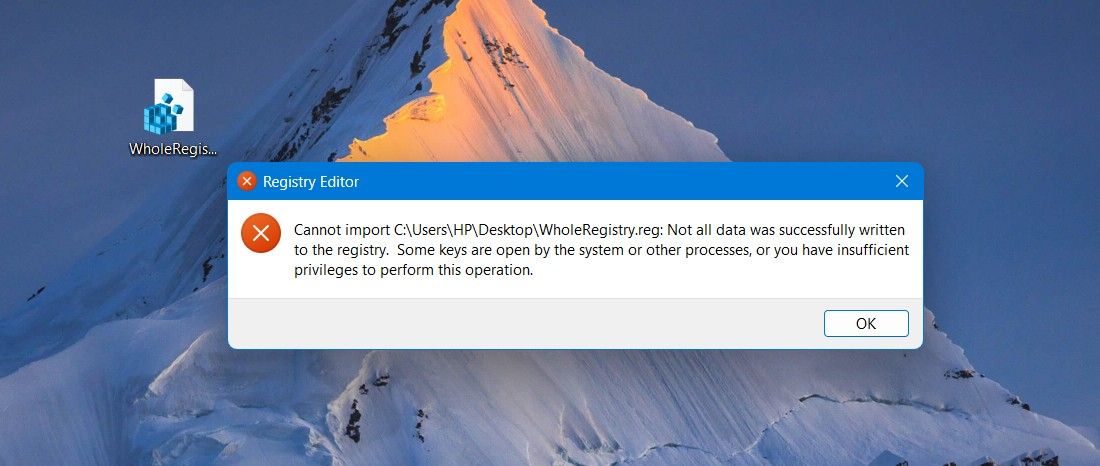
If you double-click on the registry file, you’ll see an error message letting you know that not all the entries were restored because some of the keys are open by the system, etc.

Error message of Windows Registry.

And that’s the issue with this method of backing up the registry—it doesn’t work well for significant changes, like installing applications or anything where you might actually need to restore the entire registry. You also don’t want to keep this kind of full registry backup around for too long because there’s no way to know what changes are stored in that registry file or whether they’ll cause problems when you restore it.

Fortunately, there’s a better way to backup the registry, and it won’t mess up your PC.

Using System Restore to Properly Back Up your Registry

Whenever you’re planning to make significant changes to the registry, install things like drivers, or modify a lot of settings at once, it’s a good idea to create a System Restore point. This will allow you to easily revert back later if needed. An added benefit is that it also creates a backup of the registry.

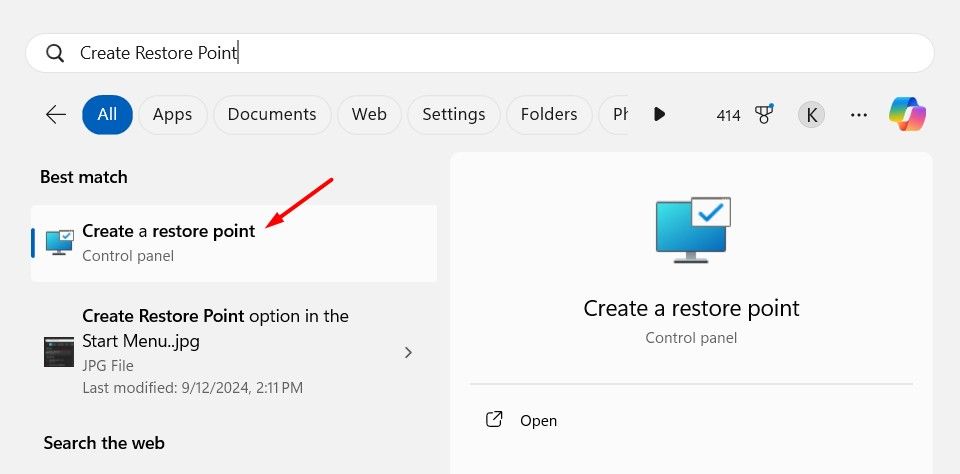
You can make a restore point easily in just a few clicks. Open the Start Menu, search for Create Restore Point and select the relevant option from the result that appears.

Create Restore Point option in the Start Menu.-1

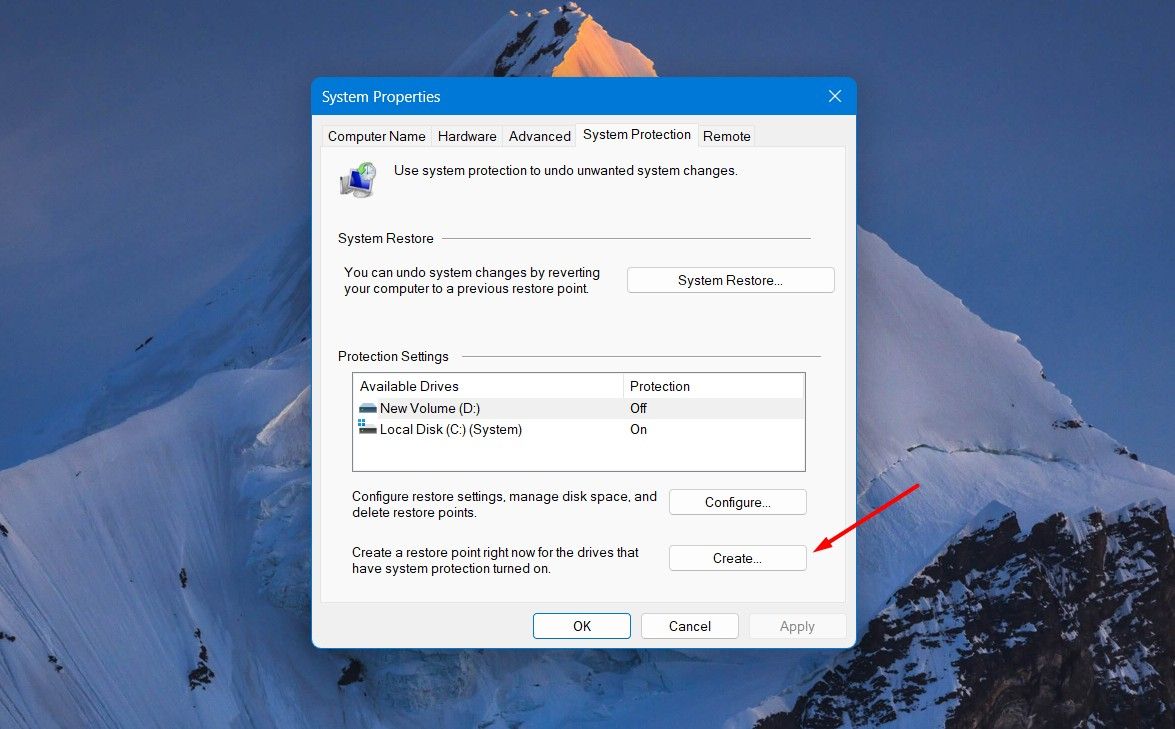
Now you can click the “Create” button, give the restore point a descriptive name, and it will be immediately created.

Create option in the System Properties window.

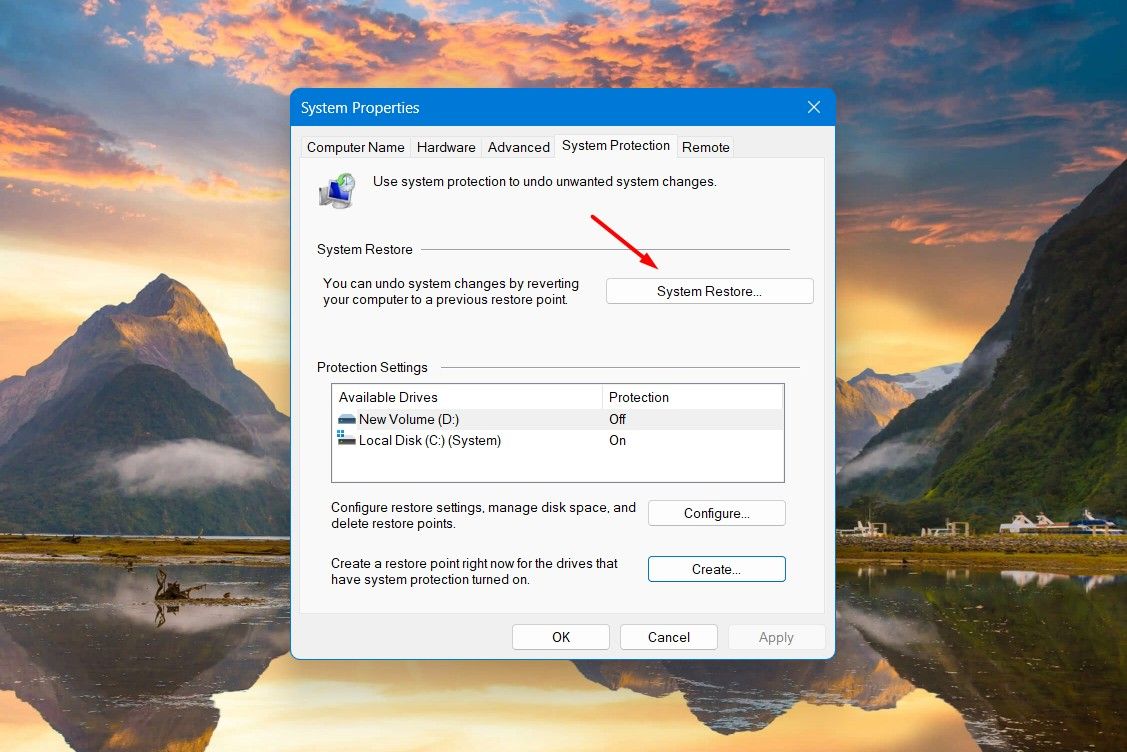
To restore from that restore point, search for Create Restore Point again in the Start Menu and click the relevant option. Click the “System Restore” option.

System Restore option in the System Properties window.

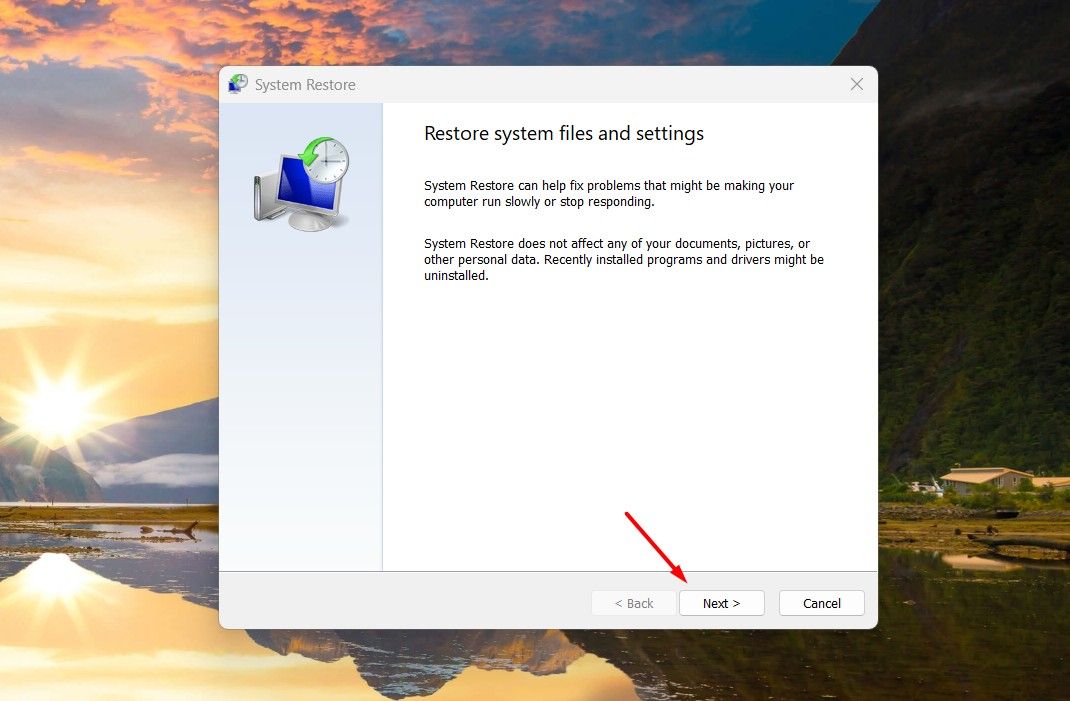
In the System Restore window, click the “Next” button.

Next option in the System Restore window.

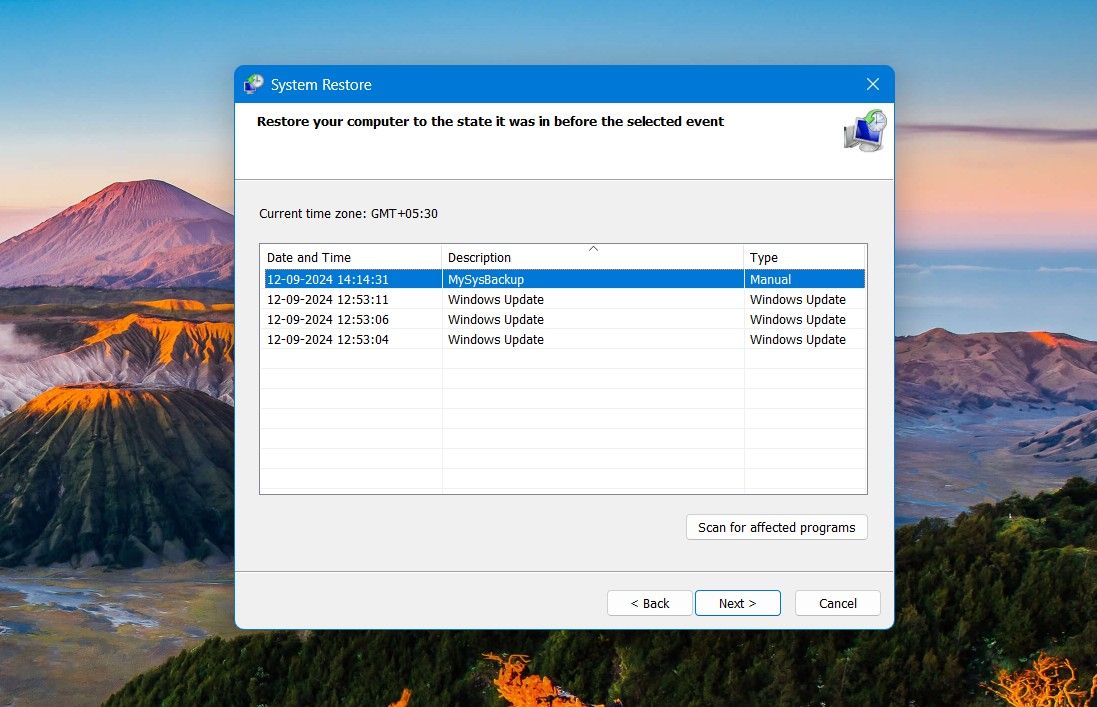
Select the restore point you want to restore from and click “Next.”

Selecting Restore Point in the System Restore window.

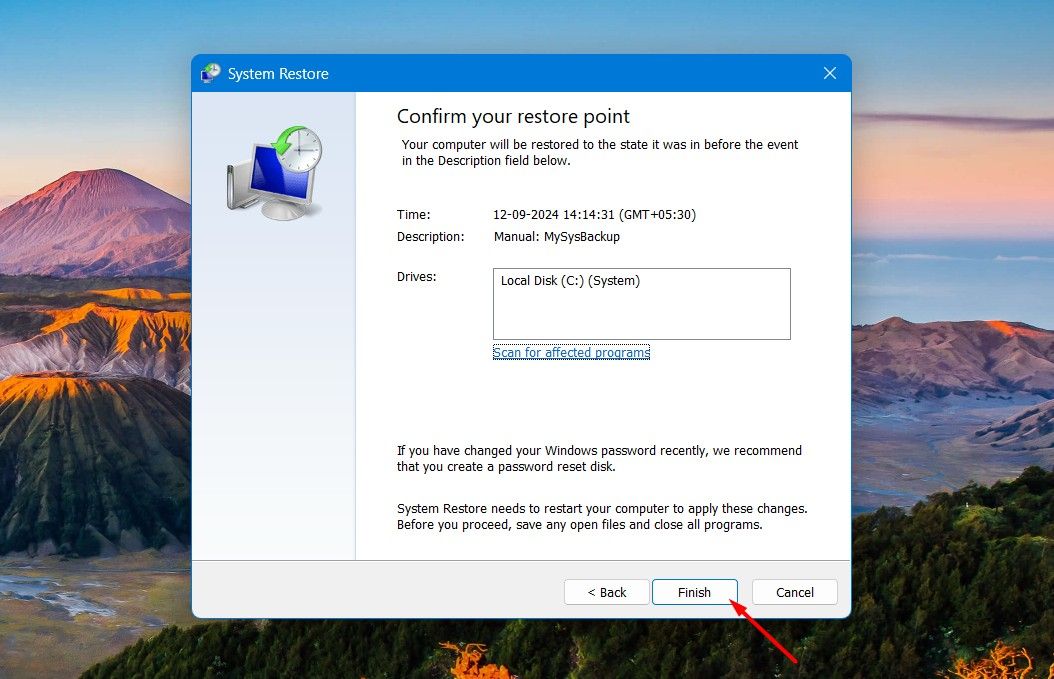
Click the “Finish” button to start the restoration process. The process may take a while, depending on how much data is being restored.

Finish option in the System Restore window.

You’ll often have better luck restoring from Safe Mode though. If you are running Windows 10 or later, you can actually access both Safe Mode, and System Restore, directly from the boot menu by using Shift+Restart.

That’s all about how you can back up and restore the Windows Registry. Wasn’t the process easy and straightforward? However, as mentioned above, the Windows Registry contains settings related to core components of the operating system, so make sure you’re only accessing and editing it when absolutely necessary. Any misconfiguration in the Windows Registry can make your system unstable.

Tip solutie

Permanent

Voteaza

(4 din 7 persoane apreciaza acest articol)

Despre Autor

Leave A Comment?