Situatie
Have you ever felt like you’re not getting the most out of your Linux terminal? Well, you’re not alone. Over the years, I’ve found several Linux tools that have transformed my workflow and improved my command-line productivity.
Solutie
Pasi de urmat
- tmux
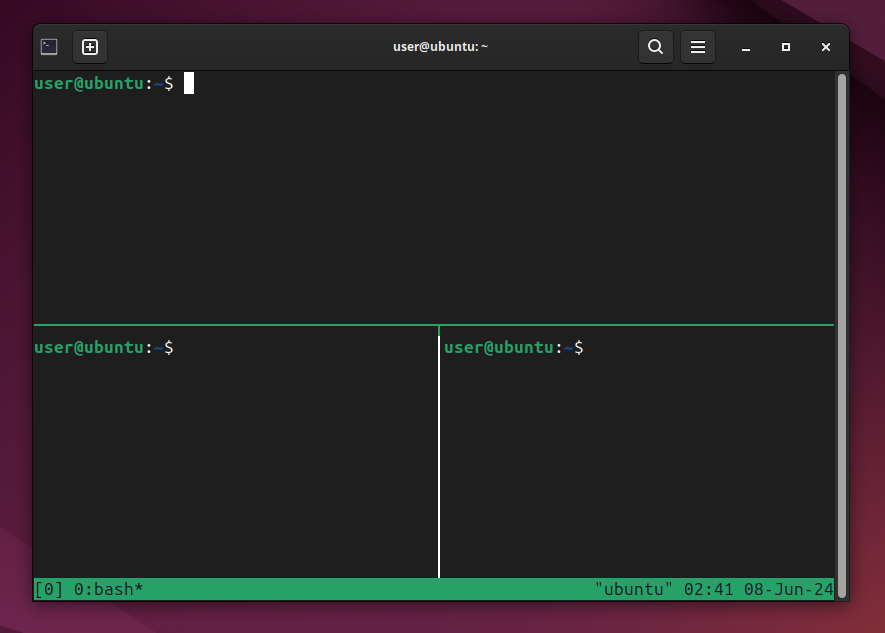
tmux is a terminal multiplexer, similar to GNU Screen, which lets you start a session and open several windows within it. Each window takes up the full screen and can be divided into rectangular sections. For example, you can have one session for fixing bugs, another for writing code, and a third for monitoring system logs.
With tmux, you can detach and reattach sessions, which is very useful when you need to step away from your computer or switch between different devices. Additionally, tmux sessions are persistent, meaning that programs will continue running even if you remove yourself from the session.
It also offers a wide range of key bindings for a seamless experience, along with customizable options and appearances for individual terminals. You can enhance tmux by using Oh my tmux! and various themes.
To install tmux on Ubuntu and Debian-based distros, run the following command:
sudo apt install tmux
To get it on CentOS/Fedora, run this:
sudo yum install tmux
For Arch Linux:
sudo pacman -S tmux
To start a tmux session, type tmux in your console. This opens a new session, creates a window, and starts a shell in that window.
- tldr
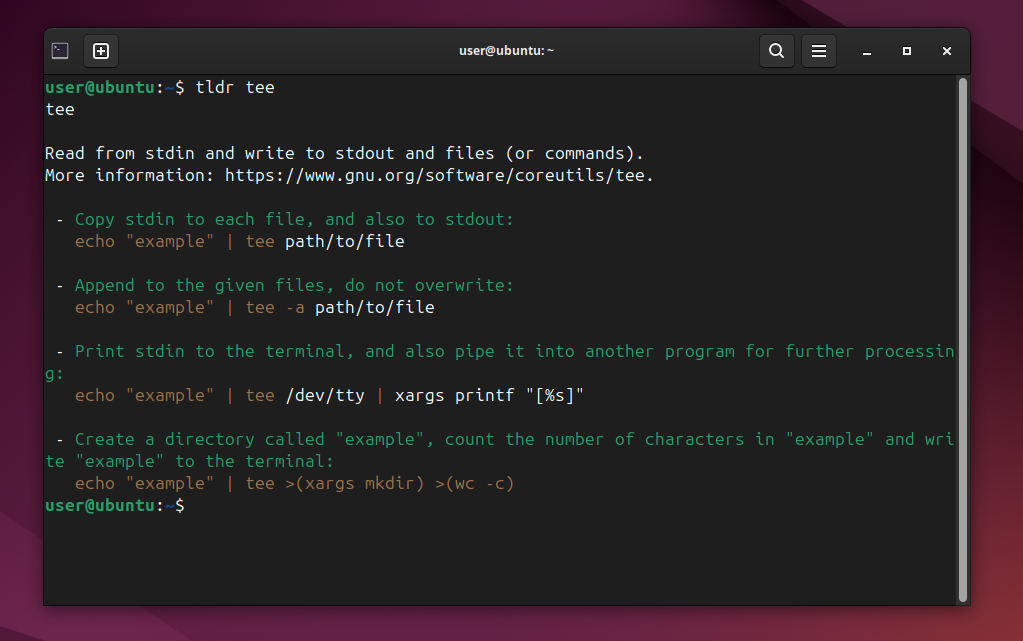
Want to access simplified manual pages for your favorite commands with concise and easy-to-understand explanations? Try tldr (Too Long; Didn’t Read).
While the traditional Linux man pages can be a valuable resource, they can also be overwhelming and difficult to navigate, especially for less experienced users. tldr solves this problem by providing simplified, community-driven man-pages for various Linux commands and utilities.
For example, let’s consider that you’re trying to remember the exact syntax for a command you haven’t used in a while. Instead of going through a lengthy man page, you can simply type tldr <command name> and get a concise explanation of the command’s purpose, options, and basic usage. This saves you valuable time and allows you to focus on getting things done.
You can install tldr on Ubuntu or other Debian-based distros easily.
sudo apt install tldr
To get it on CentOS or Fedora Linux, run:
sudo dnf install tldr
For Arch Linux:
sudo pacman -S tldr
- Vim
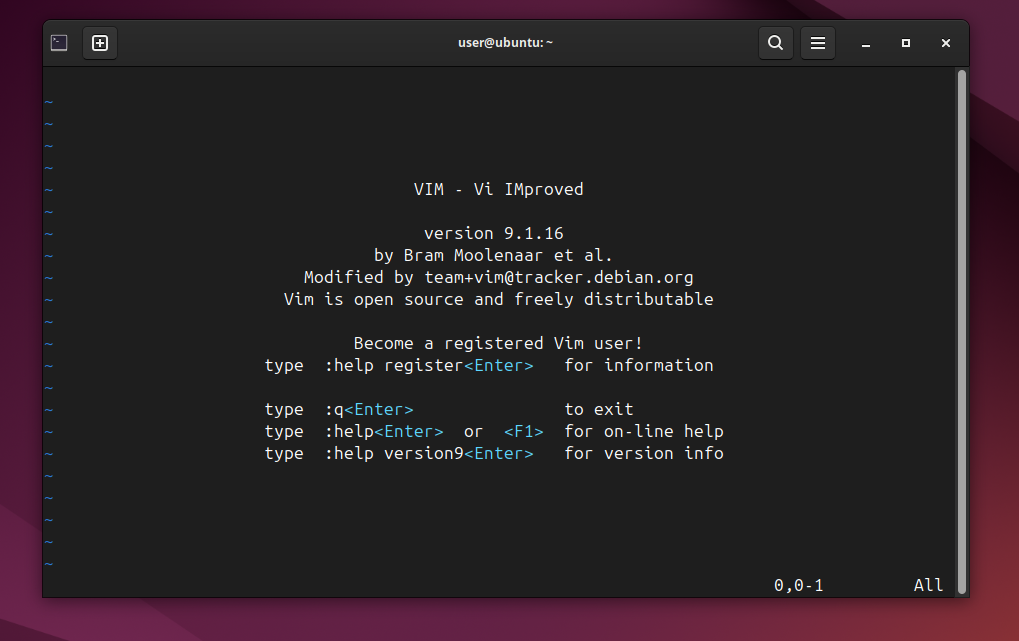
If you haven’t explored Vim yet, you’re missing out on a highly effective text editor. Vim (Vi IMproved) is a highly customizable text editor that’s been popular among Linux users for a long time. At first, it might seem difficult, but as you learn how to use it, you’ll find it’s a very effective tool for editing code, configuration files, and other text documents.
For instance, let’s say you want to edit a large configuration file on a remote server. With Vim, you can connect to the server, open the file, and make edits efficiently, even with a slow internet connection. Its modal editing allows you to move around the file, copy, paste, and manipulate text without ever needing to take your fingers off the keyboard.
If Vim is not pre-installed on your system, you can install it from your distro’s repositories.
To install Vim on Ubuntu, run:
sudo apt install vim
You can install Vim on CentOS or Fedora:
sudo dnf install vim
For Arch Linux:
sudo pacman -S vim
- Fastfetch
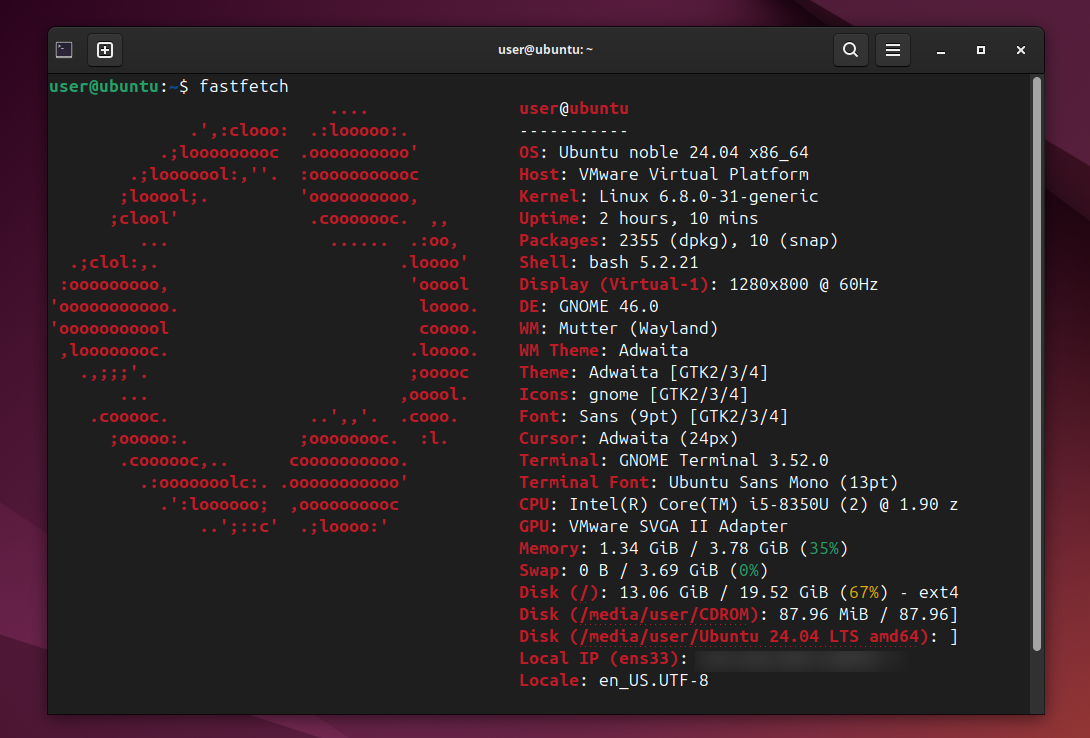
Do you want to view system information with lightning speed and accuracy? Look no further than Fastfetch. With Fastfetch, you can display detailed information about your system, including CPU, memory, disk usage, kernel version, uptime, and even CPU architecture. It is one of the widely used alternatives to Neofetch.
Viewing system information with Fastfetch can be useful for troubleshooting, system administration, or just keeping track of what’s on your machine. Instead of having to run multiple commands or navigate through complex system information tools, you can simply type fastfetch in the terminal and get a clean, concise, and visually appealing display of all the key details.
Fastfetch isn’t included in the default software repositories for Debian or Ubuntu. To get it on Ubuntu or Debian-based distros, you first need to add its PPA repository:
sudo add-apt-repository ppa:zhangsongcui3371/fastfetch
Now, install Fastfetch with:
sudo apt update && sudo apt install fastfetch
You can get Fastfetch on Fedora or CentOS by running:
sudo dnf install fastfetch
To install Fastfetch on Arch Linux, run:
sudo pacman -S fastfetch
- fzf
fzf, short for Fuzzy Finder, is another useful command-line tool that enables you to quickly find and navigate through files, directories, command history, and more. It’s much faster and easier to use than traditional commands like find or grep, which can be slow and difficult with large file systems or complicated searches.
fzf lets you locate what you need with just a few keystrokes. It uses fuzzy matching, meaning you don’t have to remember the exact name—just type a word, and fzf will present you with a list of relevant options.
You can search for a file by its name and contents, and open the selected file in your preferred text editor. You can also list installed packages and search for a specific one using fzf.
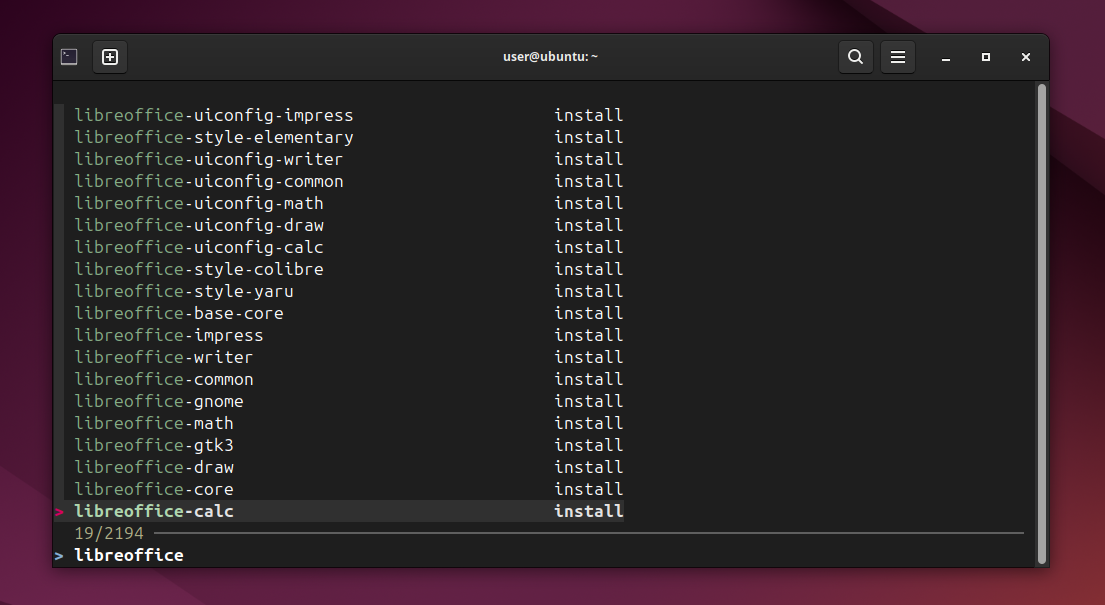
For example, to search for all the packages related to LibreOffice, run this command:
dpkg --get-selections | fzf --query 'libreoffice'
You can install fzf on Debian-based distributions or Ubuntu using this:
sudo apt install fzf
For RHEL/CentOS/Fedora, use:
sudo dnf install fzf
For Arch Linux:
sudo pacman -S fzf
- bat
bat is a modern alternative to the traditional cat command. With bat, you can quickly view and understand the contents of text files, especially those with complex formatting or syntax. The built-in syntax highlighting feature makes it much easier to quickly scan and identify the different components of a file, such as code, comments, and configuration settings.
Here is what a Python file looks like when opened with bat in the terminal:
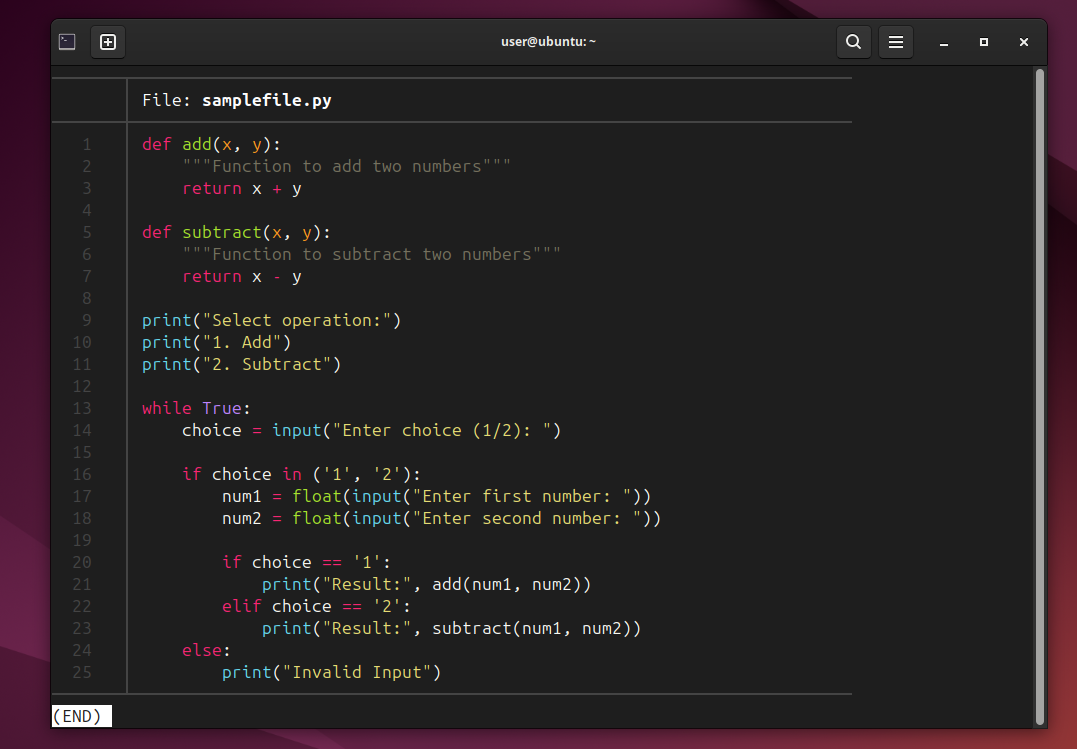
With cat, it would appear as a plain block of text, making it difficult to distinguish between different sections and elements. By switching to bat, you get syntax highlighting, allowing you to quickly grasp the structure and scope of the content.
To install bat on Debian-based distros like Ubuntu, run:
sudo apt install bat
To get it on Fedora or CentOS, use:
sudo dnf install bat
For Arch Linux:
sudo pacman -S bat
On Ubuntu and Debian, you need to use the batcat command instead of bat because of a conflict with a package named bacula-console-qt.
However, if you still intend on using bat, there is a workaround you can try. Simply create a symbolic link to batcat with the following commands.
mkdir -p ~/.local/bin
Next, run this:
ln -s /usr/bin/batcat ~/.local/bin/bat
Make sure you don’t have the bacula-console-qt package installed before doing this. If you use that package often, you’ll have to continue using batcat.
- Oh My Zsh
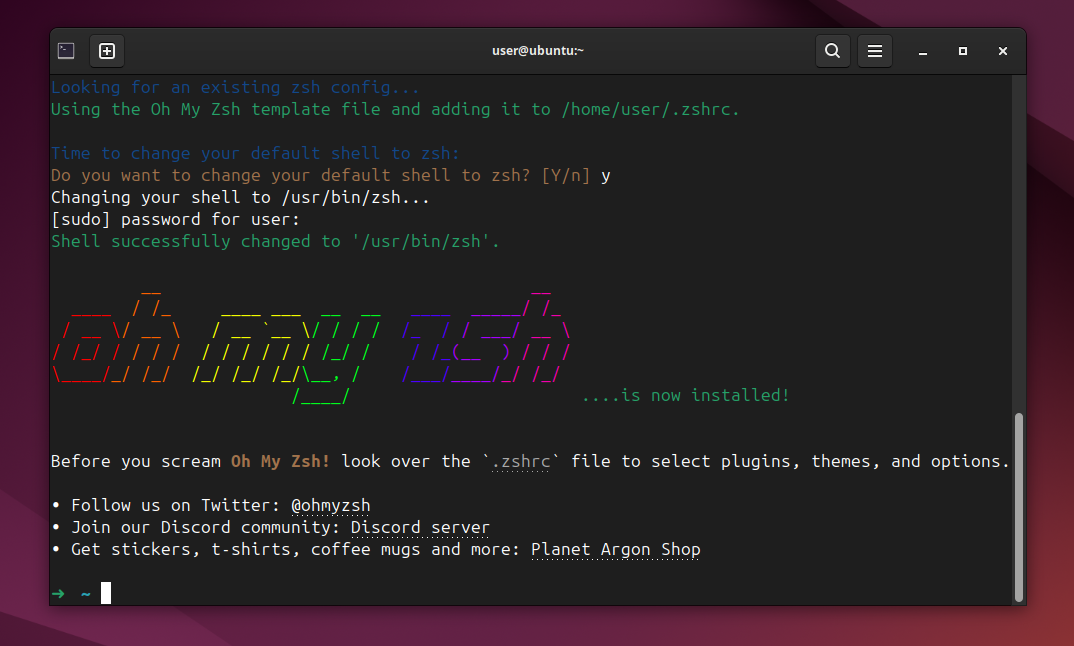
What if your command line could be more informative and customizable? That’s exactly what Oh My Zsh offers. Oh My Zsh is an open-source Zsh configuration framework that provides a wide range of themes, plugins, and features to enhance your command-line experience.
With Oh My Zsh, you can configure your prompt to show information such as Git branch, current directory, or system load. For instance, you can install plugins for syntax highlighting in your prompt, auto-completion for frequently used commands, and integration with version control systems like Git.
To use Oh My Zsh, you need to have Zsh installed on your Linux system. Once Zsh is set and installed, you can get Oh My Zsh on Ubuntu, Fedora, and Arch Linux, using the curl command:
sh -c "$(curl -fsSL https://raw.githubusercontent.com/ohmyzsh/ohmyzsh/master/tools/install.sh)"
You can also use the wget command:
sh -c "$(wget https://raw.githubusercontent.com/ohmyzsh/ohmyzsh/master/tools/install.sh -O -)"
- htop
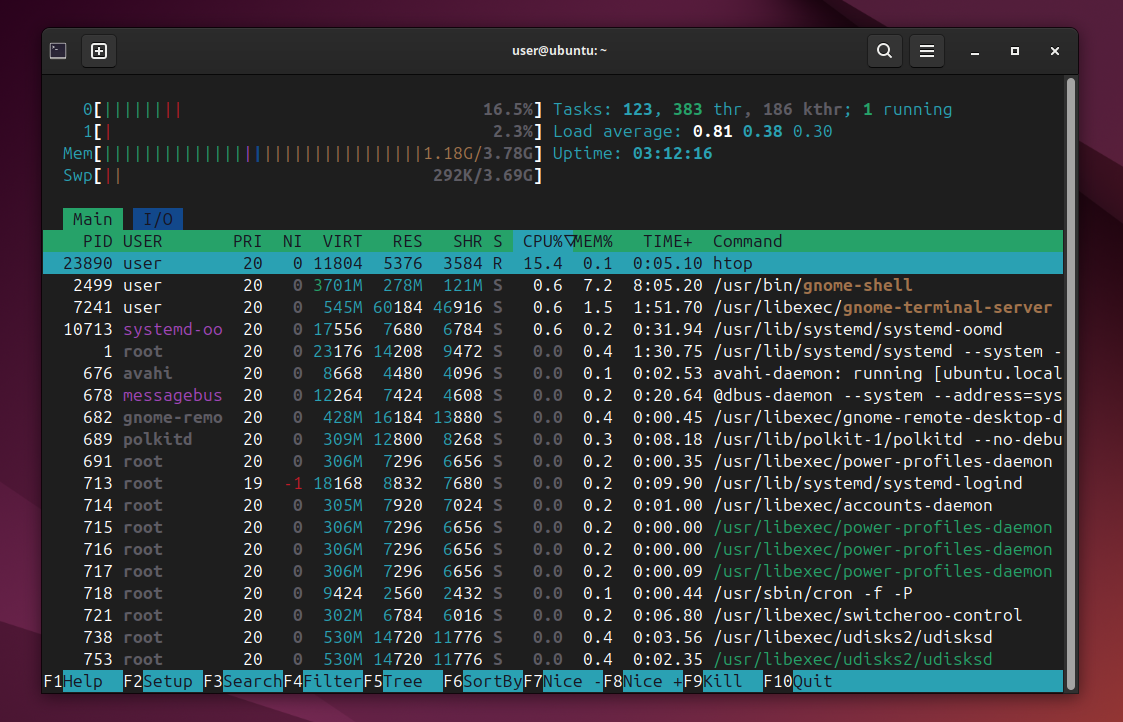
Want to monitor your system’s resource usage in a more efficient and visually appealing way? Try htop. You can use htop to view detailed information about your system’s CPU, memory, and disk usage. Unlike the classic top command, htop provides a visual representation of resource allocation that makes it easier to identify bottlenecks and diagnose performance issues.
With htop, you can quickly see which processes are consuming the most CPU, memory, or other resources, and then take appropriate actions to optimize or terminate them.
You can install htop on Ubuntu or Debian-based distributions using this command:
sudo apt install htop
To install htop on Fedora/CentOS, run:
sudo dnf install htop
You can get htop on Arch Linux using this:
sudo pacman -S htop
- zoxide

If you spend a lot of time navigating directories in the command line, then zoxide is for you. zoxide is a fast and efficient alternative to the built-in cd command. It uses a ranking algorithm to keep track of the directories you visit most frequently, allowing you to quickly navigate to them using a simple command.
You also do not need to remember and type out long file paths, rather you can simply type z followed by a few letters of the directory you want to access, and zoxide will automatically take you there.
To install zoxide on Ubuntu or Debian, you can run this:
sudo apt install zoxide
To install zoxide on Fedora/CentOS, use this:
sudo dnf install zoxide
For Arch Linux:
sudo pacman -S zoxide
After installation, you need to add the following command to the end of your config file (usually “~/.bashrc”):
eval "$(zoxide init bash)"
When you install zoxide, start using it normally like the cd command for the first time. It will create a small database on your computer for every folder you visit. It keeps track of how often you visit each folder and the last time you accessed it. This helps zoxide find and open folders faster for you.