
Situatie
Facing issues while logging into your Windows Computer is a serious challenge because you cannot access your system. And if you are getting the “The User Profile Service failed the logon”, then the problem is quite serious. However, without entering into the Windows System, the User Profile Login Problem can be resolved.
Solutie
To Fix “The User Profile Service Failed the Logon” on Windows OS, the following methods should be used. Let us start with the Scanning Process with Command Prompt.
Method 1: Scan Corrupted Files
Step 1: First, Enter into Safe Mode
Step 2: Run Command Prompt as an administrative
Step 3: Type the below-mentioned command > Press Enter
Command: Sfc /scannow
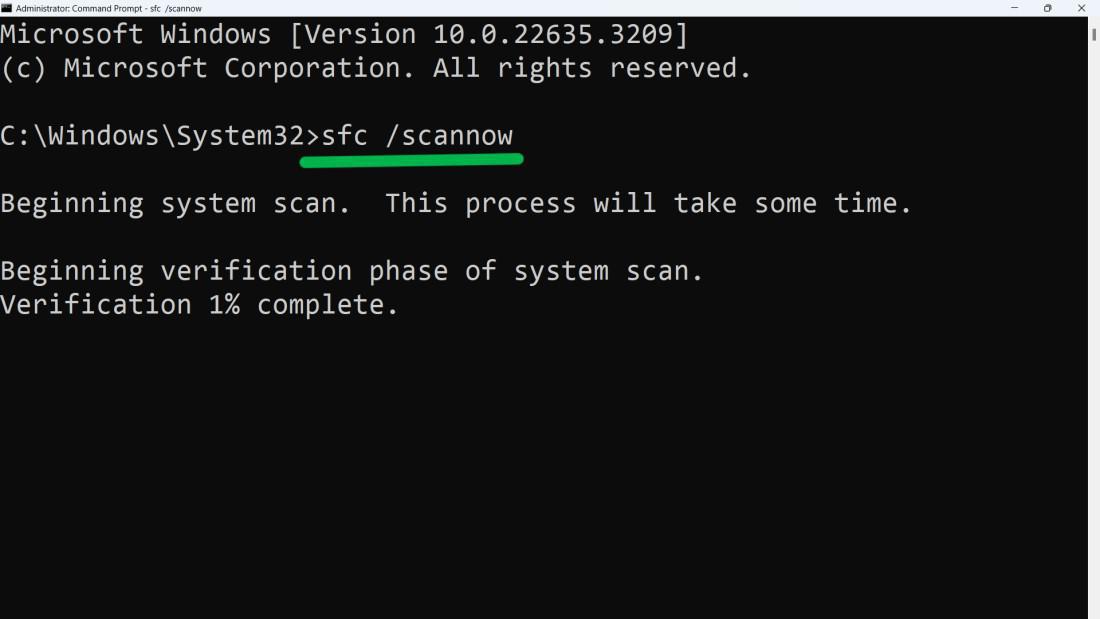
Step 4: After the scan is completed 100%, restart your computer and try logging in again.
Method 2: Enable Admin Account
Step 1: Click the Power icon, then press and hold Shift and click Restart
Step 2: After restart, select Troubleshoot
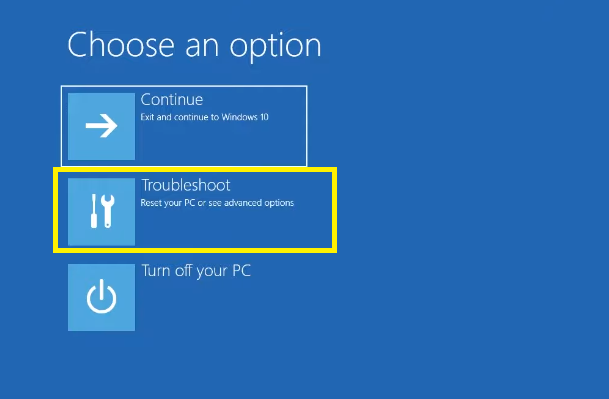
Step 3: Open Command Prompt from Advanced Options.
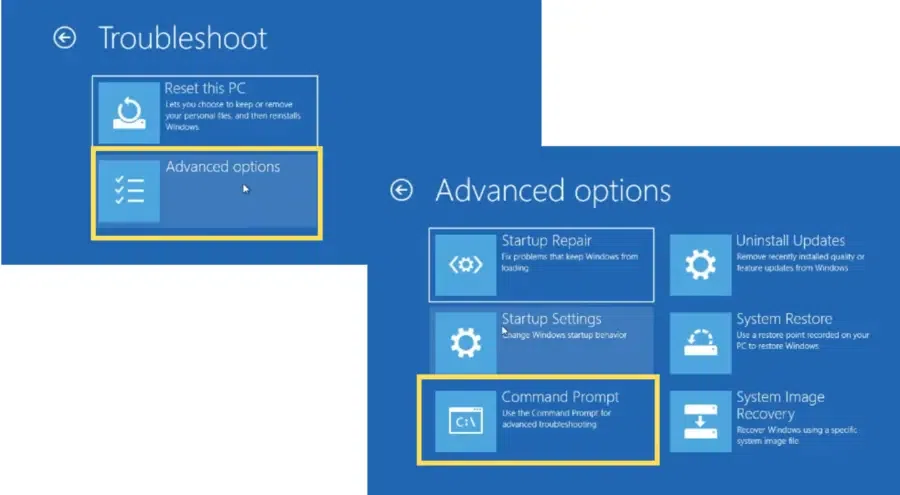
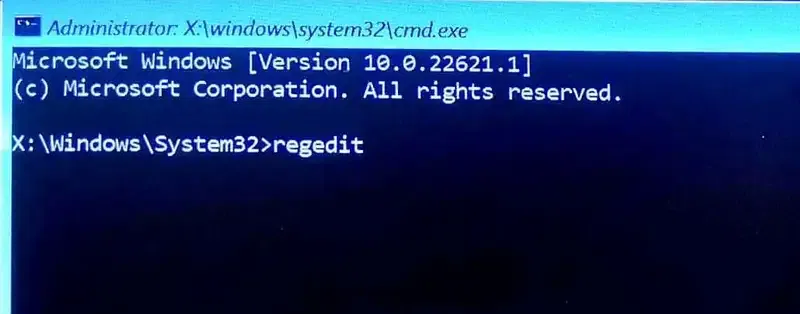
Step 4: Type regedit and press Enter.
Step 5: Navigate to HKEY_LOCAL_MACHINE > Load Hive > This PC > Windows > System32
Step 6: Find and double-click on the config folder
Step 7: Find the SAM file and double-click on it
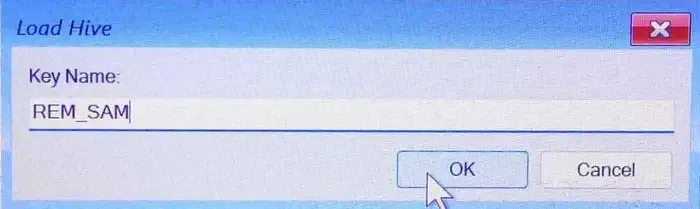
Step 8: In the dialog box, write Key Name – REM_SAM and click OK.
Step 9: Navigate to “HKEY_LOCAL_MACHINE\REM_SAM\SAM\Domains\Account\Users\000001F4” in the registry editor.
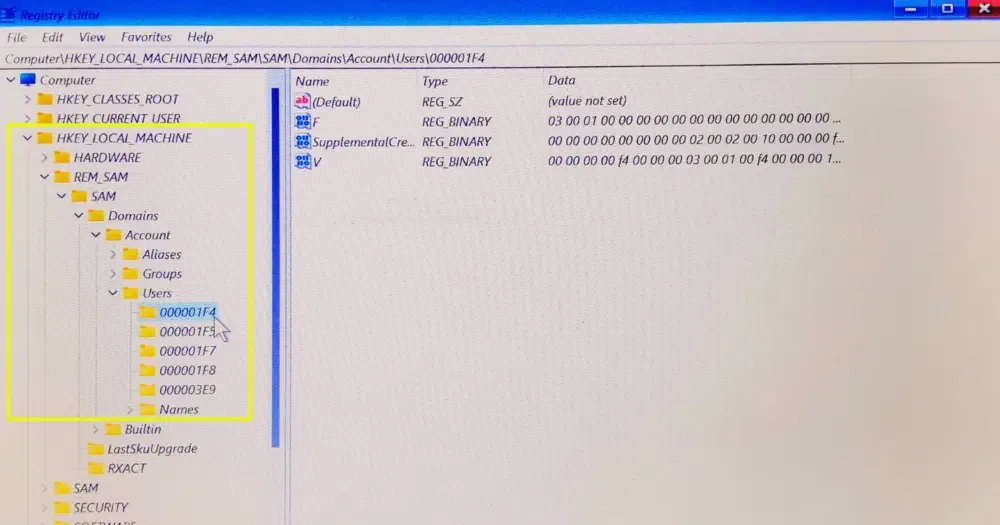
Step 10: Double-click on the “F” binary value
Step 11: Go to the “00000038” entry in the first row
Step 12: Modify the value “11” in the second column to “10“
Step 13: Click OK to save the changes.

Step 14: Exit the registry editor window
Step 15: Close the Command Prompt
Step 16: Click “Continue” to boot to the lock screen. After enabling the built-in admin account, don’t log in directly to this account. Instead, first boot Windows in Safe Mode to ensure it functions properly. Then, log in to the built-in administrator account and proceed with the next methods.
Method 3: Replace Corrupt NTUSER.DAT File
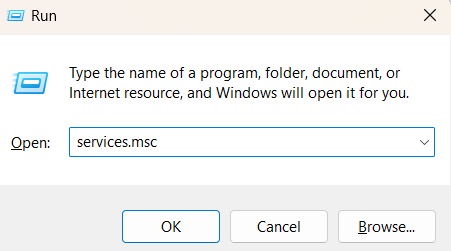
Step 1: Press Win + R and type services. the msc in the Run dialog box.
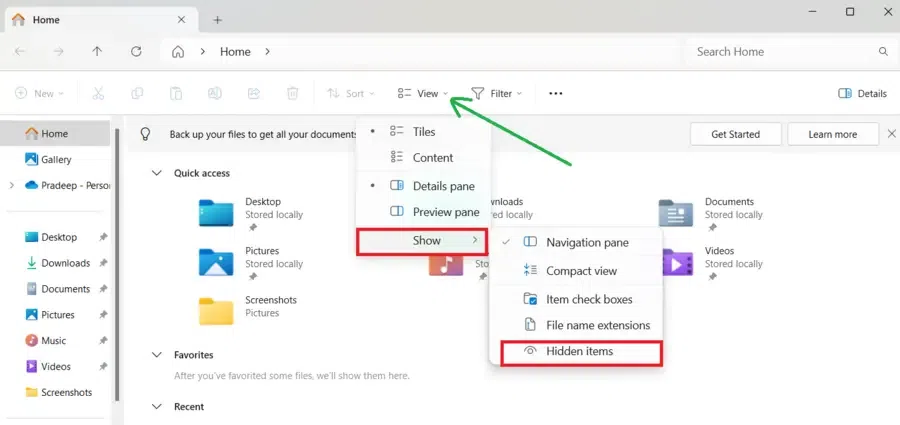
Step 2: Now, click Views > Shows > Hidden items
Step 3: Navigate to This PC > Local Disk (C:) > Users > Default
Step 4: Rename the NTUSER.DAT file to NTUSER.DAT.OLD
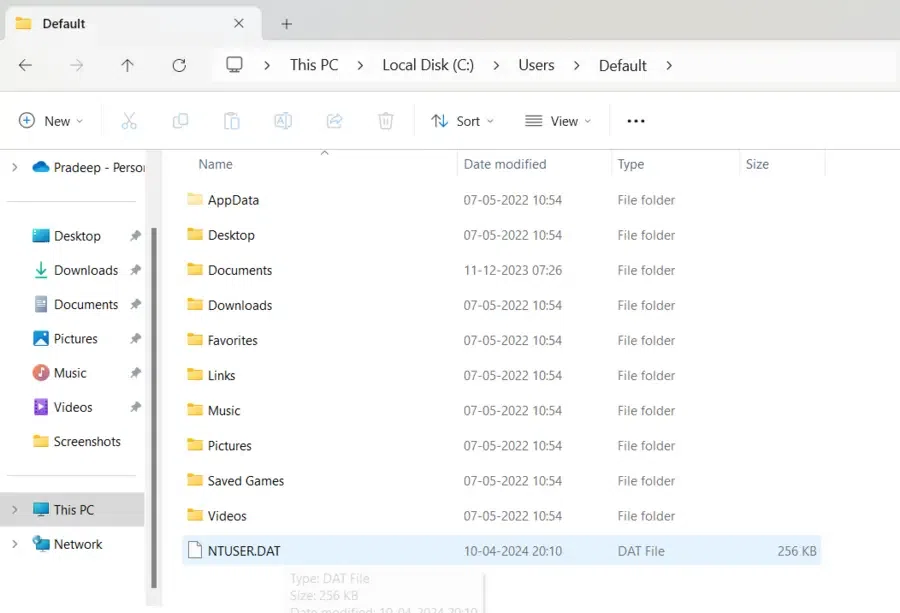
Step 5: Now, Paste the copied file into the Default folder
Step 6: To implement the changes, restart your computer.
Method 4: Create a New User Account
Note: Please ensure that your user profile files are backed up before continuing.
Step 1: Open Windows Settings choose Accounts > Other Users and click Add account
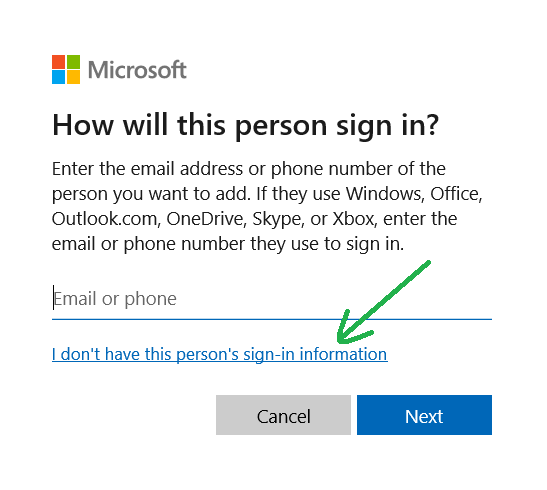
Step 2: Now click I don’t have this person’s sign-in information.
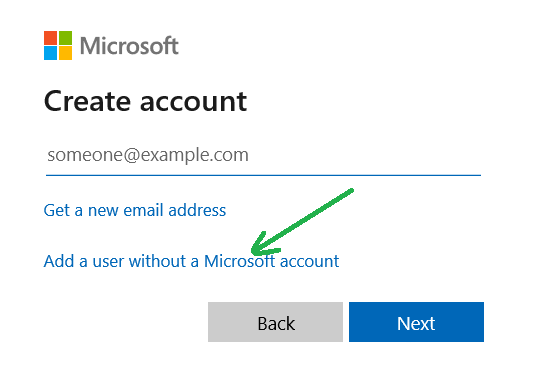
Step 3: Click Add a user without a Microsoft account.
Step 4: Enter User Name, Password, Confirm Password and Security Hints. Click the indicates button.
Step 5: Restart your PC to log in to your new user account
Method 5: Enable User Profile Service
Step 1: Enter into safe mode by following the steps.
Restart PC > Hold Shift > Troubleshoot > Advanced Options > Startup Settings > Restart > Press F4 or F5
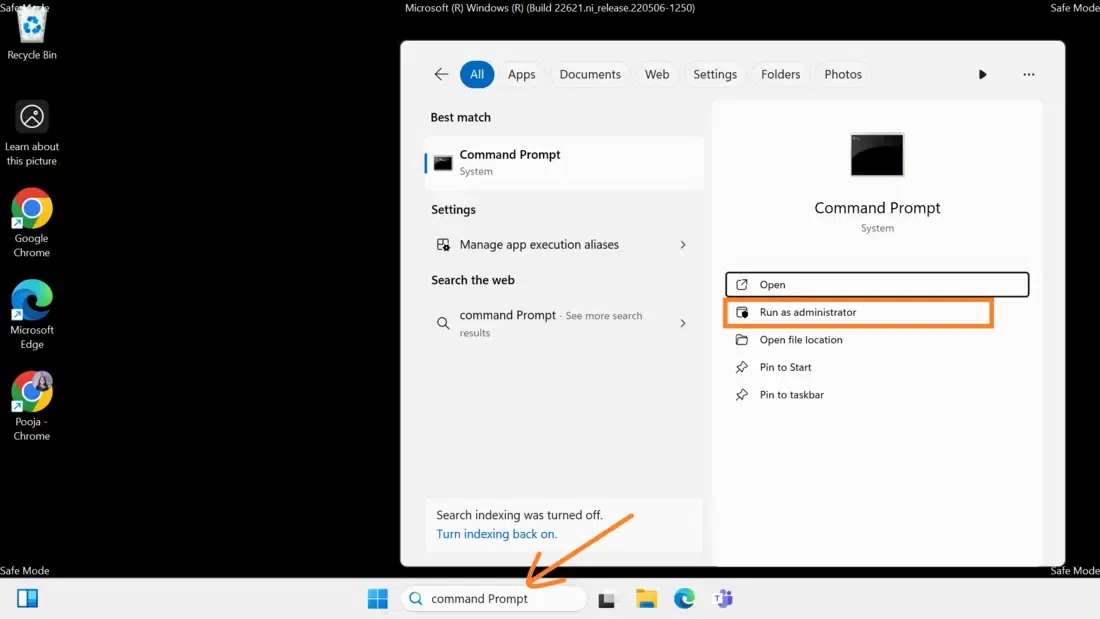
Step 2: Copy-paste the following commands one by one and hit Enter.
sc config ProfSvc start= auto
sc start ProfSvc
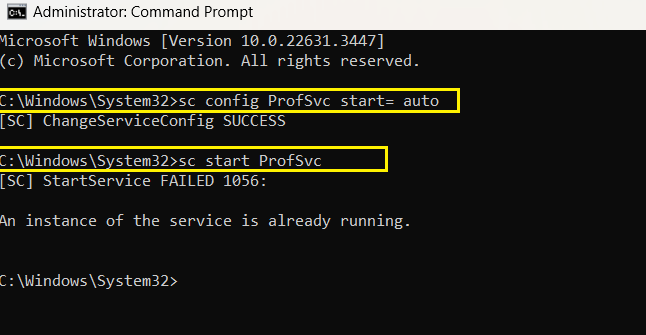
Step 3: Restart your PC again to exit safe mode.
Method 6: Enable User Profile Service via Registry Settings
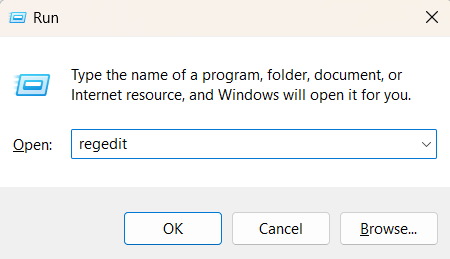
Step 1: Press Win + R and type regedit in the Run dialog box.
Step 2: Navigate to HKEY_LOCAL_MACHINE > Software > Microsoft > Windows NT > CurrentVersion > ProfileList.
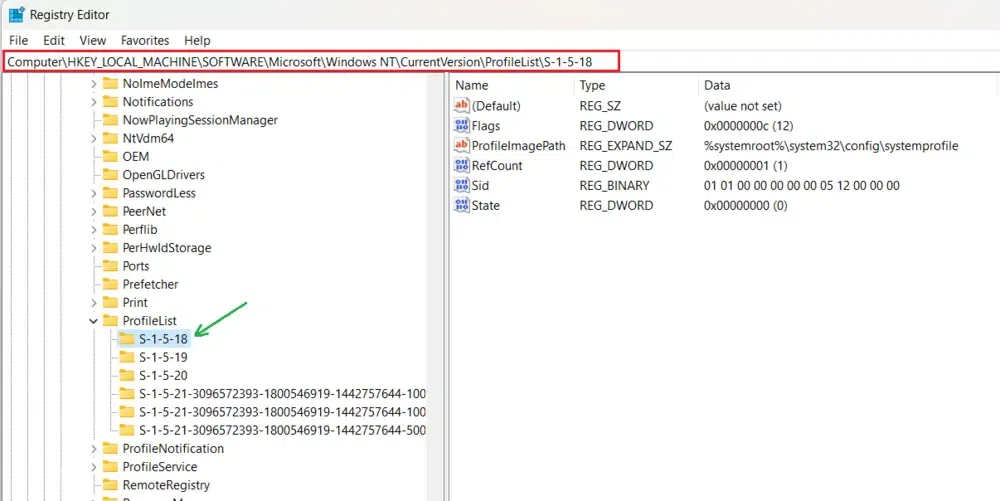
Step 3: Find the corrupted profile by checking each S-1-5 folder’s ProfileImagePath to match your profiles.
Step 4: Change RefCount and State values to zero for the corrupted profile, then restart your computer.
Leave A Comment?