
Situatie
- Click on Create flow → Automated cloud flow
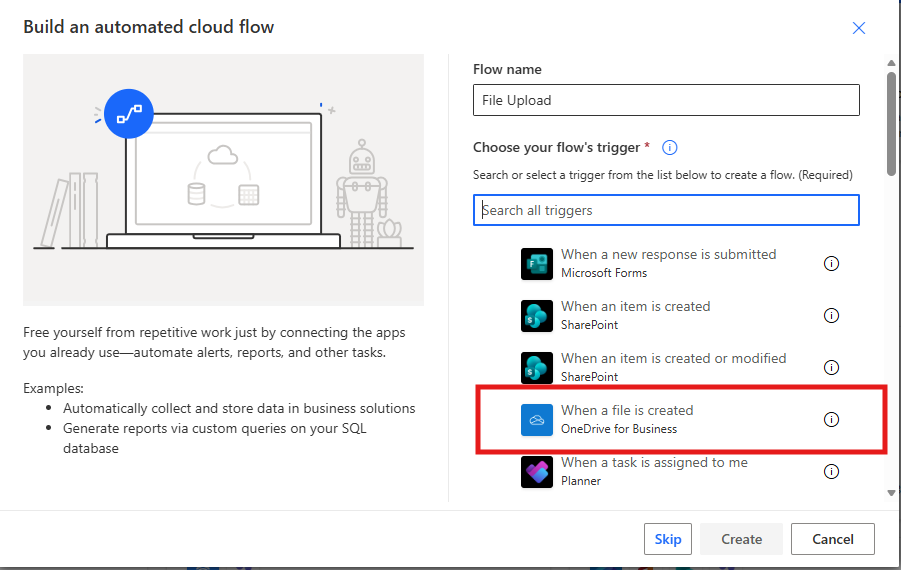
2. Give your flow a name and choose your flow trigger
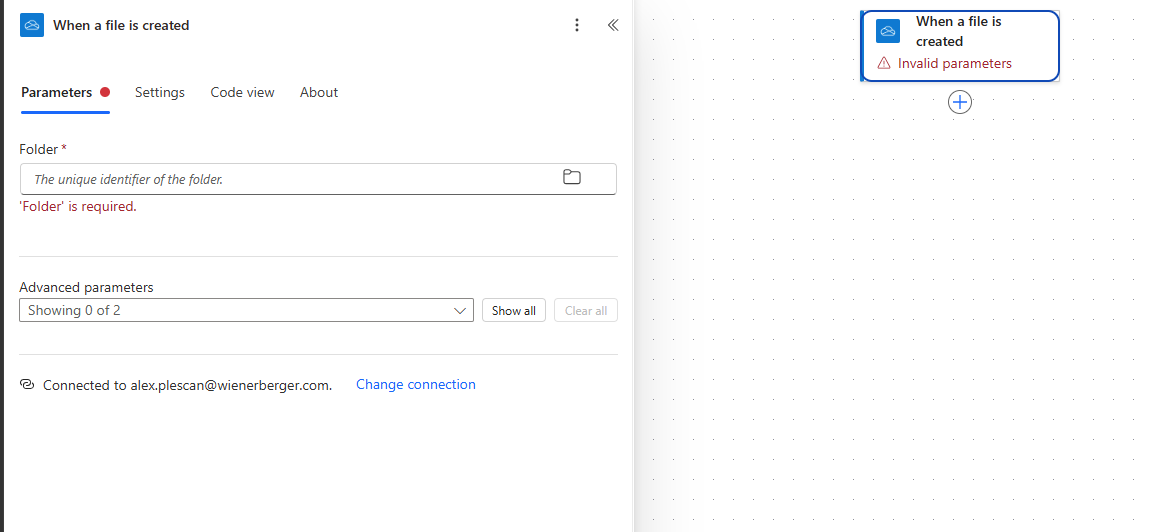
3. In this case, we will choose When a file is created and select the folder we want to work with.
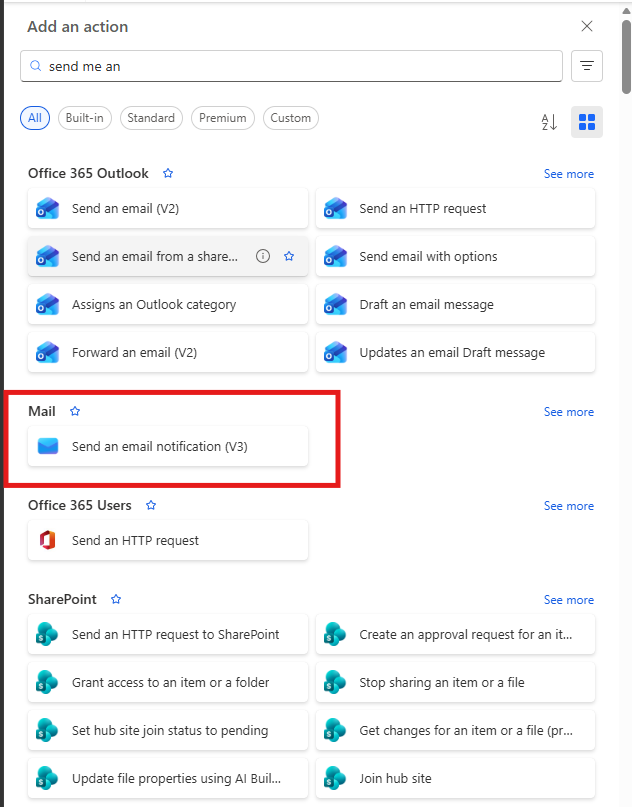
4. Next, click on New step and search for the action called Send me an email notification.
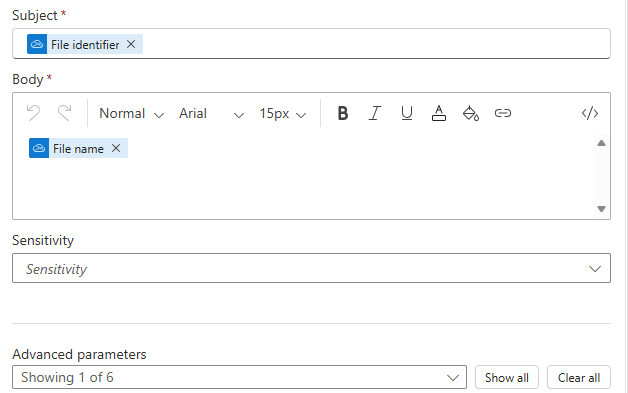
5. In these fields, enter your email address or another recipient’s email address, choose a subject (e.g., New File Uploaded), and add a message in the body, such as:
-
- File name: [File Name]
- Date uploaded: [Created Time]
- Please check the file for more details.
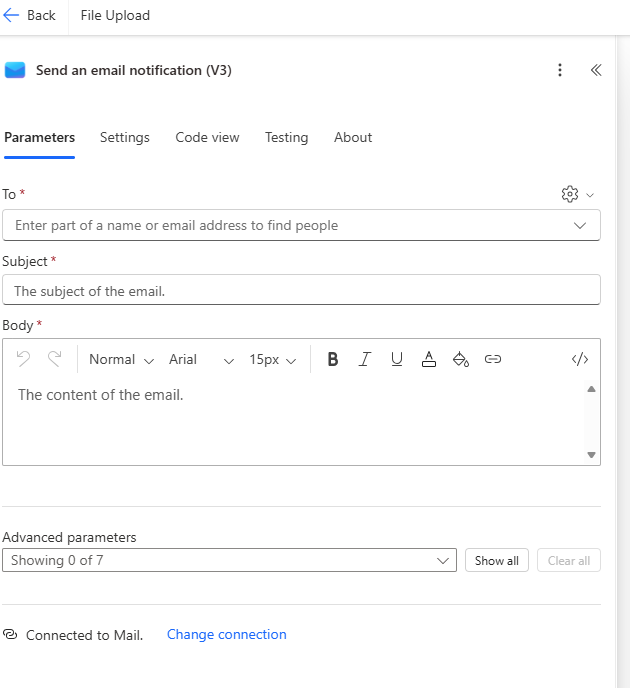
In Power Automate, use the Dynamic content options to automatically insert the file name and creation date instead of typing [File Name] and [Created Time] manually. Also, the exact names of the trigger and action may vary depending on the connector used.
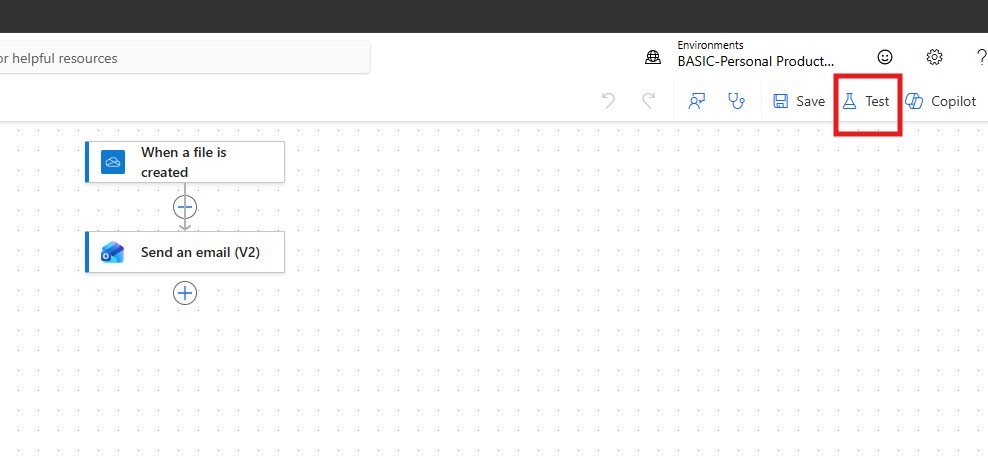
6. In the next step, we will test our flow. Click on Test and choose Manually. Then, create a new file in the selected folder and wait for an email notification to check if the flow works correctly.
Leave A Comment?