Social

How To Organize Your Messy Windows Desktop

The desktop is a convenient place to store files and program shortcuts, but it can get messy fast. Here’s how to tidy your desktop up so you can quickly find everything you’re looking for—and make sure it stays nice and organized.

Hide All Your Desktop Icons

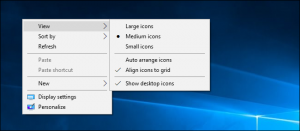
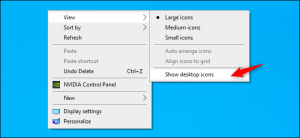
If you don’t use your desktop much, but programs keep dropping shortcuts on it, here’s a quick solution: Hide everything to get a perfectly clean desktop. To toggle desktop icons on or off, right-click your desktop and select View > Show Desktop Icons. Your desktop will appear empty.

To see your desktop icons again, click the “Show Desktop Icons” option again. Or, you can open a File Explorer or Windows Explorer window and click the “Desktop” folder to view the contents of your desktop in a standard file browser window. That’s the nuclear option, of course. If you like storing files and program shortcuts on your desktop, you won’t want to hide them all.

Quickly Sort Your Desktop Icons

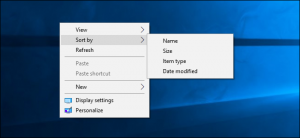
For a quick organization, you can right-click your desktop and select an option in the “Sort By” menu. For example, select “Name” to sort files alphabetically or “Date Modified” to sort them chronologically. This makes it easier to find what you’re looking for if your desktop is very messy.

You can also use the options under the “View” menu to choose the size of your desktop icons and decide whether they’re aligned to a grid. If you uncheck “Auto Arrange Icons,” you can drag and drop icons anywhere you want. If this option is enabled, icons will always be grouped, one after the other.

These options can be helpful, but they’re no substitute for truly taming the clutter.

Organize Your Files and Shortcuts Into Folders

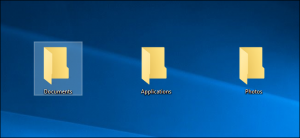
Consider using folders to keep your desktop organized. To create a folder, right-click the desktop, select New > Folder, and give the folder a name. Drag and drop items from your desktop into the folder. You can double-click a folder on your desktop to open it, so it takes a few more clicks to open your files—but they’re still easy to find.

For example, you could have separate folders for your photos and documents, or keep files related to a single project in their own folder. And yes, you can drag and drop program shortcuts into folders, too. If you’d like to clean up your desktop quickly, you can select everything on your desktop and then drag and drop them into a folder. You can then move items back onto your desktop as you need them.

Use the Desktop as a Temporary Working Area

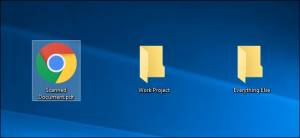
The desktop works well as a workspace, giving you a convenient place to store files with which you’re working currently. For example, you might store spreadsheets you’re working on, documents you’ve scanned, photos you’ve just taken, or things you’ve just downloaded on your desktop.

To keep the desktop useful for this task and prevent it from getting too cluttered, try only storing files on your desktop for as long as you need them. When you’re finished with a project or task, move the associated files to another folder like your main Documents or Photos folder—or even dump them in a folder on your desktop. In other words, treat the desktop like you should treat a physical desktop or counter—place things on it while you’re using it, and clear them away afterward rather than letting them pile up.

Put Shortcuts in Your Start Menu and Taskbar

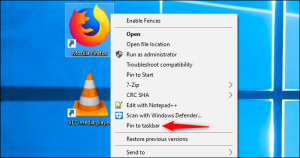
Programs often add shortcuts to your desktop when you install them, which makes your desktop get more and more cluttered over time. Try placing program shortcuts elsewhere, such as on your taskbar or in your Start menu. To pin a program shortcut to your taskbar, right-click it and select “Pin to Taskbar.” It will always appear as an icon on your taskbar, and you can drag the icon to the left or right to position it.

To get more space for icons on your taskbar, you can remove some things to free up space. For example, to hide the Cortana search box on Windows 10, right-click your taskbar and select Cortana > Hidden. You can also click Cortana > Show Cortana Icon, which will make Cortana be a standard taskbar icon instead of a large search box.

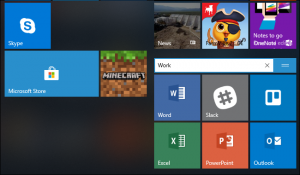
You can also place shortcuts in your Start menu. To do so, right-click a shortcut and select “Pin to Start.” On Windows 10, it will appear as a tile at the right side of your Start menu. On Windows 7, it will appear as a shortcut at the left side of your start menu. You can also pin apps right from the Start menu—either right-click a shortcut in the all apps list in the Start menu and select “Pin to Start,” or drag the icon to the pinned apps area.

On Windows 10, you can drag and drop pinned application shortcuts in your Start menu to organize them into groups, and click the header at the top of the group to give it a name. For example, you could create a “Work” group with shortcuts to applications you use for work or a “Games” group that contains shortcuts for your games.

Also, if you’re using Windows 10, you can unpin all those pinned apps Microsoft put there to make the Start menu your own. Feel free to unpin any shortcuts you don’t use.

After you’ve moved all the shortcuts you want to your taskbar and Start menu, you can delete them from your desktop like you’d delete any file—or move them to a folder. If you accidentally delete a shortcut and want it back on your desktop, open your Start menu and find the shortcut in the list of all your installed applications. Drag and drop the shortcut to your desktop.

[mai mult...]

How to Create a Shortcut to an Application

To do this the easy way, open Windows 10’s Start menu. Look for the application you want to use by scrolling through the Apps list at the left side of the menu. If it’s in the tiles list at the right side of the menu, you can also drag it from there.

Once you’ve found it, drag and drop the application’s shortcut from your Start menu to your desktop. You’ll see the word “Link” appear when you’re hovering over the desktop. Release the mouse button to create a link to the program, also known as a desktop shortcut.

Note that you can’t search for the application by name in the Start menu. Windows 10 won’t let you drag and drop anything from the search results. It should, but it doesn’t.

How to Create a Shortcut to a File or Folder

To create a desktop shortcut to a file, first, locate the file somewhere in File Explorer. Hold down the Alt key on your keyboard and then drag and drop the file or folder to your desktop. The words “Create Link in Desktop” will appear. Release the mouse button to create the link.

Holding down Alt is necessary. If you don’t hold down Alt, Windows will show the words “Move to Desktop,” and it will move the folder or file to your desktop rather than simply creating a link.

How to Create a Shortcut to a Website

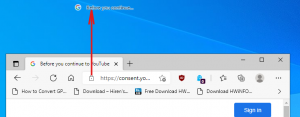
In Google Chrome or Mozilla Firefox and Microsoft Edge, you can quickly create desktop shortcuts to websites. With a web page open, drag and drop the icon to the left of the address bar—it’s generally a padlock or an “i” in a circle—to the desktop.

Working With Your Shortcuts

Whatever type of shortcut you create, you can right-click it afterward, select “Rename,” and change the name to whatever you like. You can use all the above methods to create shortcuts in other folders, too. Want to create a shortcut to a website or application in your Downloads folder? Go right ahead! Just drag and drop it to your desired location instead of the desktop.

ADVERTISEMENT

If you don’t see any shortcuts on your desktop, they may be hidden. Right-click the desktop and select View > Show Desktop Icons to unhide them.

You can also choose the size of your desktop icons from here—large, medium, or small. For more size options, position your mouse cursor over the desktop, hold down the Ctrl key, and scroll up and down with your mouse wheel.

[mai mult...]
How to Freely Move Pictures in Microsoft Word

By default, you can’t freely move pictures (by drag-and-drop) to any position in a Microsoft Word document without also placing them somewhere in the text. But with a small change, you can drag images anywhere.

Make a Picture Freely Move in a Word Document

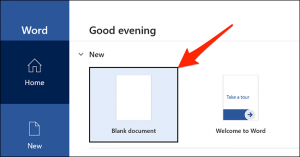
Using the method below, you can move a picture anywhere you want in your Word document—outside of the normal flow of text. You can even place the picture on top of an existing block of text if you want. We’ll use a blank document to do this. Start by opening Microsoft Word on your Windows or Mac computer. On Word’s first screen, select “Blank Document” to create a new document.

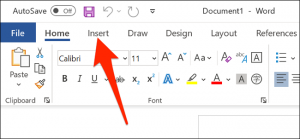
In Word’s editing window that opens, click the “Insert” tab at the top.

In the “Insert” tab under the “Illustrations” section, click Pictures > This Device. This lets you add a picture from your computer.

Use the “File Explorer” window that opens to navigate to the folder containing your picture. Double-click the picture to add it to your Word document.

Back on Word’s editing screen, right-click the image that you just added and select Wrap Text > In Front of Text from the menu.

Your picture is now freely movable. Drag and drop it anywhere you want in your document.

Make All Future Pictures Freely Move in a Word Document

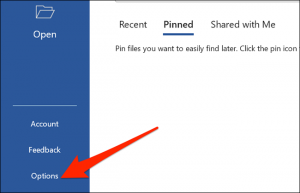
If you’d like to make all of your future pictures freely move in your Word documents, you can modify an option in Word’s settings menu. To do so, first, open Microsoft Word on your Windows or Mac computer. On Word’s main screen in the lower-left corner, click “Options.”

Note: If you’re on Word’s document editing screen instead, click “File” at the top to see the “Options” option.

In the “Word Options” window, select “Advanced” in the sidebar on the left.

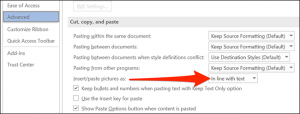
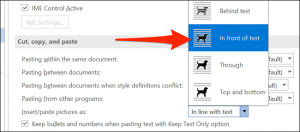
Scroll down the right pane to the “Cut, Copy, and Paste” section. In this section, find the “Insert/Paste Pictures As” option and click the drop-down menu next to it.

Select “In Front of Text” in the drop-down menu.

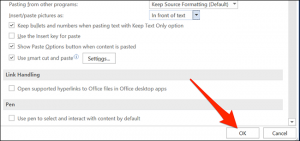
Click “OK” at the bottom of the “Word Options” window to close the window.

And that’s it. From now on, Word will allow you to freely move pictures on top of text in your documents.

[mai mult...]
Review laptop Allview Allbook I: bun pentru office multitasking

Compania are la activ cateva produse din aceasta gama lansate pe piata dar Allbook I se remarca prin simplul fapt ca beneficiaza de configuratii care il fac un produs foarte atractiv, fiind primul astfel de dispozitiv lansat sub marca romaneasca pe care l-am folosit si de care am ramas placut surprins.

Allbook I m-a surprins pentru ca vine cu un SSD de 256 de GB, 8 GB DDR4 si un procesor Intel I3 din a 10-a generatie. La o prima vedere acestea sunt configuratii pentru un laptop in general mai performant ce poate fi folosit pentru procese putin mai avansate decat simpla navigare pe internet sau editarea de documente. Treceti pe lista si faptul ca produsul vine cu licenta Windows 10 (in cazul produsului testat este vorba de Windows 10 Home pe 64 de biti). Fiind un produs ce intra in categoria mobilitate, sa spunem ca pe partea de greutate avem aproximativ 2 kilograme (1,9), nefiind chiar voluminos, deci poate fi carat cu usurinta fara sa para inconfortabil.

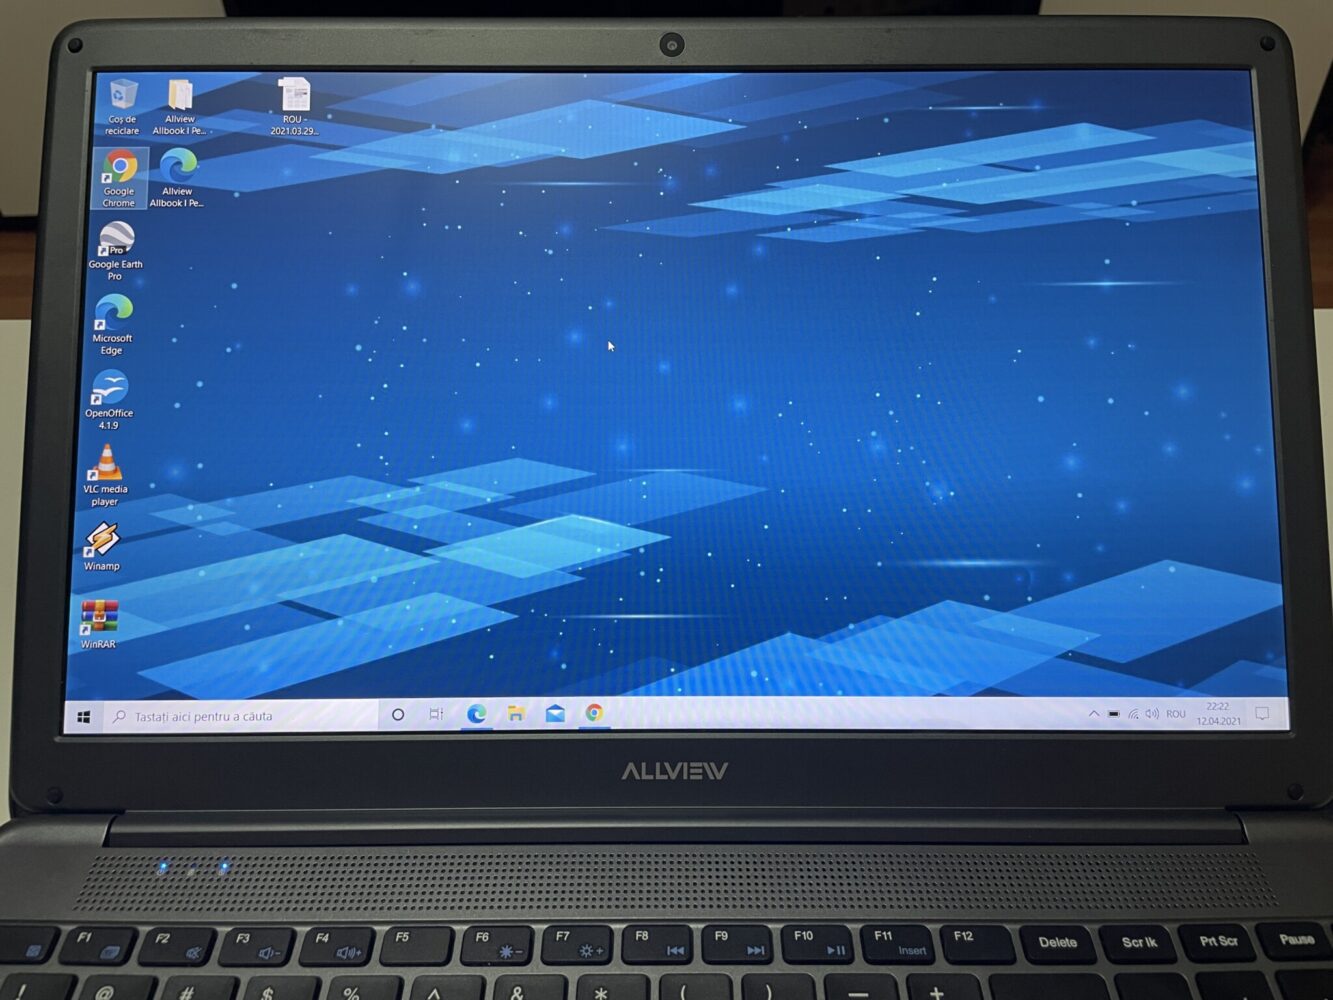
In ceea ce priveste dimensiunile avem 359x242x19.6 mm si cand vine vorba de ecran acesta are 15.6 inchi. Rezolutia lui este 1920 X 1080p de tip Full HD de tip IPS, formatul fiind 16:9. Cu o rata de refresh de 60 de HZ si o luminozitate de 200 de nits performantele la acest capitol pot fi apreciate la o folosire in interior si mai putin afara, in expunerea directa a luminii soarelui.

Spre comparatie, ecranul lui iPhone 12 are 600 de nits, dar ar putea fi capabil sa ofere un maxim de 1200 de nits. Insa Allbook I ofera niste culori vii si placute, unghiurile de vizualizare sunt bune functia anti-glare fiind de ajutor daca lucrezi intr-un birou cu lumina aprinsa care bate spre ecran.

Spuneam ceva mai sus ca datorita specificatiilor am putea spune ca produsul e mai capabil de sarcini avansate decat alte produse prezentate drept ideale pentru office. In cazul de fata, la momentul lansarii, produsul a fost prezentat de companie drept ideal pentru utilizatorii casnici. Totusi el este capabill si de multitasking fara sa va faceti griji ca acesta se va bloca.

Review Allview Allbook I imdeplineste cele mai mari performante hardware?!

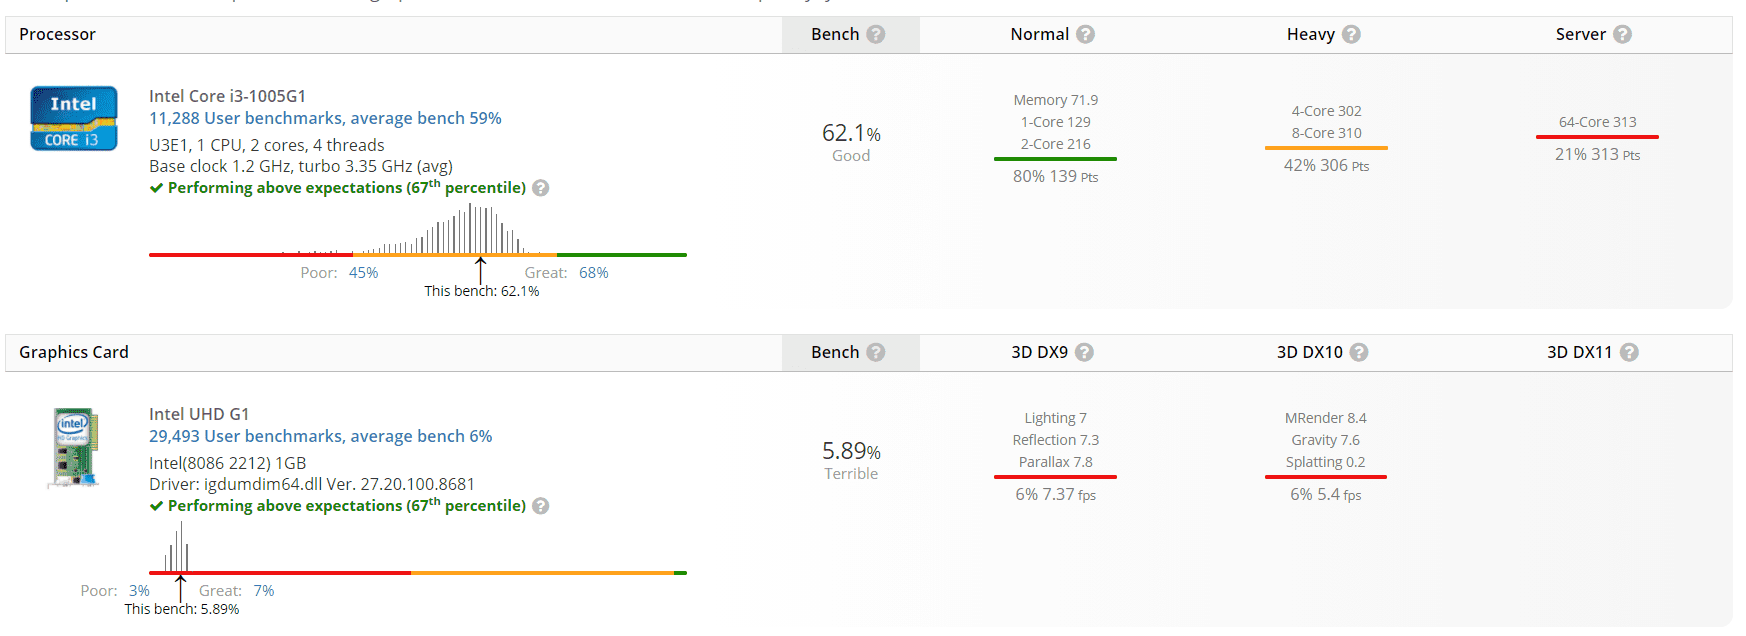
Allbook I are o placa integrata de tip Intel® UHD Graphics for 10th Gen Intel® Processors. Altfel spus sa nu va asteptati la acest latpop sa faca mai mult decat poate duce, el nu este un produs de gaming pentru jocuri ce va solicita resurse importante. Dar chiar si asa, el s-a descurcat decent cu titluri de gaming disponibile in Windows Store.

Pentru a evita supraincalzirea componentelor, Allbook I are pe spatele sau un sistem de 4 fante de aerisire ce in teorie ar trebui sa ajute foarte mult daca folositi laptopul pentru sarcini mai avansate ce solicita resurse importante. Ele sunt asezate in linie dreapta iar pentru ca laptopul sa nu stea efectiv lipit de suprafete, acesta este prevazut cu patru picioruse de cauciuc.

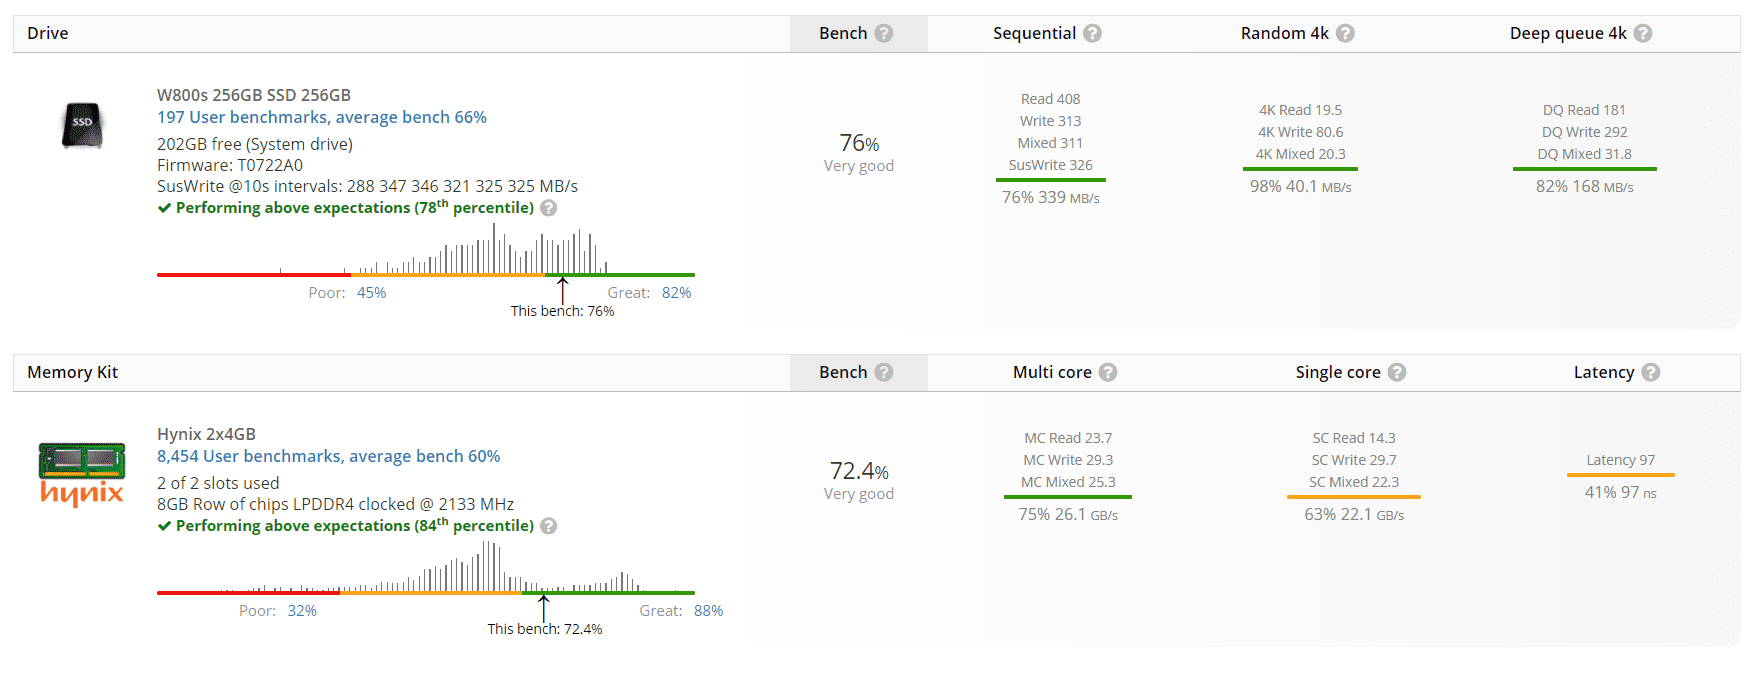
Allbook I este laudat pe partea de procesor, acesta fiind totusi capabil sa sustina rularea de jocuri 3D. Insa, datorita componentei grafice, adica placa video integrata, Allbook I este capabil sa redea doar jocuri 3D de baza, fiind capabil pentru multi tasking general in conditii bune. Pentru ca avem stocare SSD, este destul de clar ca acest lucru va aduce un scor bun pe partea de Boot drive, programele raspunzand mai rapid.

Memoria RAM instalata este mai mult decat suficienta pentru a rula orice versiune de Windows si este suficienta pentru vasta majoritate a jocurilor, dar sa nu va asteptati sa puteti incerca titluri ce va solicita frame rate-uri ridicate. Totodata 8GB sunt suficienti pentru system cache si rularea de fisiere, ceea ce rezulta intr-un sistem de operare responsiv.

Concluzia generala a testului UserBenchMark este ca Allbook I este bun drept produs Desktop, si un produs slab daca intetionati sa il folositi drept produs pentru gaming sau tip server. Altfel spus editarea video (ceea ce fac eu foarte des) sau randarea 3D nu sunt punctele sale si ar trebui sa va luati gandul de la astfel de sarcini.

Un SSD este intotdeauna de preferat in locul unui Hard Disk obsinuit oferind viteze de scriere si citire mai rapide insa capacitatea de 256 de GB ar putea sa devina rapid insuficienta pentru stocarea de fisiere. Si inca o remarca, laptopul vine cu o singura partitie din fabrica, ceea ce inseamna ca va trebui sa folositi utilitarul Windows 10 pentru a creea inca una.

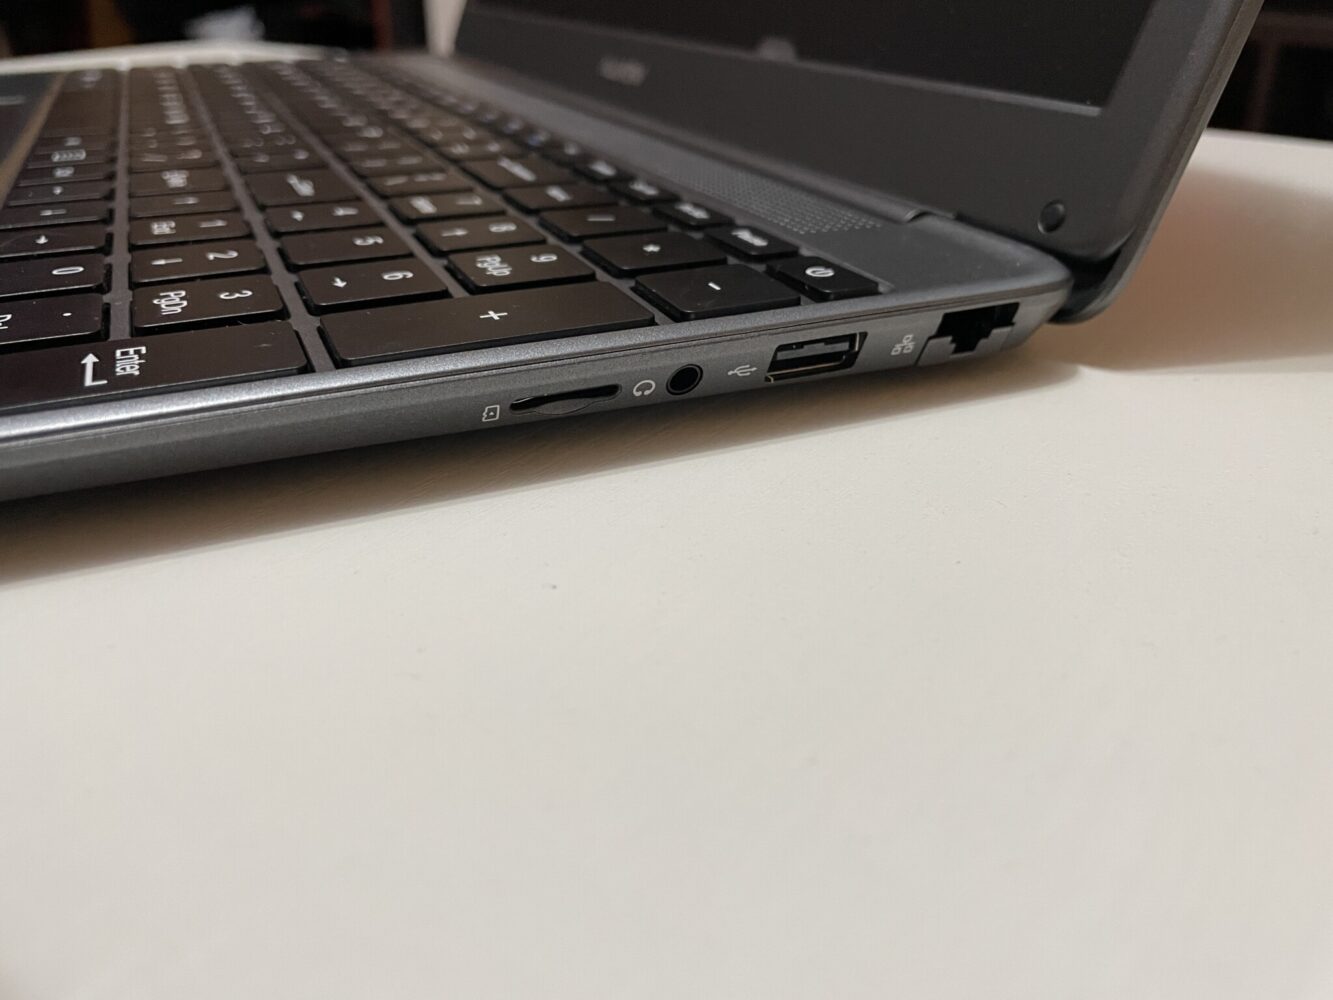
Pe partea de conectivitate sa trecem pe lista ca Allbook I are porturi adaptate noilor tehnologii din ziua de azi. Pe partea din dreapta avem un port LAN, un port USB 2.0, portul pentru casti si un port pentru cardu micro SD. Pe partea din stanga succesiunea de porturi este Port USB 3.0, portul de alimentare, portul HDMI si un port USB Type-C, adica cel unde veti putea conecta telefoanele mai noi.

Pentru ca am vorbit despre porturi dar nu am pomenit despre conectivitate, sa precizez ca avem WiFi 802.11 a/b/g/n/ac, Bluetooth 4.2 dar si posibilitatea de a transforma laptopul in Hotspot (folosind tethering prin Wi-Fi, BT și USB). Si da, puteti proiecta cu usurinta ecranul pe un televizor smart folosind functia ecran Wireless, asigurandu-va ca cele doua dispozitive sunt conectate in aceeasi retea.

Review Allview Allbook I

Pe partea de audio, Allbook I se descurca decent, difuzoarele fiind situate in imediata apropiere a ecranului, ele fiind pozitionate undeva in partea dreapta. Pentru consum de media, scoala online si alte astfel de activitati este de ajuns.

Revenind la partea frontala, marginile ecranului sunt destul de late, insa nu as zice ca acesta ar fi cel mai deranjant lucru la laptop. In partea de sus a ecranului avem si o camera WEB care nu pot spune ca se poate lauda cu ceva, are 2MP, si este ajutata si de doua microfoane care ajuta astfel pentru orele de scoala online. Calitatea video nu este chiar una sa te dea pe spate dar e suficienta pentru videoconferinte sau ore online. De fapt acest aspect nu a fost niciodata un element de baza pentru producatorii de laptopuri, fiind acum de interes doar pentru ca in ultimul an laptopurile au devenit extrem populare din cauza pandemiei, fiind de preferat in locul unor tablete sau telefoane.

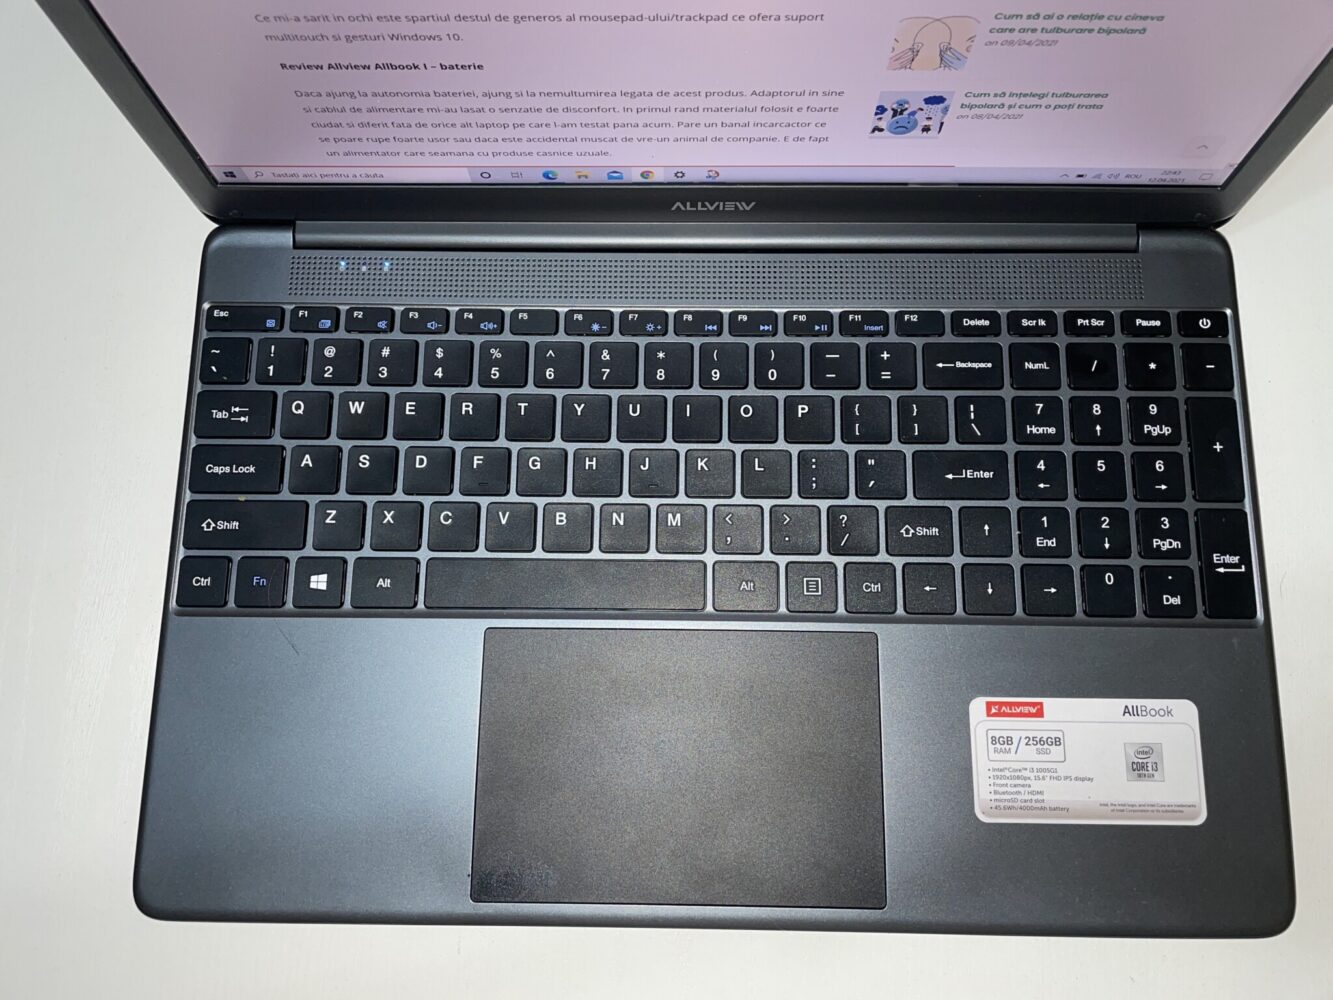
Tastatura este una completa, adica include si tastele NUMPAD in partea din dreapta. Ele sunt destul de mari iar spatiul dintre ele este destul de generos deci tastarea ar trebui sa fie cursiva. Din pacate aceasta nu are iluminare, insa nu ar reprezenta neaparat un mare neajuns daca tastarea este un reflex pentru tine. Butonul de alimentare este situat pe randul de sus, in partea din dreapta, si ai putea sa il atingi din greseala daca folosesti tastatura NUMPAD.

Un lucru important este spatiul destul de generos al mousepad-ului/trackpad ce ofera suport multitouch si gesturi Windows 10.

Review Allview Allbook I

Review Allview Allbook I – Baterie

Daca ajung la autonomia bateriei, ajung si la nemultumirea legata de acest produs. Adaptorul in sine si cablul de alimentare mi-au lasat o senzatie de disconfort. In primul rand materialul folosit e foarte ciudat si diferit fata de orice alt laptop pe care l-am testat pana acum. Pare un banal incarcactor ce se poate rupe foarte usor sau daca este accidental muscat de vre-un animal de companie se va strica instant. E de fapt un alimentator care seamana cu cel al unor produse casnice uzuale.

Continuand pe aceasta idee, bateria laptopului are 4000 mAh , ceea ce in termeni practici inseamna cam 2:45 – 3 ore de autonomie cu o luminozitate la 60% si sarcini de baza ce nu solicita prea mult resursele. Incarcarea la 100% dureaza cam 2 ore si 15 minute, pentru ca acumulatorul vine cu incarcare la 19W. Bateria este una de tip Litiu-Polymer si are o putere de 45,6 Wh.

[mai mult...]
How to Set Up Amazon Smart Plug

There are a lot of third party smart plugs designed to work with Alexa, but the Amazon Smart Plug is one of the easiest to set up and use. If you chose to have it preconfigured for your account, then setup is even easier. It doesn’t require a hub or any additional equipment or any complicated configuration, and it connects directly to your Wi-Fi network.

Setup is performed in the Alexa app, and you will need to connect the Amazon Smart Plug to your Wi-Fi network and Amazon account if it wasn’t preconfigured for you.

[mai mult...]