How to Disable Pop-Up Blocker in Safari on iPhone and iPad
By default, Safari on your iPhone and iPad blocks any website pop-ups. If a site requires these tiny windows to function, you can disable Safari’s built-in pop-up blocker.
[mai mult...]Soluții pentru problemele tale IT

By default, Safari on your iPhone and iPad blocks any website pop-ups. If a site requires these tiny windows to function, you can disable Safari’s built-in pop-up blocker.
[mai mult...]Like other modern web browsers, Chrome lets you quickly reopen tabs and windows you’ve recently closed. Google moved this option a bit in 2019 when it rolled out Chrome 78, but it’s still easy to find if you know where to look.
[mai mult...]Vrei să-ți folosești PC-ul ca tabletă sau poate tastatura fizică s-a stricat ori nu mai are baterie. Activarea tastaturii tactile adaugă o scurtătură pentru aceasta pe bara de activități și îți permite să o aduci pe ecran cu o singură apăsare atunci când ai nevoie de ea.
[mai mult...]To sync the clock manually to fix the time and date information on Windows 11, use these steps:

Once you complete the steps, the system clock should start showing the correct time information in the Taskbar.
To change the date and time manually on your computer, use these steps:


After you complete the steps, the Taskbar should display the correct date and time information.
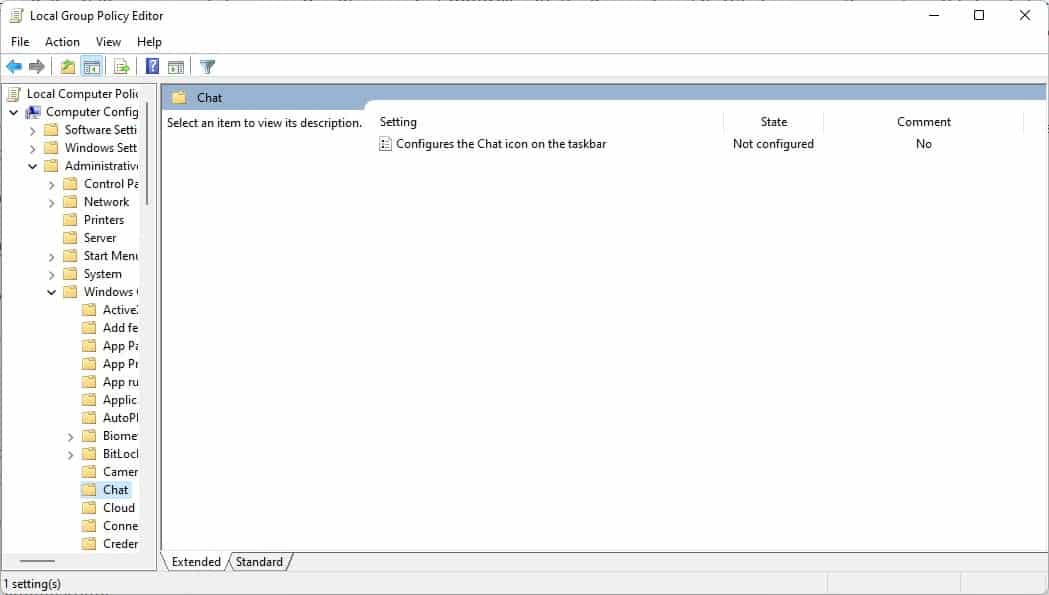
[mai mult...]Microsoft ships a useful tool called the Group Policy Editor, commonly known as Gpedit.msc or just GPEDIT, with the Pro version of its Windows operating system. It is handy for enabling or disabling functions of various elements in the OS, by changing Registry values, but in a more user-friendly way. Unfortunately, Home Edition users don’t get access to this nifty tweaking utility. But, there is a way to enable the Group Policy Editor on Windows 11 Home.
Let me remind you that simply enabling the utility only lets you access the GPEDIT console’s interface, it does not apply the changes for the policy settings (at least not for the ones I tried to modify). It is still worth a shot though, especially for the price of free, and the GUI definitely works.
Note: If you have Windows 11 Pro, don’t bother with this, as you will already have the fully-functional version of the tool.
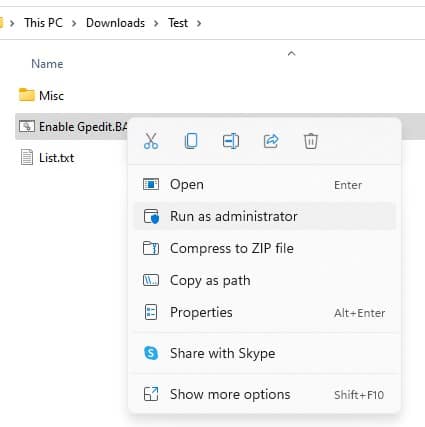
1. Download the ZIP archive from our website, extract it to a folder, and you will get a BAT file.
Or, copy the code below and paste it in Notepad. Save the file with the .BAT extension like Script.BAT or GPEDIT.BAT, the name doesn’t matter.
@echo off
pushd “%~dp0″dir /b %SystemRoot%\servicing\Packages\Microsoft-Windows-GroupPolicy-ClientExtensions-Package~3*.mum >List.txt
dir /b %SystemRoot%\servicing\Packages\Microsoft-Windows-GroupPolicy-ClientTools-Package~3*.mum >>List.txtfor /f %%i in (‘findstr /i . List.txt 2^>nul’) do dism /online /norestart /add-package:”%SystemRoot%\servicing\Packages\%%i”
pause
2. Right-click on the BAT file and run it as administrator.
3. A command-prompt window should open. This is the DISM command, which installs the relevant packages to enable GPEDIT on your computer. Wait for the process to be completed, it may take a few seconds. You’ll know when it’s done, when you see a message that says “Press any key to continue”.
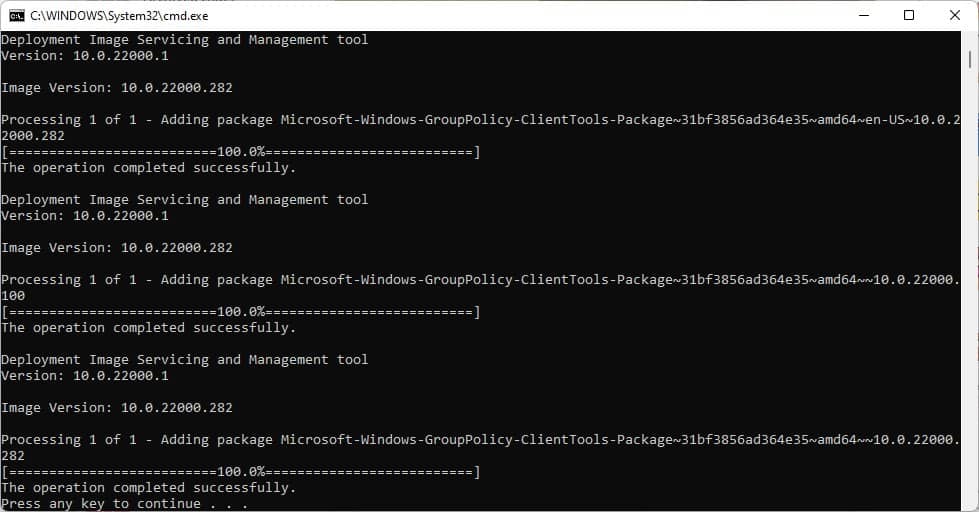
4. Tap any key and the command window should close.
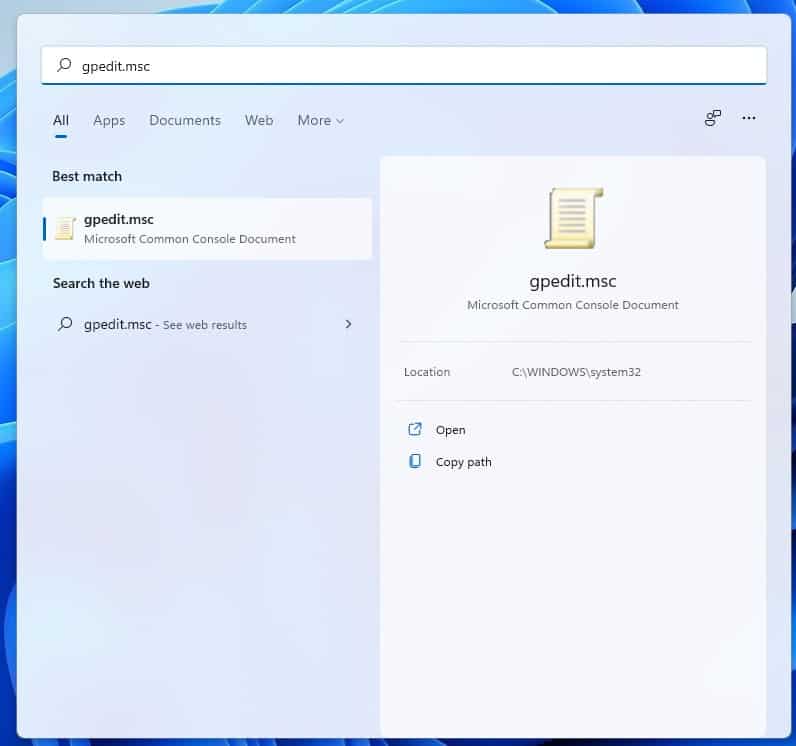
5. Click the Start button and type Gpedit.msc, and you should see the tool appear in the result click on it (or use the Run command with Win + R, followed by Gpedit.msc), and you will be able to access the Group Policy Editor.
You don’t need to reboot the computer for the utility to show up, you may want to turn off the system and turn it on again. If you try to modify a policy, but it doesn’t appear to take effect, don’t be surprised. As I mentioned earlier, it’s a bit of a hit-and-miss, the tool seems to work sometimes. There is no known workaround to enable the functionality in Windows 11 Home or Windows 10 Home, besides upgrading your operating system to the Pro version, of course.
I recommend using the third-party program, Policy Plus, to make changes to the operating system. It is essentially the same as the Group Policy Editor, but with a slightly better interface.
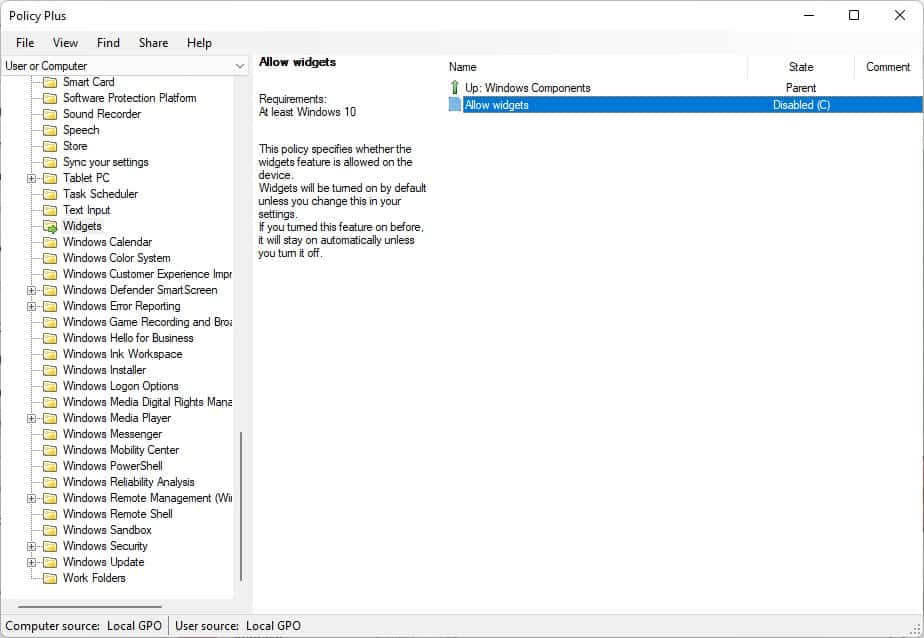
Please be aware that some antivirus programs detect it as a threat (I observed 4 detections on VirusTotal), these are not from major AVs, and I’m fairly certain these are false-positives.
[mai mult...]To completely remove the printer driver from the device, use these steps:
1. Open Start.
2. Search for Control Panel and click the top result to open the console
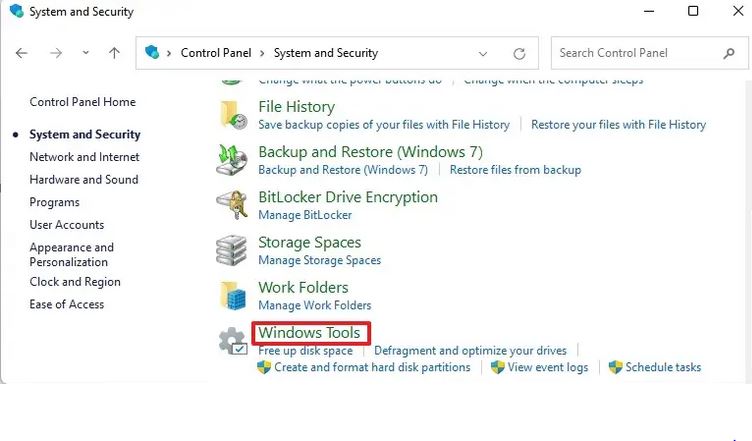
3.Click on System and Security.
4. Click on Windows Tools.
5. Double-click the Print Management option.
6. Expand the Custom Filters branch.
7. Click on All Drivers from the left navigation pane.
8.Right-click the printer driver on the right side, and select the Delete option.
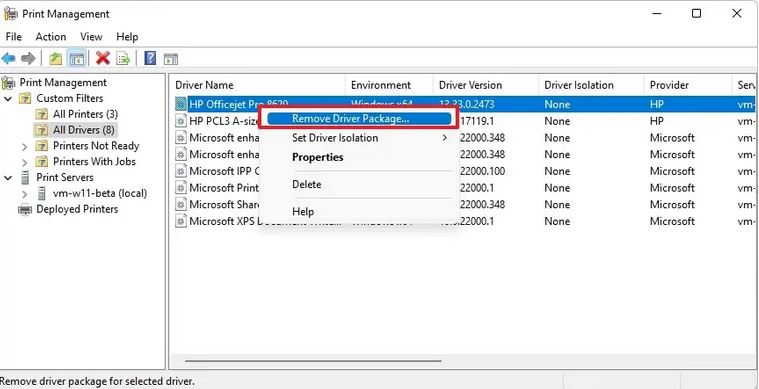
9. Click the Yes button.
After you complete the steps, the printer driver will no longer be available on the device. If you need to reinstall the peripheral, Windows 11 will need to download the driver again, or you will need to provide them manually.
[mai mult...]