Crearea unei sarcini noi in Outlook
Gestionarea sarcinilor în Outlook este simplă și eficientă datorită funcționalităților dedicate pentru organizarea și urmărirea activităților.
[mai mult...]Soluții pentru problemele tale IT

Gestionarea sarcinilor în Outlook este simplă și eficientă datorită funcționalităților dedicate pentru organizarea și urmărirea activităților.
[mai mult...]If you need to designate the timeframe for accepting form submissions, you can set a start and end date.
For example, you might have finished creating your form, and you want to plan ahead by sending it to everyone who needs to complete it. However, they still have yet to receive a piece of information that will help them answer the questions, so you don’t want them to respond just yet.
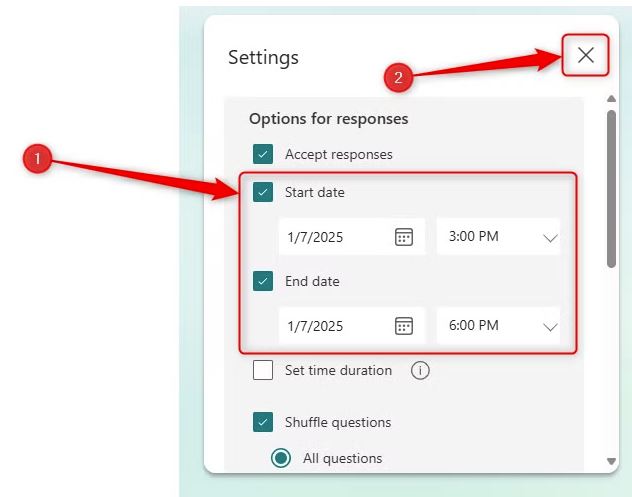
To do this, open the relevant form, and click “Settings” in the ribbon. Then, check “Accept Responses”. This is a crucial step, whether you set a timeframe or not, because it makes sure that the form is accessible.

Now, check “Start Date” to dictate the date and time your form becomes available, and check “End Date” to specify a date and time after which people can no longer submit responses. After you have set the relevant dates and times, simply click the “X,” and these new settings will be saved immediately.
Finally, “Collect Responses” and copy and paste the URL into your web browser to check that your adjustments have worked as expected. For example, if the start date is in the future, you should see a message saying that the form is not accepting responses.
[mai mult...]