Verificare MBR sau GPT
Situatia in care doresti sa verifici daca HD-ul functioneaza pe MBR (Master Boot Record) sau GPT (GUID Partition Table).
[mai mult...]Soluții pentru problemele tale IT

Situatia in care doresti sa verifici daca HD-ul functioneaza pe MBR (Master Boot Record) sau GPT (GUID Partition Table).
[mai mult...]Avem mai multe multifunctionale Kyocera, in diferite locatii pe care vrem sa configuram functia de Scan to Email. Adresa de pe care vrem sa fie primite scan-urile vrem sa difere in functie de locatie. Pentru a nu folosi mai multe licente/casute de email pentru fiecare locatie in parte, putem pregati mai multe adrese de email ca si grupuri de distributie sau Shared Mailbox (in cazul Office 365) pe care sa dam permisiuni de Send As unui singur cont pe care il vom folosi pentru autentificare.
[mai mult...]
Moving your old data to a new computer can be a bit of a headache, especially if you’re going from PC to Mac. Thankfully, there are several ways to go about it, so you can get your new Mac set up and ready to go.
There are various ways to transfer data from your old PC to your new Mac. You could drag your files to an external hard drive and manually transfer them over, set up a networking share between the two systems, or sync them up using a cloud storage account. There’s also the Windows Migration Assistant, a special tool Apple created expressly for this purpose. Both computers will need to be on the same network to use this tool, but past that there aren’t any other hard requirements.
Here’s how to use the Windows Migration Assistant to transfer your files.
To start this process, begin on your Windows PC. Open up a browser of your choice. There’s an Apple page located on Apple’s official help database with links to the Windows Migration Assistant program for each of the various versions of macOS on your new Mac. You’ll install this application on your Windows machine.
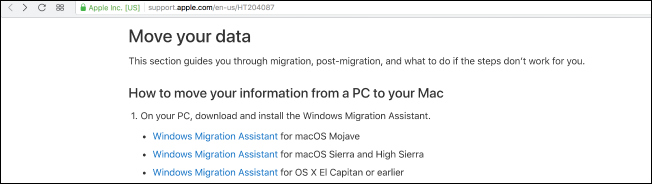
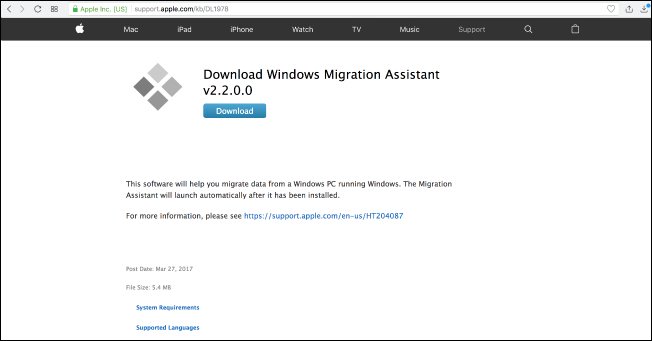
Choose the right download for the version of macOS on your new machine and click on the link to get to the download page. Once there, click the blue “Download” button.
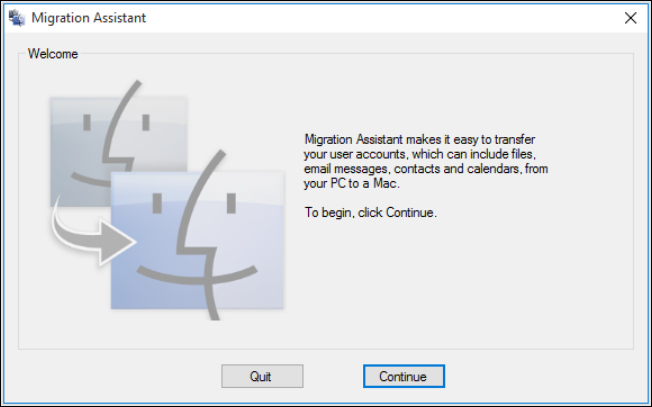
Once you have the Migration Assistant downloaded, make sure you’ve closed any open Windows apps, and then open Windows Migration Assistant by double-clicking it. In the Migration Assistant window, click “Continue” to get the process underway.
Leave your PC available on the next screen, where a code will appear shortly. We’ll come back to this, don’t worry.
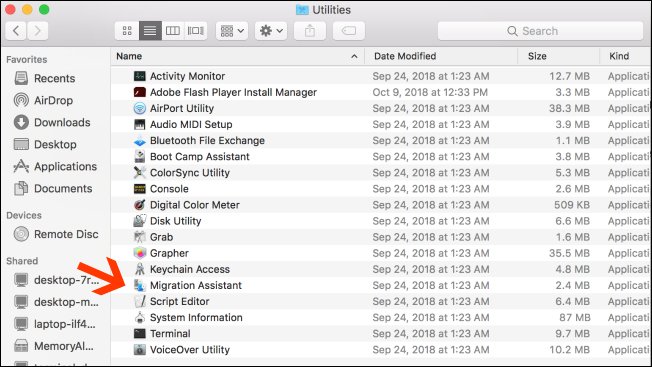
You’re done with your Windows machine for the moment, so turn on your Mac. Open the Mac Migration Assistant, found in the Utilities folder. It’s already pre-installed.
When you open up Migration Assistant on your Mac and click “Continue,” all apps on the Mac will close, so make sure you’re ready to proceed before doing so.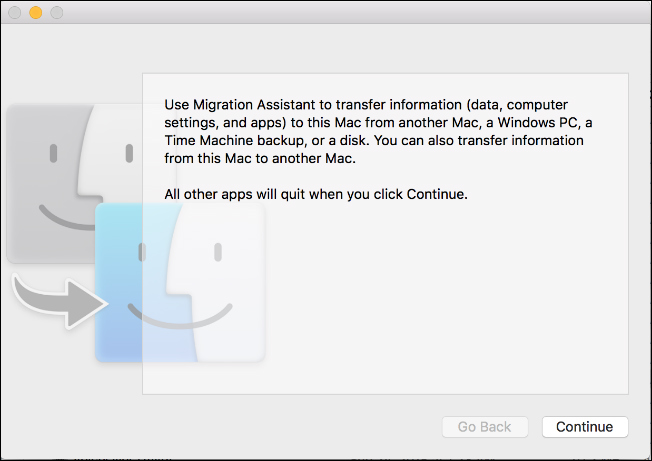
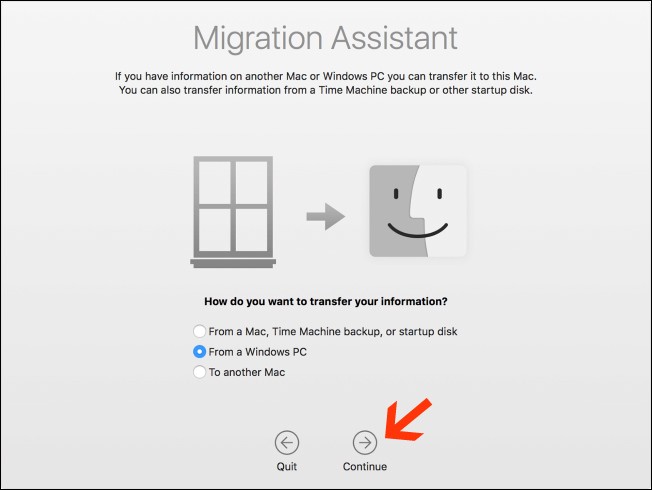
On the next screen, choose the option to transfer data “From a Windows PC.” Then click “Continue” via the arrow at the bottom of the screen.
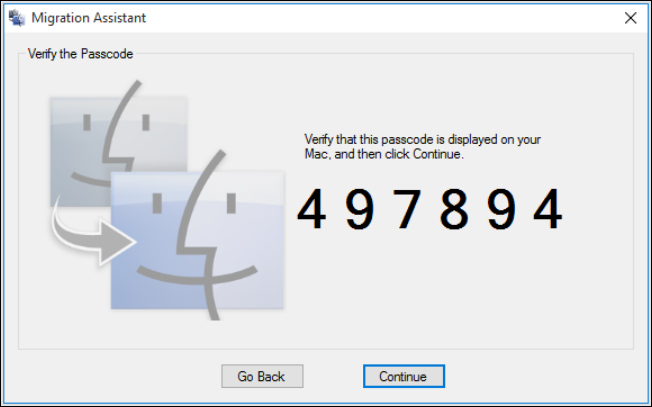
The next screen will show a passcode for the Mac where you’re migrating data. You will see your PC also showing the same code on its instance of the Migration Assistant. The screens will look identical while you have both machines running.
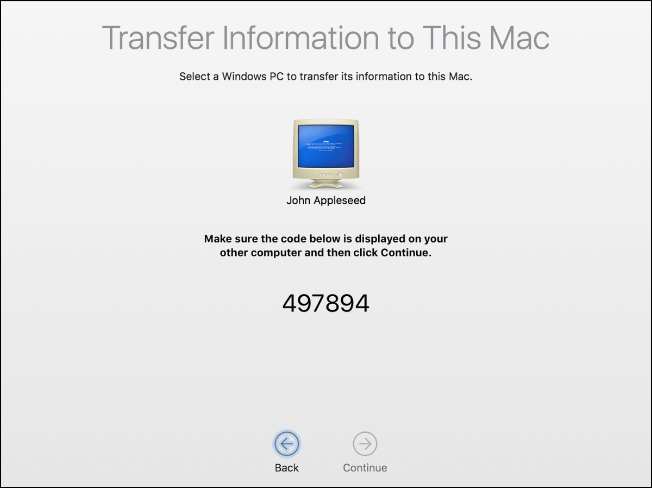
Make sure the two computers display the same code. Next, click “Continue” on your PC first and then do the same on your Mac.
You’ll be focusing on your Mac for the rest of the process.
When you press “Continue,” the Migration Assistant on your Mac will scan for a list of files that you can migrate to your new computer. Once it finishes, it will show you all the files it found, separated by user. Select the data you want to move over and then click “Continue.”
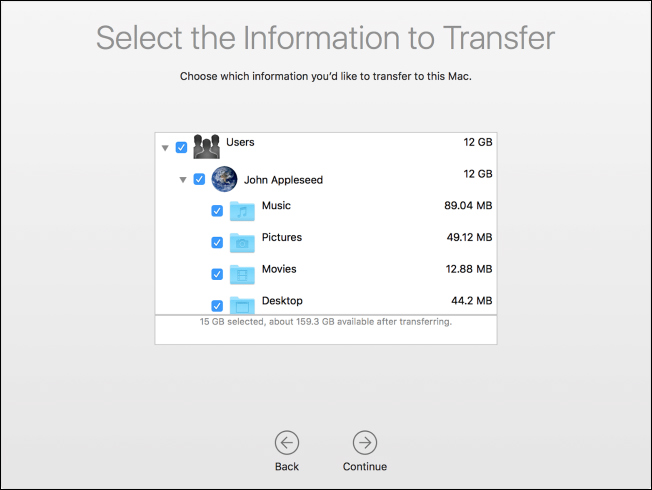
After you do this, the process will begin, and you’ll be shown an ETA until it’s finished. The transfer can take a while to complete, depending on how much data you’re transferring, and the Assistant will notify you when it’s finished.
Congratulations! You’re now able to start using your fresh new Mac
[mai mult...]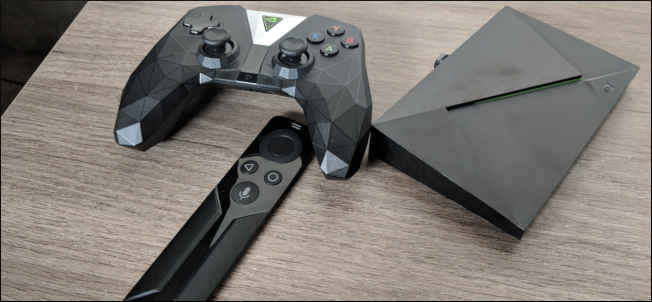
Short of an HTPC, the NVIDIA SHIELD TV is the most versatile box you can put in your entertainment console. It supports 4K HDR playback from Netflix and YouTube. You can play games from Google Play Store and stream games from your PC or NVIDIA’s servers. And you can even set up an emulator for retro gaming.
While we’ve seen retro consoles like the PlayStation Classic and NES Classic, their single use case may be a bit of a turn-off. There’s nothing wrong with just wanting to plug something in and dive into games, but other options are better if you want a more multipurpose system. And the NVIDIA SHIELD might be the best of them.
[mai mult...]

If you’re a fan of Google Lens, you now have another avenue for accessing the feature in iOS, because it’s now included in the Google Search app on the iPhone. Here’s how to use it.
Google Lens is a neat little feature that can identify real-world objects, like signs, buildings, books, plants, and more using your phone’s camera. And it gives you more information about the object. It’s available in the Google Photos app, but if you don’t use Google Photos, you can now access Google Lens in the regular Google Search app. We’ll show you how to use Google Lens in both apps.
[mai mult...]The Tcpip.sys Blue Screen of Death error is among the more common of Blue Screen errors. The Tcpip.sys is a driver file is associated with the Transmission Control Protocol over Internet Protocol and you could get this Blue Screen error if this file goes corrupt. The accompanying error descriptions for this error are:
[mai mult...]