How to add multiple users to a group at once in linux?
Managing user groups in Linux is an essential part of system administration. Often, you’ll find the need to add multiple users to a specific group simultaneously.
[mai mult...]Soluții pentru problemele tale IT

Managing user groups in Linux is an essential part of system administration. Often, you’ll find the need to add multiple users to a specific group simultaneously.
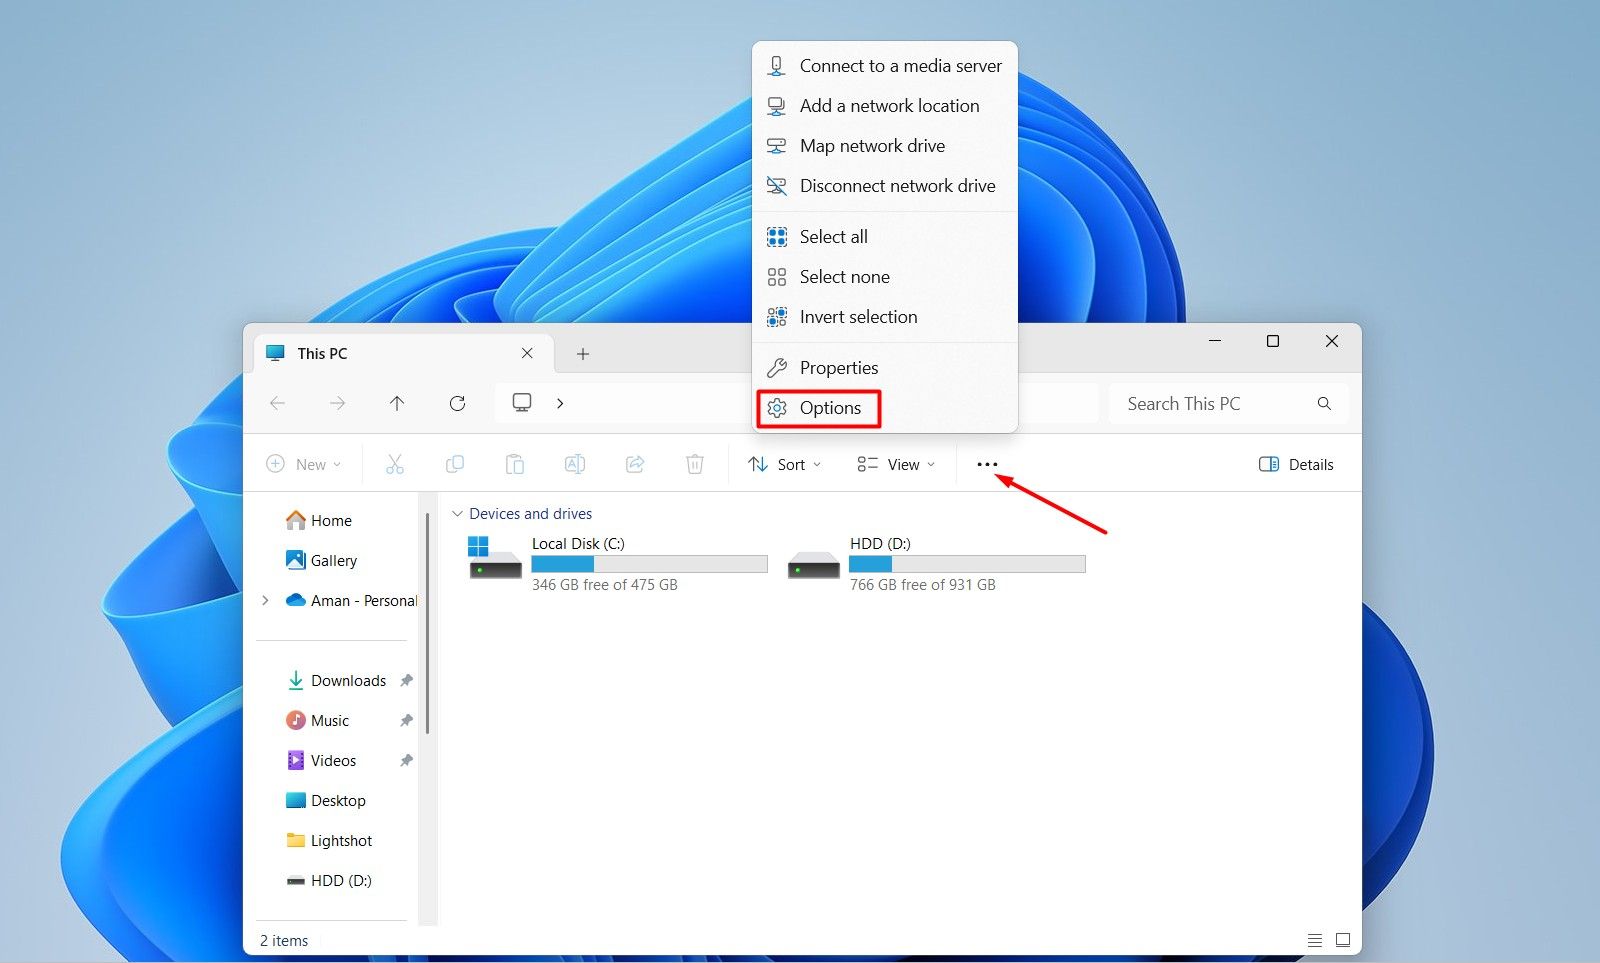
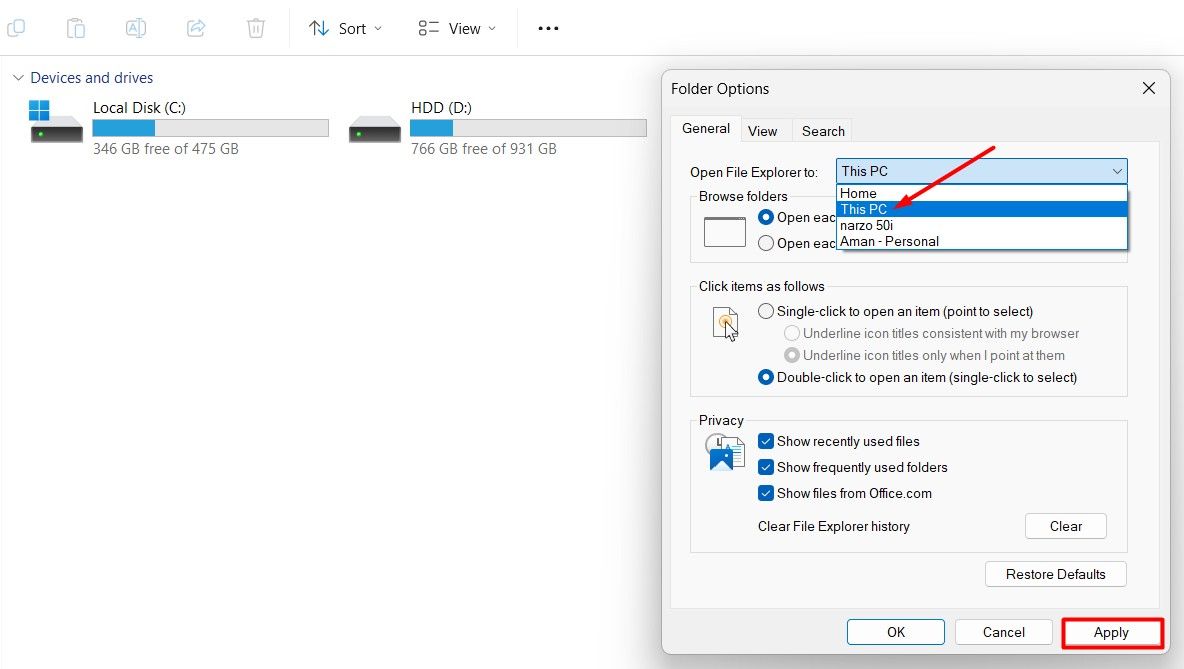
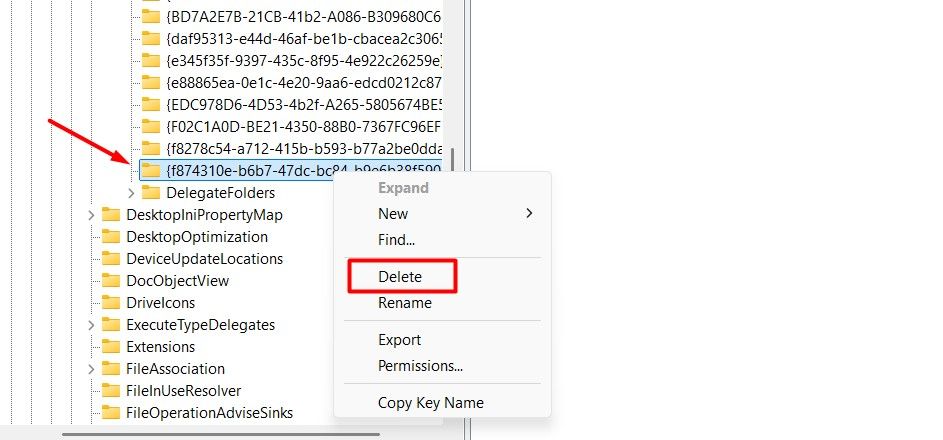
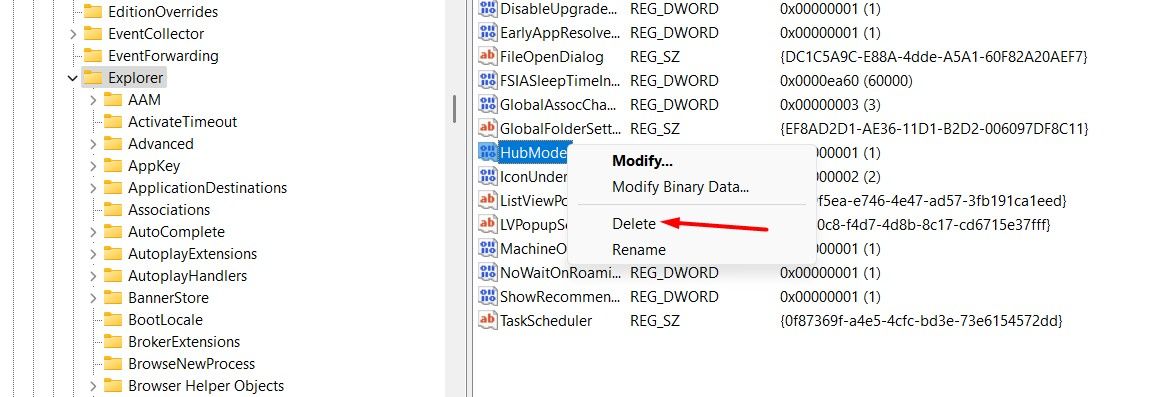
[mai mult...]It’s easy to configure File Explorer to open the “This PC” page on launch. To do this, open the File Explorer, click the three dots in the top bar, and select “Options” from the menu that appears.
Linux is a multi-user operating system. Linux employs a robust and granular system of permissions, users, and groups to control access to files and resources. Understanding this is useful for understanding to provide permission to the non-admin user.
[mai mult...]With Windows 11’s metered connection feature, you can reduce the amount of internet data your system uses from apps or updates. It’s handy if you have a data limit.
For example, if you’re using your phone’s internet (hotspot) with your PC, you can mark that connection as metered so you don’t drain the data of your limited mobile plan. You can use the metered connection feature with any internet connection you want.
When you’re on a metered connection, Windows delays installing some non-essential system updates, which means you won’t get the latest Windows features immediately. Other services like Dropbox and OneDrive will also stop syncing your files.
Note that this feature isn’t perfect. My colleague here at How-To Geek had a situation where the Microsoft Store downloaded a 20GB update for a game they had never played, even though the connection was set as metered.
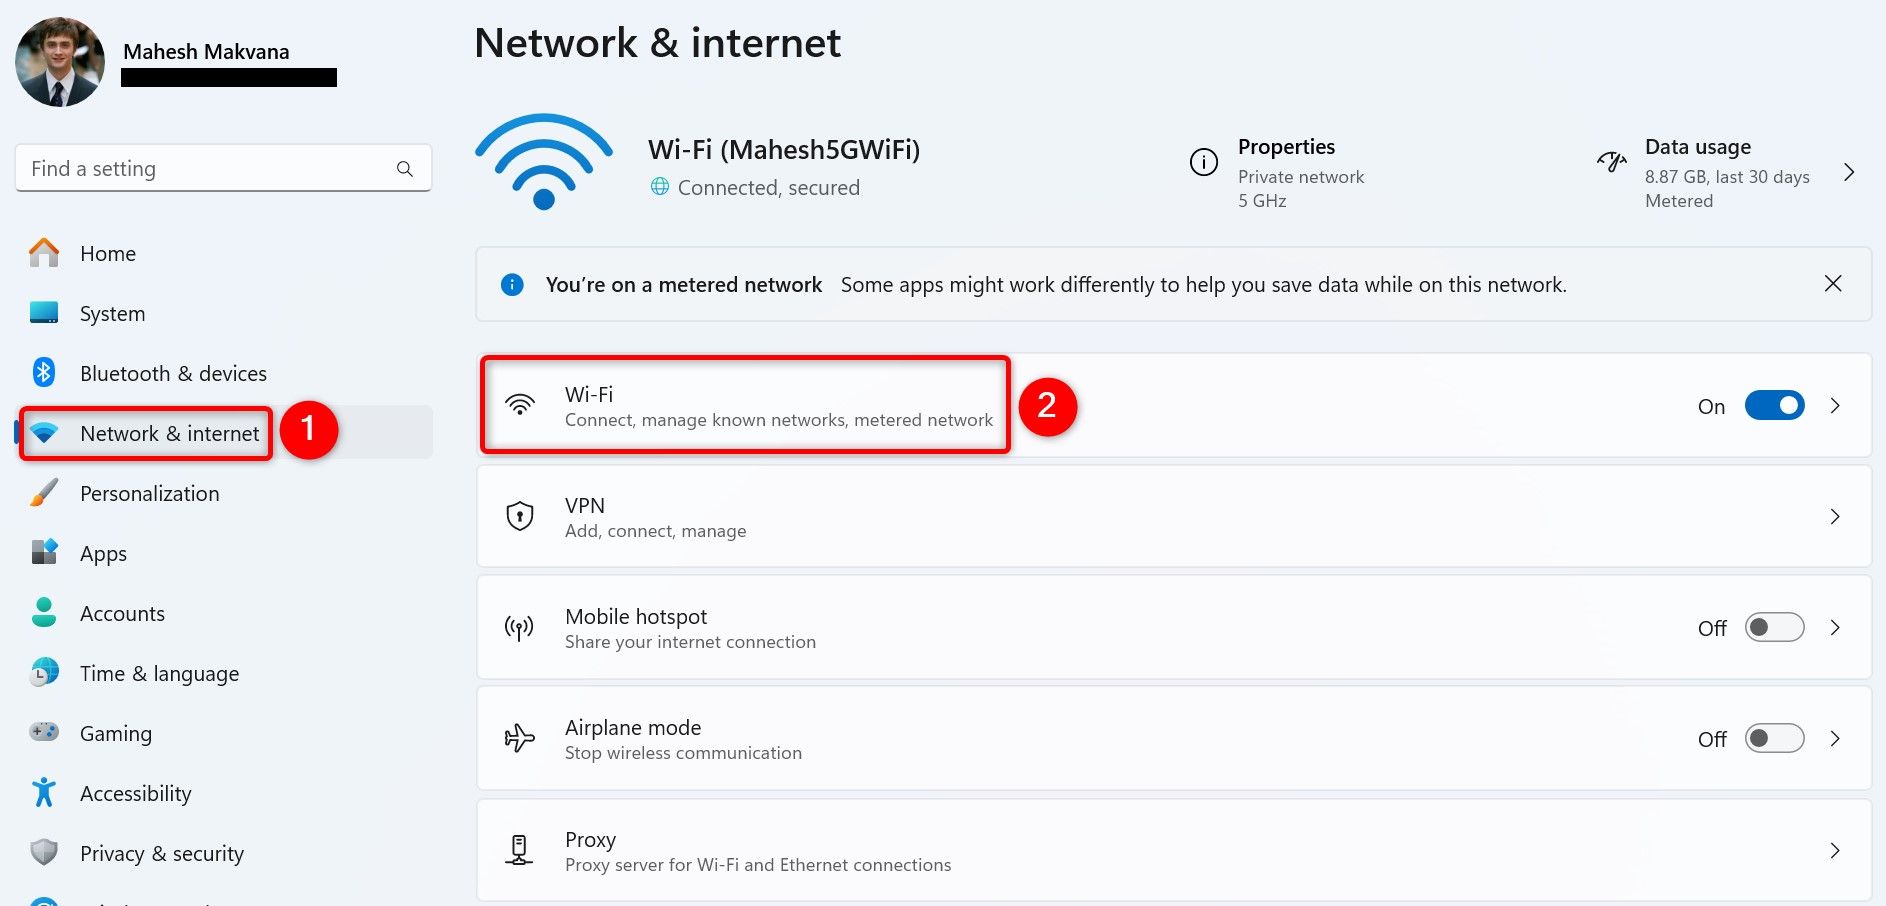
Using Settings is the easiest graphical way to set a connection as metered. To do that, open Settings by pressing Windows+i. From the left sidebar, select “Network & Internet.” On the right pane, choose your Wi-Fi or Ethernet connection.
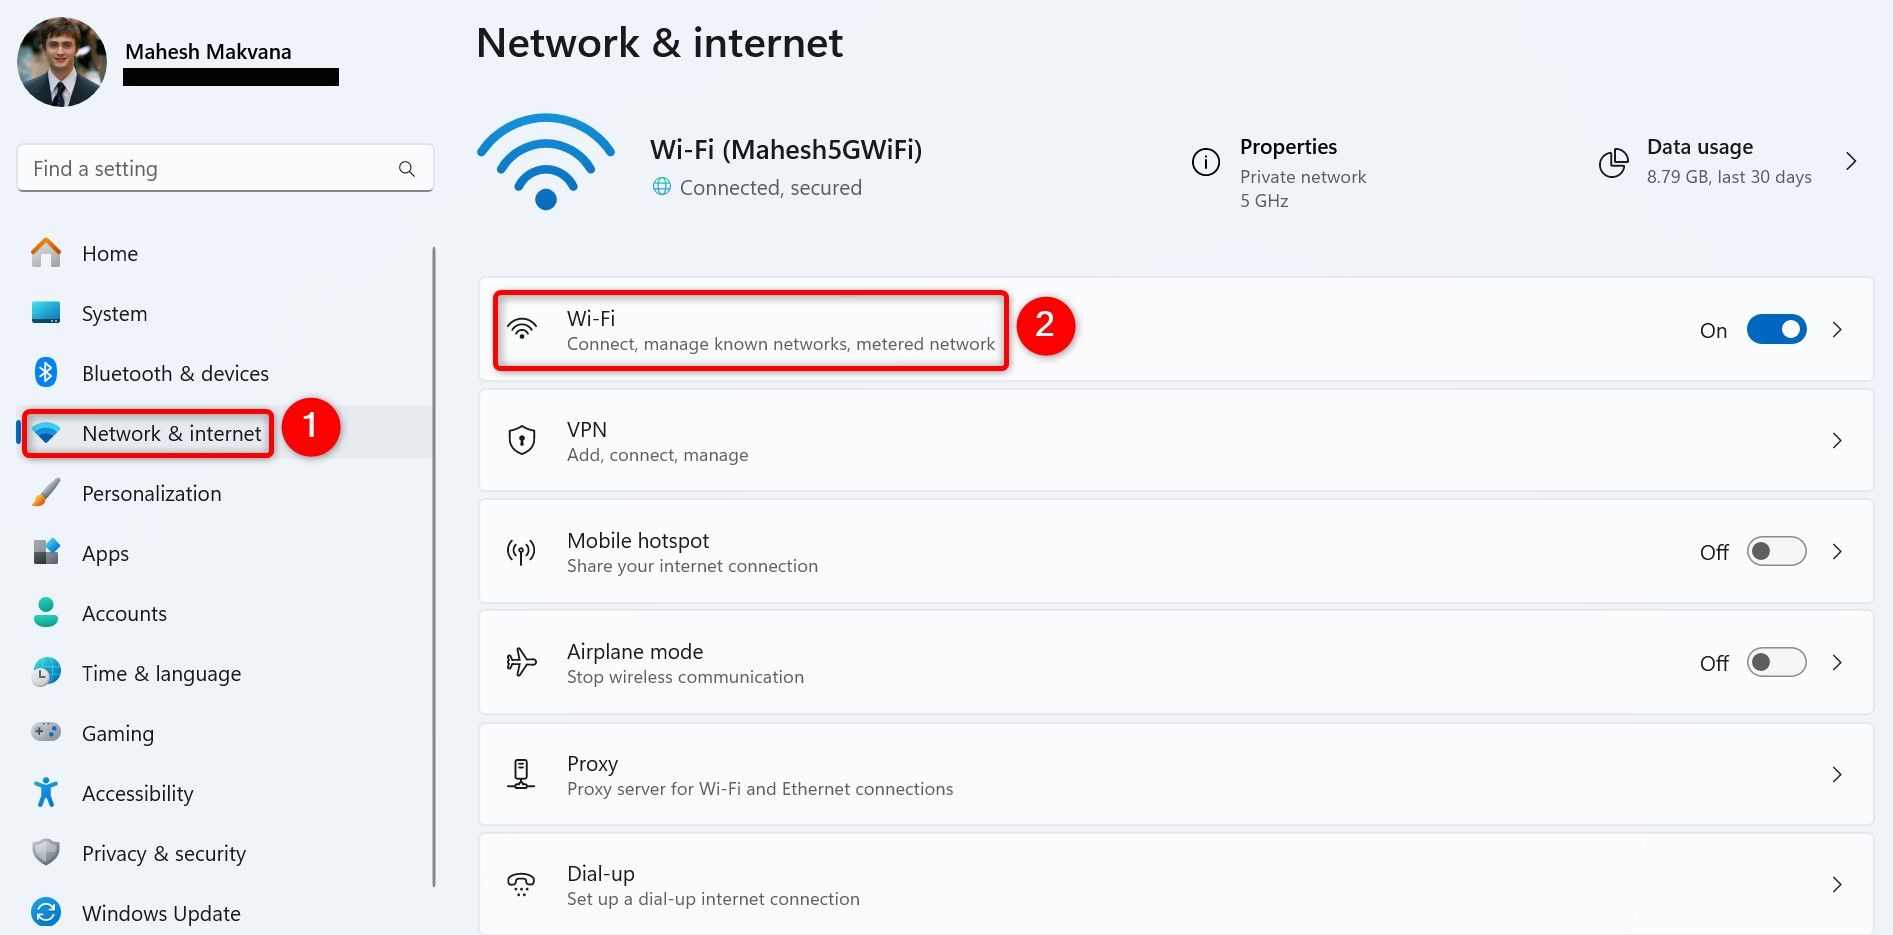
Select “[Connection Name] Properties.”
!["[Connection Name] Properties" highlighted in Settings.](https://static1.howtogeekimages.com/wordpress/wp-content/uploads/2024/12/2-settings-choose-network.jpg)
On the following screen, turn on the “Metered Connection” toggle.
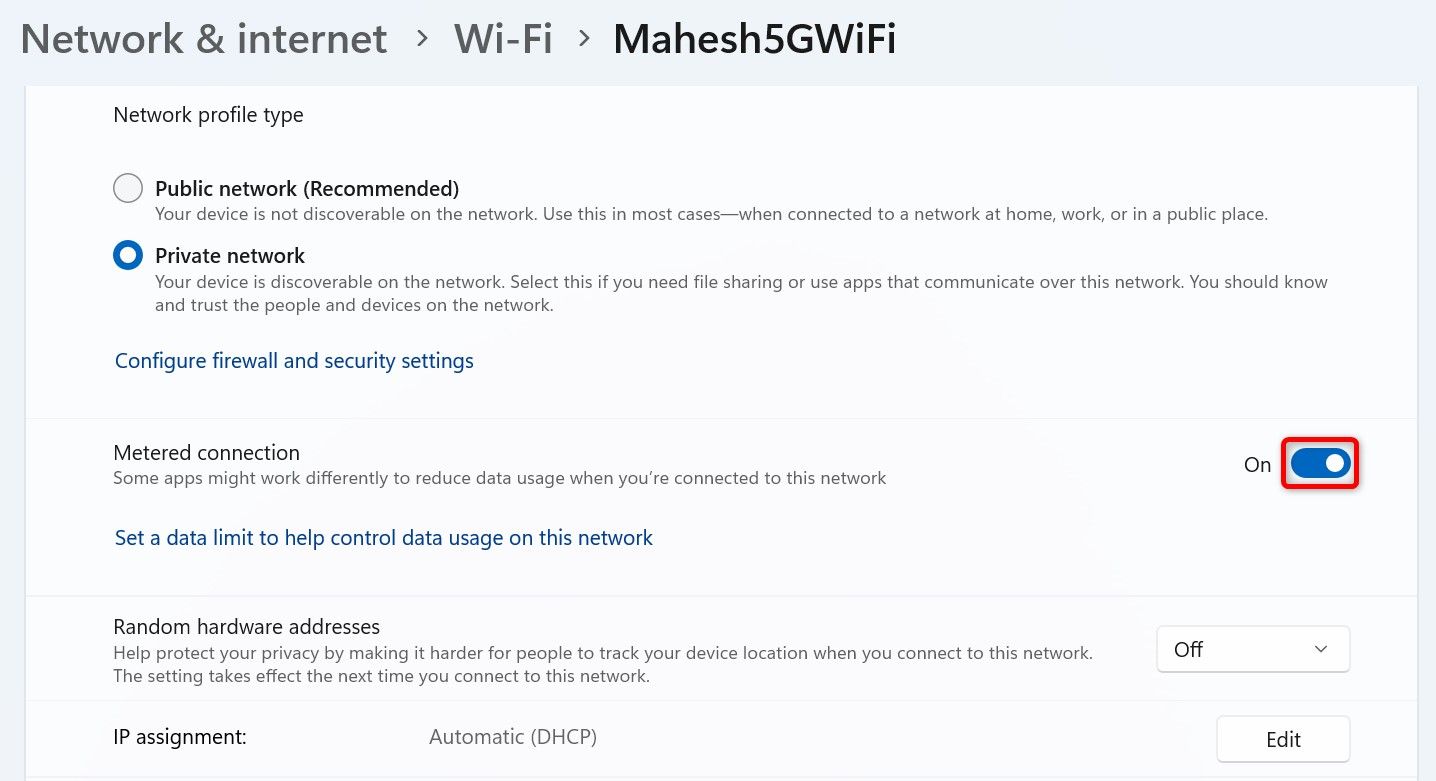
Without any prompts, Settings will mark your specific connection as metered. In the future, you can disable the feature by toggling off the “Metered Connection” toggle.
Using Command Prompt
You can use a command in Command Prompt to set a connection as metered, but this method only works for Wi-Fi connections. If you want to set an Ethernet connection as metered, use the other methods listed in this guide.
netsh wlan show profiles
netsh wlan set profileparameter name="YourNetwork" cost=fixed
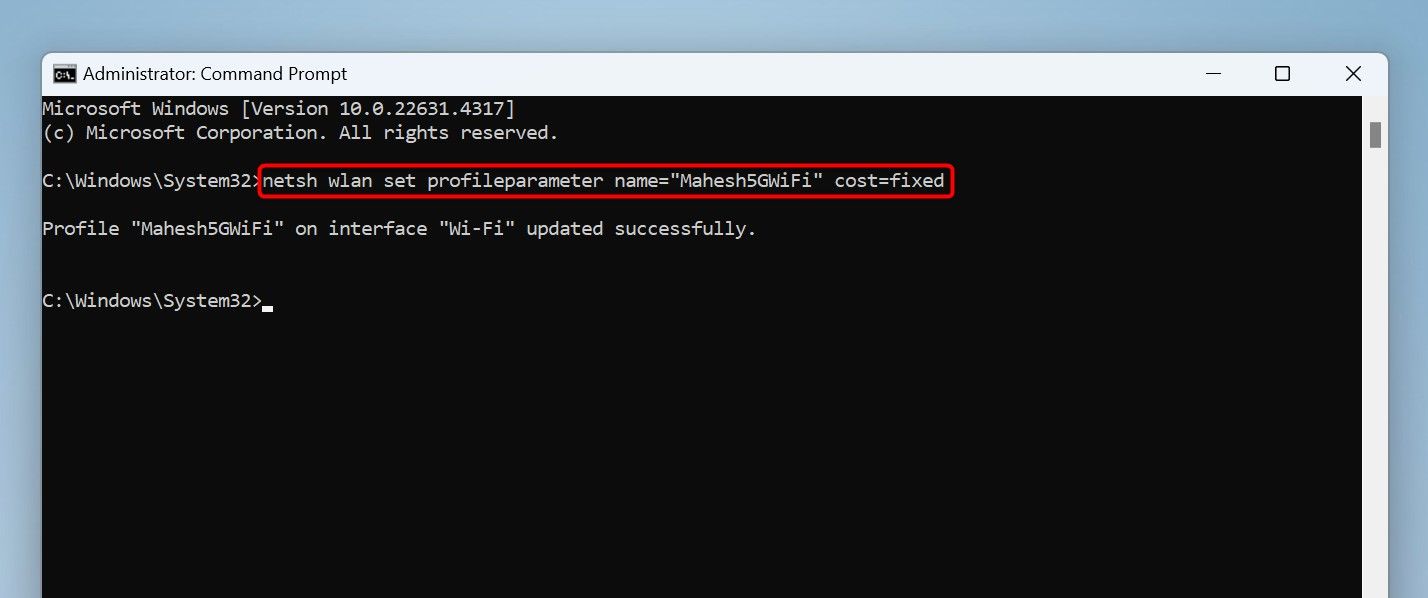
Your chosen connection is now set as metered. To verify that, run the following command replacing “YourNetwork” with your network name. In the Cost Settings section, next to Cost, it’ll say “Fixed,” which means the connection is marked as metered. If it says “Unrestricted” or “Default,” the connection is unmetered.
netsh wlan show profiles name="YourNetwork"
In the future, to set the connection as unmetered, use the following command. Make sure to replace “YourNetwork” with the name of your wireless network.
netsh wlan set profileparameter name="YourNetwork" cost=unrestricted
With Registry Editor
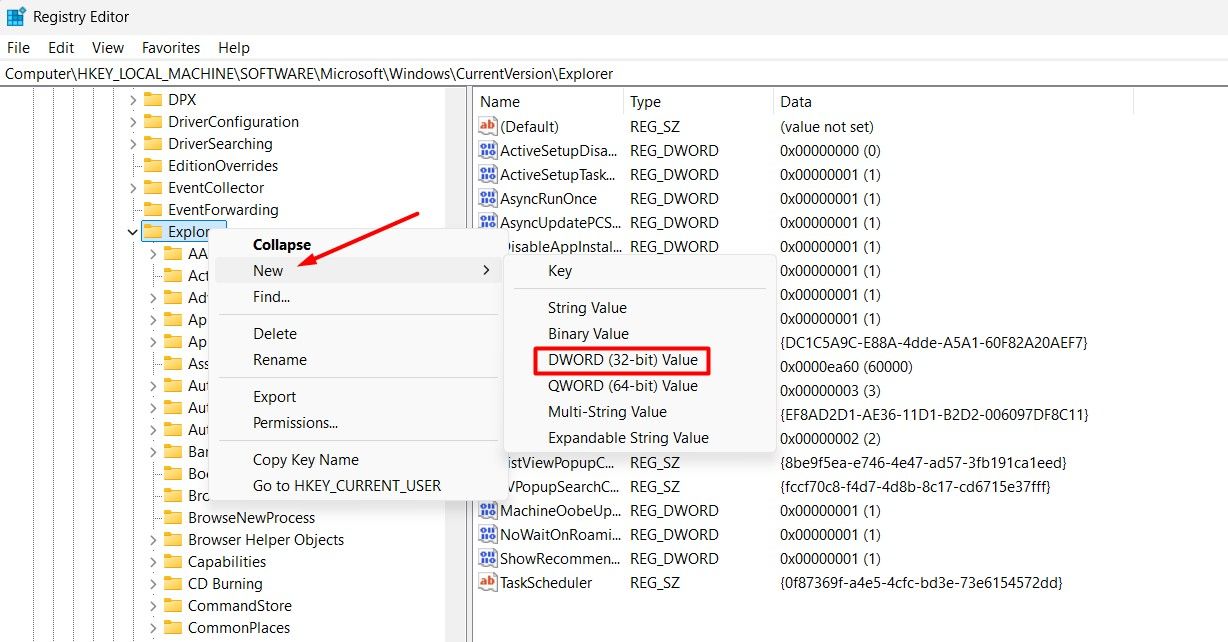
Another graphical way to set Wi-Fi or Ethernet connections as metered is by using Registry Editor. You tweak a registry item’s value, which sets your connection type as metered. This method sets the entire network type (Wi-Fi or Ethernet) as metered; you can’t select a specific network to be set as metered. Also, follow the instructions carefully as accidental changes can cause your system to be unstable.
To do that, launch Run by pressing Windows+R. Type the following in the Open field and press Enter:
regedit
In the User Account Control prompt, choose “Yes.” Then, navigate to the following path:
You can copy the following path, paste it in the Registry Editor’s path box, and press Enter to quickly get to the path.
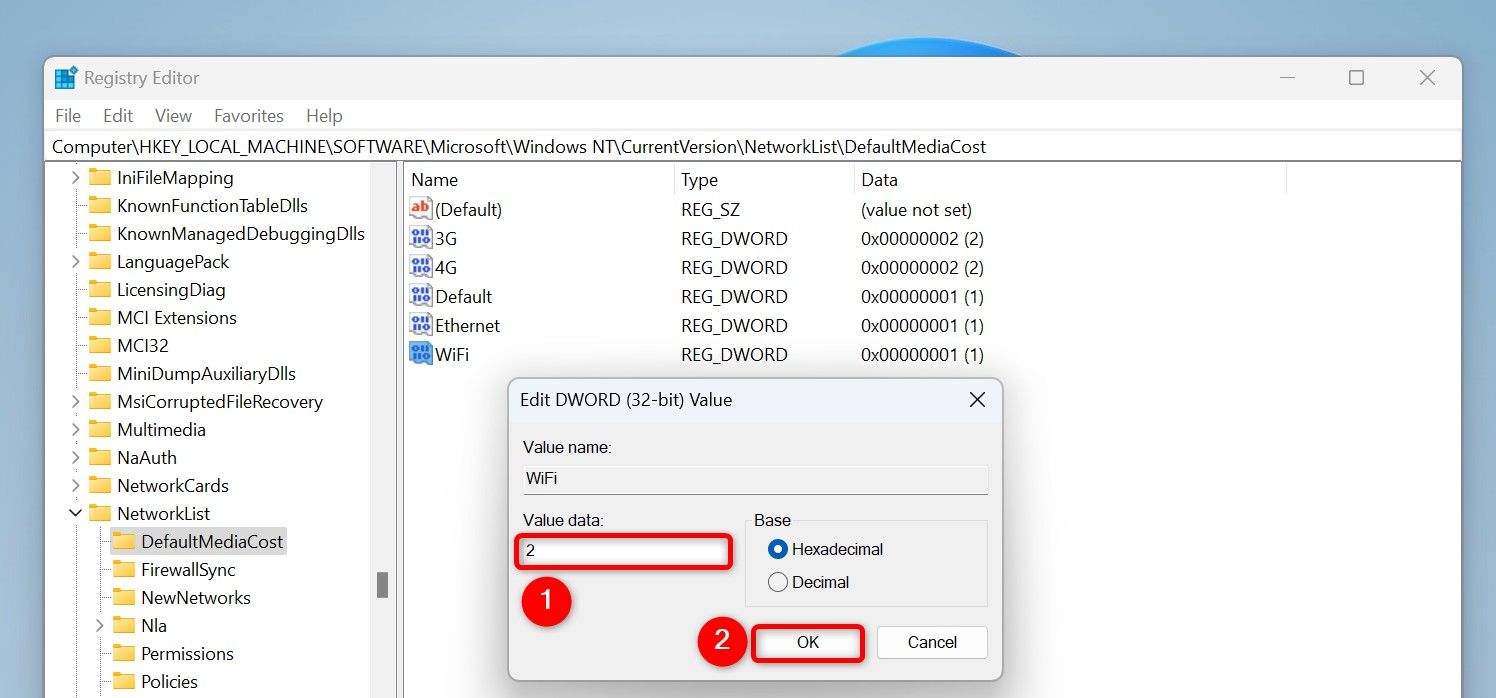
HKEY_LOCAL_MACHINE\SOFTWARE\Microsoft\Windows NT\CurrentVersion\NetworkList\DefaultMediaCost
To be able to change certain items, right-click “DefaultMediaCost” in the left sidebar, choose “Permissions,” and give your user account all the permissions.
To set a Wi-Fi connection as metered, on the right pane, double-click “WiFi.” In the open box, click the “Value Data” field and type 2. Then, select “OK”.
If you’d like to set your Ethernet connection as metered, double-click “Ethernet” on the right pane, type 2 in the “Value Data” field, and select “OK”. Then, close Registry Editor and restart your Windows 11 PC to bring the changes into effect.
Set Data Limit for your Metered Connection
You can specify the amount of data for your connection, so Windows 11 knows what amount of data is available to use on your metered connection and doesn’t exceed it.
To do that, open Settings using Windows+i. From the left sidebar, select “Network & Internet.” On the right pane, choose your Wi-Fi or Ethernet connection.
Select your connection on the following screen. Beneath Metered Connection, select “Set a Data Limit to Help Control Data Usage on This Network.”
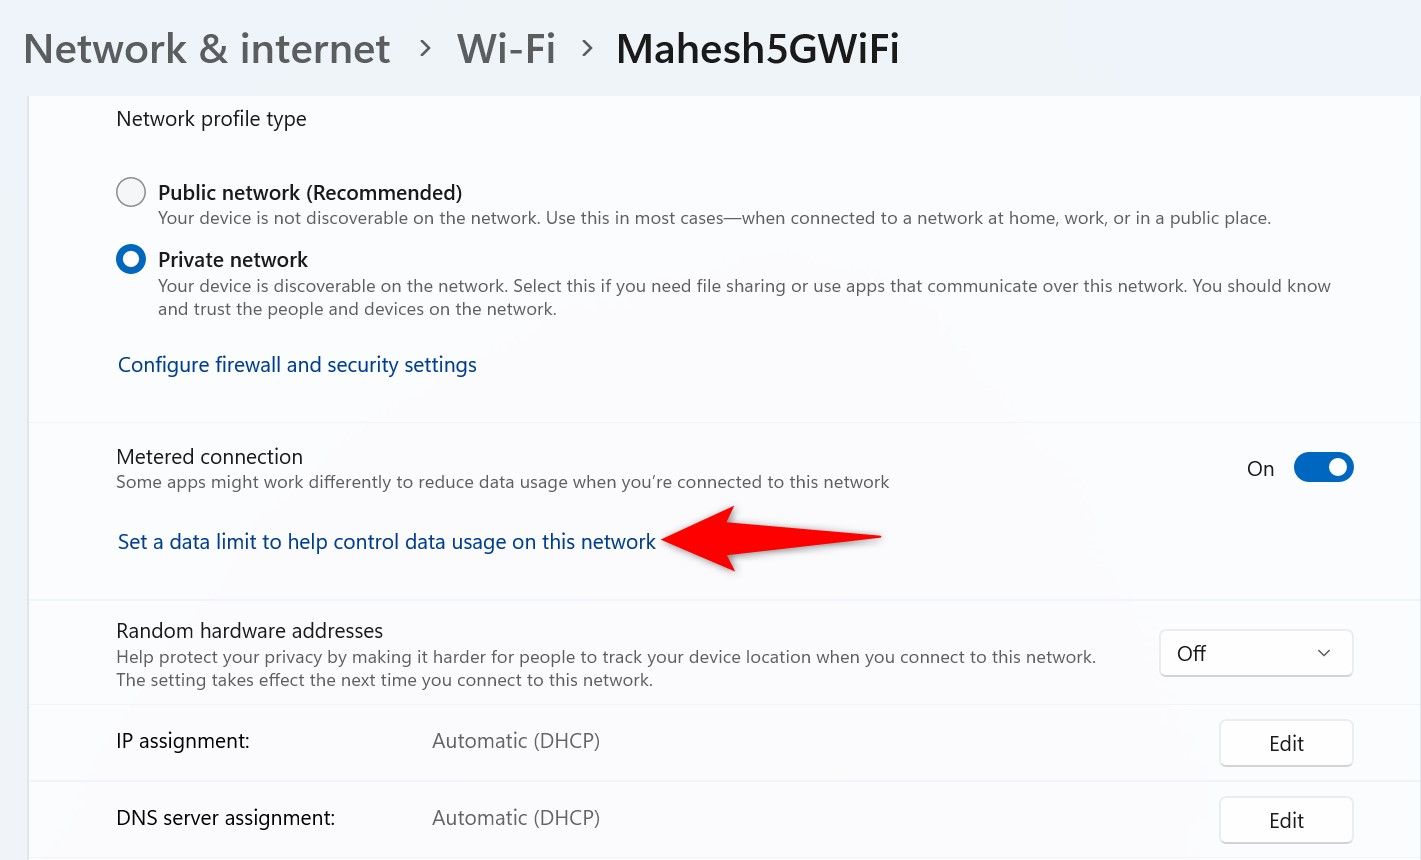
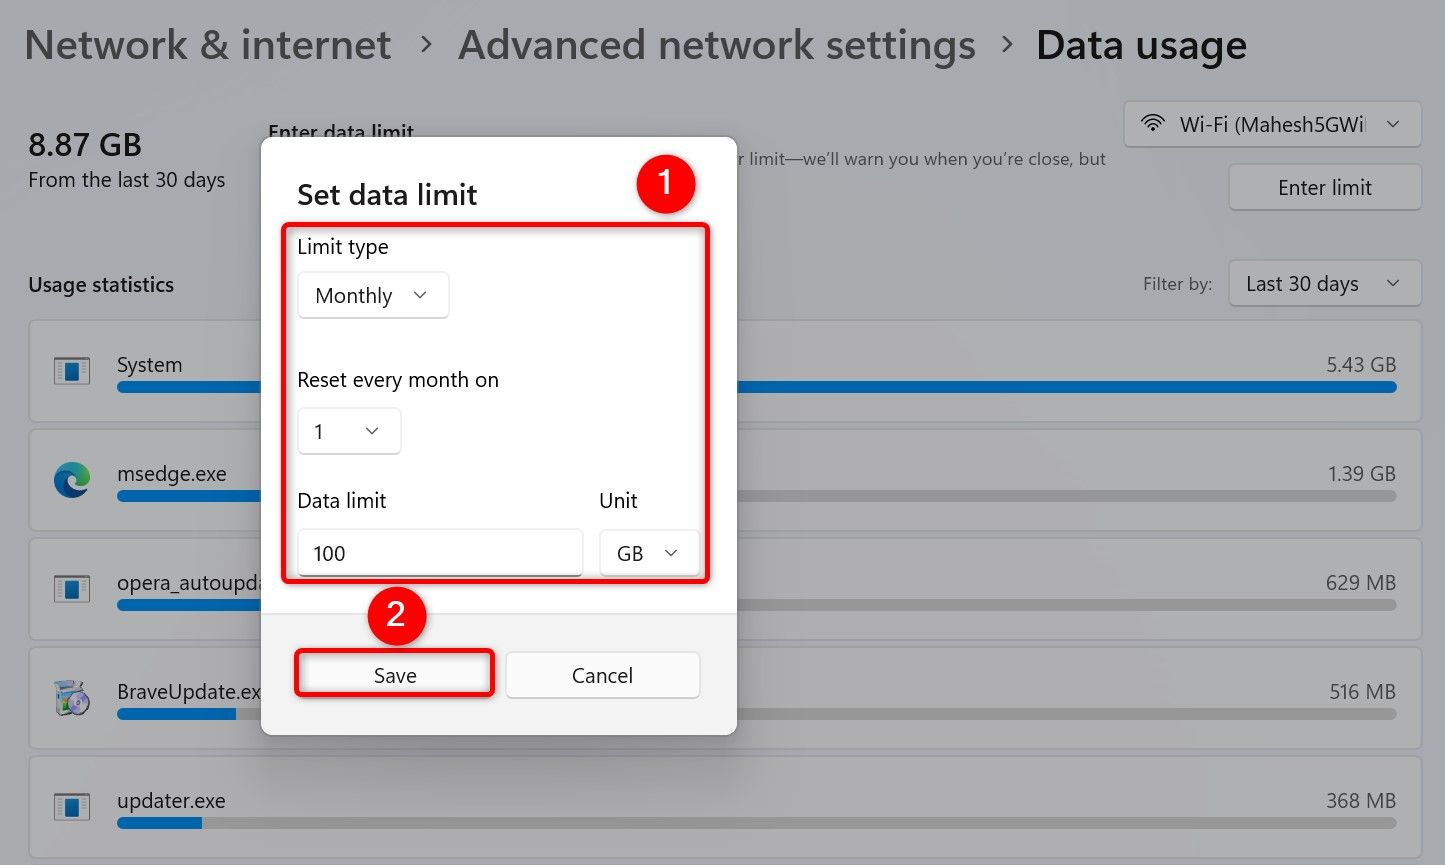
In the top-right corner, click “Enter Limit.” You’ll see a Set Data Limit dialog box. Here, click the “Limit Type” drop-down menu and choose the limit frequency. Select when the limit resets from the other drop-down menu. Click the “Data Limit” field and type the limit. Choose the limit unit from the “Unit” drop-down menu.
Then, select “Save” to save the changes.