Soluții

How to set a different Wallpaper on each monitor in Windows 10 and Windows 11

Set a Wallpaper in the Settings App on Windows 10

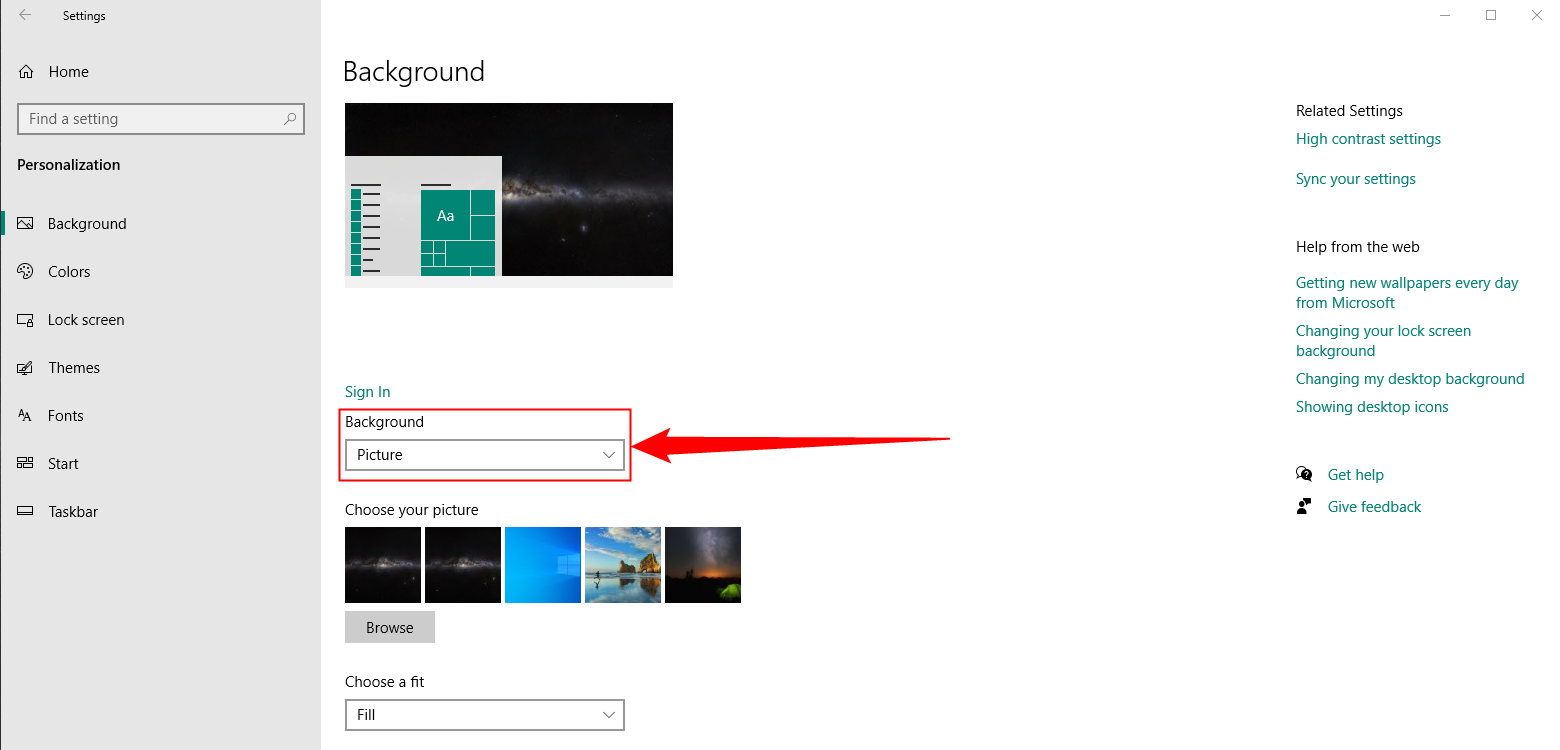
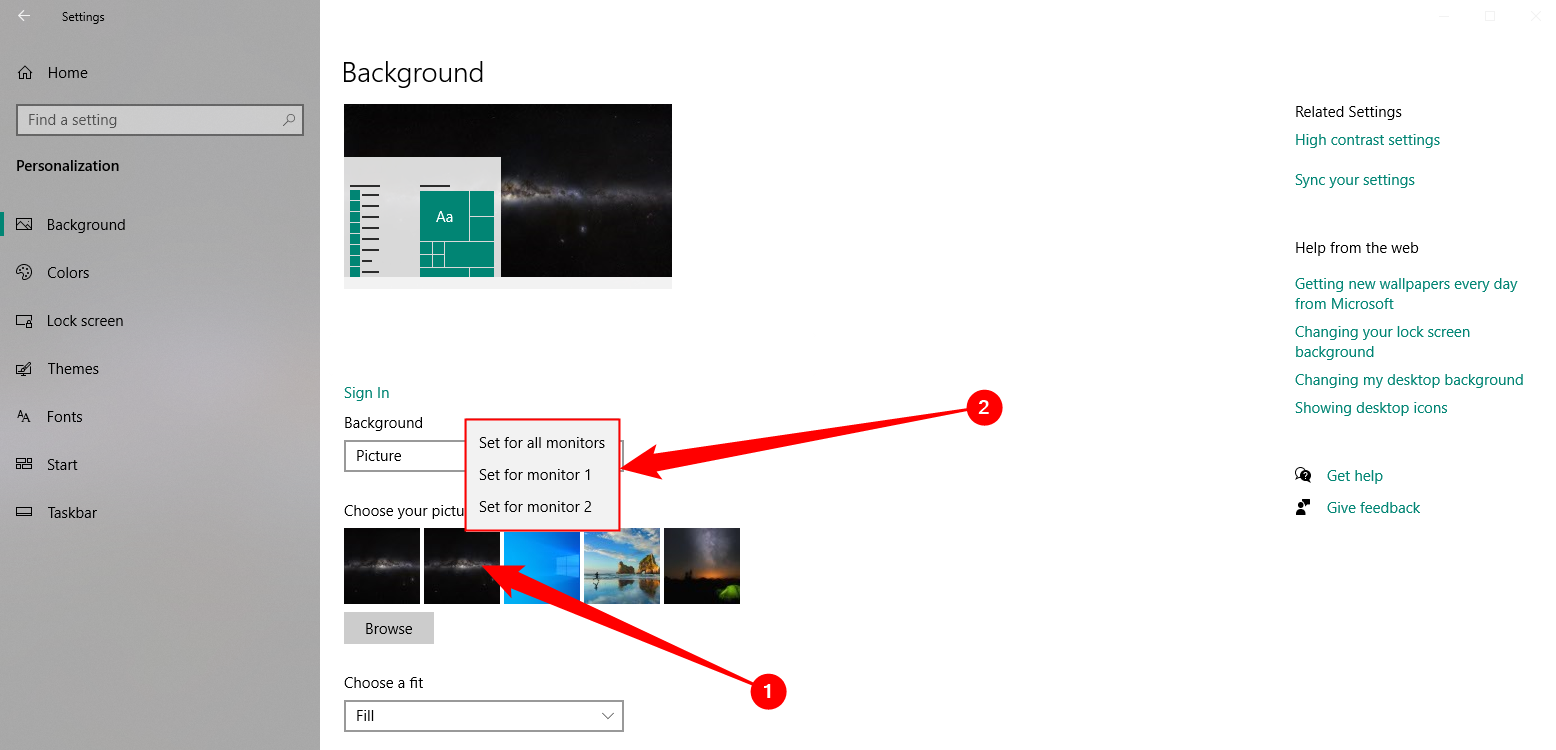
To change desktop backgrounds individually for each monitor, head to Settings > Personalization > Background. Under Choose Your Picture, right-click a background image and select “Set For Monitor 1,” “Set For Monitor 2,” or whichever other monitor you want to use it on.

To add additional images to this list, click “Browse” and select a wallpaper you want to use. Windows will set it as your default on all desktops. Right-click the wallpaper icons and choose which monitor you want to use each on.

Set a Wallpaper in the Settings App on Windows 11

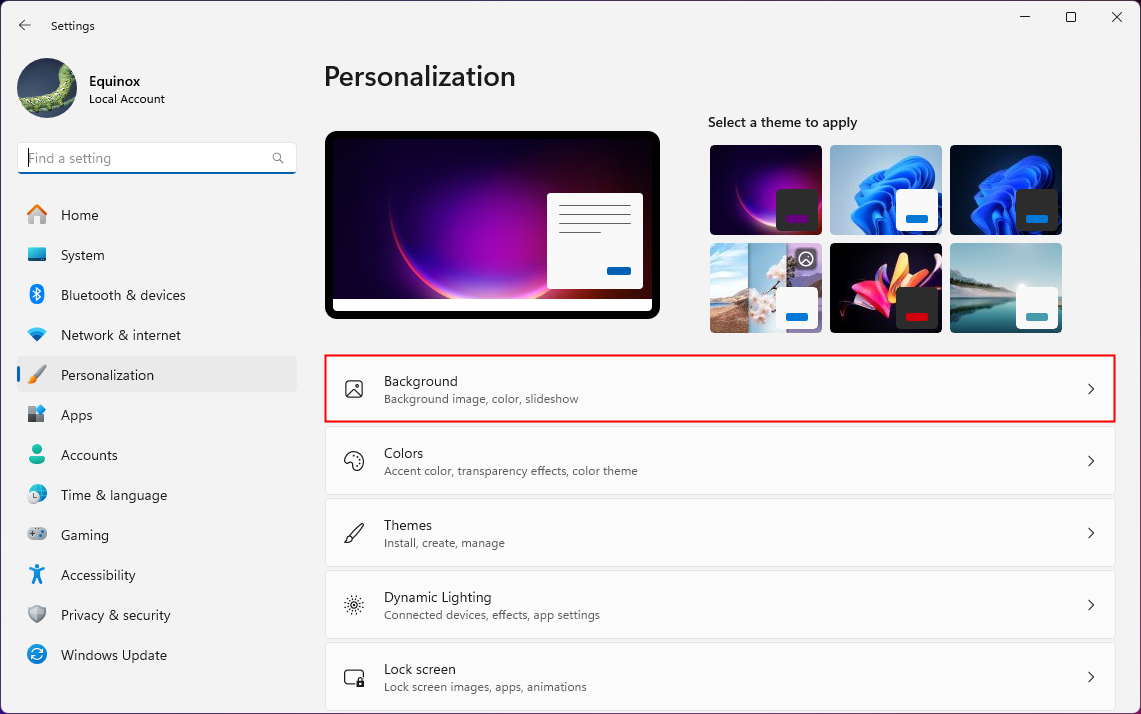
To set different wallpapers on multiple monitors on Windows 11, you need to access the Settings app. Press Windows+i to open the Settings app, then navigate to Personalization > Background. Alternatively, you can right-click empty space on your desktop and select “Personalization,” then navigate to “Background.”

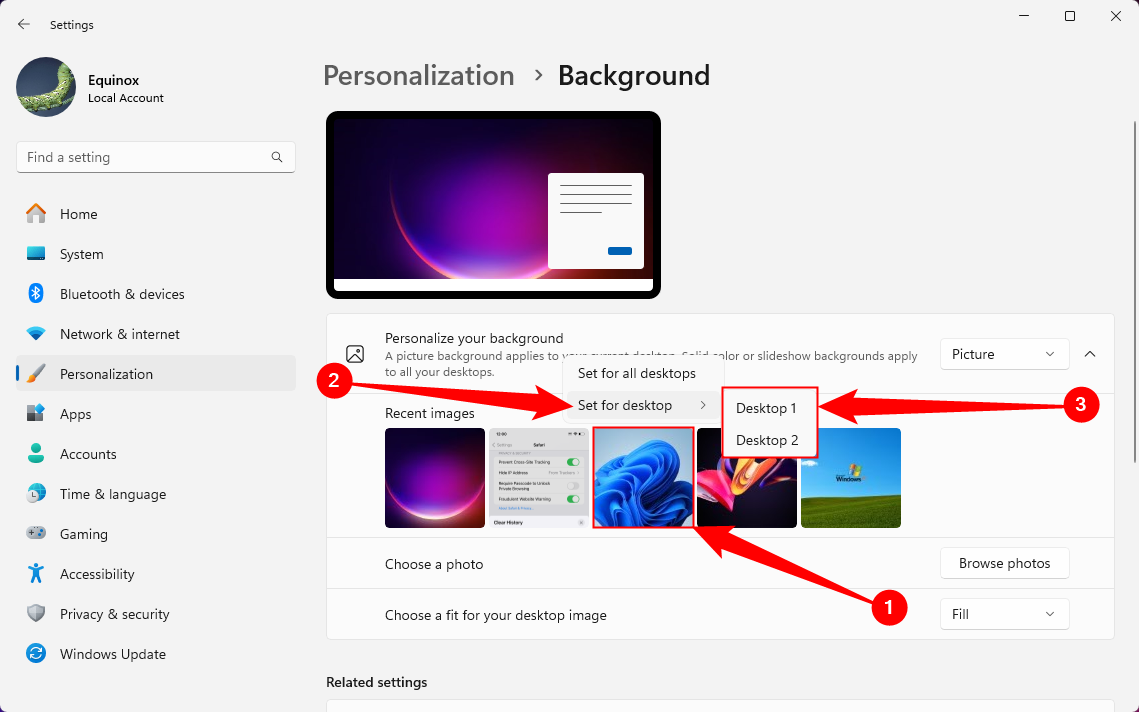
Once you’re in the Background window, make sure that the drop-down menu next to Personalize Your Background is set to “Picture.” Right-click the image you want to set for one (or both) monitors and mouse over “Set for Desktop.” You’ll have options for each individual monitor, or the option to change all of them at once—pick whichever you like.

If you use a third-party app with more advanced wallpaper customization options, you should skim through that app’s settings instead. The Settings app won’t work correctly with whatever additional features the third-party app includes.

[mai mult...]

Serverul Apache nu pornește

Această problemă poate fi cauzată de conflicte de port, fișiere de configurare incorecte sau erori de log. Verificarea logurilor și asigurarea că portul 80 este disponibil sunt pași esențiali. Repornește Apache după rezolvarea conflictelor.

[mai mult...]

How to reset your Android phone to factory settings

Restoring your Samsung® or Google® phone to its factory settings helps protect your personal information when you do the following:

  • Sell your phone.
  • Trade it in for a new device.
  • Give your phone to a friend or family member.
  • Need to troubleshoot performance issues, such as a frozen device or forgotten passcode. Our experts only recommend this as a last resort, after you’ve tried everything else.

A factory reset deletes nearly all data on your Android phone, giving it a clean slate. That’s why it’s important to make sure you’re prepared to take such a big step. It does more than reset your device settings and accessibility settings, here’s what a factory reset deletes from your phone:

  • Contacts
  • Photos and videos
  • Music
  • Passwords and files
  • Accounts
  • Messages

Before you restore your Android to factory settings, there are important steps to take to make sure you don’t lose your existing data.

  1. Back up your Android phone. The first thing you should do is back up your phone. Uploading it to a service like Google Drive™, or one offered by your phone carrier, will ensure you don’t lose everything during a factory reset.
  2. Plug your Android phone in and connect to Wi-Fi. The backup process can be time-consuming, so you’ll want the power boost. It’s also best to save your files over a secure Wi-Fi connection so you don’t use up a lot of mobile data during the transfer.
  3. Know your login info to restore data after resetting your Android. Before you reset your phone, make sure you know your login information. A Google Account username and password are required to restore data on an Android device—you can typically find your Google Account in Settings.
  4. Unpair your Android device. Be sure to unpair or disconnect Bluetooth® devices like your smartwatch or wireless headphones.
  5. Sign out of all accounts. Protect your privacy by signing out of all your apps, services, and email accounts and also delete any cards you have saved in your mobile wallet. You should also turn off Find My Device—check out our guide to learn how.
  6. Remove your SIM card. Check out our guide to removing your SIM card from your Android device for easy-to-follow steps.
  7. Sign out of your Android phone. After backing up your data and completing the checklist above, don’t forget to sign out of your Android phone too. Although a factory reset removes all the information stored on the device, this will ensure no one can access your account after you sell or trade in your phone for another one.

You can usually perform a factory reset in Settings, but it can take up to an hour to complete. Make sure your phone is plugged in while you’re going through the factory reset process.

To reset a Samsung Galaxy phone:

  1. Open the Settings app, then tap General management > Reset
  2. Tap Factory data reset > Reset.

To reset other Android devices:

  1. Open the Settings app, then search “Reset”
  2. Tap Erase all data (factory reset) in the results
  3. Tap Erase all data (factory reset) on the Reset options screen, then tap Erase all data and enter your password or PIN to confirm your decision.

To reset a locked Samsung phone (Samsung Galaxy S8 and newer):

  1. Turn off the phone if it doesn’t require a PIN to do so. You may have to wait until it runs out of battery and turns off on its own.
  2. Press and hold the Bixby®, Power, and Volume Up buttons simultaneously until your phone vibrates and the Samsung logo appears.
  3. When the Recovery menu appears, press the Volume buttons to select Delete all user data or Wipe data/factory reset. Then press the Power button to make your selection.
  4. Use the Volume buttons again to confirm “Yes” or “Factory data reset,” then press the Power button to select it.
  5. Once your phone processes the factory reset, you may see the message “Data wipe complete” at the bottom of your screen. Press the Power button one last time to select the option “Reboot device.”

Your Samsung phone will reset and power back on automatically when it’s time to set it up.

To reset a locked Google Pixel:

  1. Turn off your phone
  2. Press and hold the Volume Down and Power buttons until you see the Android logo
  3. Press the Volume buttons to choose the Recovery Mode menu option, then press the Power button to select it
  4. Use the Volume buttons to choose the Wipe data/Factory reset option, then press the Power button to select it
  5. Use the Volume and Power buttons to choose and select Factory data reset
  6. Your phone will display a message telling you the data wipe is complete. Select Reboot system now to restart your phone.
[mai mult...]