Situatie
Solutie
Changing the Privacy Settings
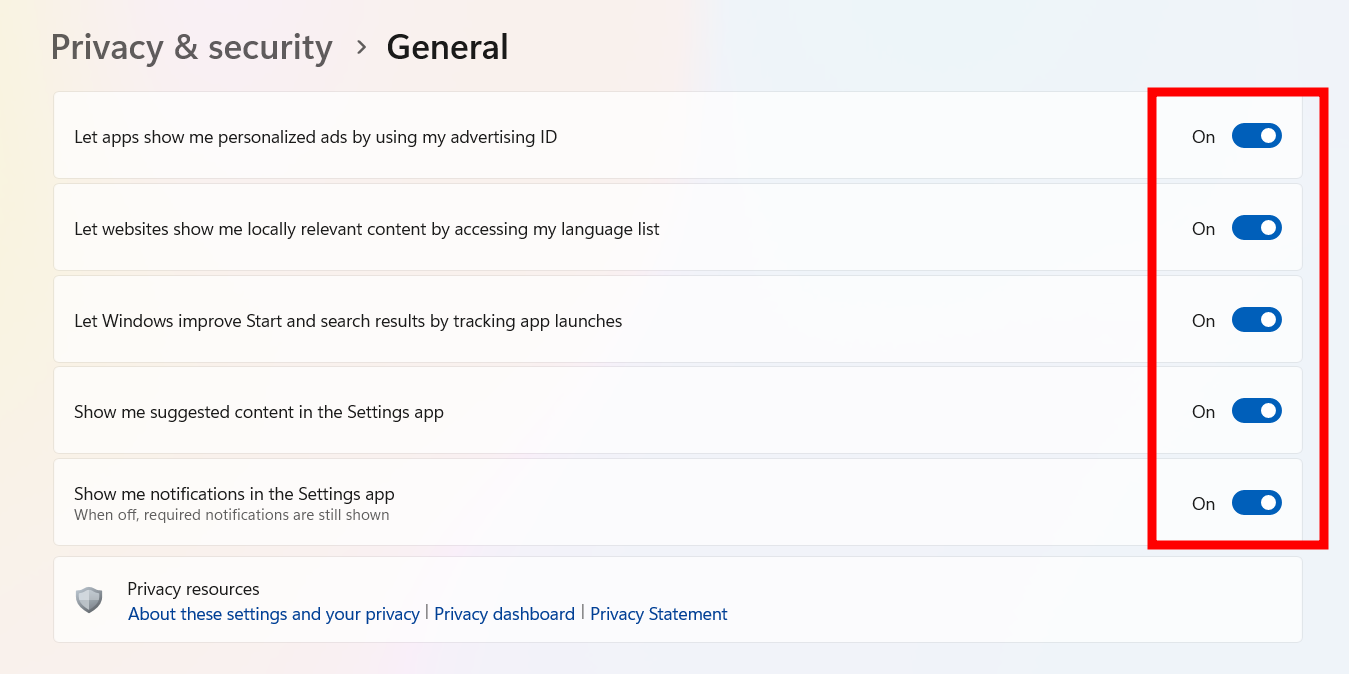
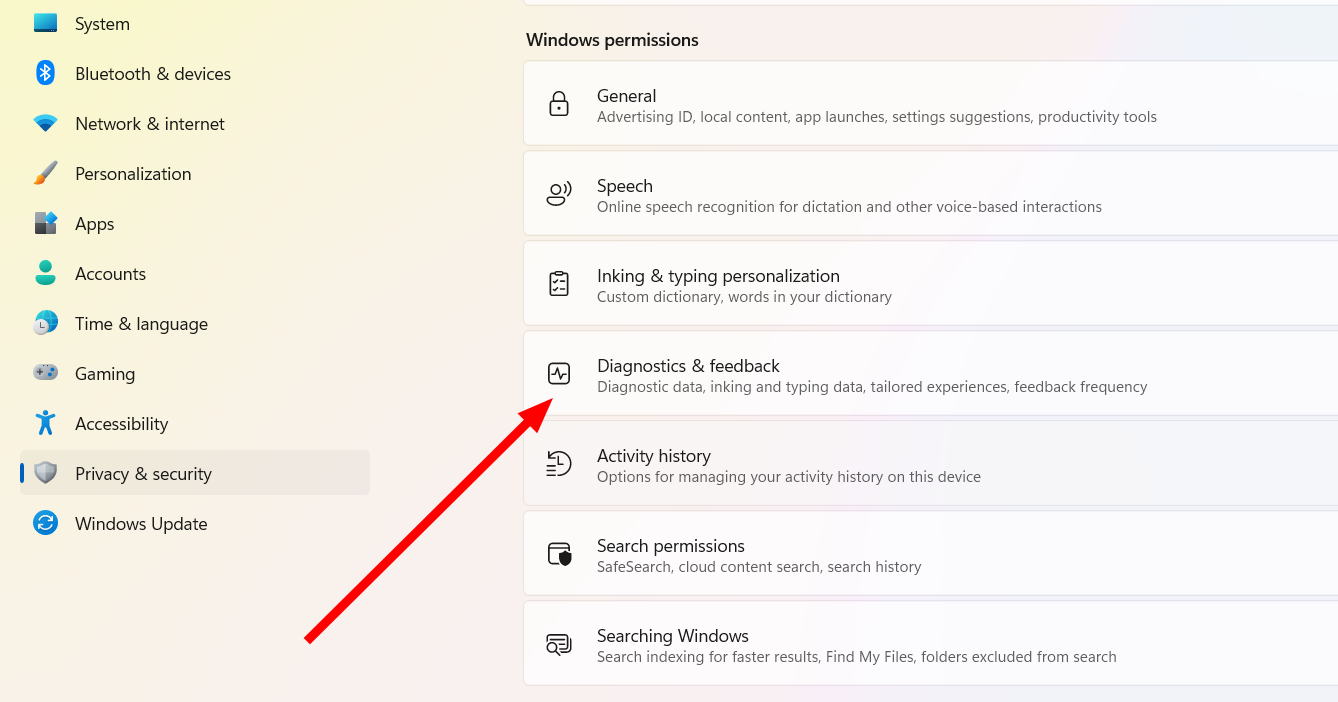
Among all the hype about Microsoft’s Recall feature on Windows and new privacy concerns, it’s time to limit the data Microsoft collects from you. Luckily, you can tweak some of the privacy options from Windows Settings. Go to Settings > Privacy & Security. Under “Windows Permissions”, go to “General.”
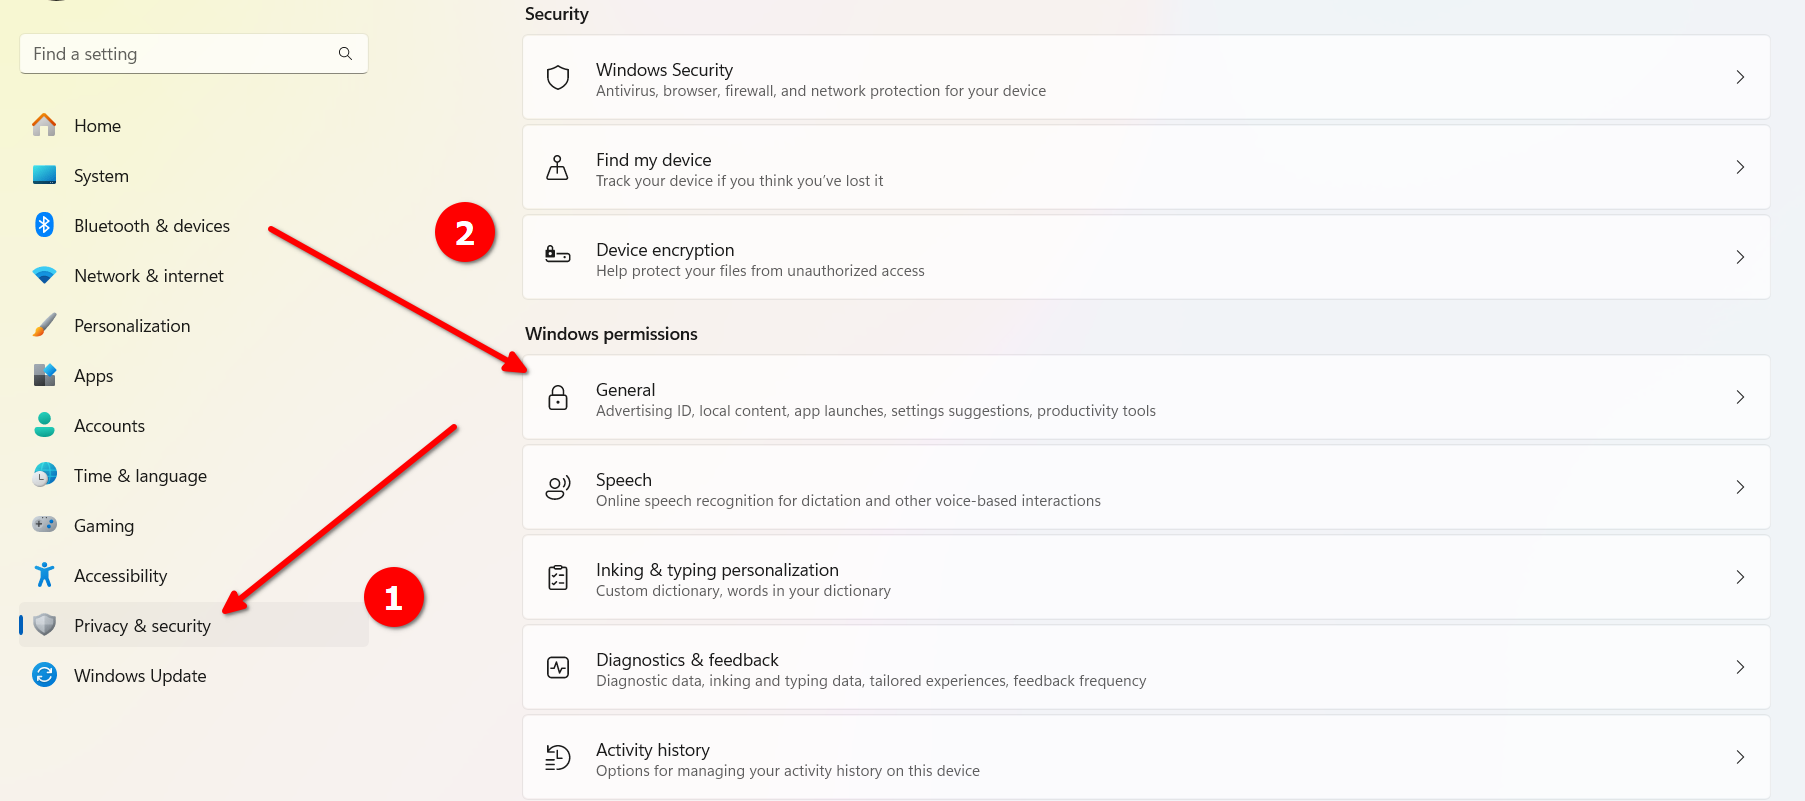
By default, everything is turned on. Use the toggle buttons to turn off the data you share with Windows.
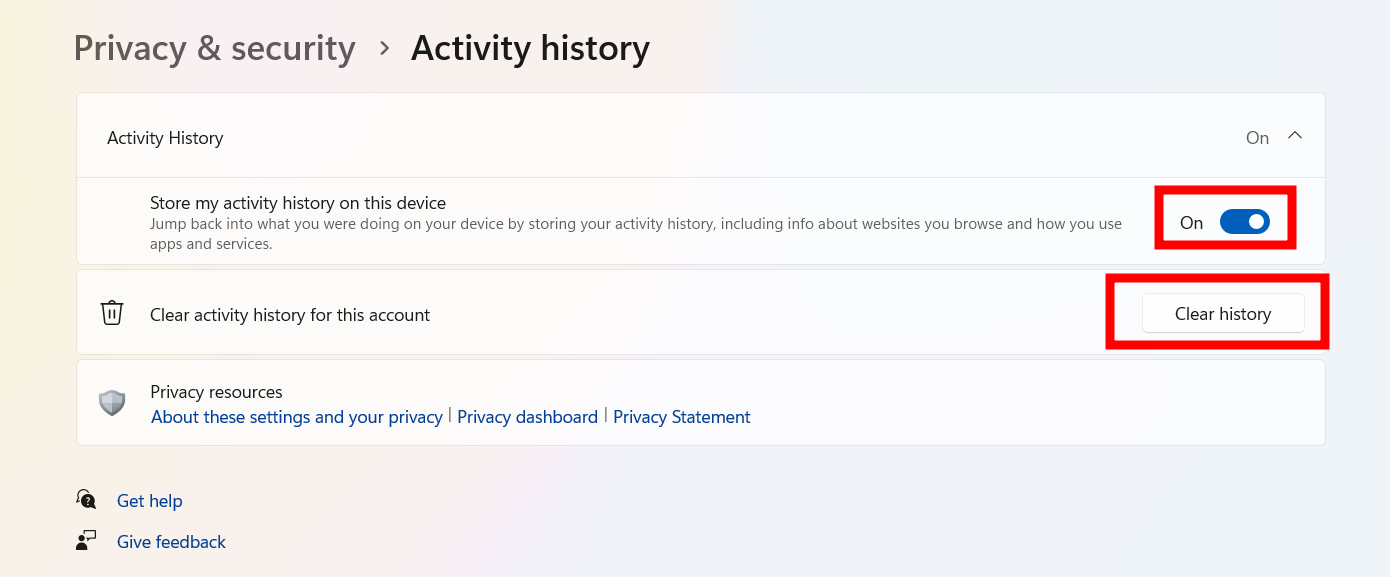
Next, return to the “Privacy & Security” menu and go to “Activity History” under Windows Permissions.
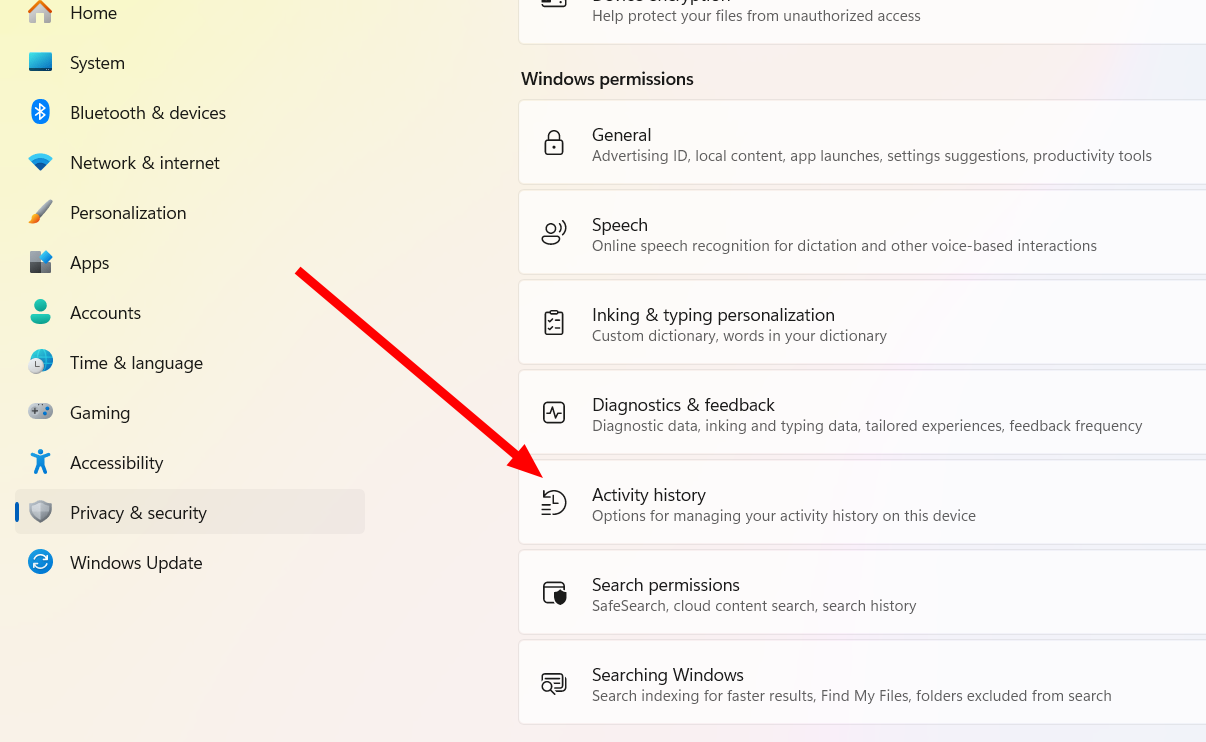
This setting tracks the websites you browse and the apps you use on your system. Use the toggle button to turn it off. Then click the “Clear History” button to delete previously collected activity history.
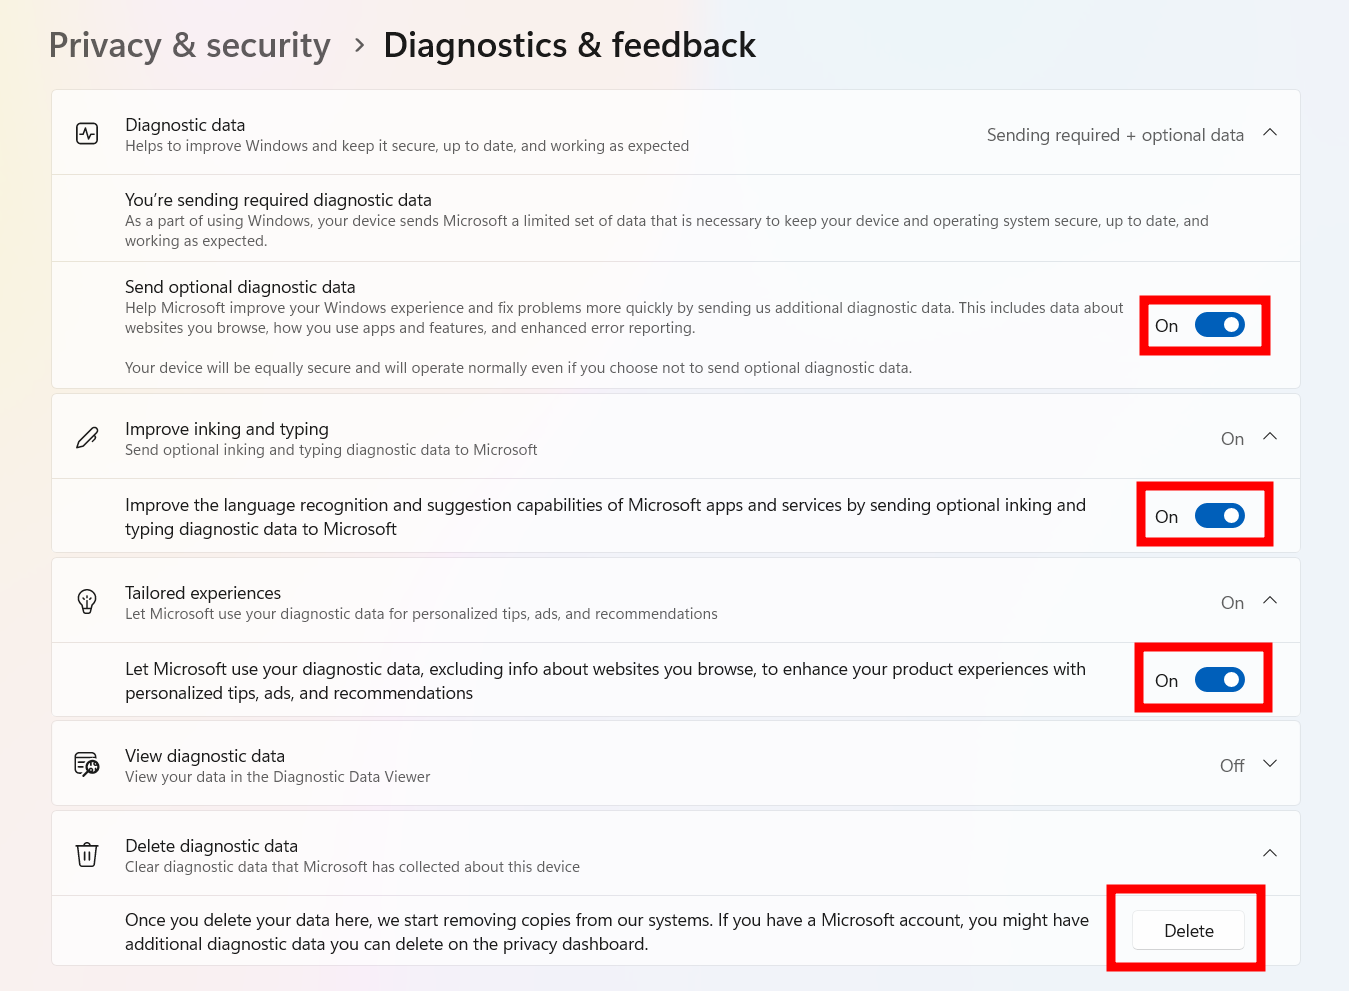
One last setting you should consider is the one that sends diagnostic data to Microsoft. Again, go back to “Privacy & Settings.” This time, go to “Diagnostics & Feedback” under Windows Permissions.
Toggle the buttons to turn off sending all types of diagnostic data. Then press the “Delete” button to clear any previously collected data.
There are more privacy settings on Windows 11 that you can change for a better Windows user experience.
Live Captions Anywhere
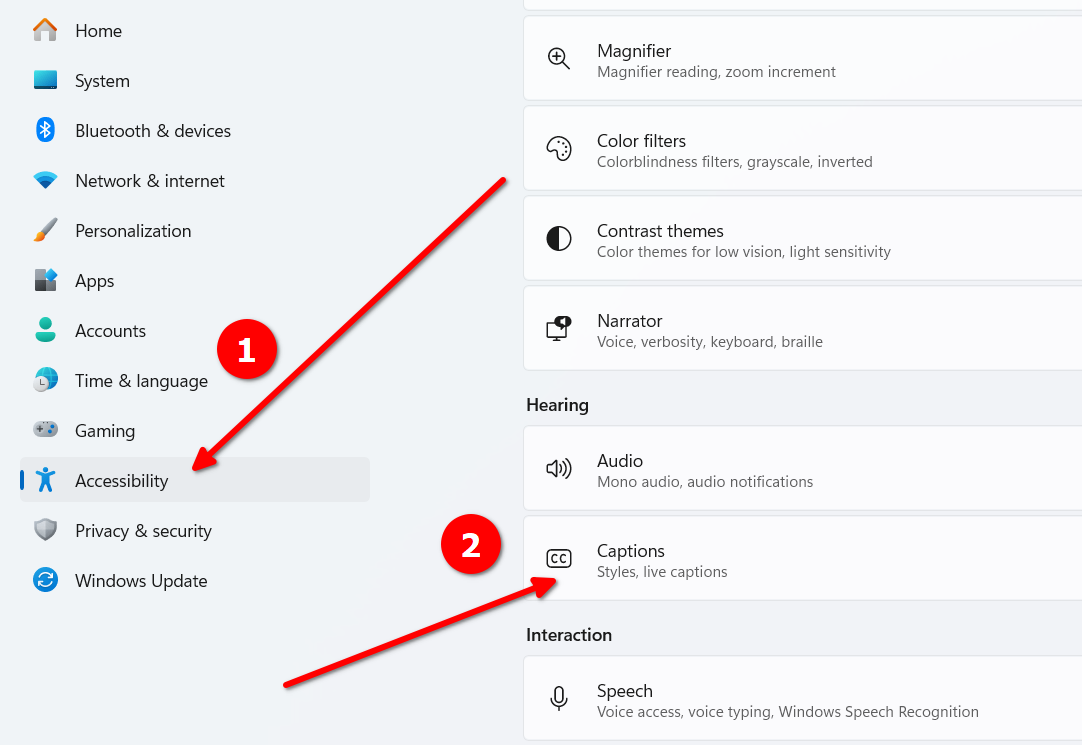
If you find it hard to listen to what’s going on in meetings or want to read subtitles when watching videos, Live Captions on Windows 11 makes that happen. It works throughout your whole system, even if you’re listening or watching something on your browser. To find Live Captions, go to Settings > Accessibility > Captions.
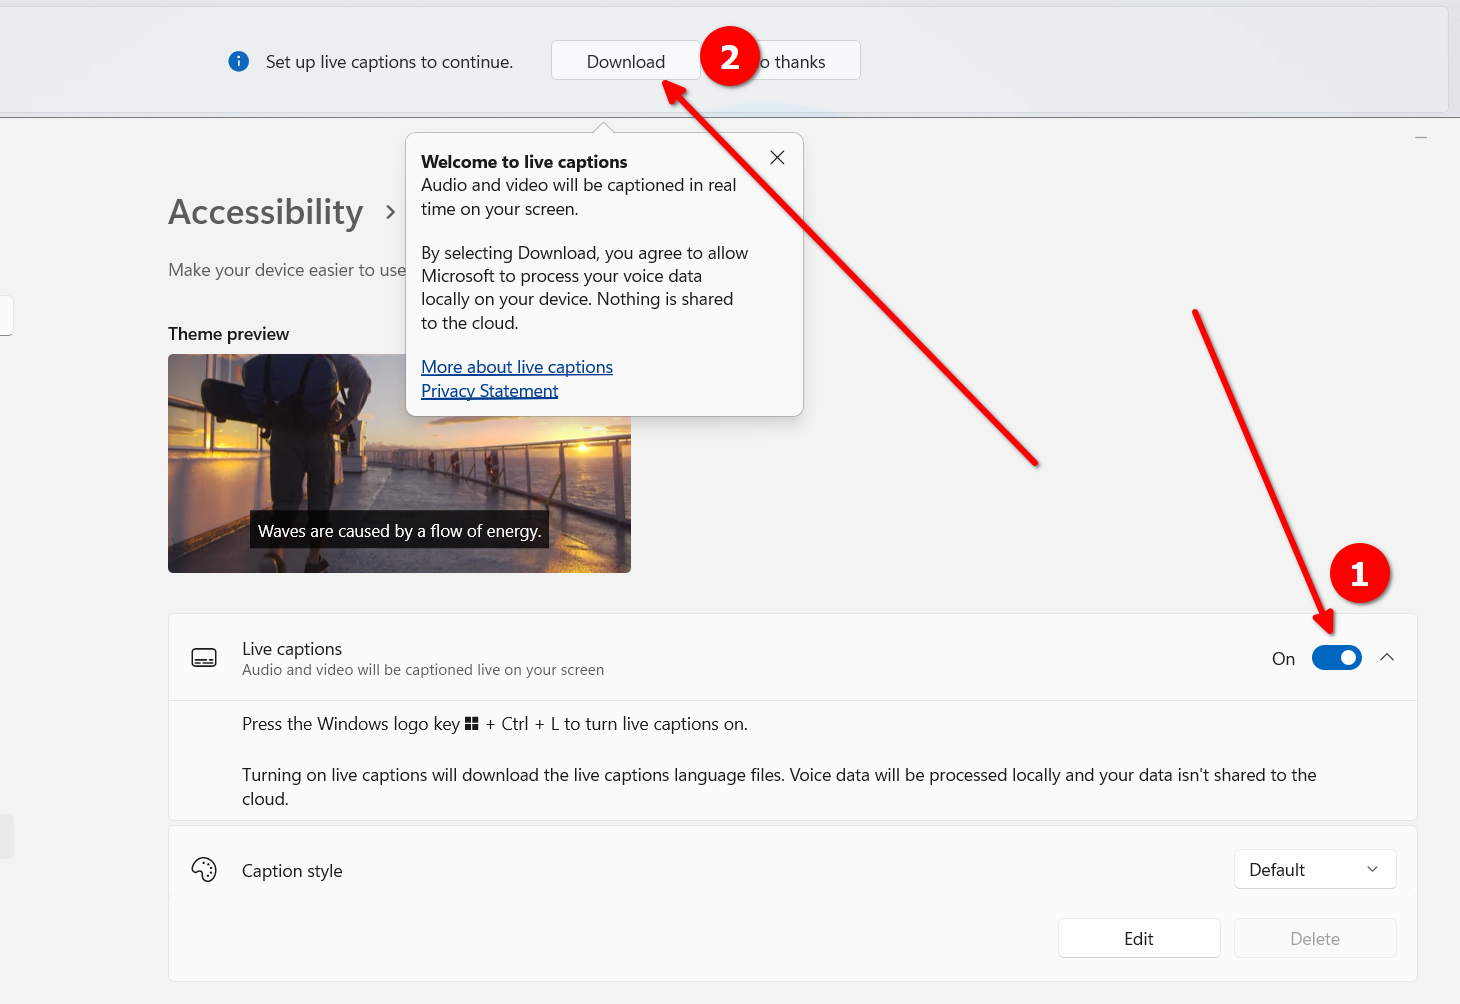
Turn on “Live Captions.” You should see a prompt about permitting Microsoft to process your voice data locally. Press “Download” to agree.
Now attend a meeting or play a video on a media player or on a browser to see live captions being generated for that.
Voice Typing Anywhere
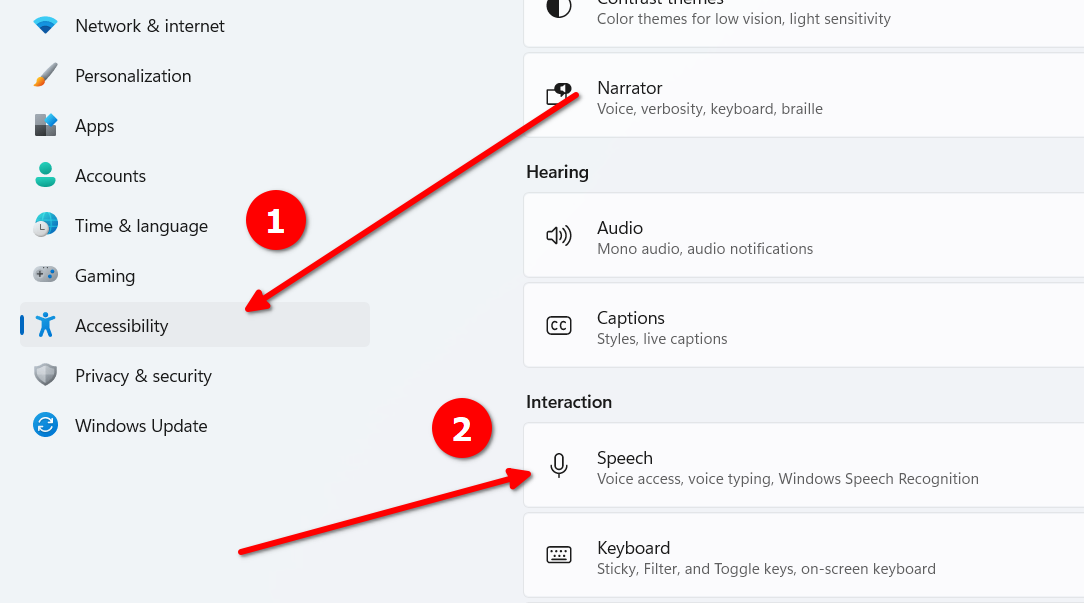
Another useful accessibility feature on Windows 11 is Voice Access. You can type by speaking whenever you’re on a text prompt. Enable Voice Access by going into Settings > Accessibility > Speech.
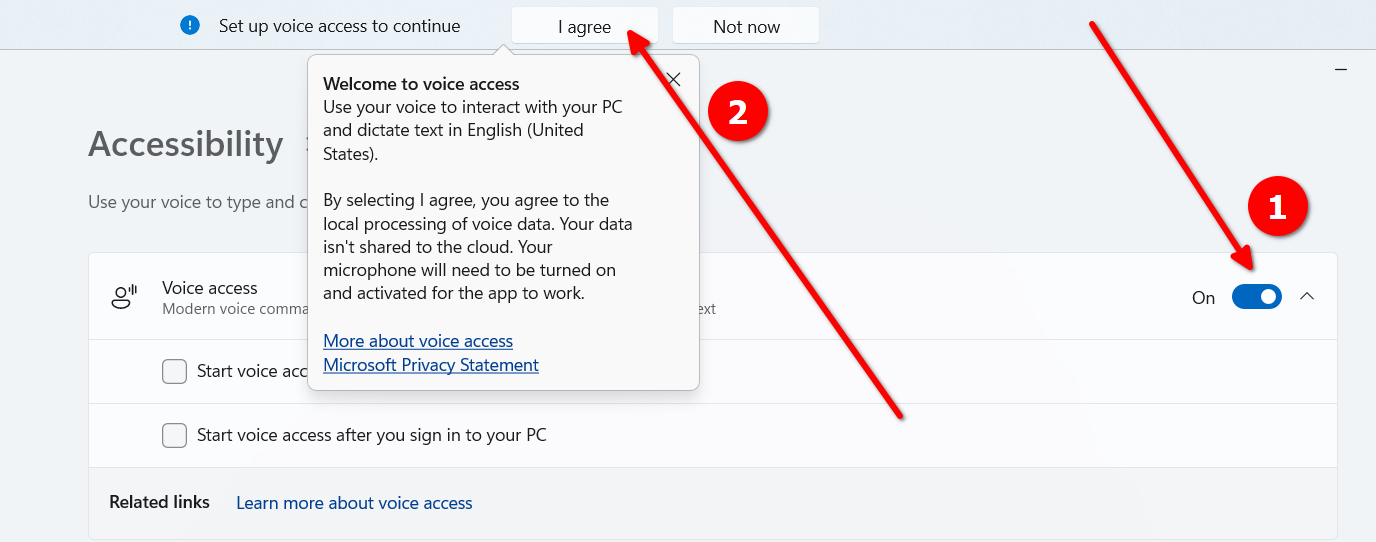
Turn on “Voice Access.” Then press “I Agree” when the popup appears.
You’ll be guided through a tutorial on using Voice Access. You can say different commands to perform actions or type using your voice when the mouse cursor is active on a typing box. Try using it on the Notepad.
Focus Sessions
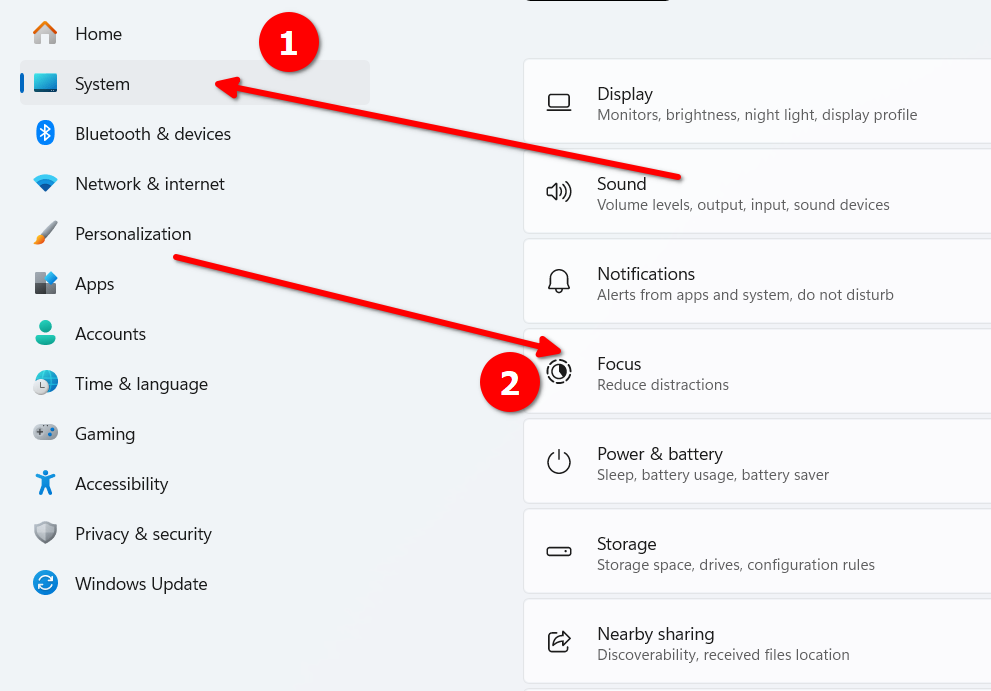
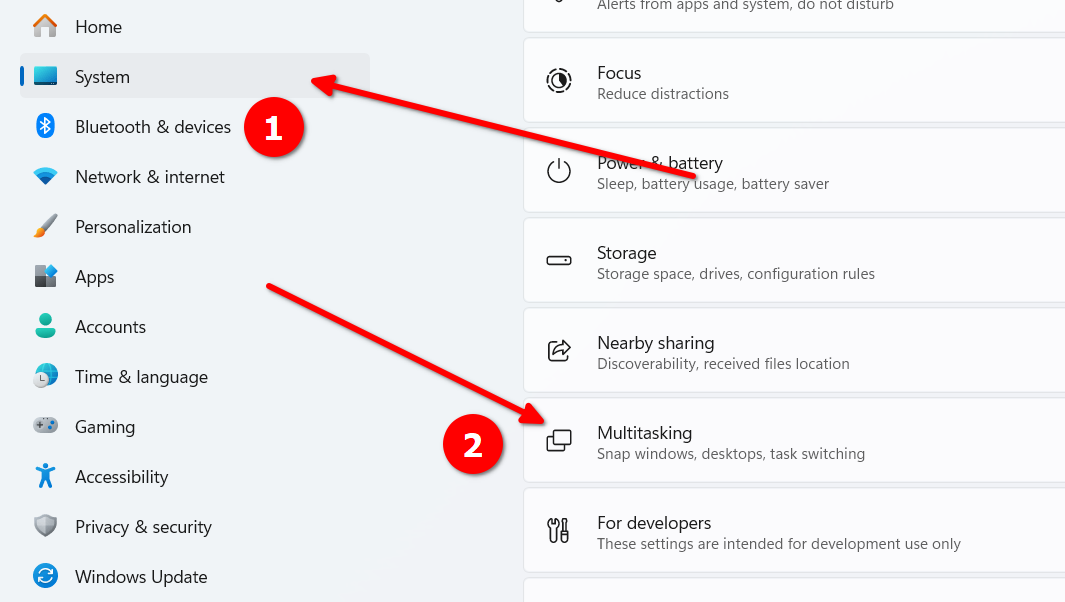
I use Focus Mode on Android a lot. When you need to get some work done free of distractions, it comes in handy. Windows has its own focus mode called Focus Sessions. To start a Focus Session, go to Settings > System > Focus.
Set a duration for your session and select or deselect any of the options depending on your preferences. Then press the “Start Focus Session” button.
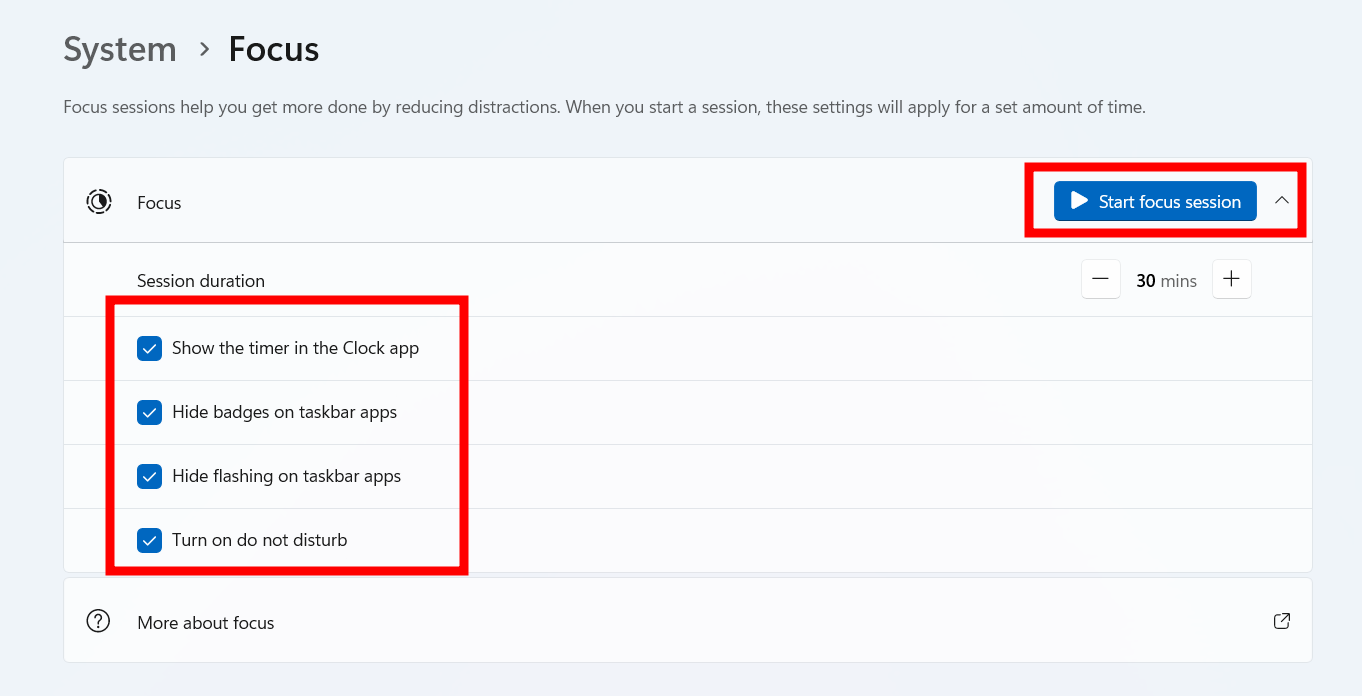
Once you start a session, you’ll see a new window with a clock, timer, task list, and other options. You can also integrate Spotify with Focus Sessions.
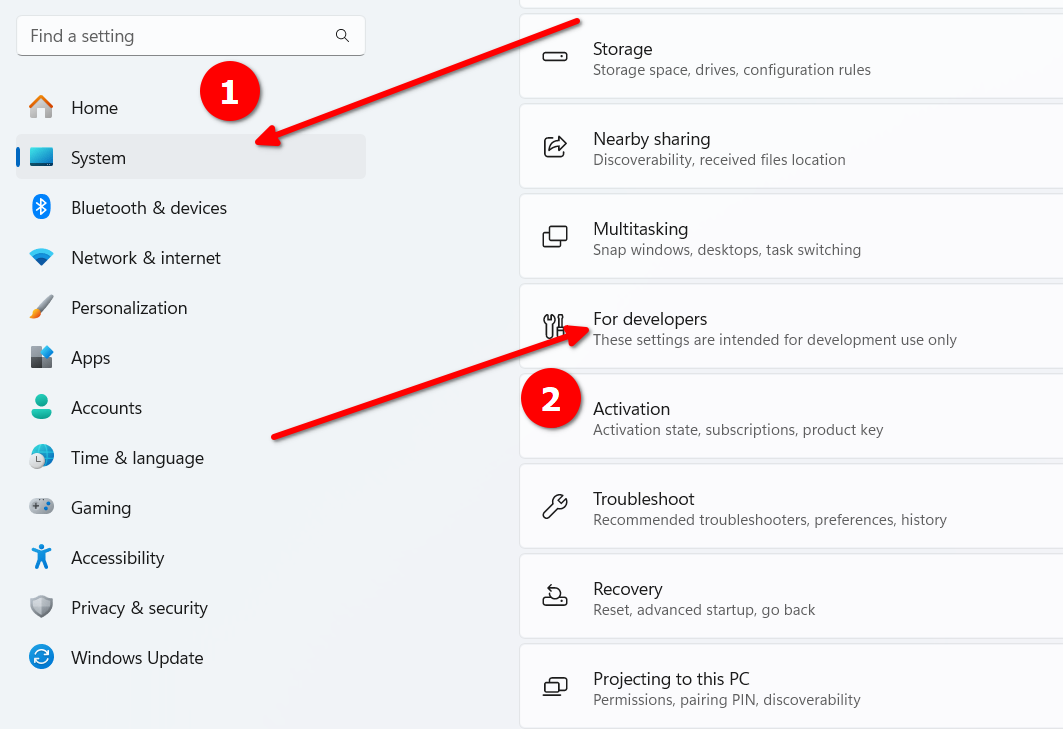
End Tasks From the Task Bar
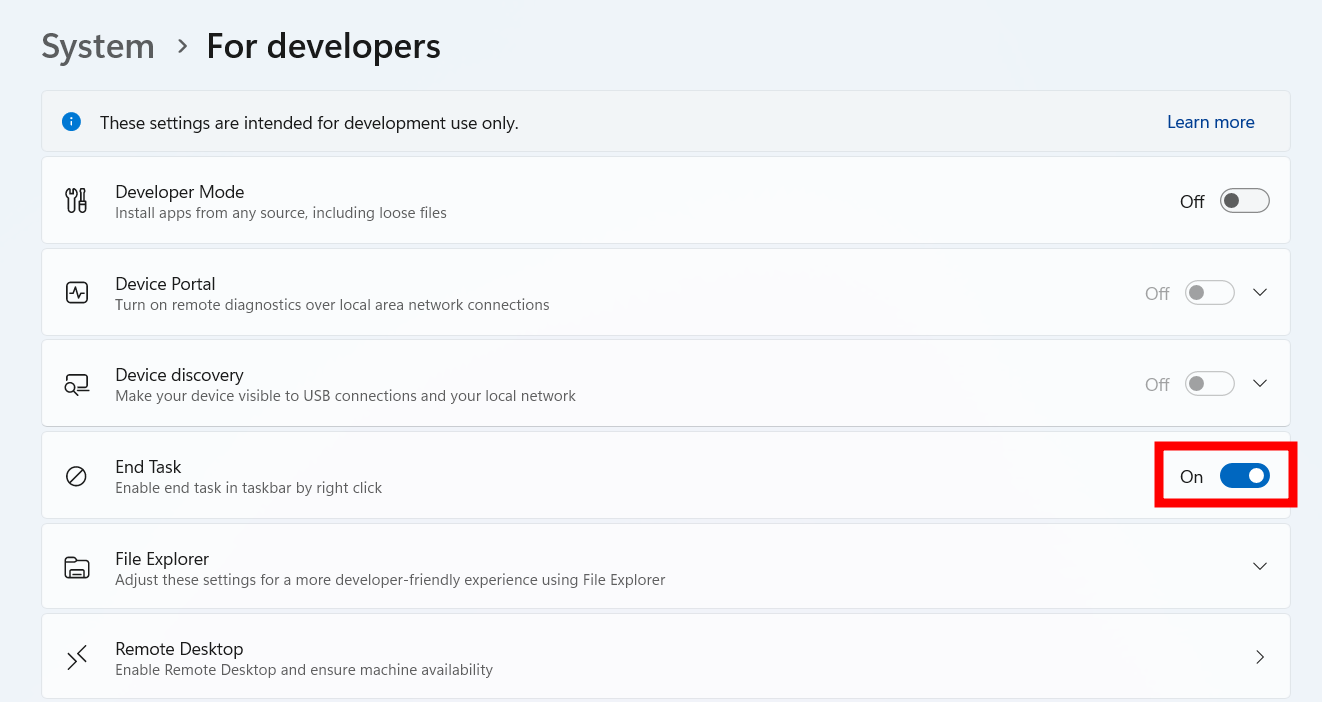
Anytime an app freezes on Windows, the most common way to end that running task is to use the Task Manager. But Windows 11 lets you end it from the task bar. You need to enable the option first. Go to Settings > System > For Developers.
Turn on “End Task.”
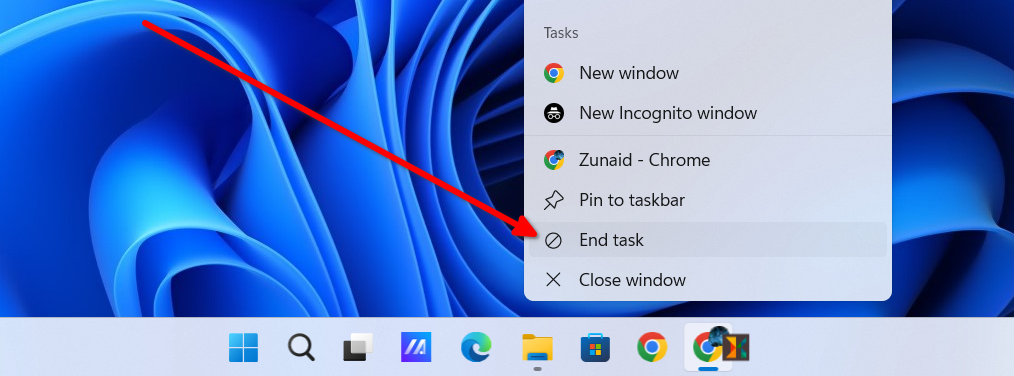
After that, if you want to end a task, simply right-click on the icon of that task in the taskbar and click “End Task.”
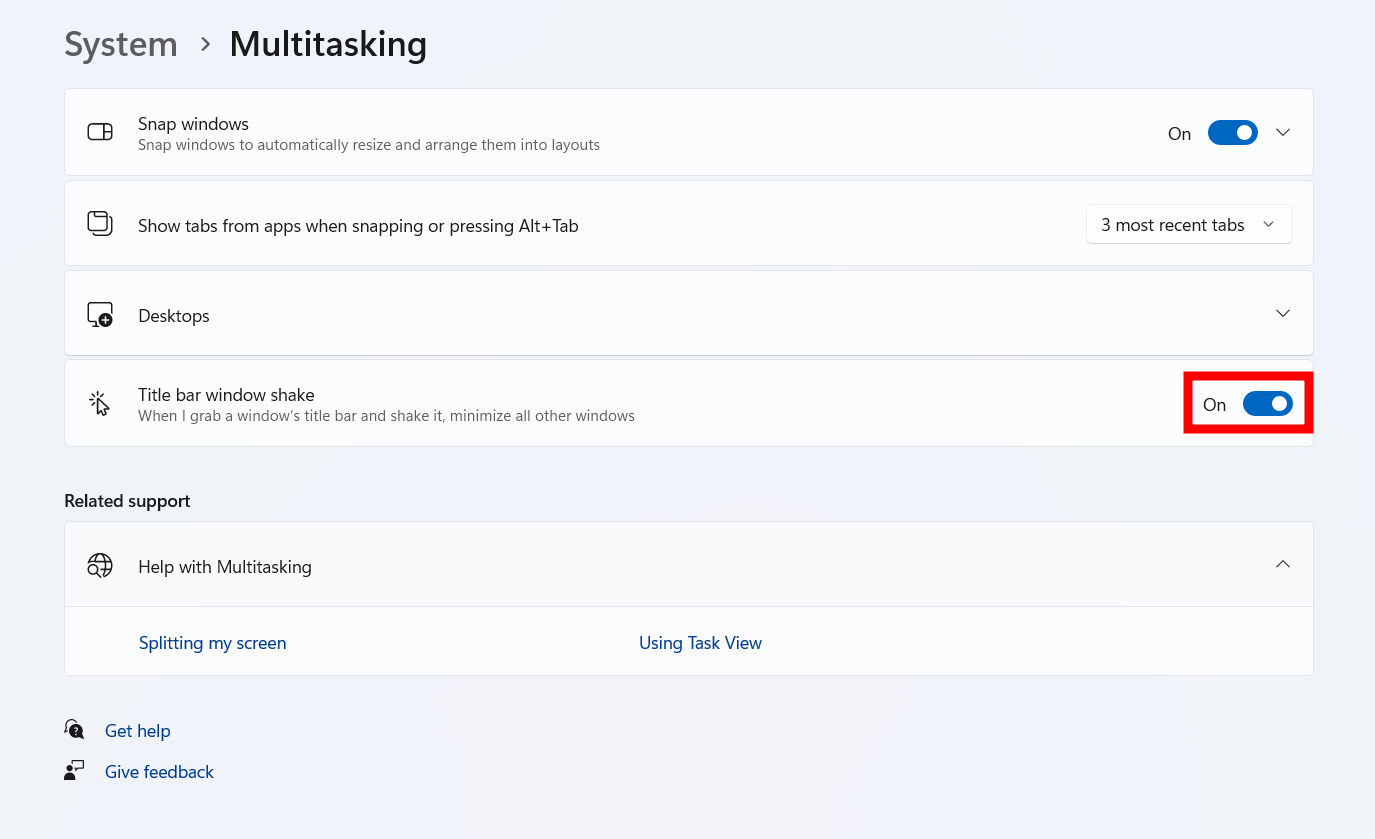
This is a fun little feature when you have a lot of windows open together, and you need to minimize all of them quickly. You can drag a single window’s title bar and shake it to minimize all other windows. To turn this feature on, go to Settings > System > Multitasking.
Turn on the “Title Bar Windows Shake” option.
Be cautious though, because sometimes this can become a problem when you’re just trying to move a window, but it’s registered as a shake.
Scrolling over the Volume Icon to Change the Volume
A lot of apps and software already have this feature, so Windows might be a little late for the party. But yes, now you can simply go to the volume option on the taskbar and scroll your mouse wheel to increase or decrease the volume. If you use your touchpad quite often, this should be even more useful. You don’t need to hold the scroll bar and drag it.
Instant Photo Transfer from Android
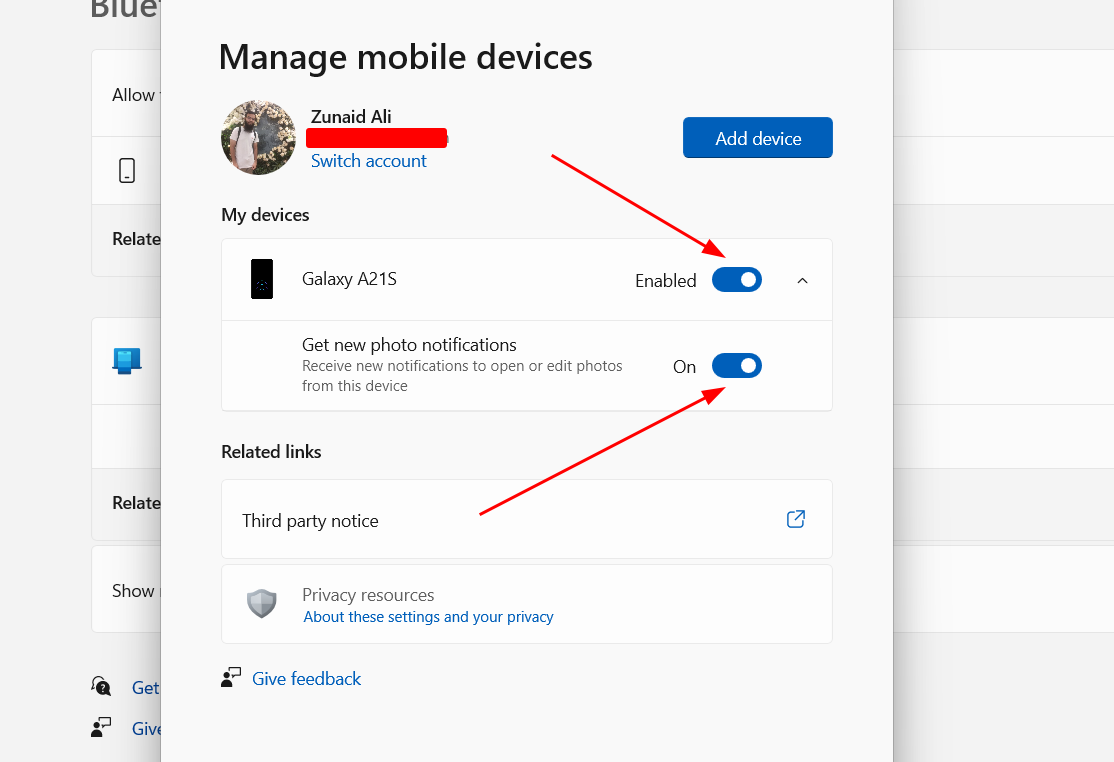
A new Windows update now allows you to transfer photos and screenshots the moment you take them on your Android phone. But it’s turned off by default. You first need to connect your Android phone to your Windows PC via the Link to Windows app from Play Store. You may also need to log in using your Microsoft account on both.
After you’ve connected the devices, go to Settings > Bluetooth Devices > Mobile Devices on your Windows computer. Make sure you’ve allowed your PC to access the mobile devices. Press “Manage Devices.” Turn on the “Get New Photo Notifications” option.
After that, take a photo or screenshot on your Android device while connected to the PC. You should see a notification on your Windows PC.

You can tap the notification to open the photo on the Snipping Tool and start editing. This also works if you’re on mobile data on your Android. Check out the full tutorial on instantly transferring your Android photos to your Windows PC.
I’m a big fan of using shortcuts on my computer. Keyboard shortcuts, desktop shortcuts, you name it. The Start button on Windows 11 has a lot of useful shortcuts hidden from us. Right-clicking the Start button reveals these shortcuts. You can also hit Windows+X to open it (using a shortcut to open a shortcut menu.)
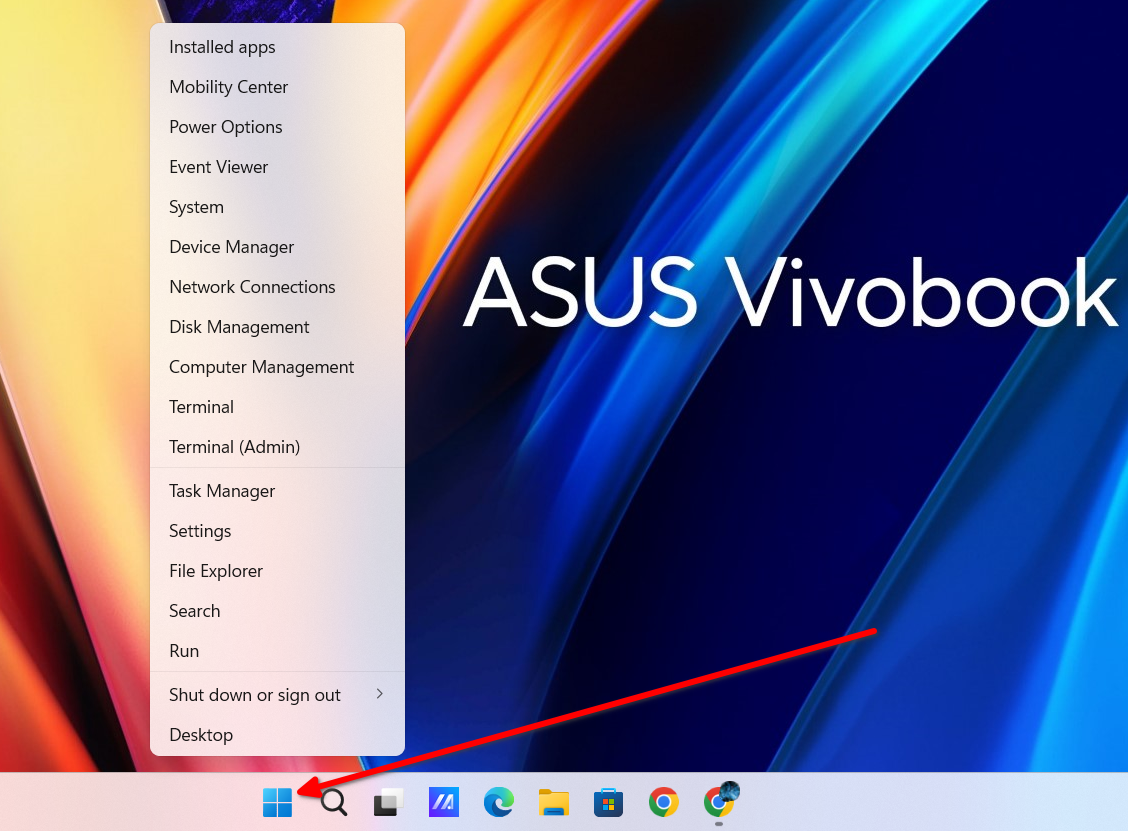
One advantage of pressing Windows+X instead of right-clicking the Start button is that you’ll notice all the options in the menu have an underlined letter. Pressing that underlined letter on your keyboard will open that option. For example, if you press Windows+X and then T, it will open the Task Manager. No need to touch the mouse.
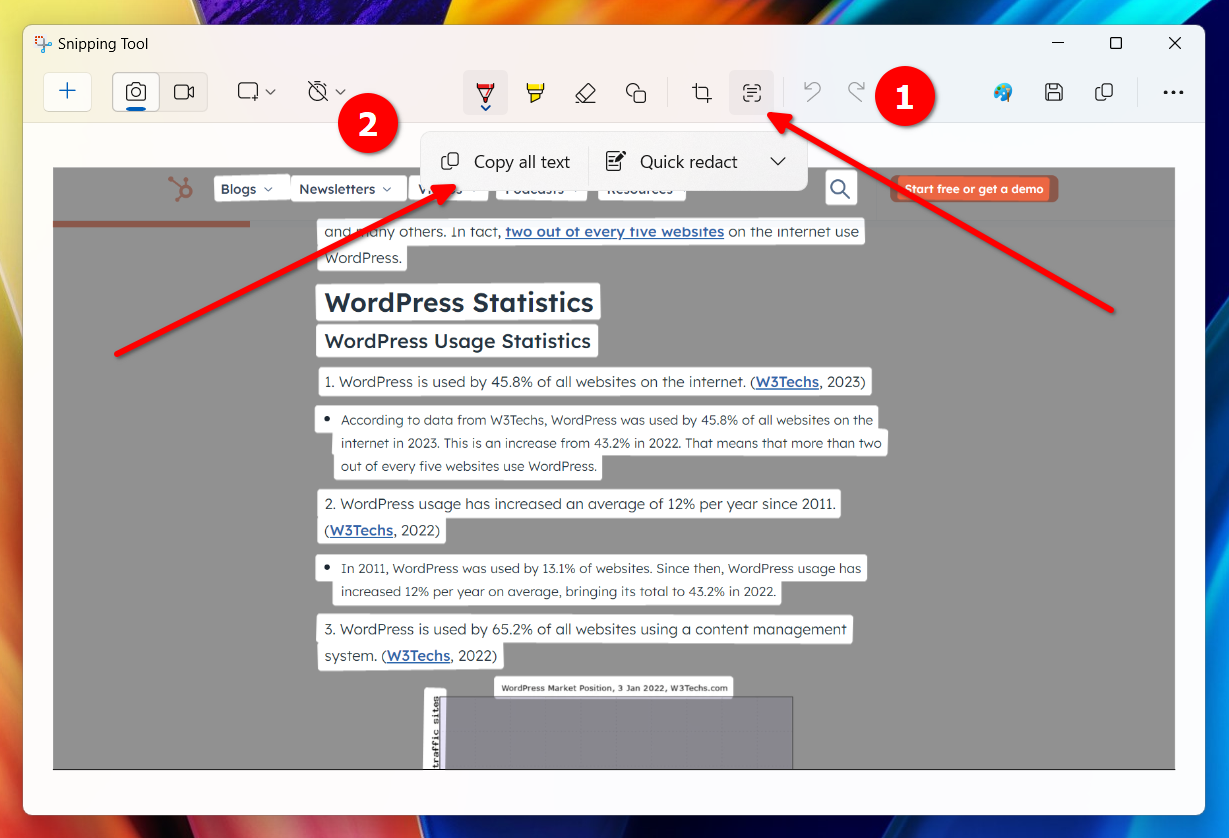
If you need to quickly extract some text from an image, the Windows Snipping Tool can help you with that. It’s known as the Text Actions feature. Open the Snipping Tool and take a screenshot of the image that you want to extract text from. If the photo is already on your PC, you can right-click it and open it in Snipping Tool.
After that, press the Text Actions button from the top menu. You can then click the “Copy All Text” button to copy all the text in the picture. You can also manually select text using your mouse and copy only specific portions. If there is any sensitive information in the picture such as phone numbers or emails, you can redact it too.
Built-in Image Editing in the Photos App
This is a big one for me personally. For small edits, I either had to rely on a large program like Photoshop, which would be overkill, or apps on the web, which would sometimes force watermarks and limit the resolution. Now, with some useful editing features integrated into the Windows Photos app, it’s easier than ever to make small tweaks to give a perfect shape to your photos.
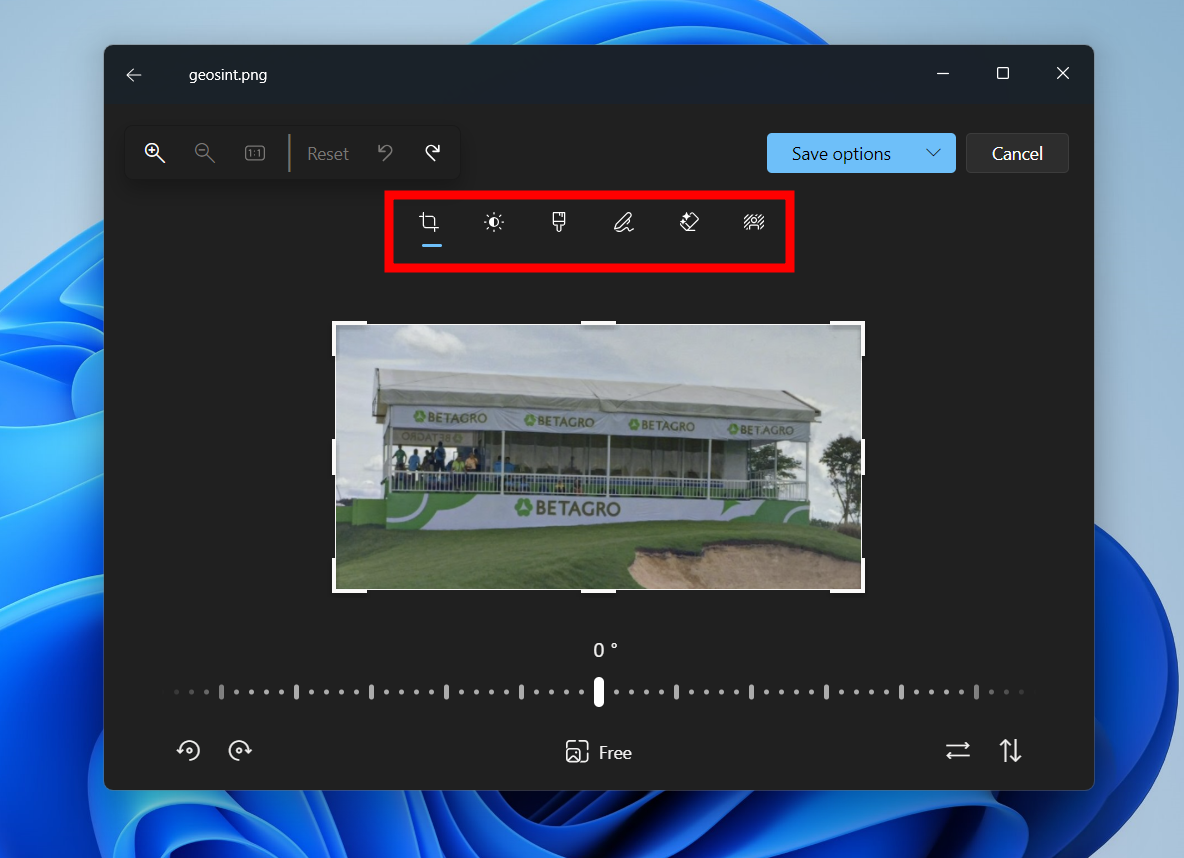
To get access to the editing options, open any image in the app and then press Ctrl+E. You can crop the image, make light and color adjustments, add filters, erase objects, and remove the background from the image.
Leave A Comment?