Situatie
We can use ZFS as a local or external storage option for the VMs and containers with Proxmox VE. In order to do so, we must run the following steps:
Steps to add ZFS storage to Proxmox
1. Set Proxmox VE on the servers we intend to use for managing VMs and containers.
2. Create a ZFS pool on the disks we need to assign to VMs and containers using local storage on the VE server. Make that the pool is already established and reachable from the Proxmox VE host if we install external ZFS storage from a different server.
3. Proxmox VE employs LVM as its storage backend by default. In order to use ZFS as a storage option, enable ZFS on the Proxmox VE host. It includes installing the ZFS package and turning on the ZFS service.
4. With ZFS enabled, a ZFS dataset will be created and used by VE as a pool. Typically, this dataset is connected to a particular ZFS pool path.
5. We’ll add this dataset as storage using the VE web interface (GUI). Choose “ZFS” as the storage type by going to “Datacenter” >> “Storage” >> “Add”. After that, give the pertinent information, such as the dataset path and storage choices.
6. In order to give VE the access rights necessary to read and write data to the storage, we need to modify the permissions of the ZFS dataset.
7. After installing the ZFS storage, it’s crucial to make that Proxmox VE can access and use the ZFS dataset as needed.
8. Finally, create Virtual Machines and Containers that Use ZFS Storage. Now that the ZFS storage has been configured, we may produce virtual machines and containerized software that utilizes the ZFS storage. We can pick the ZFS storage pool we previously installed while creating a virtual machine (VM) or container by selecting the storage location option.
Backup
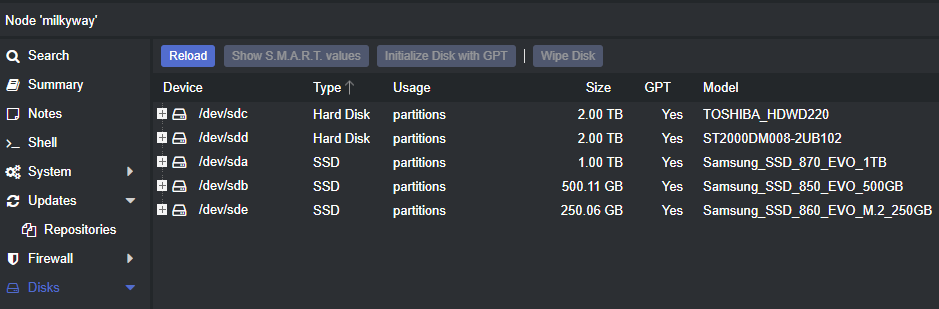
Wiping the disk
via Proxmox GUI
Go to the Proxmox webpage and wipe the disk. The option is under your node -> Disks. I will be setting up Mirror raid level for “/dev/sdc” and “/dev/sdd”.
via dd
If the command line is your way, you can run the command below. Make sure to replace the device id with yours.
# dd if=/dev/zero of=/dev/sdc bs=512 count=1
Leave A Comment?