Situatie
Solutie
How to Take Steam Deck Screenshots in Game Mode
Taking screenshots in Game Mode is easy, and works within the main Steam Deck UI and in any games you are playing. To take a screenshot, press and hold the Steam button and tap the right bumper (Steam+RB).
You should hear a sound effect from Half-Life to indicate a screenshot has been taken, with a notification appearing in the lower-right corner of the screen. Whatever you see will be captured, including the screenshot notification (so make it count).
This is just one of the many useful Steam Deck shortcuts you should have memorized.
How to Take Screenshots on the SteamOS Desktop
Desktop mode is a little different since the Steam+RB shortcut won’t work here. Just in case you aren’t aware, you can get to Desktop mode by pressing and holding the Power button on top of the unit and selecting “Switch to Desktop.”
Since this is a standard Linux operating system, you can use a third-party app to capture screenshots. As luck would have it, SteamOS comes with an app that can do just that called Spectacle.
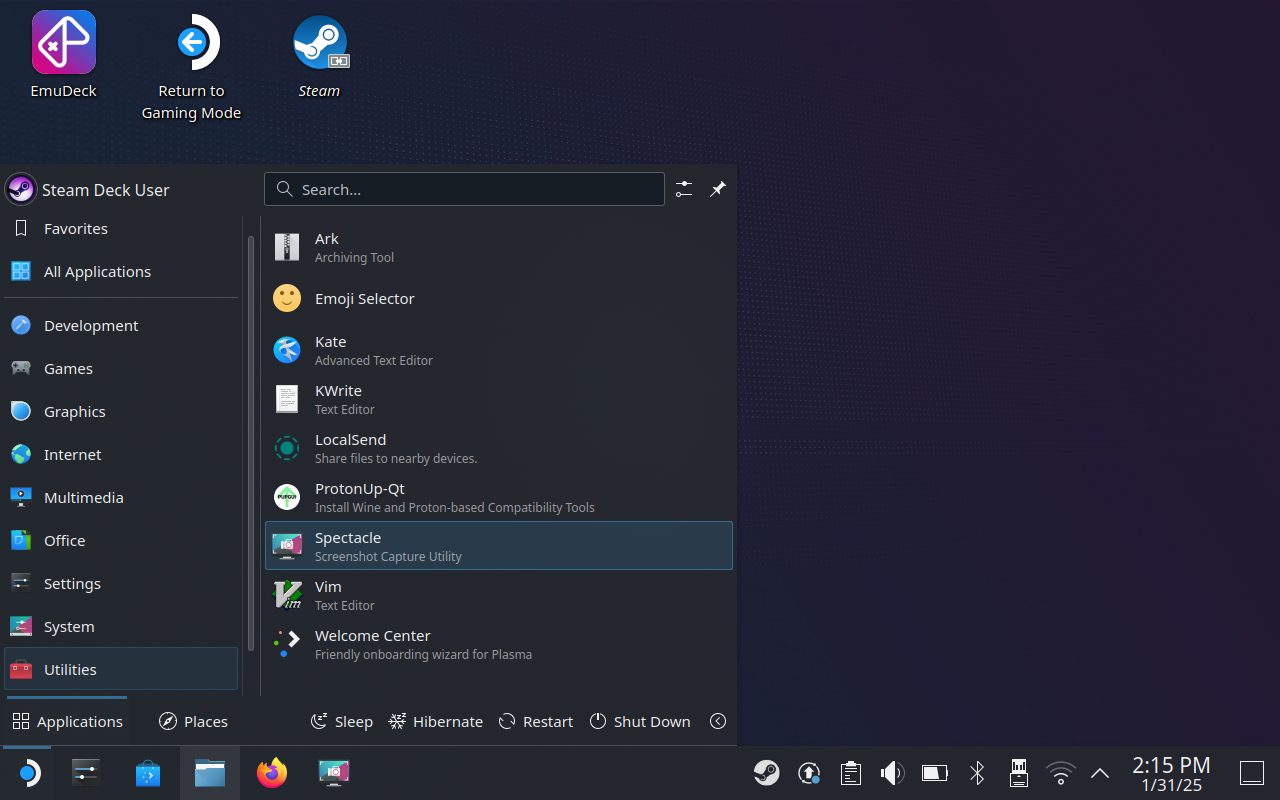
You can find Spectacle by clicking the Application Launcher icon in the bottom-left corner of the screen and navigating to Utilities > Spectacle.
Spectacle will take a screenshot as soon as you launch it, which you can save if you want. You can also use the on-screen controls to take a full-screen, rectangular, or active window screenshot (and apply a delay).
The app works best if you configure it to behave however you want. To do this, click on “Configure” and then use the “When launching Spectacle” drop-down to select an action. In addition, you can use the “Save to Default Folder” checkbox to automatically save your screenshots. This will save all screenshots in your /home/deck/Pictures/ folder as soon as you capture them. You can change this (along with the naming convention) under the “Save” section.
Personally, I’ve set Spectacle to take and save a screenshot whenever I launch the app. I also pinned it to my Task Manager (the bar at the bottom of the screen) by right-clicking (left trigger) the app icon and selecting the “Pin” option.
Now whenever I open the app by clicking the icon, I capture and save a screenshot automatically. I can also right-click the app icon to access other common capture settings.
How to Find Game Mode Screenshots
In Game Mode, screenshots should appear under the Media section of the main menu. This is accessed by hitting the “Steam” button on your console, beneath the left trackpad.
In practice, this doesn’t work very well. I find that screenshots frequently disappear from the media browser, with seemingly no way of getting them back. I thought Steam was deleting them before I realized something else was going on and they were all safe.
To access screenshots you’ve taken in Game Mode, boot into Desktop mode by holding the Power button and selecting “Switch to Desktop”.
Now launch Stream using the tray icon in the bottom right corner (you can just open the “Library” button) and then use the menu bar at the top of the window to navigate to View > Recordings and Screenshots.
Your most recent media will now be shown, but you can use the relevant drop-down menus to filter by games or media type. Best of all, you can right-click on an item and choose “Show on Disk” to open the containing folder within the Dolphin file explorer.
Steam groups your screenshots by app, so you’ll need to “Show on Disk” for each different game.
How to Find SteamOS Desktop Shortcuts
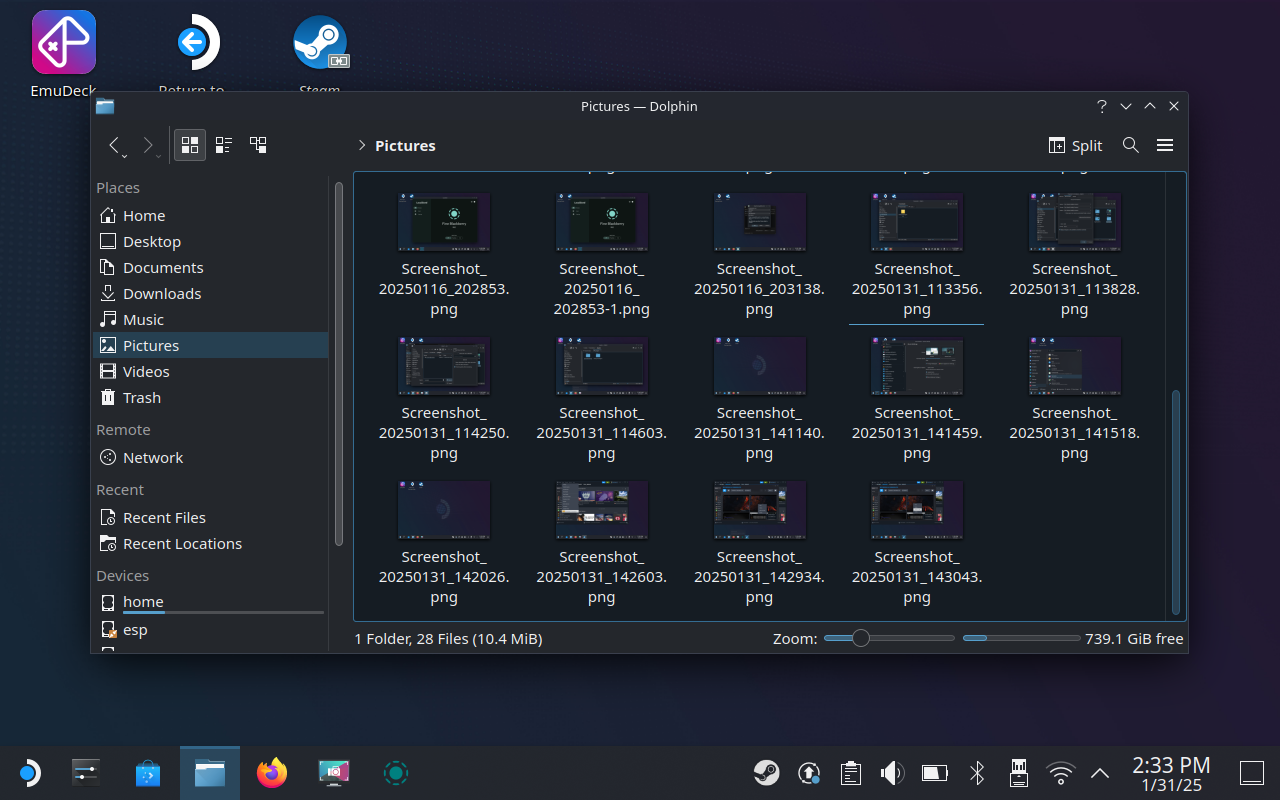
Finding shortcuts taken with Spectacle in Desktop mode is a lot easier since they’ll save to the /home/deck/Pictures/ folder by default unless you change it. Open the Dolphin file explorer and use the sidebar to select “Pictures” and you should see all of your screenshots.
Uploading screenshots and other media using Steam is a miserable experience. Things are frequently missing in Game Mode, and media has to be uploaded one at a time. It’s tedious, but if you want to give it a shot find your image, select it, hit the “Share” button, choose “Share on Steam…” and then hit “Upload.”
If all goes well, the image will be available via Steam on your computer. In my experience, the upload fails all too often for seemingly no reason. For this, I like to use a wonderful bit of freeware called LocalSend. This wireless file transfer protocol works between almost any device connected to a local network. There are versions of LocalSend for Windows, macOS, Linux (obviously), iPhone and iPad, and Android.
First, download LocalSend for your Steam Deck by opening the “Discover” store under Application Launcher > System. Search for LocalSend (press Steam+X to show the on-screen keyboard) and use the “Install” button to add it.
Now find your screenshots using the instructions in the sections above. Select multiple screenshots by clicking the “+” plus button on each image icon until you’ve selected all, then right-click (left trigger) and hit Compress > Here as “name.zip” to create a new archive.
To make things a little easier, you can right-click (left trigger) the archive you just made then choose “Cut” then right-click on the desktop and choose “Paste One File.”
Now head to Application Launcher > Utilities and open LocalSend. Click Send > File then choose “Desktop” and select the archive. Any other devices running LocalSend should appear under the “Nearby devices” heading. Click on one to initiate the transfer.
Accept the transfer on the other device and your screenshots will be transferred.