Situatie
Windows has the built-in ability to function as VPN server using the point-to-point tunneling protocol (PPTP), although this option is somewhat hidden. Here’s how to find it and set up your VPN server.
Solutie
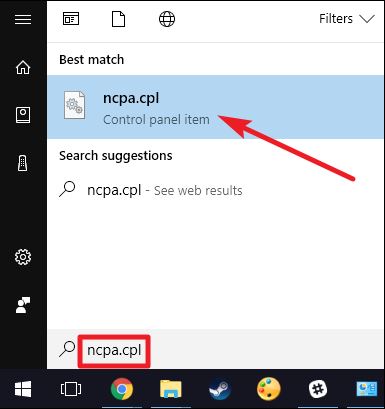
To create a VPN server in Windows, you’ll first need to open the “Network Connections” window. The quickest way to do this is to hit Start, type “ncpa.cpl,” and then click the result (or hit Enter).
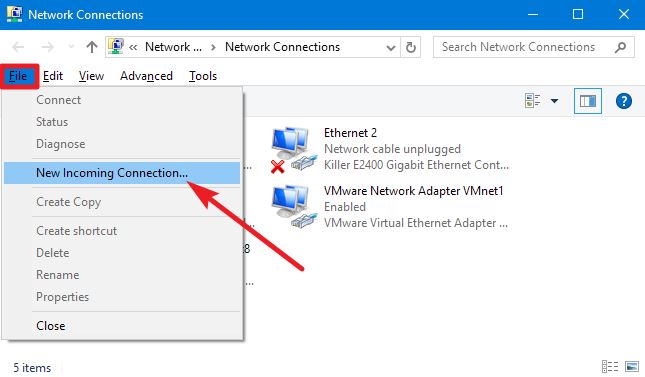
In the “Network Connections” window, press the Alt key to show the full menus, open the “File” menu, and then select the “New Incoming Connection” option.
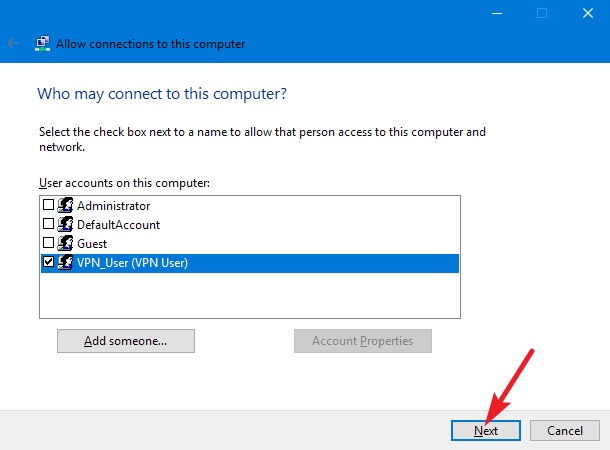
Next, select the user accounts that can connect remotely. To increase security, you may want to create a new, limited user account rather than allow VPN logins from your primary user account. You can do that by clicking the “Add someone” button. Whatever user account you choose, ensure that it has a very strong password, since a weak password could be cracked by a simple dictionary attack.
When you’ve got your user selected, click the “Next” button.
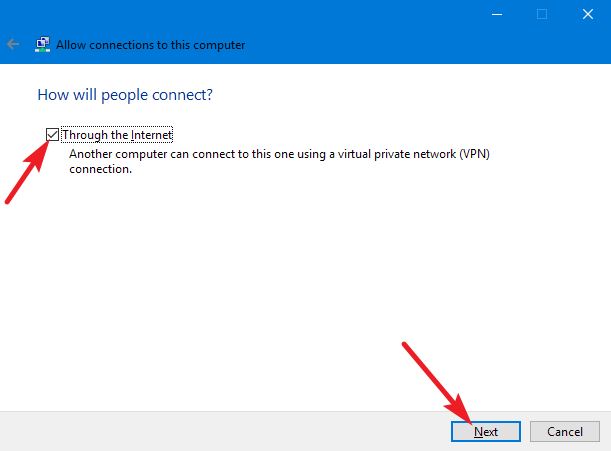
On the next page, select the “Through the Internet” option to allow VPN connections over the Internet. That’s likely the only option you’ll see here, but you could also allow incoming connections over a dial-up modem if you have the dial-up hardware.
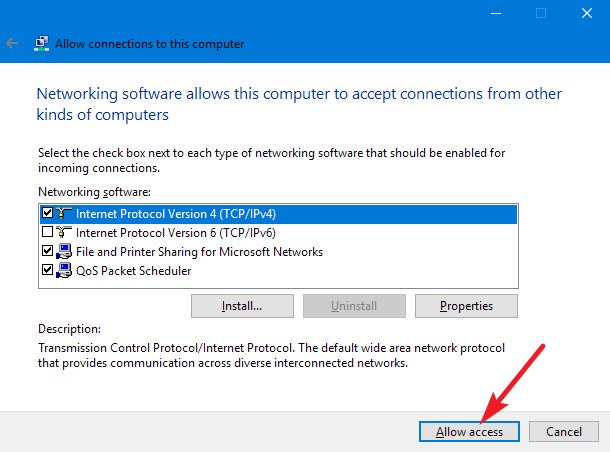
Next, you can select the networking protocols that should be enabled for incoming connections. For example, if you don’t want people connected to the VPN to have access to shared files and printers on your local network, you can disable the “File and Printer Sharing for Microsoft Networks” option.
When you’ve got things set up, click the “Allow Access” button.
Windows then configures access for the user accounts you chose—which can take a few seconds.

And at this point, your VPN server is up and running, ready to take incoming connection requests. If you want to disable the VPN server in the future, you can simply return to the “Network Connections” window and delete the “Incoming Connections” item.
Leave A Comment?