Situatie
The Control Center has been a part of macOS since the release of Big Sur in 2020, allowing easy access to important settings such as Wi-Fi, volume and the display brightness. Since then, it has only benefited from minor tweaks but, with the release of macOS Tahoe, that has changed.
Solutie
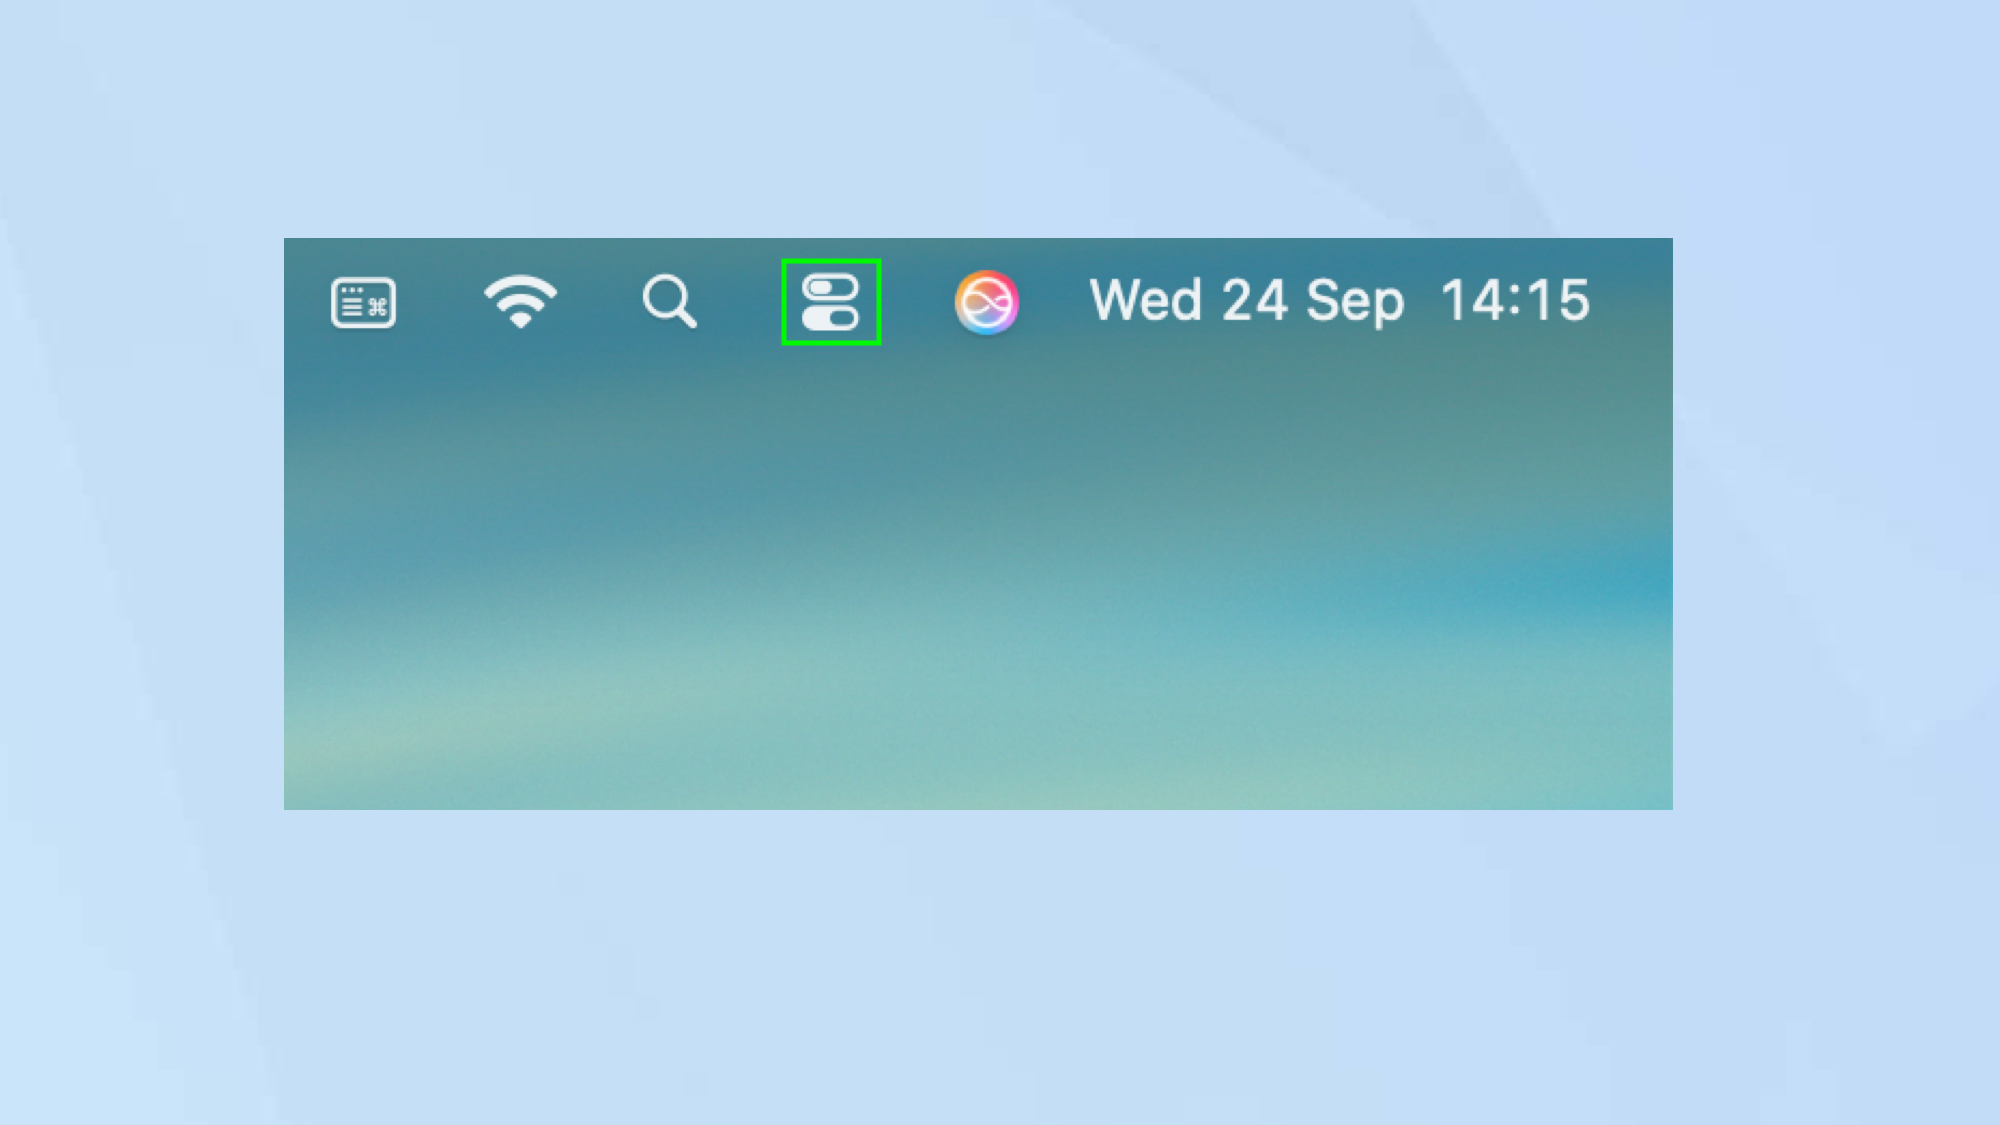
First of all, select the Control Center icon in the menu bar in macOS Tahoe 26. This will display the Control Center with various familiar options such as Wi-Fi, Bluetooth, AirDrop, sound and Focus.
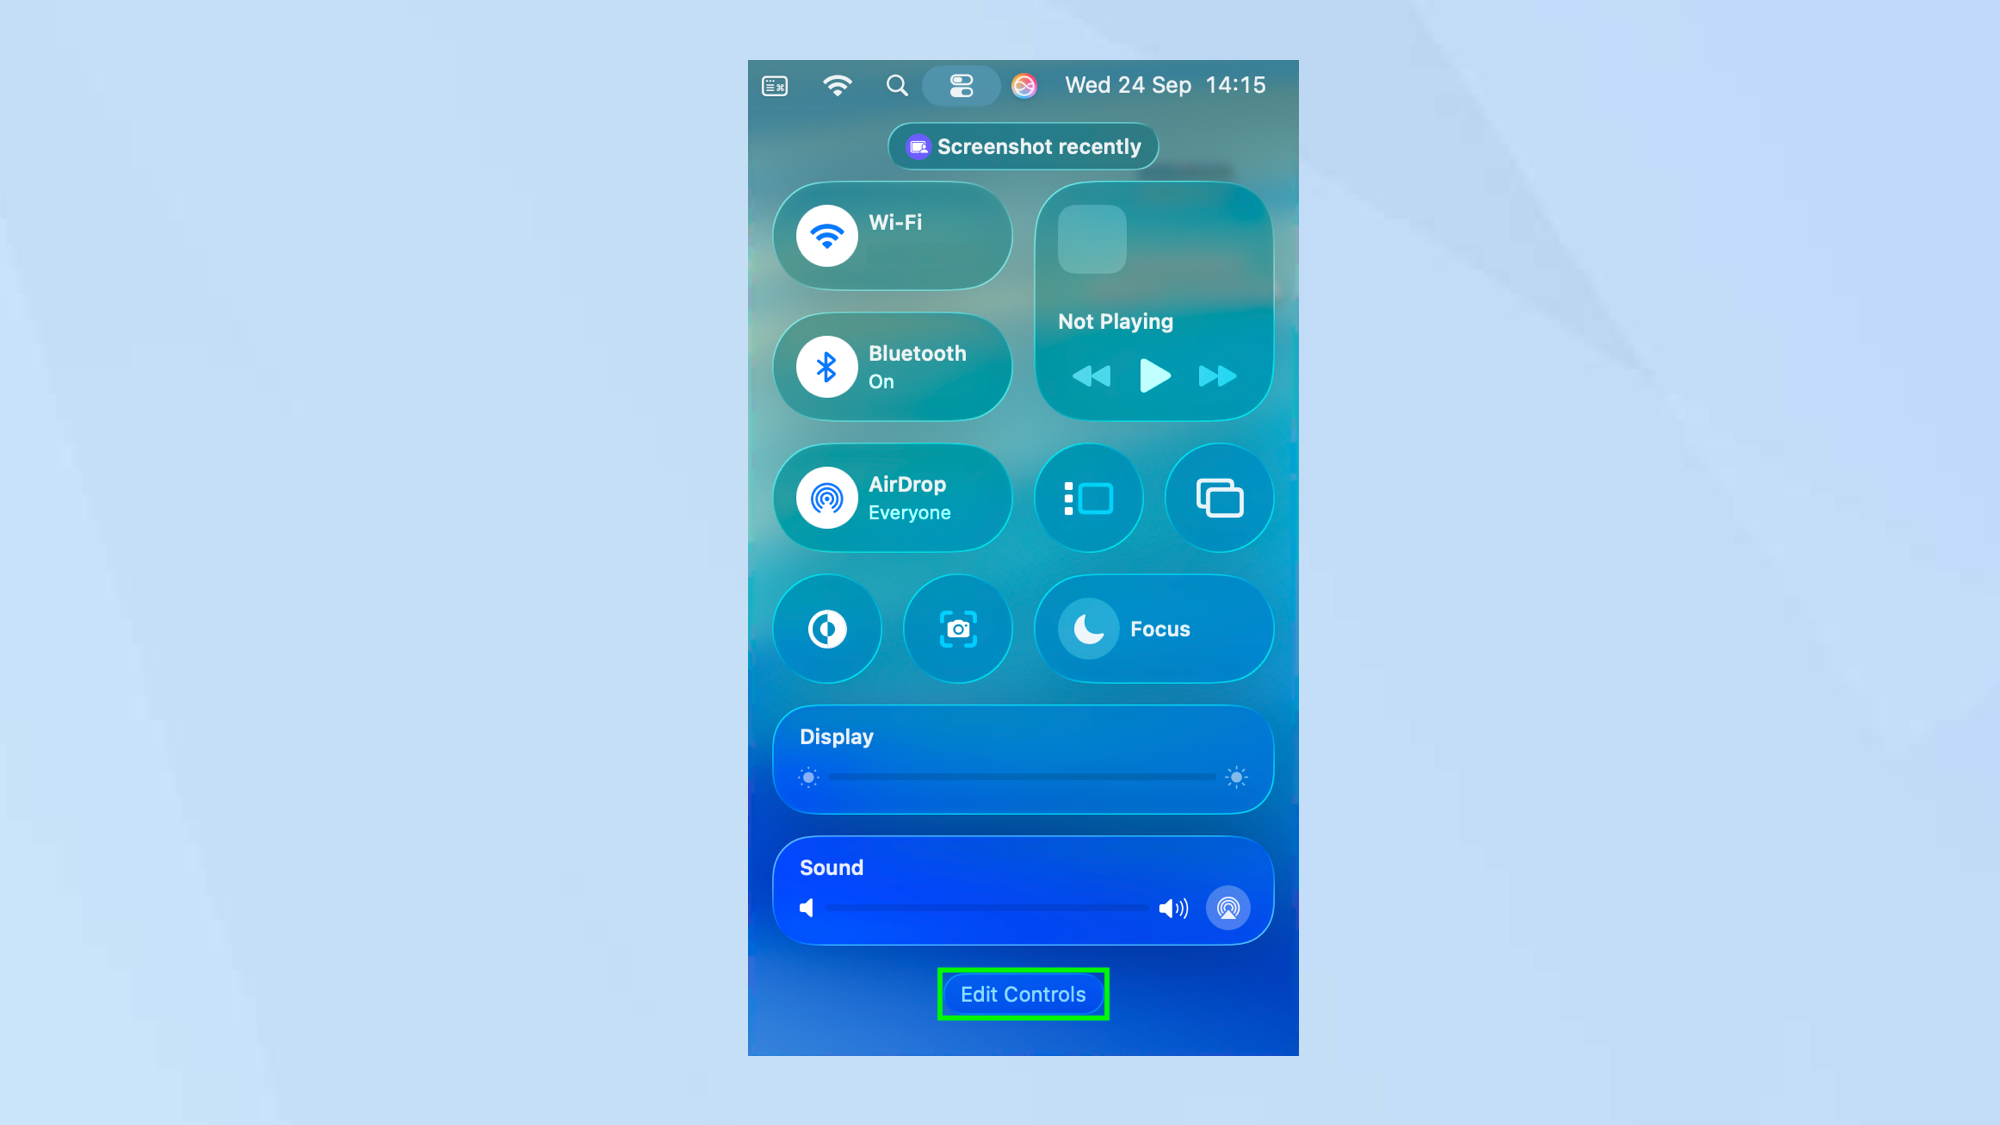
To manage the options displayed in the Control Center, click Edit Controls.
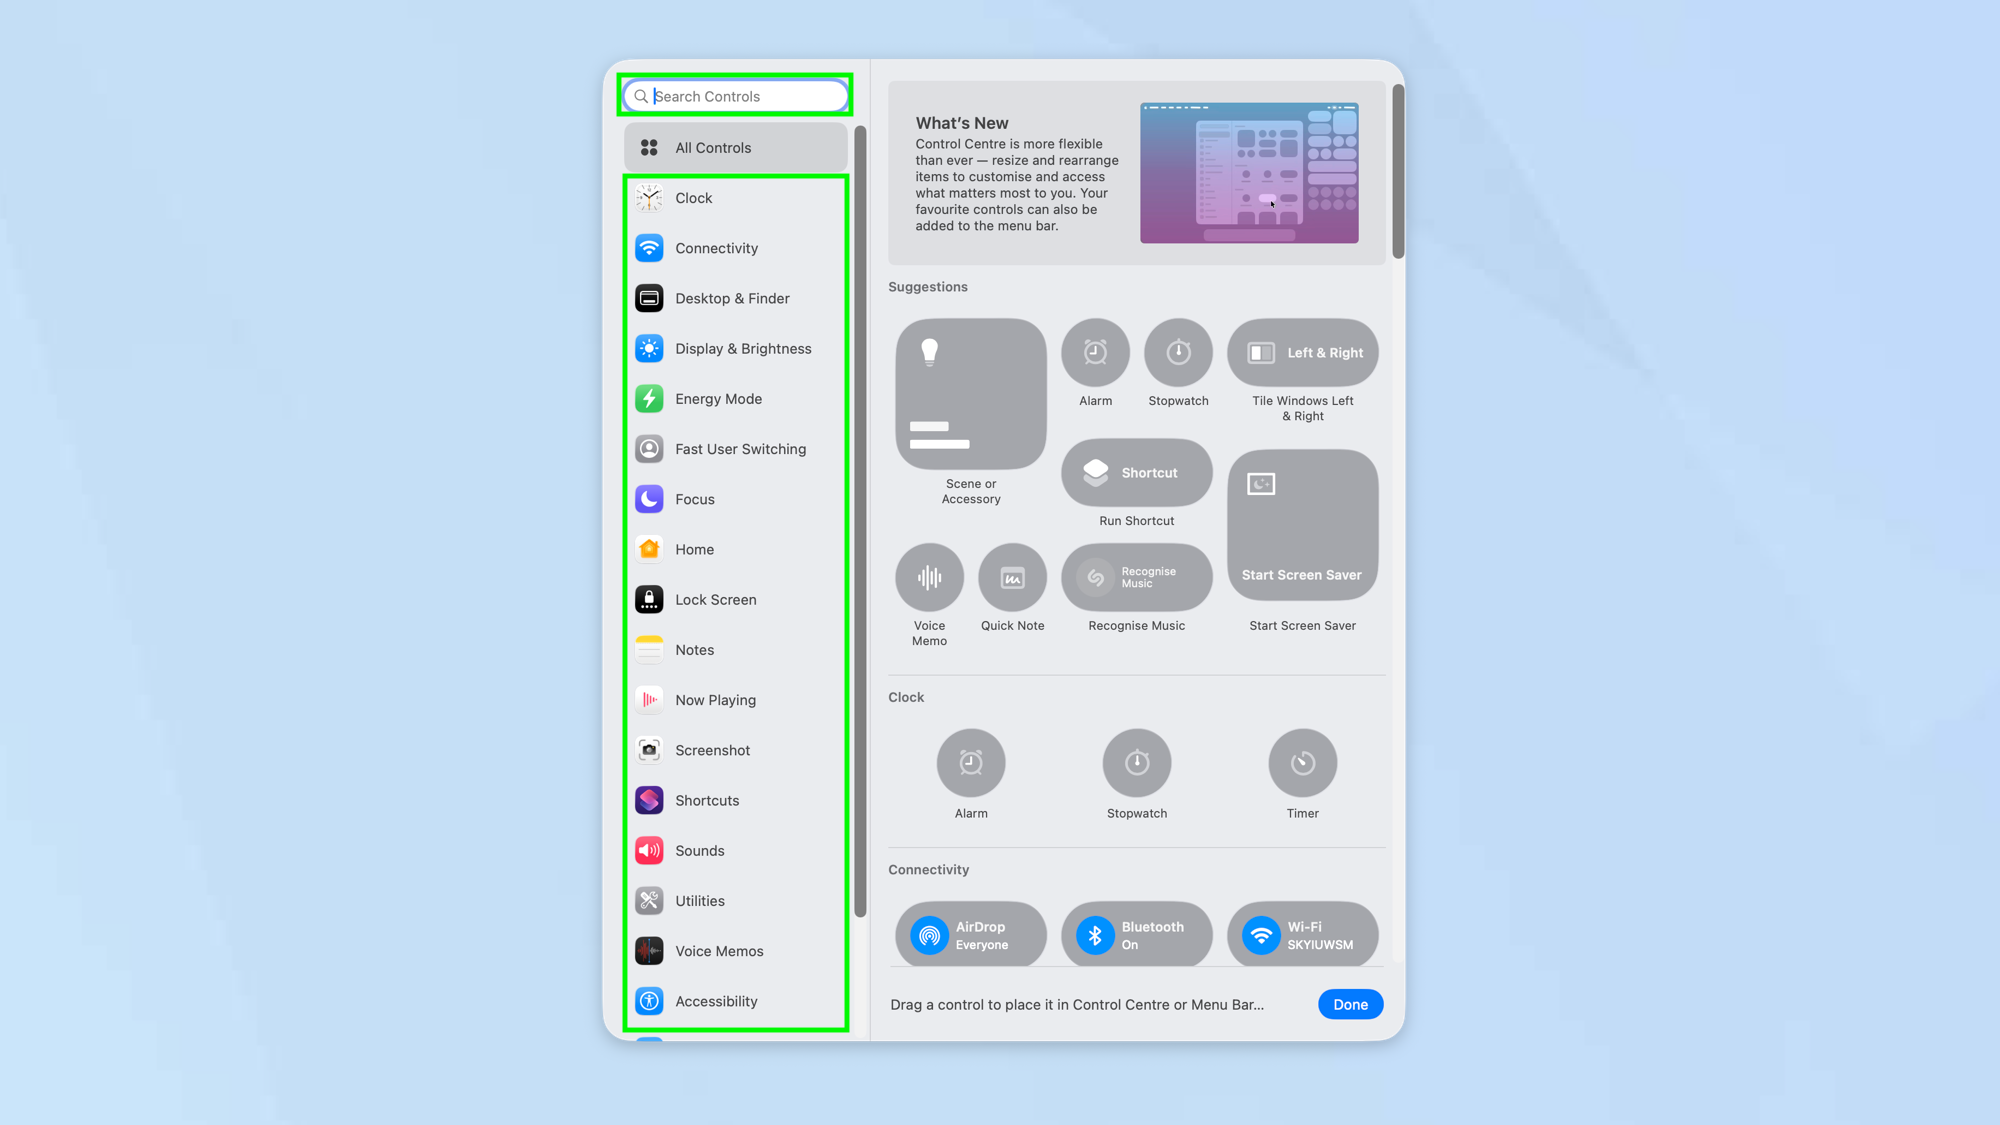
You will see a Control Center window packed with options. By default, it will show you every available control, allowing you to scroll through and select the controls you require.
This may feel overwhelming, however, so you may want to select a category from the sidebar. You can also select Search Controls and enter a search term.
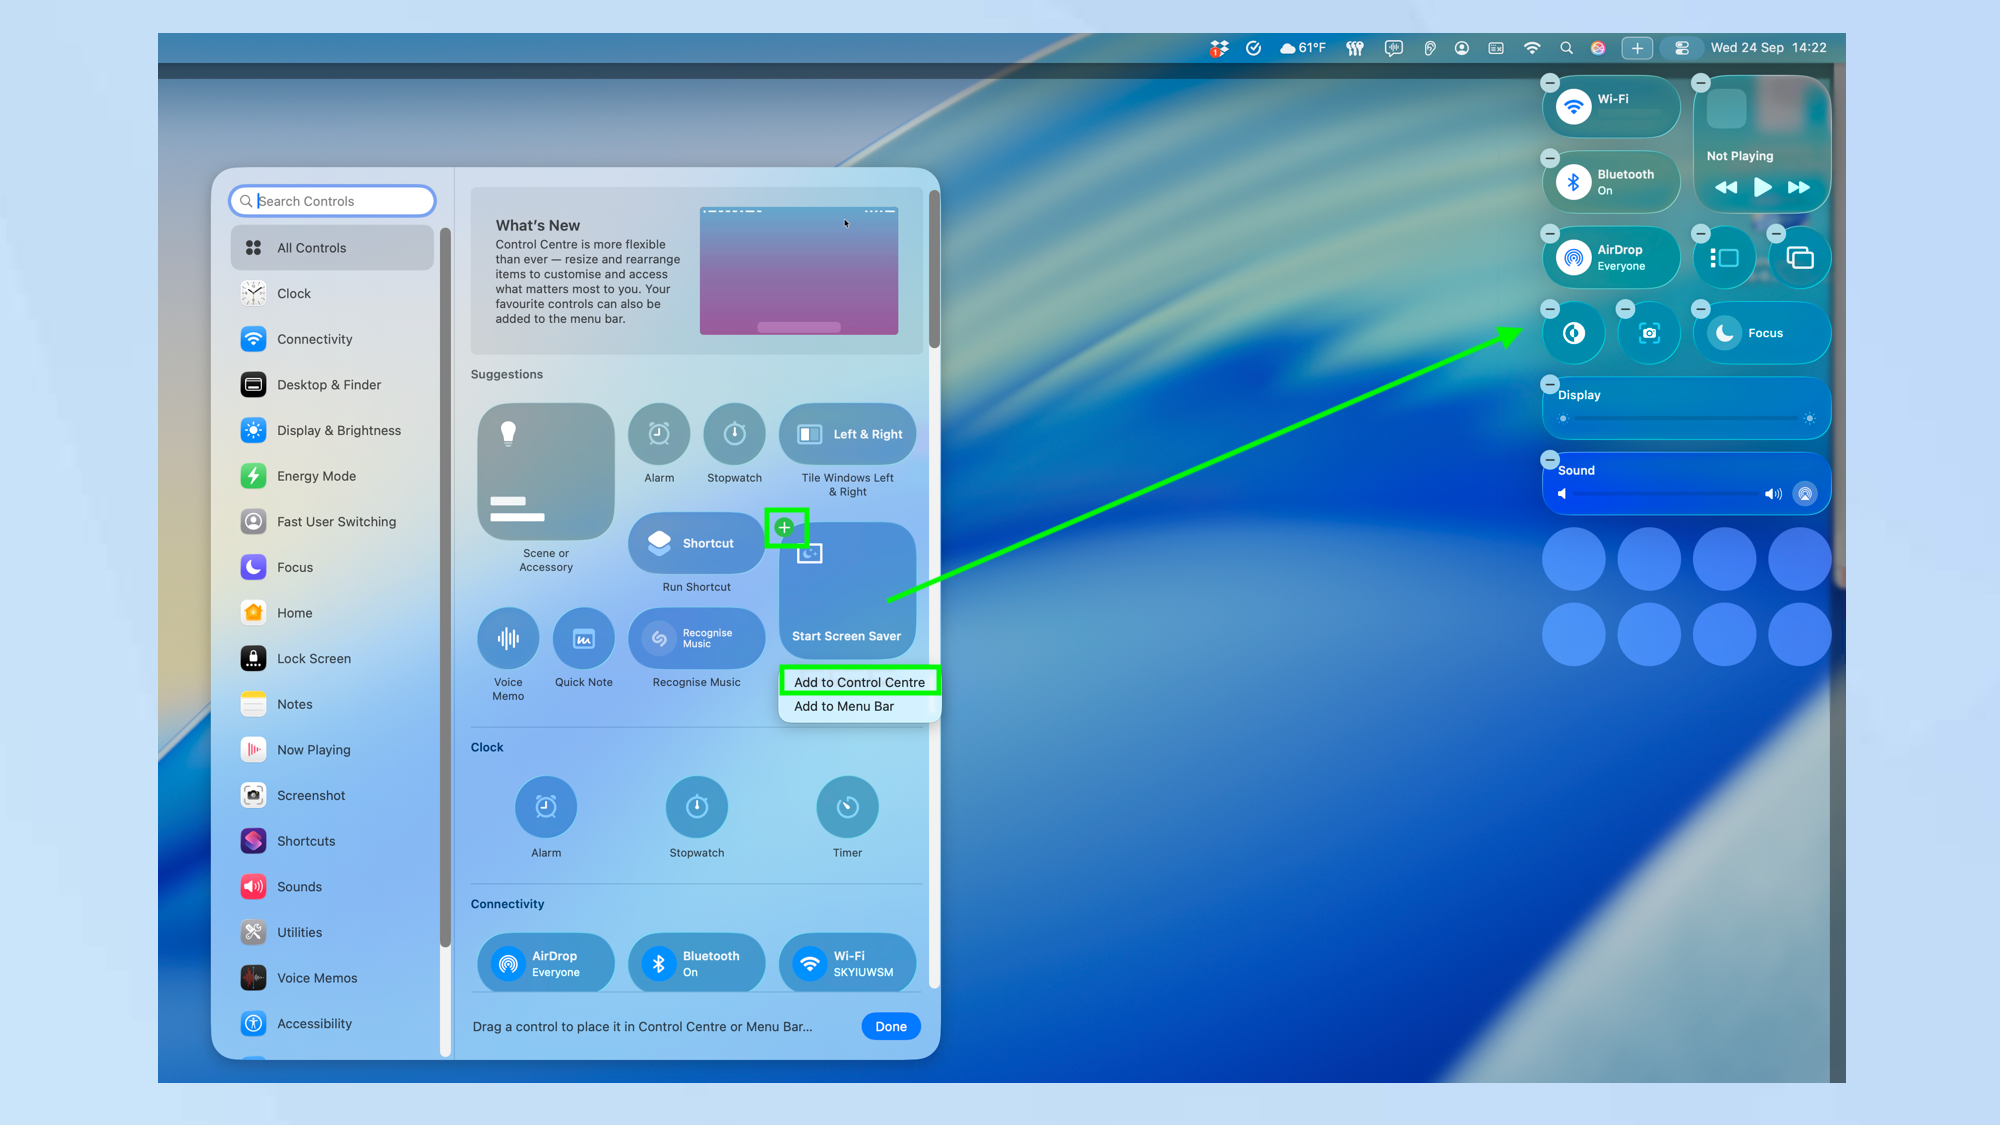
There are two ways to add an item to your Control Center. You can click the item and select Add to Control Center. You can also drag the item to the Control Center which continues to show to the right of the screen.

If you would prefer a control to be more easily to hand — that is, if you don’t want to keep clicking Control Center to access it, you can place an item in the menu bar of macOS Tahoe. Again, there are two ways. You can click the item and select Add to Menu Bar. You can also drag the item to the Menu Bar.
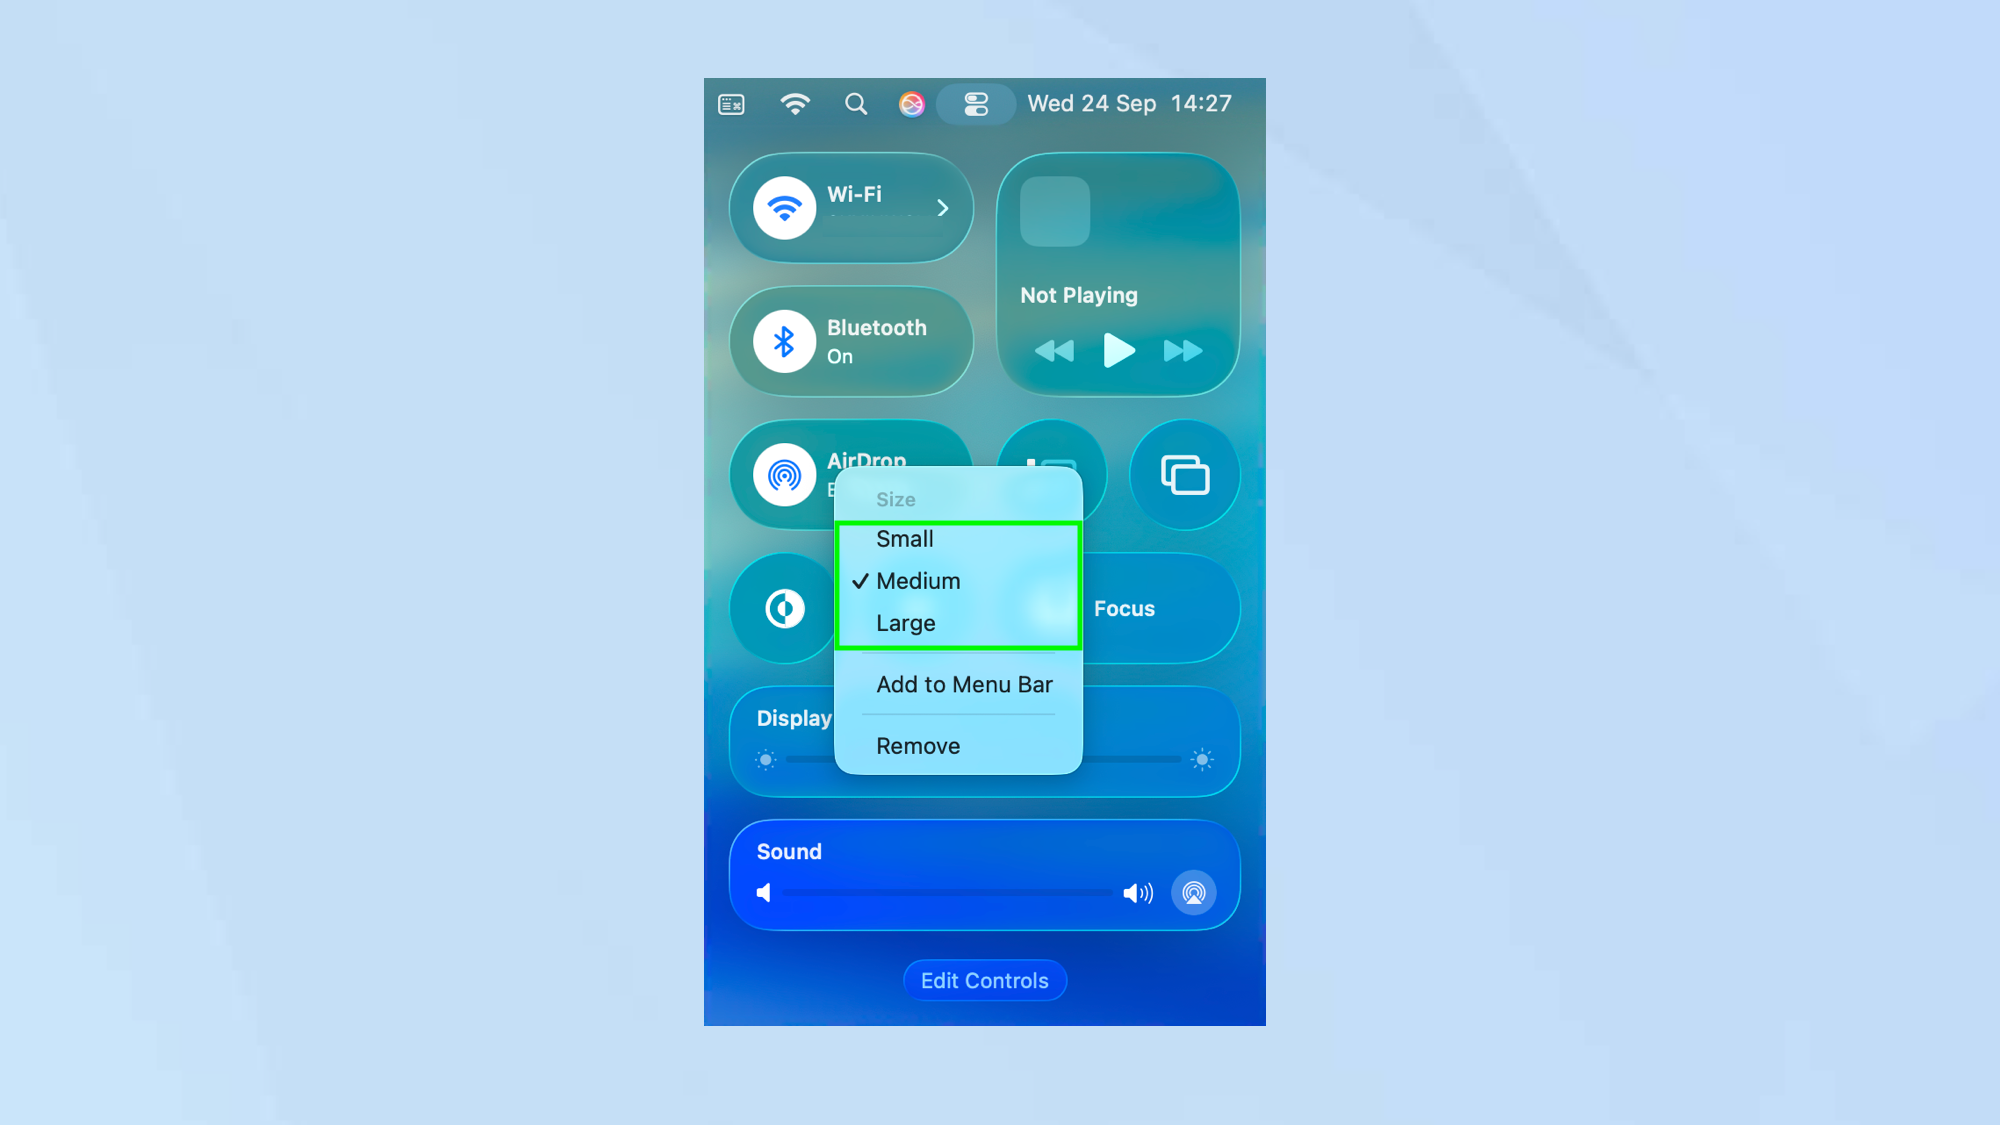
When items are placed in the Control Center, you can, if you wish, make them larger or smaller depending on how prominent you want them to be. Just control-click an item in the Control Center and select Small, Medium or Large.
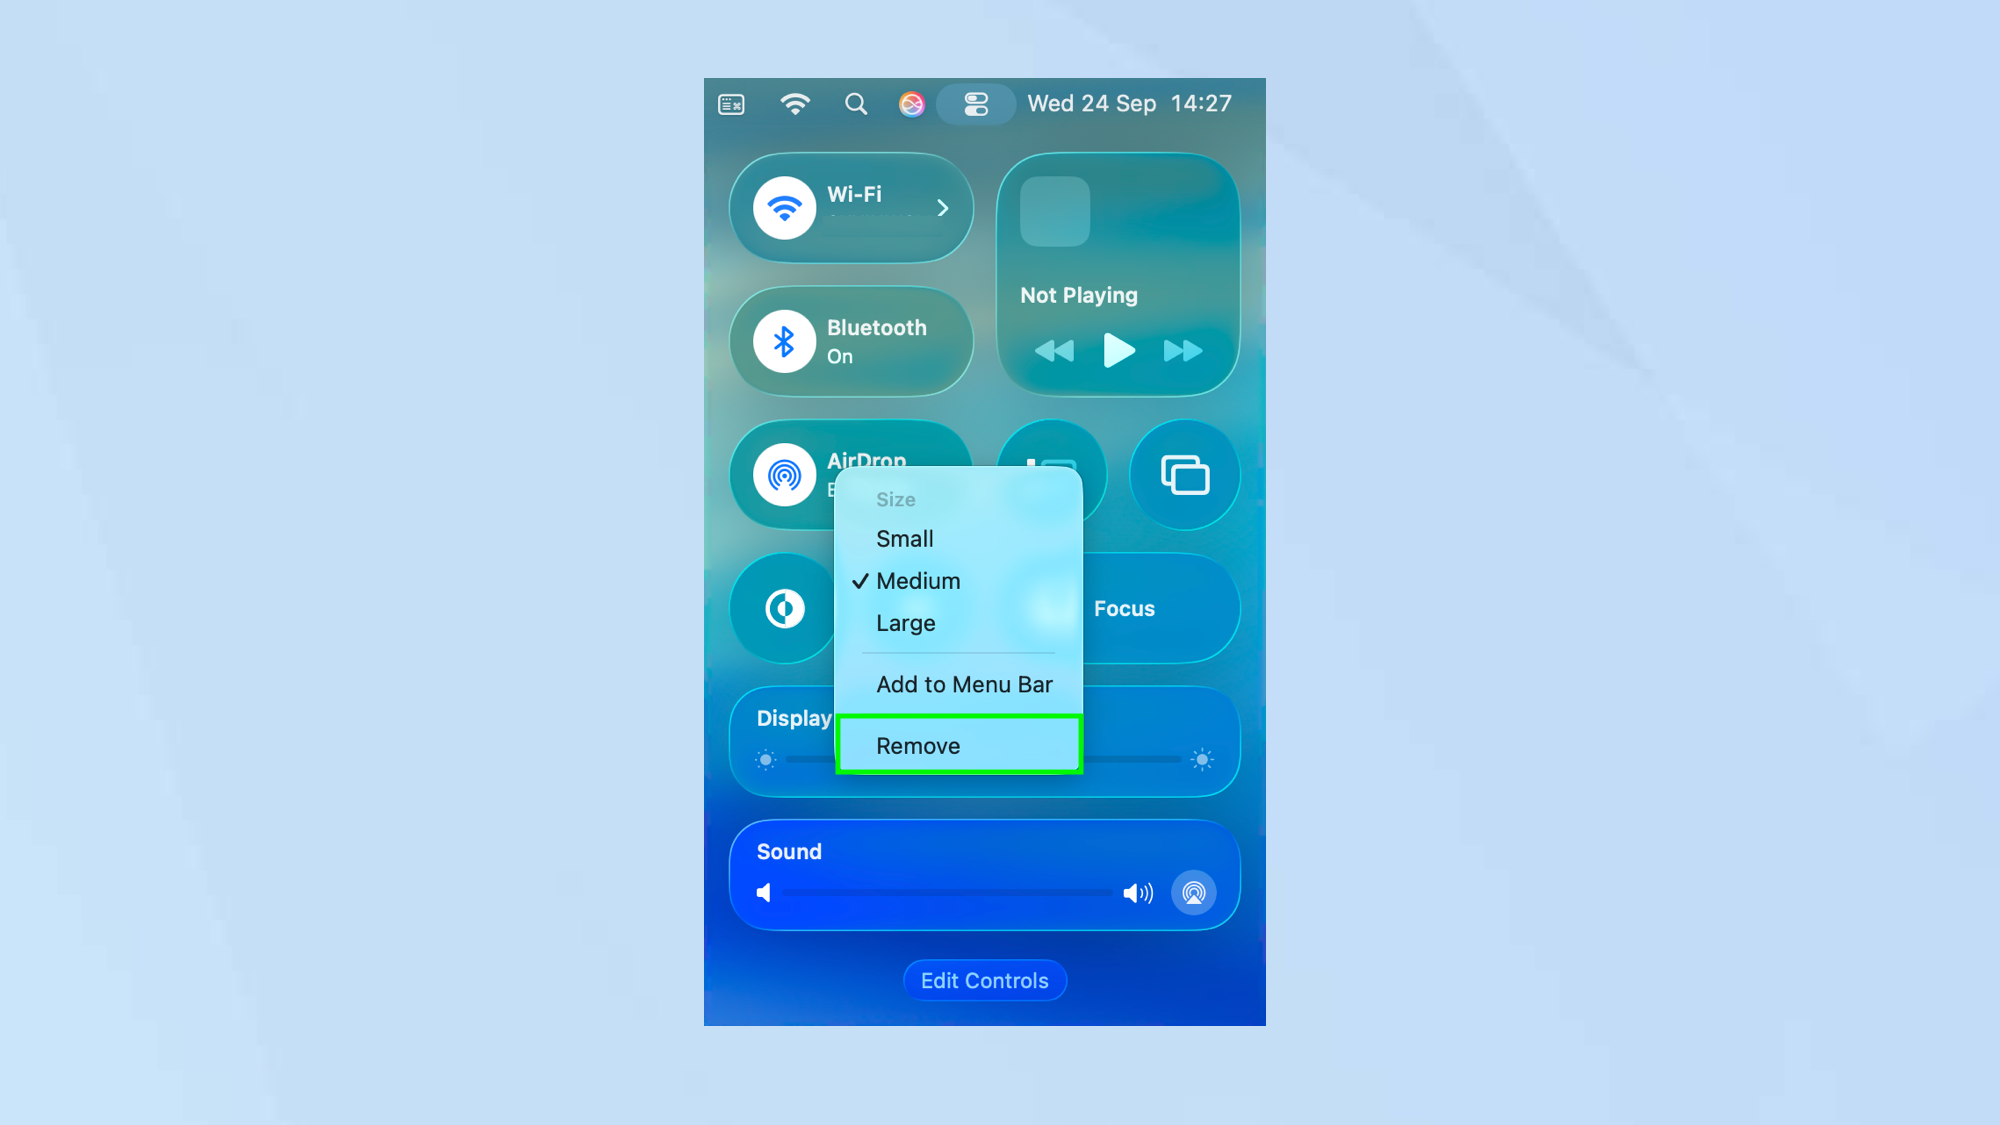
You can also remove an item from the Control Center. It won’t be deleted so you can also follow steps four and five above to reinstate it. There are two ways to remove an item. You can control-click an item in Control Center and select Remove. If you are in Edit mode, you can also click the “—” symbol next to an item to remove it.

With all of the desired items in place and sized appropriately, you can now start to organize them. This is easy enough. In Edit mode, just drag and drop the items into different positions.
Leave A Comment?