Situatie
Reasons to Turn DHCP Off
But DHCP by its nature means your device may have different addresses over time, and there are some reasons you might not want this. A prime example is if you’re running a server, such as a self-hosted web server. You’ll need a consistent way to contact said server, and the easiest path to achieve that is to give it a static IP address, i.e. you’ll actually configure the machine with an IP address yourself. On the plus side, this means you have control over which address your machine receives. However, you’ll need to be careful with those configurations, especially when it comes to not duplicating any addresses.
Solutie
Disabling DHCP for a Connection in Windows
If you’re running a typical home network, then your devices receive their IP addresses via the Dynamic Host Configuration Protocol (DHCP). This means they’re assigned an IP address when they connect to the network, and may in fact receive a completely different one the next time. Whether or not your device will use DHCP or not is a setting unique to each connection. In other words, if you turn off DHCP for your wired connection, all your wireless connections will continue to use DHCP until you do the same.
To turn off DHCP for a connection in Windows:
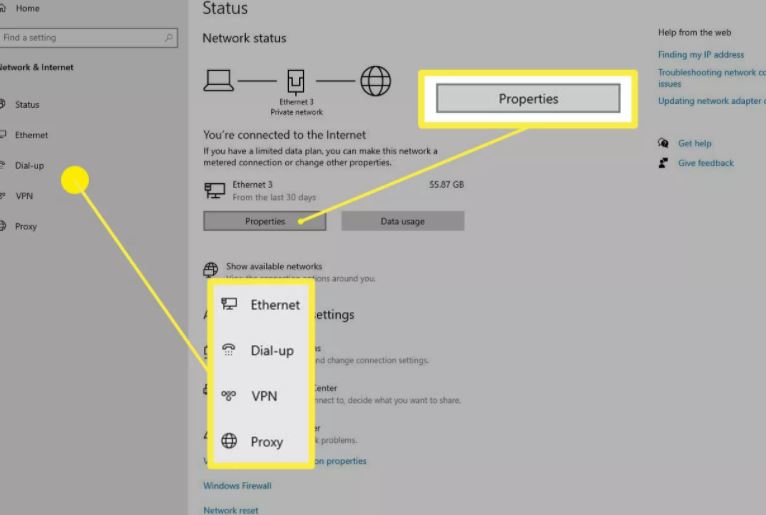
- Press the Windows + x keys, then select Settings.
- Click to the Network & Internet item.
- Click on the (wired or wireless) network connection (such as Ethernet) you want to configure, then click the Properties button.
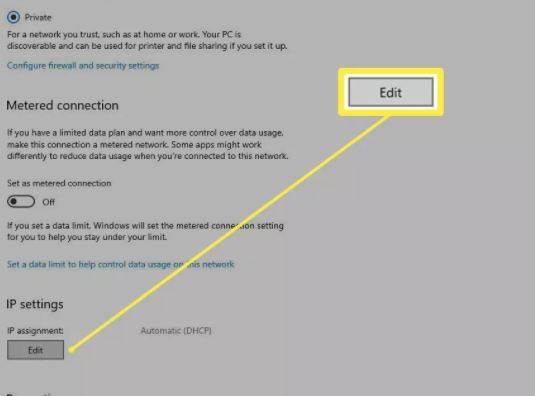
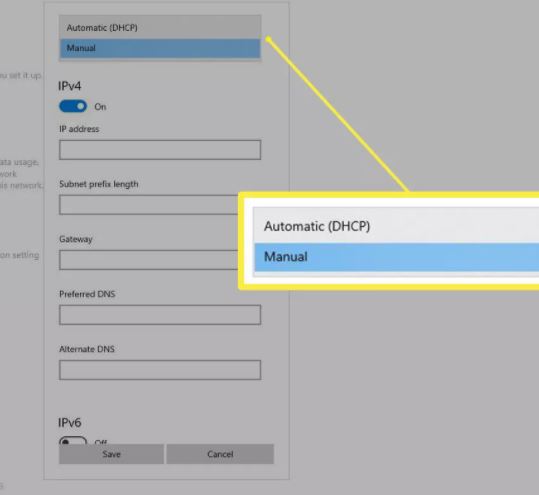
Within the details for the connection you’ll see the IP settings section. Click the Edit button you’ll find there. In the Edit IP settings dialog the connection will most likely be configured as Automatic. Click the drop-down and change it to Manual.
You’ll see two toggle switches show up, one for IPv4, and one for IPv6. You can enable either or both of these, the process is the same for each. We’ll click the one for IPv4 for the purposes of the next step. A slew of new fields will appear. you’ll need to fill these out to include at least the IP address (the address you want the machine to have, of course), the Subnet prefix length (this describes the class of the network, try 24 here, and if that doesn’t work, 16), Gateway (the address of your router device, most likely 192.168.0.1), and Preferred DNS (you can use one provided by your ISP, or try Google’s if you can’t find one: 8.8.8.8).
- Click Save to commit the change.
Leave A Comment?