Situatie
Encryption is the process of changing information into something meaningless unless you have the key. BitLocker encrypts information on hard drives so that it can only be read once the key is entered. The key may be managed by a Trusted Platform Module (TPM) chip in the computer, a USB drive that stores the key, or even just a password. If you try BitLocker and don’t like it, it’s easy to turn BitLocker off.
Solutie
Pasi de urmat
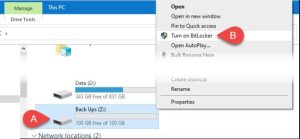
- Open File Explorer and navigate to the drive to be encrypted with BitLocker.
- Right-click on the drive and select Turn on BitLocker.
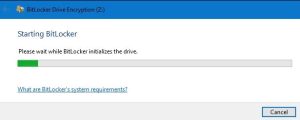
- There may be a Starting BitLocker message with a progress bar. Let it finish.
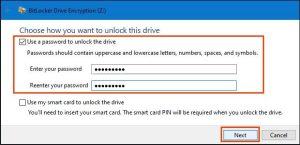
It will prompt you to Choose how you want to unlock this drive. There are 2 choices; Use a password to unlock the drive, or Use my smart card to unlock the drive. If the device is being used in a business, you may have a smart card and want to use that. If not, then choose to use a password. Create a strong, secure password.
Now it asks How do you want to back up your recovery key?
There are 4 options:
- Save to your Microsoft account: If you use a Microsoft account to log in to the device, this is the easiest method. It’s what’s being used in this example.
- Save to a USB flash drive: If this method is chosen, only use the USB flash drive for this purpose. Do not try to store other things on that flash drive.
- Save to a file: If choosing this method, don’t save the file to the drive being encrypted. Save it to another drive or cloud storage.
- Print the recovery key: Choosing this method means the printed key needs secure storage, safe from fire, theft, and flood. When the key is needed, it’ll need to be manually typed in.
Depending on the method selected, there may be some additional steps, but all methods will eventually lead to the next screen.
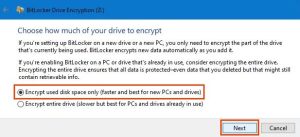
This step asks to Choose how much of your drive to encrypt. That may be confusing. If there’s nothing on the drive being encrypted, select Encrypt used disk space only. It’s very fast.
Anything added to the drive after this will be automatically encrypted. If the drive already has files and folders on it, choose Encrypt entire drive to ensure they’re all encrypted immediately. Then select Next.
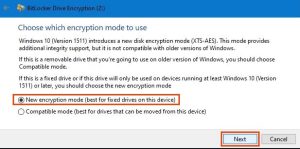
The next screen might not display depending on the version of Windows you’re using. It’s important to take the time to read and understand it.
To sum up, if anyone ever takes the drive out of this device and puts it into any version of Windows prior to Windows 10 Version 1511, the drive won’t work. Most people won’t ever do that, so most will choose New encryption mode, then select Next.
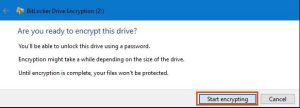
Encryption is serious business and things can go wrong. That’s why the process will ask one last time, Are you ready to encrypt this drive? If so, select Start encrypting.
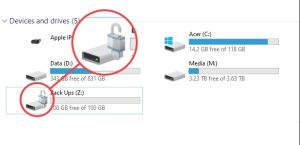
Once BitLocker is done encrypting the drive, go back to File Explorer. Notice that the drive icon now has an unlocked padlock. That means the drive is encrypted but ready to receive files. If the padlock was locked, you would need to enter the password to access it.


Leave A Comment?